
This article was updated in November 25, 2025 with new products and information by Mark S. Taylor
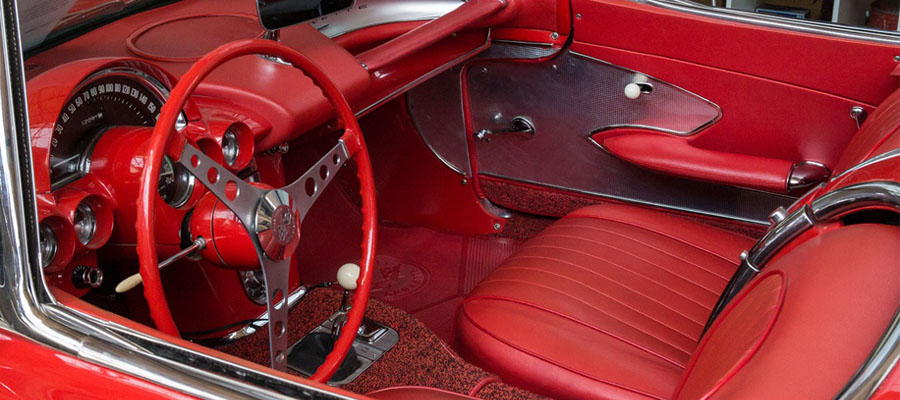
Cleaning leather seats does not need to be hard. The best way to clean leather car seats is to use soft tools, light soap, and a good plan. I learned this the hard way. I once used a strong spray. My seats dried out. Small cracks showed up. I felt bad. So I changed how I clean leather. In this guide, I talk to you like a friend. I share what works. I share what to avoid. And I show each step in a simple way. Let’s give your seats the care they need.
Contents
- 1 Understanding Leather Car Seats
- 2 Why Proper Cleaning Matters
- 3 Step-by-Step Guide: The Best Way to Clean Leather Car Seats
- 4 How to Deep Clean Leather Car Seats
- 5 Special Considerations by Leather Type
- 6 Household Methods: What Works & What to Avoid
- 7 Climate & Region Tips (Because Weather Matters)
- 8 What to Look for in a Leather Cleaner
- 9 Top 3 Commercial Cleaners & Conditioners I Trust
- 10 Frequently Asked Questions (FAQs)
Understanding Leather Car Seats
Leather makes your car feel fancy, but it needs special care. If you ignore it, you might see cracks and fading. It’s like how your skin gets dry without lotion. I used to think any cleaner would work, but soon learned it wasn’t enough. A good leather cleaner and conditioner make all the difference.
There are different types of leather. Black leather hides dirt well, but it still needs care. White leather looks sharp but stains easily. Faux leather is easier to clean, but it still needs attention. No matter what kind of leather, using the right products helps keep it in top shape.
Conditioning your leather is key. It keeps the leather soft and prevents cracks. Without it, leather can dry out and feel rough. I always use a leather conditioner to keep my seats looking great and feeling comfortable.
| Type | How it looks | How strong it is |
|---|---|---|
| Pigmented | Smooth and even | Very strong |
| Semi-aniline | Soft and rich | Medium strong |
| Aniline | Very soft | Not strong |
Why Proper Cleaning Matters
Cleaning leather isn’t just about looks—it’s about keeping it in good shape. If you clean it wrong, you risk cracks and discoloration. I learned the hard way that using the wrong products or scrubbing too hard can make things worse. It can take away the natural oils in the leather, making it brittle.
Regular cleaning and conditioning can make a big difference. Not only does it protect your leather, but it also keeps your car comfortable. Well-maintained leather can even increase your car’s resale value. When I sold my car, the clean leather seats helped me get a better price.
Car detailing and leather care will keep your car looking like new. A little effort goes a long way, and it’s worth it!
Let’s talk gear — yeah, I know, it sounds like we’re about to go camping, but stick with me. When it comes to the best way to clean leather car seats , having the right tools and products makes all the difference. I used to think a paper towel and whatever cleaner I had lying around was good enough — until my leather started looking more “vintage” than “vibes.”
So trust me when I say: a few simple, smart choices in your cleaning kit can save you time, effort, and a lot of heartache down the road.
✅ The Cleaning Tools That Make Life Easier
Start with the basics — no need for anything fancy, just the right stuff. A few microfiber towels are your best friend. They’re soft, won’t scratch, and soak up cleaner like a champ. Pair that with a soft-bristled brush (think old toothbrush vibes) for getting into seams and textured areas.
For those hard-to-reach spots or small stains, cotton swabs are gold. And if you’re doing a deeper clean? Grab a sponge — it spreads cleaner evenly and gets into the grain without being too rough. Oh, and don’t forget your vacuum with an upholstery attachment . It’s not just for show — it pulls out all that dust and hair hiding where your hands can’t reach.
Pro Tip: I keep a dedicated cleaning kit in my trunk. Saves me from last-minute panic when I notice a stain before a road trip.
💧 Cleaners That Actually Work (And Won’t Ruin Your Seats)
Now, let’s get into what goes on your leather. For real leather , always start with a quality leather cleaner — it’s made for the job and keeps your seats from drying out. If you’re on a budget or in a pinch, a mild soap and warm water mix works fine, too. Just keep it light and avoid anything with strong fragrances or degreasers.
If you spot-treat stains, rubbing alcohol on a cotton swab is a lifesaver — especially for ink. And yes, saddle soap still works! It’s old-school but great for conditioning as it cleans.
Quick Note: Some people swear by vinegar for faux leather — and it can work — but only in small amounts and never on real leather.
🛡️ Protectants: Don’t Skip This Step!
You wouldn’t wash your face and skip moisturizer, right? Same goes for leather. After every clean, follow up with a good leather conditioner . It keeps your seats soft, prevents cracks, and gives them that rich, deep look.
If you live somewhere sunny, add a UV protectant spray to your routine. It blocks harsh rays that fade and dry out your leather over time.
My Routine: After every full clean, I condition and sometimes mist on UV protection — especially during summer road trips.

Step-by-Step Guide: The Best Way to Clean Leather Car Seats
Alright, let’s get into the nitty-gritty — the best way to clean leather car seats without causing any damage or heartache. I’ve been through the trial and error so you don’t have to. Here’s exactly how to do it right, step by step.
Step 1: Vacuuming to Remove Loose Dirt and Debris
Start simple: grab your vacuum. This might seem like a no-brainer, but trust me, skipping this step is like washing dishes without scraping off the food first — messy and ineffective. Vacuuming lifts up all that dust, hair, and sneaky crumbs hiding between the seams. Use a soft brush attachment to be gentle on the leather and avoid scratching. I learned this after one too many times finding gritty bits left behind that mixed with cleaner and made a muddy mess.
Quick Tip: Don’t just hover over the surface — press lightly along the creases and seams. That’s where the gunk likes to hide.
Step 2: Choose Your Cleaner
Now comes the big question: leather cleaner or mild soap solution? Both work, but here’s the deal — leather cleaner is made for leather, which means it’s pH-balanced and won’t strip away natural oils. Mild soap (like dish soap diluted in water) can work in a pinch, but use it sparingly — too much can dry out your seats over time.
I personally keep a bottle of Chemical Guys Leather Cleaner in my garage for regular touch-ups. It’s fast, effective, and safe for real leather. If I’m in a rush or on the road, I’ll mix a drop of Castile soap in water and go from there.
Bottom Line: For best results and long-term care, stick with a quality leather-specific cleaner.
Step 3: Cleaning the Seats
Time to scrub — gently. Dip a microfiber cloth or soft-bristled brush into your cleaning solution and start working in small sections. Think of it like exfoliating your skin — slow, circular motions, not aggressive scrubbing. This helps lift dirt without soaking the leather.
If you hit a stain that won’t budge, don’t panic. Grab a cotton swab dipped in rubbing alcohol and blot it carefully. Works like magic on ink or oil spots. Just test it on a hidden area first — better safe than sorry.
Pro Insight: Never spray directly onto leather. Spray your cloth instead to avoid oversaturation.
Step 4: Wiping and Drying
Once you’ve cleaned each section, grab a fresh, damp cloth and wipe away any leftover cleaner. You want to remove residue without leaving anything sticky behind. Then, take a dry microfiber towel and gently pat everything down until it’s fully dry. Skipping this step can leave your seats feeling tacky or even cause moisture to seep into seams — not good news for your car’s interior.
Personal Note: I used to rush this part and ended up with weird streaks. Now I take my time — and it makes all the difference.
Step 5: Conditioning
Here’s the love letter your seats have been waiting for — conditioning. After all that cleaning, your leather is probably a little thirsty. Apply a small amount of conditioner (I swear by Lexol or Meguiar’s Gold Class) to a clean microfiber towel and rub it in using soft, circular motions. Let it soak in for at least 15–20 minutes before buffing off any excess.
Conditioning keeps your leather soft, prevents cracks, and gives it that rich, showroom glow. Do this every few months, especially if you live somewhere hot or sunny.
Why it matters: Cleaned but unconditioned leather = dry, aging leather. Don’t skip this final step.
How to Deep Clean Leather Car Seats
Let’s be real — regular cleaning is great, but every few months, your leather car seats need more than a quick wipe-down. That’s when it’s time to deep clean . Think of it like exfoliating your skin instead of just washing your face — you’re getting into the pores and lifting out all the built-up grime that daily driving leaves behind.
I used to think wiping my seats once a month was enough. Then one summer, after a road trip with spilled drinks, sandy shoes, and sunscreen fingers everywhere, I realized my leather had that dull, sticky feel no surface wipe could fix. That’s when I gave deep cleaning a shot — and wow, did it make a difference.
When to Deep Clean
A good rule of thumb: every 3–6 months, depending on how often you drive and who rides with you (kids? pets? coffee drinkers?). If your seats feel dry, look dingy, or just don’t smell as fresh as they used to, it’s time to go deeper than your usual routine.
Quick Tip: Mark your calendar — set a reminder in your phone. It’s easy to forget until things start looking rough.
What You’ll Need for Deep Cleaning Leather Seats
This isn’t your everyday clean-and-wipe job. For a proper deep clean , grab:
- A stronger leather cleaner (not harsh chemicals)
- A sponge
- Warm water
- A soft-bristled brush
- Microfiber towels
- Optional: interior cleaner wipes for spot touch-ups
You want products that can work into the grain without drying things out. I personally use a mix of Lexol Deep Cleaner and a soft scrub brush — gentle enough for leather, tough enough for life’s messes.
Pro Insight: Warm water opens up the leather’s pores, helping your cleaner penetrate deeper.
How to Do It Right
Start by vacuuming thoroughly — we’re going deep, so hit those seams again. Apply your cleaner generously, but not soaking wet. Let it sit for a few minutes so it can break down the gunk hiding under the surface.
Then, using a sponge or brush, gently work it in with small circular motions. Don’t be afraid to apply a little pressure — leather can handle it, especially if it’s been neglected for a while. Wipe off the excess with a damp cloth, then dry with a clean towel.
My Routine: I tackle one seat at a time. This way, the cleaner doesn’t dry before I get to wipe it off.
Final Touch: Condition After Deep Cleaning
Deep cleaning pulls out oils, so always follow up with a quality leather conditioner. This step keeps your seats from drying out after all your hard work. Rub it in, let it absorb, and buff off any residue.
Why it matters: Deep cleaning without conditioning is like washing your hands without moisturizing — necessary, but drying.
Special Considerations by Leather Type
🖤 Black Leather Seats
Black leather seats are gorgeous, but they come with their own set of challenges. The biggest issue I’ve noticed is fading, especially when exposed to the sun for long periods. Surface oils can also build up, making your seats look dull. One thing I learned the hard way is to avoid using silicon-based conditioners. While they may give your seats a shiny look, they can cause long-term damage by attracting dirt and grime. Stick to a good leather cleaner and conditioner made for black leather to keep it looking fresh.
☕ White Leather Seats
White leather seats are stunning but can be a bit tricky to maintain. They’re prone to stains and yellowing, especially from things like sweat or food spills. I’ve had a couple of mishaps myself where a small stain became a larger problem. The key is to use color-safe cleaners and gentle conditioners. These won’t just clean the leather; they’ll help preserve its bright, clean look. Be sure to clean up spills right away to avoid permanent stains. It’s a little extra effort, but your car with white leather seats will stay looking sharp!
🧬 Faux Leather Seats
Faux leather seats are a great alternative to real leather, and they’re super easy to clean. In fact, a mild soap and water solution usually does the trick for cleaning. However, don’t use harsh chemicals, as they can damage the surface and make the material crack. I’ve found that faux leather needs more gentle care, but when done right, it can look just as sleek as genuine leather. Plus, it’s usually more forgiving when it comes to spills and stains, which makes cleaning a breeze.
Household Methods: What Works & What to Avoid
Some simple home methods can work — but only with caution.
Answer-first: Mild soap & water are okay for real leather; vinegar is okay for faux leather — but do not overuse.
What works
- Mild liquid soap + warm water (for gentle cleaning).
- Rubbing alcohol (cotton swab) for ink or small stains.
- Vinegar + water (for faux leather only).
What to avoid
Silicon/wax-based conditioners — they attract dirt and leave build-up.
Dish soap (too harsh for real leather).
Bleach, Windex, strong solvents — they damage leather surface.
Climate & Region Tips (Because Weather Matters)
- Hot & sunny states (AZ, TX, FL) — Condition every 2–3 months. UV cracks leather fast.
- Cold & salty winters (NY, MI, IL) — Wipe road salt weekly. It eats stitching.
- Coastal & humid (CA, Gulf Coast) — Watch for mold. Use protectant with UV block.
- Dry mountain areas — Condition monthly. Low humidity sucks moisture out.
Quick fix for cracked seats in desert heat? Leather Honey overnight — soft again by morning.
What to Look for in a Leather Cleaner
First things first — check the label. The best product to clean leather car seats should be pH-balanced, non-abrasive, and free from harsh chemicals like ammonia or bleach. You also want it to be safe for both real and faux leather, just in case.
Avoid anything with strong solvents or silicone-based ingredients that might leave a greasy film. Think of it like skincare — gentle but effective is the goal.
Quick Tip: If it says “for all surfaces,” it’s probably not ideal for leather. Stick to products made specifically for it.
Top 3 Commercial Cleaners & Conditioners I Trust
After years of trial and error (and yes, a few mistakes), these are my go-tos:
- Lexol Leather Conditioner & Cleaner Kit – A solid duo that gently cleans and deeply moisturizes without leaving a shine.
- Meguiar’s Gold Class Leather Conditioner – Leaves a subtle sheen and that fresh-leather smell we all love.
- Chemical Guys Butter Wet Leather Cleaner – Great for deep cleaning without stripping natural oils.
All three are widely available, easy to use, and actually work. No more guessing games.
Pro Insight: Always test new products on a small, hidden area first — especially if you have white or light-colored leather.
Natural Alternatives: Do They Work?
I get it — sometimes you want something simple, like coconut oil or beeswax . And hey, they can work in a pinch . Coconut oil adds shine and some moisture, while beeswax offers a protective barrier.
But here’s the catch: neither is designed for deep cleaning. Over time, oils can build up and even darken your leather. Plus, coconut oil can go rancid if not wiped off completely — definitely not the fresh look you’re going for.
My Take: Use them sparingly and only for minor touch-ups, never as a full cleaning solution.
Why Conditioning Is Just as Important as Cleaning
Cleaning removes dirt, but conditioning keeps your leather alive. Without it, your seats will dry out, crack, and age faster than they should. After every clean — especially a deep one — always follow up with a good conditioner for car leather seats .
It doesn’t take much. A little goes a long way, and your seats will feel noticeably softer after just one use.
Final Thought: Treat your leather like you treat your skin — with care, consistency, and the right products.
Frequently Asked Questions (FAQs)
Q1. What is the best way to clean leather car seats?
Answer: Vacuum first, clean with dedicated leather cleaner or mild soap solution, wipe with damp cloth, and finish with conditioner.
Q2. Can I use soap and water to clean leather seats?
Answer: Yes — if it’s a mild soap and the cloth is damp (not soaked), it’s safe for real leather.
Q3. How often should I condition my leather car seats?
Answer: Every 3-6 months in regular climates; every 3 months in hot or sunny regions.
Q4. How do I remove ink stains from leather seats?
Answer: Use a cotton swab dipped in rubbing alcohol, blot gently, then clean and condition the area.
Q5. Can I clean leather car seats with vinegar?
Answer: Only for faux leather — vinegar can strip oils and damage real leather surfaces.
Clean leather seats make your whole car feel new — and protect your investment. Spend 20 minutes every couple months and your interior will look amazing for years. Got kids, dogs, or daily commutes? Double the care and thank yourself later.