
This article was updated in August 23, 2025 with new products and information by Mark S. Taylor
Owning a classic car is more than a hobby—it’s a link to the past. But with that comes the usual challenges, like when the electrical system fails. I’ll never forget the night my ‘72 Chevy stalled after a rainy drive. The lights flickered once, and then the car wouldn’t start. I found myself in the dark, trying to figure out what went wrong. That night taught me an important lesson: with the right tools and patience, you can fix almost anything yourself.
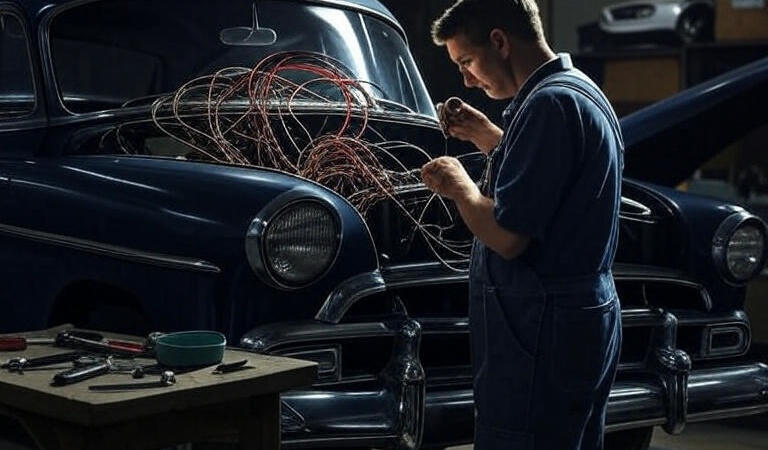
In this DIY classic car electrical wiring fixes guide, I’ll show you how I got my Chevy back on the road. Whether you’re working on a Mustang, Corvette, or any classic, I’ll help you with everything from wiring harness repairs to fixing alternators and starter motors. We’ll go over how to read wiring diagrams, pick the right tools, and handle repairs safely. Let’s take the frustration out of electrical issues and get your classic car running smoothly again—one wire at a time.
Contents
Understanding the Heart of Your Classic: The Electrical System
The electrical system is the heart of your classic car. While simpler than modern cars, its age brings unique challenges. Let’s break down the key parts that keep your vintage ride running smoothly—and why knowing them is key for DIY repairs.
The 6 Key Components of a Classic Car Electrical System
- Battery & Cables
The battery powers everything. Over time, the cables can wear out and corrode. Regularly check for fraying or corrosion, and make sure connections are clean and tight. This will keep the electrical system running strong. - Fuses & Fuse Box
The fuse box protects the electrical system by blowing a fuse if the current is too high. Classic cars often use glass fuses. If you’re replacing fuses often, it could mean there’s a bigger issue with the wiring. - Wiring Harness
The wiring harness connects all the parts of your car’s electrical system, from the lights to the ignition. Over time, wires can crack or degrade, especially if they’ve been exposed to heat or moisture. Repairing the harness prevents shorts and electrical failures. - Switches & Relays
These are the on/off switches for your car’s electrical components. As they age, they may wear out. If your headlights or other accessories stop working or flicker, it could be time to replace a switch or relay. - Charging System (Alternator)
The alternator recharges the battery while you drive. If your lights dim or your battery dies quickly, the alternator could be failing. Check it regularly to avoid getting stranded. - Starting System (Starter Motor)
The starter motor turns the engine over. If you hear a click or your car doesn’t start, the starter motor may be the issue. Troubleshooting and replacing it can ensure your car starts every time.
The Unique Challenges of Vintage Wiring
Working with vintage wiring comes with its challenges. Here’s what you need to know:
- Aging Insulation
Over time, the insulation around wires can crack and become brittle. This can cause shorts, which may lead to electrical failure or even fires. Regularly inspect wires and replace any with damaged insulation. - Pervasive Corrosion
Moisture can cause corrosion on terminals and connectors. Corrosion creates resistance, which leads to poor electrical flow and intermittent failures. Clean the terminals and replace corroded parts to keep everything working smoothly. - The “Rat’s Nest” of Past Repairs
Many classic cars have been tinkered with over the years. If you find mismatched wires or quick fixes, take the time to clean things up. Untangling and properly fixing these issues will save you headaches later. - Inconsistent Wiring Color Codes
Unlike today, vintage cars didn’t have standardized wiring color codes. A wire that’s blue in one car might be for something entirely different in another. Always consult your car’s electrical system diagram to make sure you’re connecting everything correctly.
Gearing Up: Your Essential DIY Wiring Toolkit
Tackling your classic car’s electrical system is impossible without the right gear. Trust me, I’ve learned this the hard way. Having the right tools and materials on hand will turn a frustrating job into a rewarding one. This is the exact setup I use for everything from minor fixes on my ‘66 Mustang to major rewires on my ‘72 Chevy.
A. The Must-Have Tool Roll
- Multimeter
A multimeter (or voltmeter) is your number one diagnostic tool. It’s perfect for checking voltage at the battery, testing continuity in wires, and finding short circuits. I always start by checking the voltage at the battery before assuming something else is wrong. Learning how to use its basic functions will make you a wiring pro. - Wire Strippers & Cutters
A quality wire stripper adjusts to any gauge and removes insulation cleanly without damaging the wire. You’ll also need sharp cutters for clean cuts. Trust me, I’ve ruined a few wires by not using the right tools, so don’t make that mistake! - Crimping Tool
Crimping tools are essential for attaching connectors. A good ratcheting crimper applies consistent pressure and ensures your connections won’t wiggle loose. I’ve tried cheap crimpers, and they don’t work as well—invest in a solid one. - Soldering Iron & Solder
For permanent, weatherproof connections, soldering is the way to go. A butane or electric soldering iron, with rosin-core solder, creates a strong bond that will last for decades. It’s a little more involved than crimping but is a lifesaver when you need durability. - Heat Gun
A heat gun activates heat-shrink tubing, creating a sealed, professional-looking layer around your splices. It protects them from moisture and wear. I used to rely on electrical tape, but heat-shrink tubing is far more durable and neat.
B. Essential Safety Gear
You can’t work on electrical systems without respecting the risks. These items are a must:
- Safety Glasses
Protect your eyes from sparks, solder drops, or debris. I’ve been hit by a solder splash or two, and trust me, safety glasses are a must. - Gloves
Insulated mechanic’s gloves protect your hands from minor shocks and cuts. It’s always better to be safe than sorry. - Fire Extinguisher
Electrical fires can happen fast. Keep a Class C (or ABC) fire extinguisher close by. Having one nearby gives you peace of mind.
C. Crucial Materials & Components
- Automotive Wire
Don’t use household wire. Get high-quality GXL or TXL automotive wire, designed to withstand heat, oil, and gas. Stock a few different colors and gauges (14, 16, 18) for flexibility. - Connectors & Terminals
You’ll need a variety of connectors (bullet, spade connectors) and ring terminals. Using the right size and type is key to a solid, lasting repair. Loose or improper connectors can cause flickering lights or worse. - Heat-Shrink Tubing
Heat-shrink tubing is far better than electrical tape. It shrinks when heated, forming a strong, waterproof seal around a wire splice. It’s worth the investment for neat, durable repairs. - Fuses
Make sure you know what type of fuse your classic car uses (glass or blade). Keep a full set of different amperages handy. A blown fuse often signals a deeper issue that needs attention.
D. The Most Important Tool of All: Information
- Vehicle-Specific Wiring Diagram
This is your roadmap. You can’t troubleshoot effectively without a clear diagram for your car’s exact year, make, and model. It’ll show you wire colors, routes, and connections—saving you hours of guesswork. You can find these in factory service manuals or online forums.
Quick Tip: Many forums and enthusiast sites offer wiring diagrams for specific models. Just make sure you have the right year!
The Step-by-Step Guide to Flawless DIY Wiring Fixes
Let’s walk through the entire process from diagnosis to repair. Follow these steps, and you’ll be able to tackle nearly any electrical issue your classic car throws at you.
Step 1: Play Detective – Diagnosing the Problem
Never replace parts without first diagnosing the issue. Your multimeter and wiring diagram are your detective tools.
- Safety First: Always start by disconnecting the negative battery terminal before working on any wires.
- Check the Source: Use your multimeter to check the battery voltage. A healthy battery should read about 12.6 volts when off and 13.5-14.5 volts when the engine is running. This shows that the alternator is charging the battery.
- Visual Inspection: Look for obvious culprits. Check for cracked wire insulation, green or white corrosion on connectors, or any signs of previous poor repairs (think the dreaded “rat’s nest” of wires).
- Trace the Fault: Use your wiring diagram to trace the circuit leading to the failing component. With your multimeter set to continuity mode, check if there’s a break in the wire. A test light is also a quick way to see if a circuit is live.
Step 2: Master the Core Skill – Splicing Wire Like a Pro
Almost every electrical repair involves cutting and joining wires. Doing it right ensures a permanent fix.
- Crimping (The Go-To Method): Crimping is the most reliable method for automotive repairs. Use a ratcheting crimper for consistent pressure. Slide heat-shrink tubing onto the wire before stripping about ¼ inch of insulation. Insert the wire into an insulated butt connector and crimp firmly.
- Soldering (For Permanent Bonds): Soldering creates the strongest electrical connection. Heat the wires with a soldering iron and let the solder melt onto the wires—not directly on the iron. The joint should be shiny and smooth once cooled.
- Seal the Deal: After crimping or soldering, always cover the joint with heat-shrink tubing. Use a heat gun to create a weatherproof seal. Avoid using quick-connectors or electrical tape for permanent fixes—they’re temporary solutions that don’t hold up over time.
Step 3: Performing the Repair – Harnesses and Components
With your diagnosis and skills in hand, it’s time to fix the problem.
- Repairing a Section of the Wiring Harness: If only one or two wires are damaged, you don’t need to replace the entire harness. Cut out the damaged section carefully. Then, use the splicing techniques above to integrate new automotive-grade wire of the correct gauge. Bundle the new wire with zip ties to keep it neat.
- Replacing Battery Cables: Replacing the positive and negative battery cables is an easy but impactful fix. Clean the battery posts and cable connections with a wire brush. Apply a thin layer of dielectric grease to prevent corrosion and improve connection longevity.
- Classic Car Fuse Box Replacement: Start by disconnecting the battery. Take a clear photo of the old fuse box wiring for reference. Then, move the wires one at a time from the old fuse box to the new one. If the terminals are corroded, clean or replace them now to ensure proper connections.
- Cleaning Connectors: If you’re dealing with intermittent electrical issues, the problem might just be a dirty connector. Unplug the connector and spray both ends with electrical contact cleaner. Use a small wire brush or pick to gently clean away any corrosion, then reconnect.
Troubleshooting Common Classic Car Electrical Gremlins
Classic cars are a lot of fun, but they do come with their share of electrical quirks. From flickering lights to mysterious starting problems, these issues can be frustrating. But with the right tools and a solid plan, you can tackle almost any electrical problem. Let’s go through a simple, step-by-step guide to diagnosing and fixing common electrical gremlins in your classic car.
A. Systematic Approach to Diagnosis
Before you start replacing parts, take a moment to diagnose the issue. I’ve found that a clear, methodical approach will save you a lot of time and confusion.
- Start with the Simplest Checks
Begin by checking the basics: the battery and fuses. If the car won’t start, check the battery voltage. A healthy battery should read about 12.6 volts when off and 13.5-14.5 volts when the engine is running. If the battery is fine, move on to the fuses. - Visual Inspection
Look closely at the wires. Check for frayed insulation, corrosion on connectors, and any signs of previous poor repairs (like a mess of wires you didn’t want to deal with). I’ve found that the issue is often right in front of me—just needing a good cleaning or tightening. - Use Your Multimeter
A multimeter is your best tool for diagnosing electrical problems. It can help you check:- Voltage: Is the battery charged properly?
- Continuity: Are any wires broken?
- Resistance: Are there bad connections or shorts?
A multimeter will save you from a lot of guesswork and point you to the exact issue.
B. Common Issues and Their Fixes
Here are some common electrical problems I’ve faced and how to fix them:
- No Start/Crank
If the car doesn’t crank, it might be a starter motor issue or battery cables.- Vintage Car Starter Motor Troubleshooting: If you hear clicking when you turn the key, the starter solenoid might be faulty.
- Battery Cable Replacement: Old cables can corrode, which leads to poor connections and trouble starting. Replacing both the positive and negative cables can solve the problem.
- Flickering/Dead Lights
If your lights flicker or don’t turn on, it’s often a grounding issue or a loose connection.- Classic Car Lighting System Repair: Start by checking the grounds. Loose or dirty grounds are a common cause. Clean the connectors and recheck the lights.
- Blown Fuses
Blown fuses are usually an easy fix. Just replace the fuse, but keep in mind why it blew.- Identifying the Cause of a Blown Fuse: If the same fuse blows repeatedly, it could mean there’s a short in the wiring. Use your multimeter to find the source.
- Proper Fuse Replacement: Always replace the fuse with one of the same amperage to avoid damaging other components.
- Intermittent Problems
If your car has electrical issues that come and go, it’s likely due to loose connections, poor grounds, or old switches.- Tighten any loose connections and check the grounds for corrosion. If a switch feels worn, replacing it might be the best solution.
- Charging System Issues
If your car struggles to hold a charge, the alternator might be the culprit.- Classic Car Alternator Repair: Check the voltage coming from the alternator using your multimeter. If it’s low, the alternator could need repair or replacement.
C. The Importance of Good Grounding
Good grounding is crucial for your car’s electrical system to work properly. Bad grounds can cause weird electrical issues that are hard to track down.
- Why Proper Grounding Is Critical
A good ground connection allows the electrical current to flow back to the battery. Without a proper ground, your electrical system can act erratically. - Automotive Electrical Grounding Techniques
- Clean the Grounds: If the ground points are dirty or corroded, clean them with a wire brush.
- Test the Grounds: Use your multimeter to check the ground connections for resistance. Low resistance is ideal.
- Add Ground Straps: If you’re still having issues, adding a few extra ground straps can improve the electrical flow.
Advanced Tips and Best Practices
When working on your classic car’s electrical system, there are a few advanced tips that can make your work smoother and more reliable. These tips will help you stay organized, prevent future issues, and understand your wiring diagrams better. Let’s dive in.
A. Reading and Understanding Wiring Diagrams
A classic car electrical system diagram is like a map for your car’s wiring. Learning to read it will help you make repairs and troubleshoot problems.
- Tips for Deciphering Classic Car Electrical System Diagrams
Wiring diagrams can look complicated, but they’re not too bad once you break them down. Start by identifying the battery and power source. Then, trace the circuit to the component you need to fix. Break the diagram into smaller sections to make it easier. - Common Symbols and Conventions
In every diagram, there are standard symbols to represent parts like wires, switches, and relays. Some common symbols are:- Lines represent wires.
- Circles represent switches.
- Triangles represent relays.
- Battery symbols represent the power source.
B. Organization and Labeling
When you work with electrical wiring, staying organized is key. It can save you a lot of time and stress.
- The Importance of Labeling Wires During Repair or Replacement
Always label your wires before you cut or disconnect anything. It’s easy to forget which wire goes where. I’ve been there with my ‘66 Mustang, and labeling the wires before cutting saved me hours of backtracking. - Keeping Your Workspace Organized
A tidy workspace will make everything easier. Use bins or trays for your tools and parts. I keep my wires sorted by color and size so I can grab exactly what I need without wasting time.
C. Preventing Future Issues
The last thing you want is to fix a problem and have it come back later. Here’s how to keep your wiring in great shape.
- Regular Inspections and Maintenance
Just like oil changes, wiring needs regular checkups. I make it a habit to inspect my wiring once a year. Look for things like frayed wires, corrosion, or loose connections. Finding problems early can save you from bigger headaches later. - Protecting Wiring from Heat, Abrasion, and Moisture
Classic cars often face environmental challenges. Protect your wires by using heat-resistant and abrasion-resistant covers. Also, make sure your wires stay dry and are kept away from hot engine parts. This helps them last longer.
Important Electrical Safety Precautions
When working on your classic car’s electrical system, safety should always come first. These simple safety tips will help keep you safe while you work.
Classic Car Electrical Safety Tips
- Always Disconnect the Battery Before Working on Any Electrical Components
The first thing I always do is disconnect the negative battery terminal. This stops any power from running through the system while you’re working. It’s a small step, but it can prevent shocks and shorts. - Use Insulated Tools and Wear Protective Gloves
When you’re working with wires, always use insulated tools. This helps protect you from any accidental shocks. I also recommend wearing protective gloves. They’ll keep you safe from cuts and any unexpected shocks while you work. - Check for Grounding Issues Before Making Repairs
A lot of electrical problems come from bad grounds. Always check for loose or corroded ground connections. If you find any, clean or replace them before starting repairs. A poor ground can cause your car’s electrical system to act up or even cause damage to parts.
Understanding Wiring Color Codes for Old Cars
When working on a classic car, understanding the wiring color codes is key to avoiding mistakes. Let’s look at the common color codes used in vintage cars and how to decode them correctly.
Old Car Wiring Color Codes
Explanation of the Common Wiring Color Codes Used in Vintage Cars
In older cars, wiring color codes follow certain patterns. Some of the most common ones include:
- Red: Power wires, often for ignition or battery. Black: Ground wires. Yellow and Green: Used for lighting circuits (headlights, tail lights).Blue: Often for accessories, like radios.
How to Decode and Use Wiring Diagrams to Prevent Mistakes
Once you know the color codes, reading a wiring diagram is much easier. Look for the color code on the diagram, then follow it to see where each wire connects. This step is important, especially in older cars where the wiring might have been modified. If you’re ever unsure, always double-check the diagram before cutting or splicing any wires. It may take a little extra time, but it’s worth it to avoid mistakes down the line.
Personal Anecdotes and Practical Insights
Working on classic cars is always a mix of fun and frustration. I’ve had my share of tricky electrical problems. One time, I spent hours chasing a phantom short in my ’72 Chevy. The car would stall, and the lights would flicker. I checked the battery, the fuses, and the wiring, but I couldn’t find the issue.
After what felt like an eternity of searching, I took a step back. I decided to take another look behind the dash. That’s when I found it—a frayed wire barely hanging on. It was the cause of the short. Once I replaced it, the issue was gone. The car ran perfectly, and I felt like a hero. This taught me a valuable lesson: sometimes, the simplest issues are the hardest to spot.
Practical Tips Learned from Experience
Here are a few things I’ve learned from working on my own cars that may not be in a textbook:
- Start with the Ground: If you’re having electrical issues, always check the ground connections first. I’ve found that grounding problems are often the hidden cause behind many strange electrical issues.
- Don’t Rely Too Much on Electrical Tape: Electrical tape is useful, but it shouldn’t be your go-to fix. I once used it to repair a frayed wire, and over time, the tape peeled off. If you need a more permanent fix, heat-shrink tubing is a much better option.
- Always Check the Wiring Diagram: Even when you think you know what’s wrong, always refer to the wiring diagram. It’s saved me countless hours of troubleshooting. Double-checking the diagram helps ensure you haven’t missed a step or connection.
- Stay Organized: Keep your tools and wires neat and labeled. It sounds basic, but it really helps. I’ve saved time and avoided mistakes just by making sure everything is organized and easy to find.
FAQs: Common DIY Classic Car Wiring Fixes
How much does it cost to have a classic car rewired?
DIY classic car electrical wiring fixes can save money, but pro rewiring costs between $1,500 and $5,000, depending on the car’s age and complexity. Doing it yourself is cheaper and lets you understand your automotive wiring troubleshooting guide better.
How to fix electrical problems in cars at home?
Start with a classic car electrical system diagram to find problem areas. Use basic tools and follow a DIY classic car electrical wiring fixes guide to check wires, fuses, and connectors. Replace any bad parts to restore your car’s electrical system.
What is the best way to repair car wires?
The best way is to follow a DIY classic car electrical wiring fixes method. Use automotive wire splicing, crimp connectors, and sometimes soldering. Always check your automotive wiring troubleshooting guide and seal repairs with heat shrink tubing.
Can car wiring be repaired?
Yes, car wiring can be repaired at home. Use a classic car electrical system diagram and DIY classic car electrical wiring fixes techniques to identify and fix broken wires. Replace damaged sections with new wire and proper connectors for safe repairs.
How often should I inspect my classic car’s electrical system?
It’s best to inspect your classic car’s electrical system every six months. Use a DIY classic car electrical wiring fixes checklist with an automotive wiring troubleshooting guide. Check your classic car electrical system diagram for any trouble spots and fix issues early.
My Final Thoughts on DIY Classic Car Electrical Wiring Fixes
Bringing a classic car’s electrical system back to life is one of the most rewarding projects you can take on. What once seemed like a tangled mess of wires becomes something you understand—whether it’s diagnosing a faulty alternator or splicing a wire with confidence.
Yes, there will be tough moments. But the pride you feel when your engine roars back to life because of your work will make it all worth it. You now have the roadmap, the tools, and the know-how to do the job right.
So, start small—clean your battery terminals or replace that frayed wire. You’ll be amazed at how quickly your confidence grows. Welcome to the world of owners who don’t just drive their cars, but also preserve them. You’ve got this!