
This article was updated in August 8, 2025 with new products and information by Mark S. Taylor
Dealing with rust in your gas tank can be a real headache—I’ve been there. It causes everything from poor engine performance to clogged fuel lines, and let’s be honest, no one wants to face those repairs. If you’re wondering how to clean rust out of a gas tank, you’re in the right place. I’ll walk you through some simple, DIY methods and professional solutions I’ve used over the years to fix rust issues and get your tank back to top shape. Whether it’s an old motorcycle or a car, cleaning out rust doesn’t have to be a daunting task. Stick with me, and I’ll help you tackle it step by step.
Contents
Why Rust Forms in Gas Tanks and Its Impact on Engine Performance
Rust in your gas tank can be a real problem. I’ve seen it happen when moisture builds up in the tank. This often happens if the tank isn’t used much or if the vehicle sits for a while. Rust starts to form as a result of this moisture. It’s a slow process, but over time, it can cause big issues. I learned this the hard way when my motorcycle wouldn’t start. After checking, I found that the tank was full of rust, blocking the fuel from flowing properly. It was a rusty motorcycle tank that caused all the trouble.
Rust messes with the engine’s performance. It can block fuel lines and stop the engine from getting the fuel it needs to run smoothly. If you don’t fix it, the rust can cause engine failure and costly repairs. I know because I’ve had to deal with rusted gas tank repair before. It’s a pain, and it can get expensive. That’s why it’s important to act early and clean out the rust.
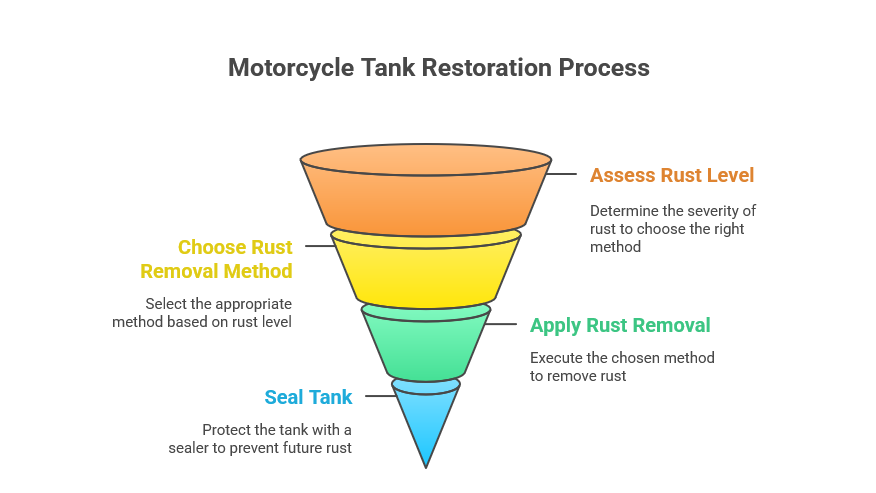
Best Methods for Cleaning Rust Out of a Gas Tank
When it comes to cleaning rust out of a gas tank, there are a few methods I’ve tried that stand out. The best way to clean a rusty gas tank really depends on how much rust is inside. Some methods are great for light rust, while others work better for stubborn rust buildup. Here’s a look at the top options, whether you’re tackling a small DIY project or a big restoration job.
Using Vinegar to Clean Rust from a Gas Tank
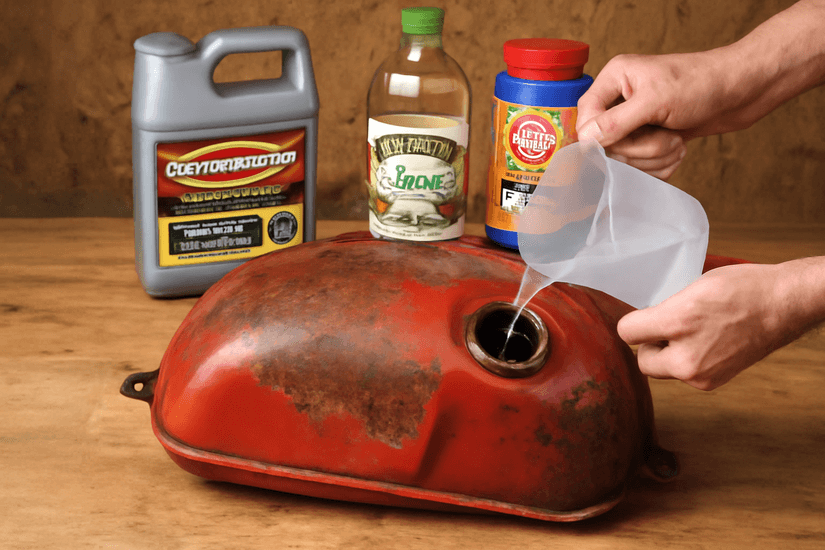
Vinegar is one of the most cost-effective methods for rust removal, especially if the rust isn’t too severe. It’s simple, cheap, and works surprisingly well on light rust buildup. I’ve used it for smaller rust spots on my motorcycle gas tank, and it did the job. Here’s how to do it:
- Empty the gas tank completely and remove any fuel lines if possible.
- Pour vinegar into the tank until it’s about halfway full. You can use white vinegar or apple cider vinegar—both work.
- Let it sit for at least 4 hours. I usually leave it overnight to make sure it dissolves the rust.
- Shake the tank gently every hour or so to help loosen the rust.
- After the waiting period, rinse the tank with water and make sure to dry it completely.
Tip: Vinegar works best for smaller rust spots. If the rust is extensive, you might need a more powerful solution. But for a DIY gas tank rust removal, vinegar is an easy, budget-friendly solution.
Electrolysis Rust Removal Method
Electrolysis is a powerful technique for removing rust, and it’s surprisingly easy to set up at home. It uses electricity to pull the rust off the metal, leaving the tank clean and rust-free. I’ve used this method for heavier rust buildup in larger tanks, and it works wonders. Here’s how it works:
- Set up a simple electrolysis tank using a plastic container, water, and washing soda (you can find washing soda at most stores).
- Attach a battery charger to the container, connecting the positive lead to a piece of scrap metal (acting as the anode).
- Submerge the rusted gas tank into the solution, making sure it doesn’t touch the anode.
- Turn on the charger and let the process run for several hours. The rust will start to break down and fall off.
Tip: While electrolysis is effective, it can take a little time. Safety first—make sure you have a well-ventilated area, and keep your setup away from anything that could cause sparks.
Using EvapoRust to Restore a Fuel Tank
If you’re looking for an easy, non-toxic solution, EvapoRust is the way to go. This product is a game-changer for anyone looking to restore their gas tank rust removal process with minimal hassle. It’s safe, easy to use, and can remove even the toughest rust. Here’s how you can use it:
- Empty your gas tank and clean out any loose debris.
- Pour EvapoRust into the tank and make sure it’s fully covered by the liquid.
- Let it sit for several hours or overnight, depending on how severe the rust is.
- After waiting, drain the EvapoRust and rinse the tank with water.
Tip: The best part about EvapoRust is that it’s non-toxic, so it’s safe to handle and won’t harm the environment. Plus, it works fast, making it one of the most popular rust removal products for fuel tanks.
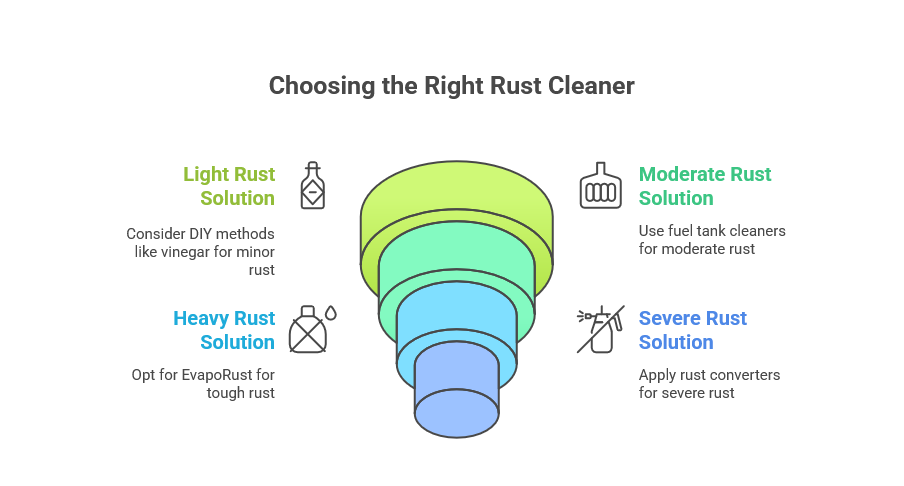
The Best Gas Tank Cleaner for Rust: What to Look For
Choosing the best gas tank cleaner for rust can be tough. There are so many options, from DIY methods to store-bought cleaners. It really comes down to what you need. The goal is to find a cleaner that works well for your tank without costing a fortune.
If the rust is light, a fuel tank cleaner or even vinegar might be enough. I’ve used vinegar on smaller rust spots, and it works just fine. But if the rust is bad, you’ll need something stronger. EvapoRust is one of the best cleaners for tough rust. It gets the job done quickly, and it’s safe to use.
If you’re dealing with heavy rust, a rust converter gas tank product might be your best bet. It helps remove rust and prevents it from coming back. It’s perfect for larger tanks or stubborn rust.
Tip: When picking a cleaner, think about your tank size and how much rust you have. A small tank with light rust might only need a DIY method, but a bigger, rustier tank may need a stronger cleaner. Balancing cost with effectiveness is key.
How to Seal a Gas Tank After Rust Removal
Once you’ve cleaned the rust out of your gas tank, it’s crucial to seal it. Sealing helps protect the tank from future rust and keeps your fuel system safe. Without sealing, moisture can sneak in, causing new rust to form, even after you’ve put in all the work to clean it. I’ve learned this from experience—once the rust is gone, sealing it is the next step to ensure long-term protection.
Here’s how to seal a gas tank after rust removal:
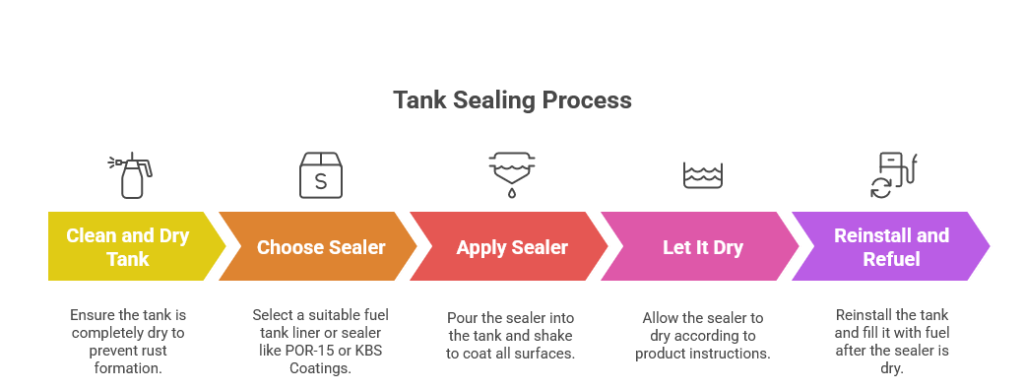
- Clean the tank thoroughly: Make sure all the rust is gone, and the tank is dry. Any leftover residue or moisture can mess with the sealing process.
- Choose a tank sealer: I recommend using a good fuel tank liner or tank sealer product. There are plenty of options on the market, like POR-15 or KBS Coatings. These products are designed for fuel tanks and offer excellent protection against rust.
- Apply the sealer: Pour the sealer into the tank, ensuring it covers the entire surface. You may need to rotate or shake the tank to make sure the sealer spreads evenly. Follow the instructions on the product for the best results.
- Let it cure: Allow the sealer to dry and cure as directed. This is important because it gives the sealer time to bond to the tank and form a protective layer.
- Reinstall and refuel: Once the sealer is fully cured, your tank is ready to go! You can reinstall it and fill it with fuel, knowing it’s protected from rust for the future.
Tip: Be sure to use a sealer that’s specifically designed for gas tanks to avoid potential issues with fuel contamination. Following these steps will help you keep your tank rust-free for years to come.
Preventing Rust in Your Gas Tank
Once you’ve cleaned out the rust, the last thing you want is for it to come back. Gas tank rust prevention is all about maintaining your tank and making sure moisture doesn’t have a chance to build up. Over the years, I’ve learned a few simple tricks that go a long way in preventing rust from forming in the first place.
Here are some tips to keep your tank rust-free:
- Keep the tank full: A full tank reduces the space for moisture to gather. If the tank is only partially filled, condensation can form inside, leading to rust over time. I always fill up my tank before storing my vehicle for an extended period.
- Use a fuel stabilizer: If you’re not planning to use your vehicle for a while, a fuel tank restoration product like a fuel stabilizer can help. It prevents the fuel from breaking down and absorbing moisture, which is a big cause of rust.
- Proper storage: If you have a motorcycle or car that’s going into storage, be sure to store it in a dry, cool place. I learned this the hard way when I left a vehicle in a damp garage for a few months. The rust quickly started to form. Storing your vehicle in a dry environment helps prevent moisture from collecting in the tank.
- Check the tank regularly: Even if you’re not using the vehicle, it’s a good idea to check the gas tank now and then for signs of rust or moisture buildup. A quick inspection can catch any issues before they become a bigger problem.
Tip: If you store your vehicle for long periods, it’s crucial to follow these steps. I’ve found that keeping the tank dry and using stabilizers can save you a lot of work later on. Rust is much easier to prevent than to fix!
Motorcycle Gas Tank Rust Removal: Special Considerations
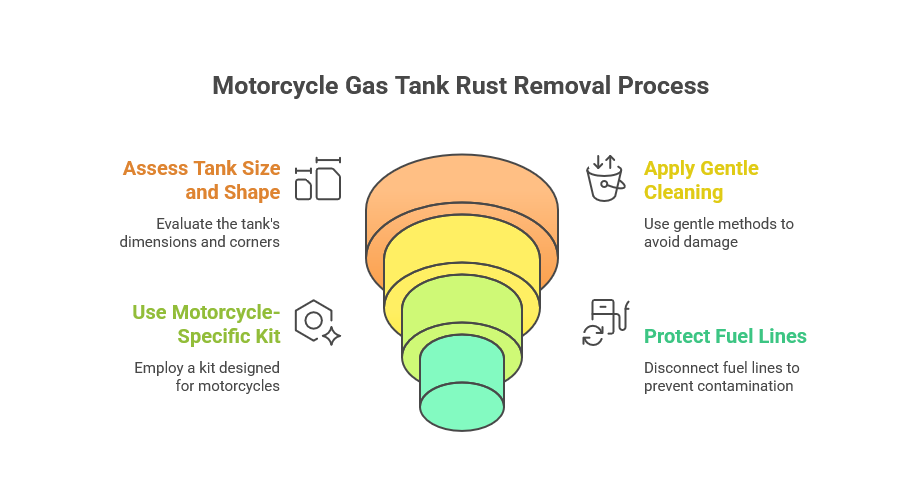
Removing rust from a motorcycle gas tank can be tricky. These tanks are smaller, and they have a different shape than car tanks. That means we need to be extra careful when cleaning them. I’ve worked on a few rusty motorcycle tanks, and I’ve learned a lot through trial and error.
Here’s what I’ve found works best:
- Tank Size and Shape: Motorcycle gas tanks are smaller and have tight corners. This can make it harder to reach every rust spot. I’ve had good luck using smaller tools and cleaners that can fit into these tricky areas.
- Be Gentle: Motorcycle tanks are thinner than car tanks. If you apply too much pressure, you could damage the tank. When shaking the tank or using a cleaner, make sure you’re gentle. You don’t want to risk bending or puncturing the metal.
- Use a Kit for Motorcycles: There are kits made just for motorcycle rust removal. These kits usually have everything you need, like a cleaner, rust remover, and tank sealer. I’ve used a few of these kits, and they make the job much easier. I recommend something like the KBS Coatings Motorcycle Gas Tank Sealer Kit.
- Protect the Fuel Lines: Before you clean the tank, disconnect the fuel lines. Rust removal can get messy, and you don’t want any debris or chemicals getting into your motorcycle’s fuel system.
Tip: A motorcycle-specific rust removal kit can make the job a lot easier. These kits are designed for smaller, delicate tanks, so they help prevent mistakes and damage.
Common Mistakes to Avoid When Cleaning a Rusty Gas Tank
Cleaning a rusty gas tank can be tricky, and there are a few common mistakes that can make the job harder. Trust me, I’ve learned from my own mistakes and want to help you avoid them. If you don’t get it right, you could end up with a rusted gas tank repair job that’s even more expensive and time-consuming.
Here are some common mistakes to watch out for:
- Not Fully Drying the Tank: After you’ve cleaned out the rust, it’s easy to skip the drying process. But leaving any moisture inside can cause new rust to form quickly. Always dry the tank completely before sealing it. I made this mistake once, and within a few weeks, rust started coming back.
- Using Harsh Chemicals: It’s tempting to use strong chemicals to get rid of rust, but some can damage the tank or leave harmful residues. Always check the label of the rust remover before use. I’ve had to deal with a few tanks where strong chemicals left a residue that caused problems down the line.
- Skipping the Sediment Removal: A lot of rust and debris can get stuck in the bottom of your tank. If you don’t remove it properly, it can clog your fuel lines later. I learned the hard way that how to remove sediment from gas tank is just as important as removing the rust itself.
- Not Using a Sealer: After all the hard work of cleaning, some people forget to seal the tank. Sealing helps prevent rust from returning, and it’s one of the most important steps. Without it, you might find yourself back at square one, dealing with rust again.
Tip: The most common mistake I see DIYers make is not fully drying the tank after cleaning. It’s a small step, but skipping it can undo all your hard work. Take the time to dry the tank completely and you’ll save yourself from doing the job again later.
Alternative Methods for Rust Removal: Citric Acid & Other Options
If you’re looking for something other than vinegar or store-bought rust removers, citric acid is a great option. It’s effective and not too harsh on the tank. I’ve used citric acid rust removal before and found it works well on smaller rust spots.
Here’s a quick look at how citric acid compares to vinegar:
- Citric Acid: Citric acid works by breaking down the rust, making it easy to wash away. It’s great for light to moderate rust. You just mix the powder with water, pour it in, and let it sit for a few hours. It’s gentle and gets the job done. I’ve used it on smaller jobs, and it worked great.
- Vinegar: Vinegar is another simple option. It’s cheap and easy to find, and it works for light rust. But, it might take longer to remove rust compared to citric acid. If the rust is heavy, vinegar may not work as well.
Tip: Both citric acid and vinegar can do the job, but citric acid usually works faster and is better for moderate rust. Vinegar works too, but you’ll need to soak it longer. If you want something quick and effective, citric acid is often the better choice.
Tank Sealing After Rust Removal
Once you’ve cleaned the rust out of your gas tank, sealing it is the next important step. Sealing the tank keeps rust from coming back. I’ve seen rust start to form again just a few months after cleaning if the tank wasn’t sealed. It’s a quick step that helps prevent future problems.
Why Sealing Is Important
Sealing your tank helps keep moisture out, which is the main cause of rust. Without a sealer, the tank can begin rusting again. I learned this lesson after missing the sealing step on one of my projects, and it caused me a lot of extra work.
Step-by-Step Guide for Applying a Sealer
- Clean and Dry the Tank: Make sure the tank is completely dry. Any leftover moisture can cause rust to form.
- Choose a Good Sealer: Use a fuel tank liner or tank sealer that is designed for gas tanks. Popular options are POR-15 and KBS Coatings.
- Apply the Sealer: Pour the sealer into the tank. Turn and shake the tank to make sure it covers all the inside surfaces.
- Let It Dry: Follow the instructions on the product for drying time. It’s important to give it enough time to cure.
- Reinstall and Refuel: Once the sealer is dry, reinstall the tank and fill it with fuel.
Recommended Sealers
- POR-15: A great choice for sealing fuel tanks, known for its durability.
- KBS Coatings Tank Sealer Kit: A popular option that provides a complete solution for rust removal and sealing.
Consequences of Not Sealing the Tank
If you skip sealing, new rust will form. Moisture and air will cause problems in no time. It’s a small step, but not doing it can lead to bigger problems later, like clogged fuel lines or engine issues.
Tip: Don’t skip sealing. It’s quick and ensures your tank stays rust-free longer.
Preventative Measures for Long-Term Gas Tank Care
After cleaning and sealing your tank, keeping it in good shape is key. A little maintenance goes a long way in preventing rust from coming back.
Regular Maintenance
- Inspect the Tank: Check the tank every now and then for any signs of rust. Early detection can save you time and money.
- Use Fuel Stabilizers: If you’re storing your vehicle for a while, a fuel stabilizer can help prevent moisture and rust. I’ve used them on motorcycles in storage, and they work great.
Keep the Tank Full
A full tank prevents moisture buildup. If the tank is empty or low, condensation can form inside, which leads to rust. Always keep the tank full when storing your vehicle.
Store Vehicles in Dry Places
Store your vehicle in a dry place. Moisture in the air can quickly lead to rust, especially if the tank is not full. A cool, dry space is the best way to keep the tank rust-free.
Tip: Proper storage makes a big difference. Keep the tank full, use a stabilizer, and store your vehicle in a dry place to keep it rust-free.
Tips for Keeping Your Tank Rust-Free
If you’ve just cleaned and sealed your gas tank, it’s important to keep it rust-free. I’ve learned the hard way that neglecting regular maintenance can lead to rust coming back quickly. Here’s how I keep my tank in good shape:
- Keep the Tank Full: I always fill my tank before storing the vehicle. A full tank reduces moisture buildup, which is the main cause of rust. I once left a tank half full, and moisture built up, leading to rust. That was a mistake I won’t repeat.
- Use Fuel Stabilizers: When I store a vehicle for a long time, I always use a fuel stabilizer. This keeps the fuel from absorbing moisture, which can lead to rust. I’ve used stabilizers in my motorcycle, and it helps prevent rust in the tank.
- Drain Sediment Regularly: Over time, debris and sediment can build up in your tank. I drain mine regularly to keep it clean. It’s a small step but important for preventing rust from forming at the bottom of the tank.
Tip: I’ve found that regular maintenance goes a long way. Keeping the tank full, using stabilizers, and draining sediment every few months saves time and effort in the future. It’s a simple routine that can help with gas tank rust prevention and fuel tank restoration.
Handling Motorcycle Fuel Tanks: Unique Considerations
Motorcycle gas tanks are different from car tanks. They’re smaller and more fragile. I’ve worked on a few rusty motorcycle tanks, and here’s what I’ve learned:
- Smaller Tanks, More Care: Motorcycle tanks are tight spaces. You’ll need smaller tools and cleaners to reach all the spots. I’ve used tiny brushes to clean the corners and get rid of rust. It’s important not to miss any areas.
- Thin Metal: The metal on motorcycle tanks is thinner. This means it’s easier to damage. I’ve learned to be gentle when cleaning them. Too much pressure can cause dents or scratches.
- Special Kits: I recommend using a motorcycle-specific rust removal kit. I’ve used the KBS Coatings Motorcycle Tank Sealer Kit, and it works great. These kits are made for the smaller tanks and give you everything you need, from rust removers to sealers.
Tip: When working on a motorcycle tank, always use a kit designed for that purpose. It’ll make the job easier and protect your tank from future rust.
Specific Challenges When Dealing with Motorcycles
Working with motorcycle gas tanks can be tricky. They are smaller than car tanks, which makes rust removal harder. Over time, I’ve learned that rusty motorcycle tanks need special care. The shape and size of the tank can make it difficult to reach every rust spot.
The metal is often thinner too. So, when you’re cleaning it, you need to be gentle. Too much pressure can damage the tank. I’ve made that mistake before, and it taught me to slow down and take my time.
Rust Removal Methods Tailored for Motorcycles
Here are a few methods I’ve found work well for motorcycle fuel tank restoration:
- Electrolysis: This method uses a battery and a water solution to remove rust. It works well for tough rust, but it can take time. It’s best if you have a rusty motorcycle tank with heavy rust buildup.
- Vinegar: For light rust, vinegar is a quick and cheap solution. Just pour it in the tank, let it sit, and shake it every hour. It’s simple and works great for small rust spots.
- EvapoRust: This is a powerful rust remover. It’s non-toxic and easy to use. I’ve used it several times on my own bikes, and it works fast without damaging the tank.
Recommended Products for Motorcycle Owners
If you need to clean a rusty motorcycle tank, here are a few products I recommend:
- KBS Coatings Motorcycle Gas Tank Sealer Kit: This kit includes everything you need for motorcycle gas tank rust removal. It comes with a cleaner, rust remover, and a sealer. It’s easy to use and very effective.
- POR-15 Tank Sealer: After removing rust, this sealer protects the tank. I’ve used it to keep tanks rust-free for years.
- EvapoRust: For rust removal, I swear by this product. It’s safe, simple, and works well on all types of tanks.
Tip: Stick with products made for motorcycles. They’re gentler on the tank and more effective for smaller projects.
Frequently Asked Questions
How do you clean a gas tank that has been sitting for years?
To clean a gas tank that has been sitting for years, start by draining any old fuel. Use a rust remover like EvapoRust or vinegar for light rust. For heavy rust, you may need electrolysis. After cleaning, rinse the tank well and dry it completely before sealing to prevent new rust.
Will muriatic acid clean rust out of a gas tank?
Yes, muriatic acid can clean rust from a gas tank. However, it is a strong acid and should be used with caution. I recommend using gloves and safety glasses. After applying it, rinse the tank thoroughly to remove any acid residue to prevent damage to the tank.
Will a rusty gas tank ruin an engine?
Yes, a rusty gas tank can damage the engine. Rust can clog the fuel lines and filter, preventing the engine from getting the right amount of fuel. It can also lead to poor engine performance or even engine failure if not cleaned and restored properly.
What is the fastest way to remove rust from metal?
The fastest way to remove rust from metal is using EvapoRust or electrolysis. EvapoRust works quickly and doesn’t require scrubbing. For stubborn rust, electrolysis is also a good method, although it takes longer. Both methods are effective and safe.
Is a rusted gas cylinder safe?
A rusted gas cylinder may not be safe. Rust weakens the cylinder’s structure, increasing the risk of leaks or rupture. It’s best to inspect the cylinder thoroughly. If the rust is severe, it’s safer to replace the cylinder or have it professionally inspected before use.
My Final Thoughts on How to Clean Rust Out of a Gas Tank
If you’re someone who likes to tackle DIY projects and wants to save money, cleaning your gas tank yourself is a great choice. From experience, I can tell you that using rust removers like vinegar or EvapoRust can work wonders and leave your tank looking brand new. However, if you’re short on time or just prefer to leave it to the pros, you might want to consider having a professional handle it for you.
In the end, cleaning your tank isn’t hard, but it does take a little patience. I’ve found that taking the time to do it myself gave me a sense of accomplishment. You’ll be amazed at how much of a difference it can make in your vehicle’s performance.