
To replace a headlight bulb, locate the bulb holder, unplug the wiring harness, remove the old bulb, and insert the new bulb. Headlight bulbs may need replacing due to burnouts or reduced visibility.
It is crucial to have functioning headlights for safe driving, especially at night or in adverse weather conditions. Replacing a headlight bulb is a relatively simple process that can be done at home with minimal tools and time. This article outlines the steps required to replace a headlight bulb in a vehicle, providing a clear and concise guide for drivers.
By following these steps, drivers can ensure that their headlights are in optimal working condition and maintain their safety on the road.
Contents
- 1 Tools Required
- 2 Safety Precautions
- 3 Locating The Headlight Bulb Housing
- 4 Removing The Old Bulb
- 5 Choosing The Right Replacement Bulb
- 6 Installing The New Bulb
- 7 Testing The Headlight Bulb
- 8 Replacing Covers And Panels
- 9 Final Tips And Tricks
- 10 Frequently Asked Questions For How To Replace A Headlight Bulb
- 11 Conclusion
Tools Required
Replacing a headlight bulb is a simple maintenance task that can save you time and money. By following a few steps and using the right tools, you can easily replace a headlight bulb on your own. In this section, we’ll discuss the tools required to complete this task.
Screwdriver
A screwdriver is an essential tool for replacing a headlight bulb. You’ll need it to remove the screws that hold the headlight assembly in place. Make sure you have a screwdriver that is the appropriate size for the screws in your vehicle.
Replacement Bulb
Of course, you’ll need a replacement bulb to replace the old one. Headlight bulbs come in different types and sizes, so make sure you know the right bulb for your vehicle. Refer to your vehicle’s manual or consult with an auto parts store to ensure you purchase the correct bulb.
Gloves (Optional)
While gloves are not necessary for replacing a headlight bulb, they can come in handy. Gloves can provide a better grip and protect your hands from getting dirty or injured during the process. If you prefer to work with gloves, make sure they are clean and offer good dexterity.
Here are the tools required for replacing a headlight bulb:
- Screwdriver: Used to remove the screws holding the headlight assembly in place.
- Replacement bulb: Make sure you purchase the correct type and size for your vehicle.
- Gloves (optional): Provide a better grip and protect your hands during the process.
Now that we have covered the tools needed, it’s time to move on to the next steps of replacing a headlight bulb.
Safety Precautions
Turn Off The Engine
- It is vital to switch off the engine before replacing a headlight bulb.
- This ensures safety and prevents any electrical accidents.
- Turning off the engine will also help avoid burns caused by hot engine components.
Allow The Bulb To Cool Down
- Prior to replacing the headlight bulb, allow it to cool down completely.
- A hot bulb can be dangerous to handle and result in burns.
- Waiting for the bulb to cool down will not only protect your hands but also prevent potential damage to the new bulb.
Wear Gloves To Protect Your Hands
- Always wear gloves when handling headlight bulbs.
- Gloves will provide protection against any sharp edges or hot surfaces.
- It is important to avoid touching the bulb directly with your bare hands, as oil from your skin can cause the bulb to deteriorate or fail prematurely.
Remember, safety precautions should never be overlooked when handling headlight bulbs. By following these measures, you can ensure your well-being and carry out the replacement process smoothly.
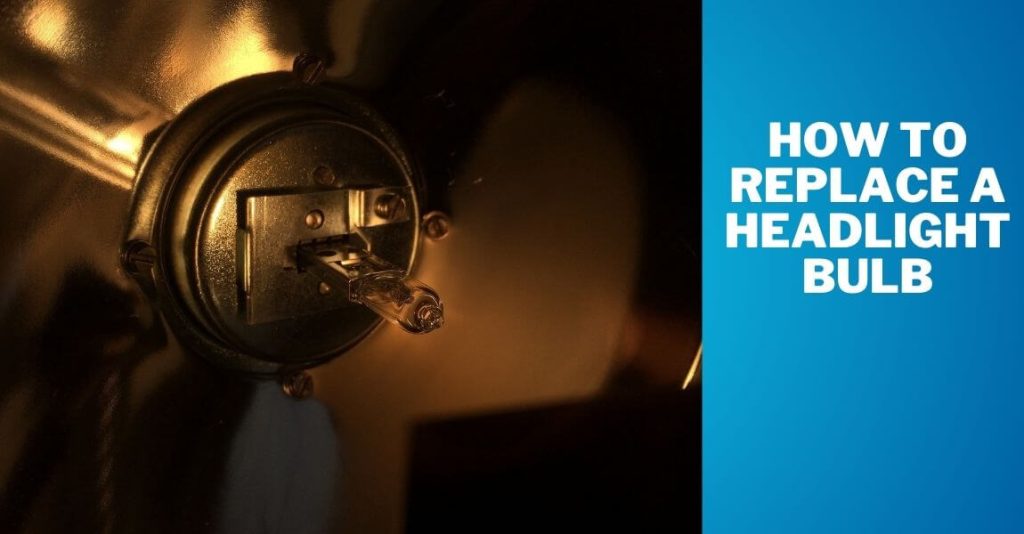
Locating The Headlight Bulb Housing
Open The Hood
Before you can start replacing a headlight bulb, you’ll need to open the hood of your car. Follow these steps to access the headlight bulb housing:
- Locate the hood release lever, usually located near the driver’s side footwell or underneath the steering wheel. Pull the lever to release the hood.
- Move to the front of your car and find the hood latch, which is usually in the middle or slightly off-center. Push the latch upward or to the side to fully open the hood.
- Once the hood is fully open, secure it with the prop rod or hood support. This will ensure that the hood stays open while you work on replacing the headlight bulb.
Identify The Headlight Bulb Housing
With the hood open, you’ll now need to locate the headlight bulb housing. Here’s how you can find it:
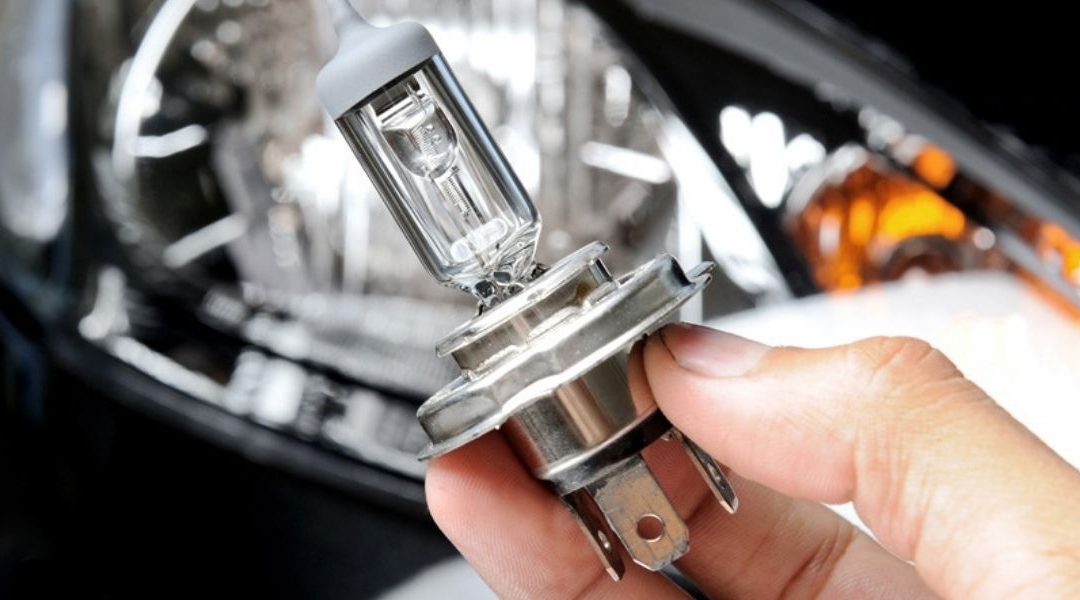
- Look for the headlight assembly, which consists of a clear lens and usually has a reflector around it. Depending on your car model, there might be separate assemblies for the high-beam and low-beam headlights.
- Once you’ve located the headlight assembly, find the backside of it. The headlight bulb housing is typically accessible from behind the assembly.
- Keep in mind that some cars may have additional components, such as covers or access panels, that need to be removed before you can access the headlight bulb housing. These components vary by make and model, so consult your car’s manual or online resources for specific instructions.
Remove Any Covers Or Access Panels
Before you can replace the headlight bulb, you may need to remove any covers or access panels that are in the way. Here’s what you should do:
- Identify any covers or access panels that are obstructing the headlight bulb housing.
- Check for screws, clips, or tabs that are securing the covers or panels. Use a screwdriver, pliers, or your hands to remove these fasteners.
- Once the covers or access panels are removed, you should have clear access to the headlight bulb housing.
- Be careful not to force or break any components while removing the covers or panels. If you encounter resistance, double-check for any missed fasteners or consult your car’s manual for guidance.
Now that you’ve located the headlight bulb housing and removed any covers or access panels, you’re ready to proceed with replacing the headlight bulb itself. Stay tuned for the next section of this guide, where we’ll walk you through the steps of safely removing and installing the new bulb.
Removing The Old Bulb
Removing the old bulb is a crucial step when replacing a headlight bulb. It may sound intimidating, but fear not! With these simple instructions, you’ll have the old bulb out in no time. Just follow these steps:
- Disconnect the electrical connector:
- Locate the electrical connector at the back of the headlight assembly.
- Gently press the release tab and wiggle the connector to detach it from the bulb.
- This will ensure that there is no live current flowing to the bulb, keeping you safe throughout the process.
- Remove the retaining clip or ring:
- Depending on your vehicle, you’ll either encounter a clip or a ring securing the bulb in place.
- For a clip: Squeeze the sides together and carefully slide it off the bulb.
- For a ring: Rotate it counterclockwise to release the bulb.
- Keep the clip or ring in a secure place to prevent it from rolling away or getting lost.
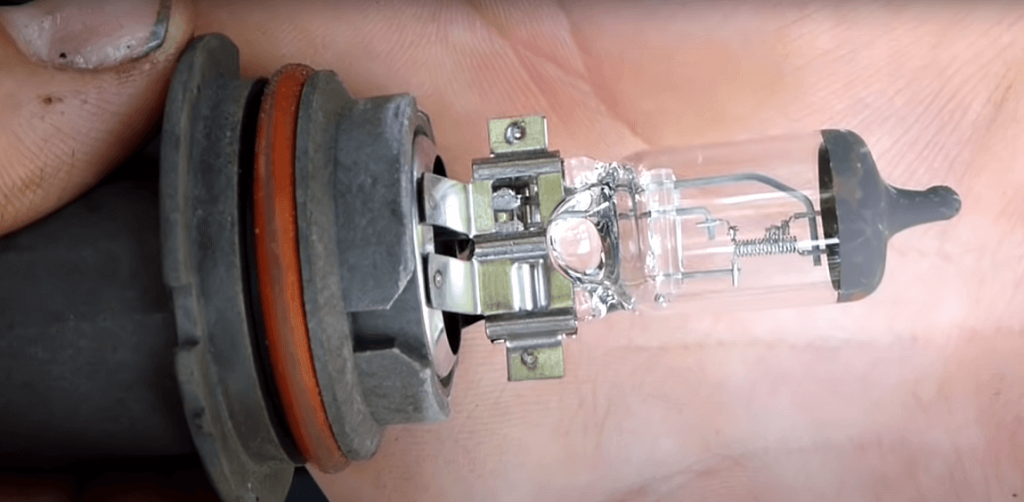
- Take out the old bulb carefully:
- Grasp the bulb firmly but gently, avoiding excessive pressure that could cause damage.
- Slowly twist the bulb counterclockwise and pull it straight out of the socket.
- Be cautious not to touch the glass part of the bulb with your bare hands, as the oils from your skin can reduce its lifespan.
Now that you’ve successfully removed the old headlight bulb, you’re one step closer to installing the new one. Stay tuned for the next section on how to install the replacement bulb securely.
Choosing The Right Replacement Bulb
When it comes to replacing a headlight bulb, choosing the right replacement is essential to ensure optimal visibility and safety on the road. Follow these simple steps to select the correct bulb for your vehicle:
Check The Owner’s Manual For Bulb Specifications
- Refer to your vehicle’s owner’s manual for specific bulb specifications. This information will guide you in selecting the right replacement bulb.
- Look for details such as bulb type, wattage, and voltage requirements. These specifications are crucial to ensure compatibility and prevent any electrical issues.
Purchase The Correct Bulb For Your Vehicle
When shopping for a replacement bulb, keep the following factors in mind:
- Bulb type: There are different bulb types available, such as halogen, led, and hid. Ensure that you choose the type recommended for your vehicle.
- Wattage: Select a bulb with the appropriate wattage as specified in your owner’s manual. Using a bulb with incorrect wattage can lead to electrical problems or even damage the headlight assembly.
- Quality: Opt for bulbs from reputable brands to ensure longevity and reliable performance.
- Compatibility: Consider the make, model, and year of your vehicle to ensure compatibility with the replacement bulb. Some headlights may require specific bulbs designed for certain vehicles.
Avoid Touching The New Bulb With Bare Hands
When handling the new bulb, it’s essential to avoid touching the glass surface with bare hands. The natural oils on your skin can leave residues on the bulb, which may cause it to burn out prematurely. Follow these tips to avoid contact:
- Wear disposable gloves or use a clean cloth while handling the bulb.
- If you accidentally touch the bulb, clean it with rubbing alcohol to remove any residues before installing it.
By following these steps, you can confidently choose the right replacement bulb for your vehicle and successfully replace your headlight bulb without any issues. Ensure that you adhere to the specific bulb specifications and take necessary precautions during the installation process for a safe and effective replacement.
Installing The New Bulb
Replacing a headlight bulb might seem intimidating, but with a few simple steps, you can easily install a new one. Follow these instructions to ensure a smooth and successful process:
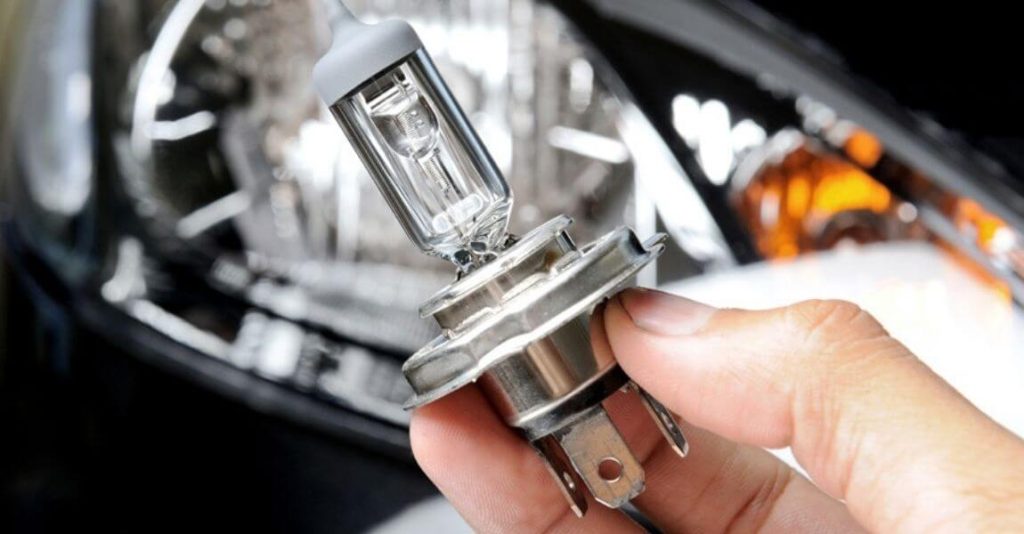
- Insert the new bulb into the housing: Carefully align the new bulb with the housing socket, ensuring the prongs are correctly positioned. Gently push the bulb into place until it fits snugly.
- Secure it with the retaining clip or ring: Depending on your vehicle model, you may need to use a retaining clip or ring to secure the new bulb in place. Slide the clip or ring over the bulb and carefully fasten it according to the manufacturer’s instructions.
- Reconnect the electrical connector: Locate the electrical connector that was disconnected earlier and reconnect it to the new bulb. Ensure that it is securely attached and the connection is tight.
By following these steps, you’ll have successfully installed a new headlight bulb in no time. Remember to refer to your vehicle’s manual for specific instructions and safety precautions. Enjoy improved visibility during your nighttime drives!
If you found this guide helpful, make sure to check out our blog for more tips on car maintenance and repairs. Stay safe on the road and keep your vehicle in top condition.
Testing The Headlight Bulb
Once you have replaced the headlight bulb, it’s important to test whether it’s functioning properly. Here are the steps to follow:
- Turn on the headlights: Before proceeding with the test, make sure to turn on the headlights. This will help you determine if the new bulb is working correctly.
- Check if the new bulb is functioning properly: To do this, follow these steps:
- Inspect the brightness: Take a look at the brightness of the new bulb. It should emit a strong and consistent light. If the light appears dim or flickers, it may indicate a problem with the bulb.
- Check for proper alignment: Ensure that the bulb is properly aligned within the headlight housing. Misalignment can lead to poor illumination and a reduction in visibility.
- Verify the color temperature: The color temperature of the new bulb should match the other headlight. If there is a noticeable difference in color, it might be an indication of an incompatible bulb or a defective one.
- Test both high and low beam settings: Switch between the high beam and low beam settings to see if both are functioning correctly. The light should change accordingly without any issues.
- Make any necessary adjustments: If you notice any abnormalities during the testing process, you may need to make adjustments. Here are some considerations:
- Bulb replacement: If the bulb is not functioning properly, you may need to replace it again. Ensure that you purchase the correct bulb type for your vehicle.
- Realign the bulb: If the bulb is misaligned, adjust its position within the headlight housing until it sits properly. This will improve the light output and ensure optimal visibility.
- Seek professional assistance: If you encounter persistent issues or are unsure about the steps mentioned above, it is advisable to consult a professional. They can help diagnose the problem and provide the necessary guidance.
Remember, ensuring the proper functioning of your headlight bulb is crucial for your safety on the road. Regularly check and replace any faulty bulbs to maintain optimal visibility during nighttime driving. Stay proactive and take prompt action to address any issues that may arise.
Replacing Covers And Panels
When it comes to replacing a headlight bulb, it’s important to not only install the new bulb correctly but also ensure that any covers or panels that were removed during the process are securely placed back in position. This ensures that the headlight assembly is properly sealed and protected.
Here’s what you need to do:
Place back any covers or panels:
- Gently align the cover or panel with its corresponding slots or clips.
- Ensure that it fits snugly into place.
- Avoid forcing or applying excessive pressure, as this may cause damage.
Ensure they are securely in place:
- Double-check that all edges and corners of the cover or panel are flush and aligned.
- Listen for a clicking sound or feel for a secure connection.
- Wiggle the cover or panel gently to confirm that it is firmly attached.
Close the hood, making sure it latches properly:
- Slowly lower the hood until it is just above the latch.
- Release the hood and allow it to close fully.
- Verify that the hood is securely closed by attempting to lift it slightly.
By following these steps, you can rest assured that the covers and panels are correctly reinstalled and the headlight assembly is properly protected. So go ahead and close that hood with confidence, knowing that your headlight bulb replacement is complete.
Remember, maintaining your vehicle’s headlights not only ensures your safety but also keeps you in compliance with traffic laws. So, don’t neglect this simple maintenance task and enjoy clear visibility on the road. Safe travels!
Final Tips And Tricks
Regularly inspect and clean your headlights:
- Ensure optimal visibility by regularly inspecting your headlights for any signs of damage or dirt buildup.
- Clean your headlights with a mild soap and water solution to remove dirt, grime, and debris.
- Use a soft cloth or sponge to gently wipe the surface of the headlights, avoiding the use of harsh chemicals or abrasive materials.
Consider replacing both bulbs for balanced lighting:
- It is recommended to replace both headlight bulbs at the same time to achieve balanced lighting on the road.
- Over time, headlights may dim or lose their brightness, so replacing both bulbs ensures consistent visibility during nighttime driving.
- By replacing both bulbs simultaneously, you can avoid the hassle of having to replace the other bulb soon after.
Seek professional help if you are unsure or uncomfortable with the process:
- If you are uncertain or uncomfortable with the process of replacing a headlight bulb, it is best to seek professional assistance.
- Professional technicians have the expertise and experience to safely and efficiently replace bulbs, ensuring proper function and alignment.
- Don’t hesitate to reach out to a trusted mechanic or automotive service center for assistance if you feel overwhelmed or uncomfortable with the task.
Remember, maintaining proper visibility on the road is crucial for your safety and the safety of others. By regularly inspecting and cleaning your headlights, considering replacing both bulbs and seeking professional help when needed, you can ensure optimal lighting performance for a safer driving experience.
Frequently Asked Questions For How To Replace A Headlight Bulb
How Do I Replace A Headlight Bulb?
To replace a headlight bulb, first, locate the back of the headlight assembly. Then, remove the power connector, twist the bulb counterclockwise, and pull it out. Replace it with a new bulb, making sure it matches the old one. Finally, twist the new bulb clockwise, reconnect the power connector, and test the headlight.
What Tools Do I Need To Replace A Headlight Bulb?
To replace a headlight bulb, you’ll need gloves, a screwdriver or pliers (depending on the bulb type), and a new headlight bulb that matches the one you’re replacing. Additionally, having a clean cloth and some rubbing alcohol can help to ensure a secure connection between the bulb and the power connector.
How Often Should I Replace My Headlight Bulbs?
Headlight bulbs typically last around 450 to 1,000 hours, which translates to about one to three years of average usage. However, various factors like driving conditions and the quality of the bulb can influence their lifespan. It’s always a good idea to check your headlight bulbs periodically and replace them if they appear dim or burnt out.
Conclusion
Replacing a headlight bulb may seem like a daunting task, but with the right knowledge and tools, it can be easily accomplished. By following the step-by-step guide outlined in this blog post, you can confidently replace a headlight bulb in no time.
Remember to start by gathering all the necessary materials, including the replacement bulb and any tools required. Next, locate the bulb housing and carefully remove the old bulb. Be cautious not to touch the new bulb with bare hands, as this can cause damage.
Insert the new bulb into the housing and secure it properly. Finally, test the new bulb to ensure it is working correctly. By taking the time to replace your own headlight bulb, you can save both time and money. With these simple steps, you’ll never have to worry about driving with a dim headlight again.