
This article was updated in June 16, 2025 with new products and information by Mark S. Taylor
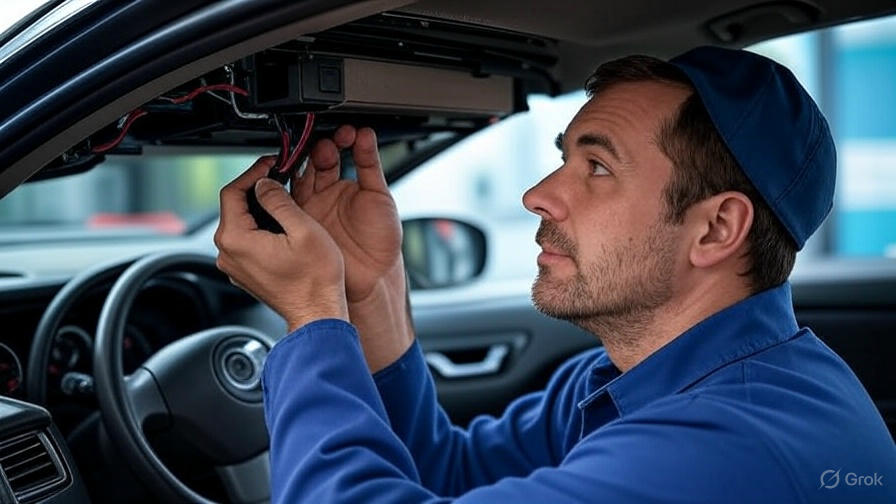
Last week, my dash cam caught a hit-and-run. It saved me hundreds — but only because I knew how to install a dash cam wire the right way. I used to think wiring was for experts. Now I know: anyone can do it with the right steps.
It’s not just about plugging in a camera. Good wiring hides the cords and makes sure everything works — like parking mode or rear view when you reverse. Whether you drive a car, truck, or SUV, clean wiring makes a big difference.
In this guide, I’ll show you how I wired my own dash cam — front and rear — without any pro help. No jargon. Just simple steps that work.
Contents
Safety First: Don’t Skip This Step — Seriously
I learned this the hard way. One time, I skipped disconnecting the battery before messing with wires — and BAM! A tiny spark jumped. No damage done, but it scared the daylights out of me. That’s when I realized: safety comes first. Always. Think of it like wearing a seatbelt — you don’t skip it just because you’re in a hurry.
Before you touch a single wire, turn off your car and disconnect the negative terminal of your battery . This cuts power to the system and lowers the risk of short circuits or fried fuses. Trust me, it takes two minutes and saves you a lot of trouble.
Use insulated tools when working near any live parts — even if you think the power is off. Better safe than sorry. I keep a small set in my garage just for car jobs like this. They’re not expensive, and they give peace of mind.
And here’s a big one: never work on live circuits . Double-check that the fuse you’re tapping into only powers on with the ignition. Use a test light or multimeter if you’re unsure. If things feel off or too risky, it’s okay to call a pro. Some cars have complex wiring, and there’s no shame in asking for help.
Tools & Materials You’ll Need — No Surprises Here
When I first installed my dash cam, I thought it was just about plugging in a camera. Boy, was I wrong. You need the right tools — not just for the install, but to make it look clean and work well long-term.
Start with your dash cam , front or front + rear if you want full coverage. I went with a dual-camera model so I could see both sides — peace of mind is worth it. Then grab either a hardwire kit or a cigarette lighter adapter , depending on how clean you want your setup to be.
You’ll also need a few extras:
- Pry tools to gently pop off trim without breaking it
- Zip ties or wire clips to keep wires neat and hidden
- A crimping tool and ring terminals if you’re connecting directly to the fuse box
And here’s a pro tip: pick up a multimeter . It’s optional, but super helpful for checking which fuses are live only when the car is on. I skipped it the first time — big mistake. Spent an hour trying to figure out why my parking mode wasn’t working!
Step-by-Step Installation Guide — No Tech Degree Needed
Installing a dash cam doesn’t have to be scary — I promise. I’ve done it more than once, and each time got faster and cleaner. Let me walk you through exactly how to install a dash cam wire like a pro, without any headaches.
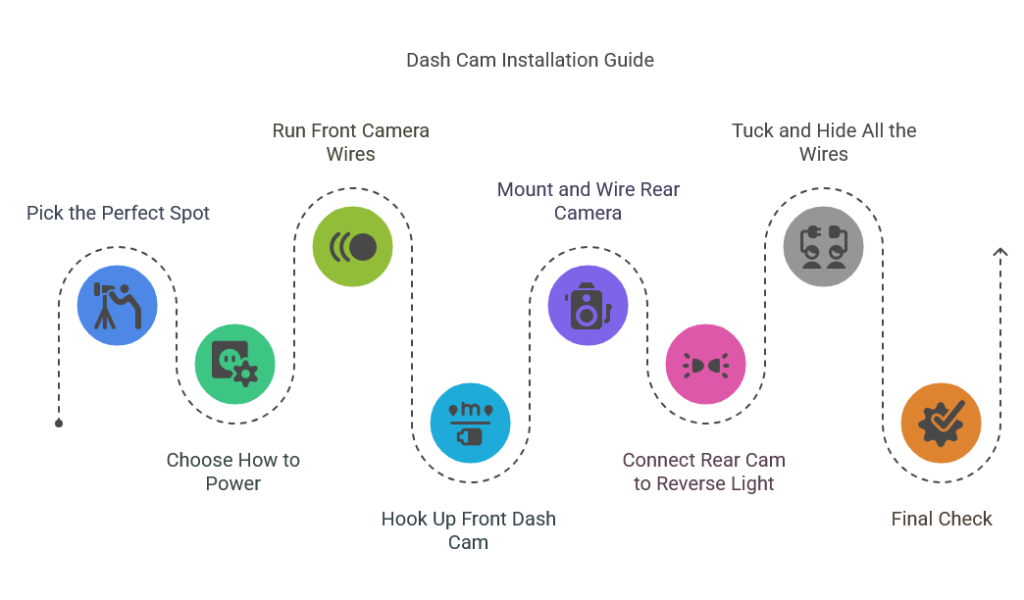
📍 Step 1: Pick the Perfect Spot for Your Dash Cam
First things first — where should the camera go? For the front cam, I always stick it behind the rearview mirror. That way, it captures the road clearly without blocking my view. If you’re adding a rear camera, two good spots are inside the back window or on the license plate. I went with the license plate mount — gives a wider view and looks neater.
Before you glue anything down, test the angle. Adjust until you can see the full lane behind you. Trust me, it’s easier to tweak now than later.
🔌 Step 2: Choose How to Power Your Dash Cam
Next up: power. You’ve got three main choices.
Option one is the easiest: plug into the cigarette lighter port . No wiring needed, but the cord stays visible.
Option two is hardwiring to the fuse box . It hides everything and keeps your dash cam running clean.
Option three — my pick — is using a hardwire kit with parking mode . This lets your camera keep recording even when your car’s off. Super handy if someone bumps your ride while parked.
🧭 Step 3: Run the Front Camera Wires Like a Pro
Now it’s time to hide those wires. Start at the top — run the cable from the dash cam down the A-pillar (that’s the frame between your windshield and front window). Use pry tools to gently tuck the wire into the rubber weather strip . It hides the wire and protects your car’s finish.
Then, run the wire along the headliner and down the side pillar. Don’t rush this part — take your time so the wire lies flat and doesn’t bulge out.
🔗 Step 4: Hook Up the Front Dash Cam
Once the wire’s in place, connect it. Plug into your chosen power source — whether that’s the cigarette port or your hardwire harness. Then use wire clips to secure any loose ends. I always add an inline fuse too — adds a little extra safety in case something goes wrong.
Pro tip: Test the camera before hiding everything. Nothing worse than sealing it all in and realizing it won’t turn on!
🚘 Step 5: Mount and Wire the Rear Camera (If You’ve Got One)
Adding a rear camera? Run the wire from front to back. I used a slim USB cable — thin enough to tuck away without bunching. Hide it along the headliner and interior molding .
If you drive a hatchback or SUV, route the wire through the hatch hinge area — it’s tight, but doable. Or, if you’re mounting externally, go with a waterproof rear camera on the license plate. Much easier than fishing wires through tight seams.
💡 Step 6: Connect Rear Cam to Reverse Light (Optional But Cool)
Want your rear camera to kick in when you reverse? Tap into your reverse light circuit . Use a multimeter to find the right wire — don’t guess! Once found, splice it carefully and cover with heat shrink tubing to protect the connection. Done right, your dash cam will auto-switch to rear view every time you shift gears.
🧵 Step 7: Tuck and Hide All the Wires
Now for the final touch — tidying up. Use pry tools to tuck wires under moldings and trim. Secure with zip ties or clips so nothing flops around. And avoid sharp bends near the rear window — some cars have super tight plastic that won’t forgive a thick cable fold.
This step makes all the difference. A clean install looks professional — and no one will ever know there’s a hidden camera watching.
🧪 Final Check: Does Everything Work?
Time to test. Reconnect your battery, then power on the dash cam. Make sure both front and rear feeds show up. If you wired it to the reverse light, throw it in gear and check if the rear view kicks in automatically.
Also, confirm parking mode works if you added that feature. Just because it’s plugged in doesn’t mean it’s ready to roll — better safe than sorry.
Common Issues & Troubleshooting Tips — Because Stuff Happens
Let’s be real: things don’t always go perfectly. I’ve had wires fall out, rear cams that wouldn’t show up, and footage that flickered like a haunted flashlight. But guess what? Most issues have simple fixes. Let me share what I’ve learned so you can fix them fast.
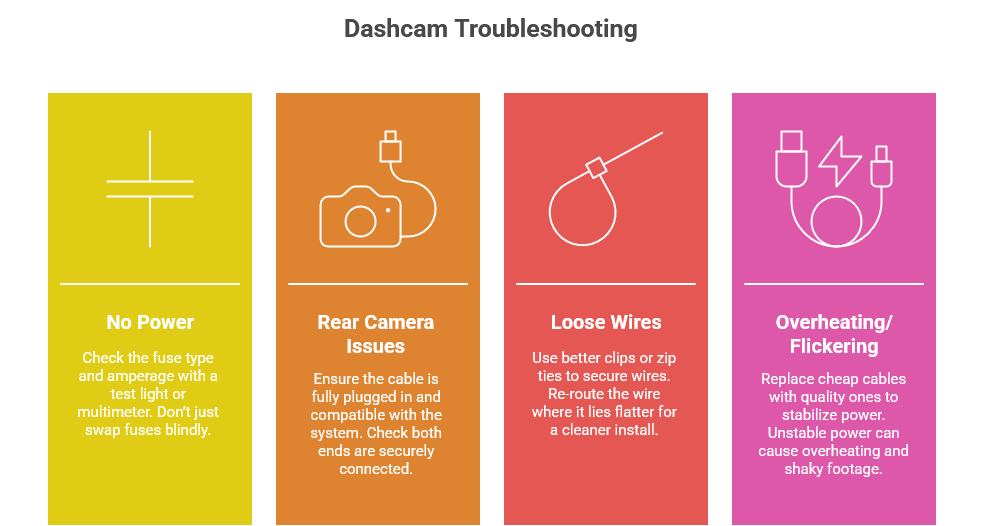
🔌 No Power? Check Your Fuse First
This one got me more than once. If your dash cam won’t turn on, check the fuse type and amperage . Most use a 2–5A fuse that only powers on with the ignition. Use a test light or multimeter to double-check. Don’t just swap fuses blindly — you could blow another one.
I once wasted an hour thinking my camera was broken — turned out, it was just a tiny blown fuse hiding in plain sight.
📹 Rear Camera Not Showing Up? Double-Check the Cable
If your rear camera isn’t showing video, start with the basics. Is the cable fully plugged in? Did you connect both ends securely? Some USB cables are too thick or not compatible — I’ve used slim ones that fit better and work smoother. Also, make sure your system supports a rear feed. Not all do!
I once bought a cheap extension cable — big mistake. It looked fine but didn’t carry the signal. Lesson learned.
🪝 Wires Keep Popping Out? Upgrade Your Clips
Nothing ruins a clean install faster than wires peeking out after a week. If they keep popping loose, try better clips or zip ties . Or re-route the wire where it lies flatter. Some cars have tight corners where wires just won’t stay put — don’t force them. Find a smoother path.
I went through three different clips before finding ones that held strong without damaging trim.
🌟 Overheating or Flickering Footage? Ditch the Cheap Cables
If your dash cam gets hot or your footage stutters, look at your power source. Cheap cables or unstable power can cause both. I once used a dollar-store micro USB — not only did it overheat, but it also gave me shaky footage. Switched to a quality cable and boom — problem gone.
Pro Tips for a Clean, Hidden Dash Cam Install — Because Nobody Likes Wires Everywhere
When I first installed my dash cam, I thought speed was the goal. Big mistake. Messy wires were everywhere, and I had to redo half of it. Over time, I’ve picked up a few smart tricks that make a world of difference. Here’s how to get a pro-level install without paying for one.
⏳ Take Your Time — Rushing Never Helps
It’s easy to want to finish fast, but trust me: rushing leads to messy wires and re-dos. I’ve done both. Slow down, plan each step, and give yourself space to think. You’ll save more time in the long run — and your dash cam will look like it came from a shop.
Think of it like cooking — you don’t skip steps if you want it to taste good.
🧰 Use OEM-Style Wiring Kits — They’re Worth It
I used a cheap wire kit once. Big regret. It looked bulky, didn’t fit well, and made hiding wires a nightmare. Now I always go for OEM-style wiring kits — they’re slim, color-matched, and blend right in with your car’s interior. Yes, they cost a bit more, but the clean look is 100% worth it.
If your dash cam came with one, great! If not, buy it separately. You won’t regret it.
📝 Label Wires as You Go — Don’t Trust Your Memory
Even if you’re only running two wires, label them. Front cam, rear cam, power — whatever it takes to keep things clear. I’ve lost count of how many times I mixed up cables mid-install and had to backtrack.
A tiny piece of tape and a marker can save you big headaches later.
🪡 Keep Spare Zip Ties & Clips Handy — You’ll Need Them
Nothing finishes off an install like neat, secure wires. That’s where zip ties and clips come in. I always keep extras on hand — some get lost, some break, and some just don’t fit quite right. Better to have too many than not enough.
And if you’re reusing old ones, double-check they’re still strong. Brittle ties snap easily — don’t let yours be the reason your wire falls out.
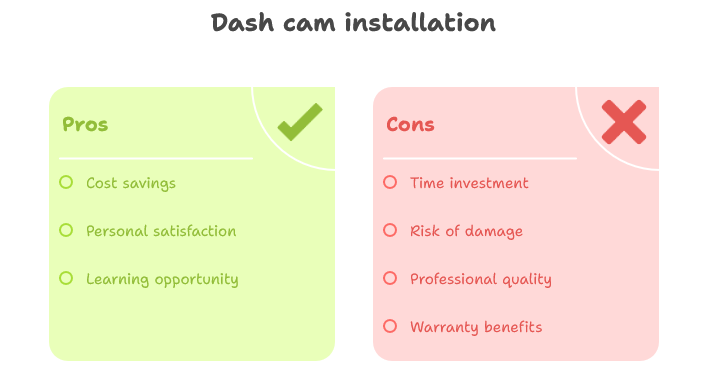
Should You Hire a Pro or Do It Yourself? Let’s Be Real
I’ve done both — installed my own dash cam and taken one to a shop. And honestly? Both have their time and place. If you’re asking yourself, “Can I install a dash cam wire myself?” the answer is often yes… but not always. Here’s how to decide what’s best for you and your car.
🛠️ When to DIY — Keep It Simple
If your car is straightforward (like most sedans) and you’re okay with basic wiring, go for it. I’ve installed dash cams in under two hours — no pro help needed. Just follow the steps, take your time, and don’t rush. If you can plug in a charger and tuck a wire behind trim, you’ve got this.
But if that sounds stressful or confusing, maybe think twice before going solo.
👨🔧 When to Call a Pro — Don’t Risk It
Some cars are just harder — like luxury models or EVs with complex wiring. I once tried installing a dash cam in a friend’s Tesla and nearly fried the whole system. That’s when I learned: some jobs are better left to experts.
A good pro will hide wires flawlessly, tap into the right circuits safely, and make sure everything works perfectly — including parking mode and reverse trigger.
💡 Benefits of a Pro Install — Peace of Mind
There’s more than just safety. A pro can do things faster and cleaner than most of us. They use the right tools, know where to route wires, and often offer warranties. Plus, they’ll test everything so you don’t have to guess if your rear camera is working.
Think of it like getting your hair cut — sure, you can do it yourself, but sometimes it’s worth paying for the clean finish.
🔍 How to Find “Rear Dash Cam Installation Near Me”
Google it — simple as that. Search for “dash cam installation near me” or “car camera installers in [your city].” Then check reviews. Look for shops that specialize in car electronics or auto accessories.
When you call, ask:
- Do you install front and rear dash cams?
- Can you wire it for parking mode?
- What’s your experience with my car model?
That way, you’ll know they know what they’re doing.
❓ Frequently Asked Questions (FAQs)
Can I install a dash cam without cutting wires?
Yes. Use a cigarette lighter adapter or an OBD2 hardwire kit . These let you power your dash cam without cutting or splicing any wires.
What fuse should I use for a dash cam?
Use a 2–5A fuse that only powers on with the ignition. Always test it with a multimeter first to make sure it’s the right one.
How do I hide dash cam wires in my car?
Tuck wires behind A-pillars , rubber seals , headliners , and interior moldings . Use pry tools and wire clips to keep them hidden and secure.
Can I connect a rear dash cam to the reverse light?
Yes. Tap into the reverse light circuit carefully. This lets your rear camera turn on automatically when you shift into reverse.
Do I need a hardwire kit for parking mode?
Yes. If you want your dash cam to record while your car is off, a hardwire kit with parking mode support is required.
How long does it take to install a dash cam?
It takes 1–3 hours , depending on your car type and how clean you want the install to be. First-timers may take longer.
My Final Thoughts on How to Install a Dash Cam Wire
If you’re someone who values a clean, hidden look and wants full use of features like parking mode, learning how to install a dash cam wire the right way is totally worth it. But if you’re not comfortable working with car electronics, don’t push it — there’s no shame in getting help.
I used to think wiring was too tricky for DIYers, but after a few installs, I realized it just takes patience and the right steps. Now, every time I start my car, I feel safer knowing my dash cam is working quietly in the background.
It’s not magic — it’s just careful planning and attention to detail. And whether you do it yourself or go to a pro, the peace of mind is what really matters.