
This article was updated in August 31, 2025 with new products and information by Mark S. Taylor
I still remember the first time I had to fix a radiator in my ’67 Mustang. It was a hot summer day, and suddenly, the temperature gauge shot up. Steam came pouring out from under the hood. I had to pull over fast. My heart raced as I realized the radiator was the problem. I learned quickly that a classic car’s radiator is the heart of the cooling system. In this guide, I’ll show you how to repair a classic car radiator. I’ll take you through simple steps to fix leaks, clean out rust, and keep your car cool. A well-maintained radiator means a longer-lasting engine. Let’s dive in and get your classic car back on the road!
Contents
Understanding Your Classic Car Radiator
What Makes Classic Car Radiators Unique?
When I first popped the hood of a vintage car, I noticed something right away. Classic radiators aren’t like modern ones. They’re made of copper or brass. These metals cool engines like champs. They’re built to last. But they need special care. That’s why I learned brass radiator repair techniques and copper radiator repair classic auto methods. Modern aluminum radiators? Lighter and tougher against rust. But classic radiators have soul. They take more work, but when fixed right? They’ll keep your vintage car humming for years.
Common Radiator Problems in Classic Cars
I’ve seen it all in my shop. Old radiators love to act up. Here’s what goes wrong most:
Leaks
Leaks happen. Pinholes. Cracked seams. Rotted hoses. They all cause trouble. Coolant leaks out. Engines get hot. Fast. I’ve spent hours soldering radiator leaks classic car style. Sometimes radiator sealant classic car works. But it’s just a band-aid. Fix leaks fast. Save your engine. Save your wallet.
Rust and Corrosion
Rust is the enemy. It builds up inside. Sludge clogs the tubes. Coolant can’t flow. Engine gets hot. I once worked on a ‘56 Chevy. The radiator was full of rust. We had to do a full radiator flush vintage vehicle style. It took hours. If your coolant looks brown? Time to flush it out.
Overheating
Hot engines mean trouble. Often? The radiator’s to blame. A classic car coolant leak overheating is bad news. So is a clogged radiator. I’ve seen steam pour from a classic car radiator. Not good. If your classic car engine temperature gauge reading high? Pull over. Check the radiator. Now.
Why Classic Car Radiators Fail (and How to Spot the Signs)
Corrosion and Sediment Buildup
Rust and gunk build up slow. They choke the radiator. Coolant can’t move. Engine gets hot. If your coolant looks muddy? Flush it. How to clean rusty radiator classic car style? Use a good radiator flush vintage vehicle method. It clears the gunk. Flow comes back.
Leaks (Pinholes, Seams, Hoses)
Leaks pop up everywhere. Seams split. Hoses crack. Pinholes form. Coolant drips. Puddles form. Fix leaks fast. I’ve fixed radiator leak old car jobs big and small. Don’t wait. Overheating kills engines.
Physical Damage
Road debris hits hard. Fins bend. Cores dent. Air can’t flow. Engine gets hot. I’ve straightened bent fins. Replaced dented tanks. Check your radiator often. Fix small dents. Before they grow big.
Ageing Materials
Time wins. Copper and brass wear out. Seals dry. Cracks form. Even the best radiators age. Check yours often. Look for leaks. Feel for weak spots. Catch problems early. Save your radiator. Save your car.
How do I know if my classic car radiator needs repair?
In my shop, I look for three red flags: overheating, coolant leaks, or rusty coolant. If your engine runs hot, you see puddles under the car, or your coolant looks brown and muddy? Your radiator needs help. Test for leaks. Check for rust. Don’t wait—small fixes now save big repairs later.
Diagnosis First: Don’t Just Start Soldering!
Before draining coolant or grabbing tools, play detective. A good diagnosis is the key to a lasting fix. Skip this step, and you’ll waste time and effort. It’s all about finding the real problem.
Spotting the Early Warning Signs
Your classic car will usually tell you when something’s wrong with the radiator. You just need to know what to look for. If you notice any of these signs, it’s time to dig deeper:
- Steam from the Radiator:
This is your “pull over now” moment. If you see steam, the coolant is boiling and escaping. Your engine is overheating fast. - Coolant Bubbling:
If you see your classic car coolant bubbling in the radiator or overflow tank, it could mean air is trapped in the system or the radiator cap is failing. The cap can’t hold the pressure anymore. - High Engine Temperature:
Your engine’s temperature gauge is your best friend. If it moves into the red zone, your radiator isn’t working properly.
Step 1: The Visual Inspection & Pressure Test
If you spot any of the above signs, start with a thorough inspection. Look for wet spots, green or orange crust around seams and hoses, or bent fins. But keep in mind that a visual check alone might not catch everything. That’s why you need to do a radiator pressure test.
The Tool:
Get a radiator pressure tester, which you can buy or rent from most auto parts stores.
The Process:
- Make sure the engine is completely cool before starting.
- Remove the radiator cap. (Don’t open it if the engine is hot!)
- Attach the tester’s adapter tightly.
- Pump the tester up to the pressure level listed on the radiator cap (usually 13-16 PSI).
- Watch the gauge. If the pressure drops, you have a leak.
Personal Tip:
“I always pressure test the system twice—once when it’s cold and again after a short drive to get it warm. Some sneaky leaks only show up when the metal and hoses expand with heat.”
Step 2: Pinpointing the Culprit (Leak Source & Type)
Now that the system is pressurized, it’s time to find the leak. Listen for a hissing sound or look for fresh drips. Leaks typically fall into these types:
- Core Leaks:
These occur in the middle of the radiator. They’re often caused by internal corrosion and are the hardest to fix. - Tank or Seam Leaks:
Leaks where the top or bottom tanks meet the core. These are more common and can often be fixed with soldering. - Hose & Connection Leaks:
Don’t forget the basics! Sometimes the issue is a cracked hose or a loose clamp. It’s often an easy fix.
Step 3: The Big Decision – Repair, Recore, or Replace?
Once you’ve found the leak, it’s time to decide how to handle it.
- Repair it:
A single leak in the tank or seam is a good candidate for a DIY soldering repair. If it’s just a loose hose clamp, tighten it up, and you’re good to go. - Recore it:
If the core has multiple pinhole leaks or is clogged with rust, but the original tanks are in good condition, radiator recoring is the best option. This keeps the original look and feel while giving the radiator a fresh, new core. - Replace it:
If the radiator is too damaged, corroded, or has been poorly repaired before, a full replacement may be the best move. Sometimes, it’s the most cost- and time-effective option.
Tools and Materials: Your Radiator Repair Toolkit
When repairing your classic car’s radiator, having the right tools and materials is key. Here’s a list of what you’ll need to get the job done right.
Essential Tools: The Must-Haves
Cooling System Pressure Tester
This tool helps you find leaks by simulating the pressure your radiator sees when the car is running. It’s essential for pinpointing problem areas.
Propane Torch (for Soldering)
A propane torch is needed to heat up the radiator for soldering. This allows you to seal leaks in brass or copper radiators effectively.
Soldering Iron (for Delicate Work)
For more precise repairs, use a soldering iron. It’s perfect for fixing small leaks or seams without damaging the radiator.
Wire Brushes (Brass and Steel)
Wire brushes help clean away rust and old residue. Use brass brushes for copper and steel brushes for tougher materials.
Infrared Thermometer
This tool lets you check the temperature of your radiator and engine. It helps ensure the system is running at the right temperature.
Radiator Fin Comb
If the fins on your radiator are bent, a radiator fin comb will straighten them. This helps airflow and prevents overheating.
Basic Mechanic’s Toolset (Wrenches, Sockets, Pliers)
You’ll need a basic set of tools to remove hoses, tighten clamps, and handle other simple tasks. Wrenches, sockets, and pliers are your go-to essentials.
Essential Materials: What You Need to Complete the Job
Flux and Silver Solder (for Brass/Copper)
Flux helps the solder stick to brass or copper. Silver solder is perfect for creating strong, lasting bonds in the radiator.
High-Quality Radiator Sealant (for Temporary Fixes Only)
Sealants are good for temporary fixes, but they shouldn’t be a long-term solution. Use them to stop a leak until you can perform a permanent repair.
The Best Coolant for Classic Cars
Green IAT coolant is the best choice for classic cars. It protects the older systems better than modern coolants.
Distilled Water
Always use distilled water when mixing your coolant. Tap water can clog your radiator over time, leading to more problems down the road.
The Repair Trenches: A Guide to Fixing Your Radiator
Alright, it’s time to get to work. Fixing an old radiator is a great job. It helps you know your car. Follow these easy steps. Your car will run cool again.
Step 1: Be Safe & Drain the Coolant
I must tell you this. Never work on a hot cooling system. Let the engine cool all the way down. Hot coolant is under pressure. It can burn you badly. Always wear safety glasses. Wear gloves too.
Once it’s cool, you can drain the coolant. Get a large pan. Put it under the drain plug. Open the plug. Take off the radiator cap. This helps it drain fast. Take old coolant to a parts store. They know how to get rid of it the right way.
Step 2: Take the Radiator Out
The system is empty. Now you can take the radiator out.
- Take Off the Hoses: Loosen the clamps on the top and bottom hoses. Gently twist the hoses off. A rag can catch any drips.
- Take Off Cooler Lines: Does your car shift gears on its own? If yes, you have cooler lines on the side tank. Use a special wrench to take them off with care. A little fluid may leak out. This is normal.
- Unbolt and Lift: Take off the fan cover if you have one. Then take out the bolts that hold the radiator. Now you can lift it out. Lift it straight up and be gentle.
Step 3: Clean It Up & Find the Leaks
You must clean the radiator first. This is key to a good fix.
- Flush the Inside: Use a good radiator flush cleaner. It will break up rust and gunk. Read the label and follow the steps. You will fill and drain it a few times. Do this until the water is clear.
- Clean the Outside: Wash the outside. Use a fin comb to gently straighten any bent fins. This helps the air flow.
Pro Tip: “Here is my best tip for finding tiny leaks. I plug the openings and put the radiator in a tub of water. I add a little air pressure. Any leak will show up as a stream of bubbles.”
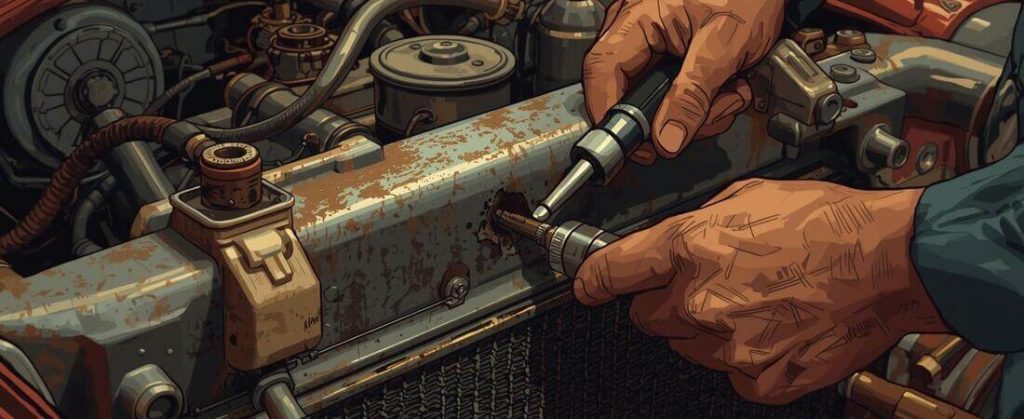
Step 4: The Fix – How to Solder Leaks
Soldering is the only real fix for a leak in a brass or copper radiator.
- Prep the Spot: First, clean the spot. Use a wire brush or sandpaper. Clean it down to the bare metal.
- Heat and Flux: Use a torch to gently heat the spot. Put flux on the hot metal. The flux helps the solder stick.
- Add Solder: Now touch the solder to the hot spot. It will melt and fill the hole. Let it cool all the way down. (A video can really help show you how to solder.)
A Note on Sealants: What about sealants like JB Weld? They can get you home. But they are not a real fix. You should still solder the leak later for a lasting repair.
Step 5: Put It Back & Add Coolant
Put the fixed radiator back in. Go slow. Bolt it in place. Put all the hoses and lines back on.
Time to add new coolant. Use a 50/50 mix. Use green coolant and distilled water. Why distilled water? Tap water has things in it. These things can cause rust.
Step 6: “Burp” It & Do a Final Test
You are not done yet! You have to get the air out of the system.
- The “Burp”: Leave the radiator cap off. Start the car. Turn the heater on high. Let the car warm up. You will see bubbles. This is trapped air coming out. Add more coolant as the level drops. Stop when there are no more bubbles.
- Final Pressure Test: You have burped the system. Now put the cap on. Test the pressure one last time. This makes sure your fix is good. It also checks that the hoses are tight. Now you are ready to drive.
The Big Decision: Repair, Recore, or Replace?
This is a question I get all the time. Do you fix the old radiator or just buy a new one? There is no single right answer. It comes down to your car, your budget, and your goals. Let’s look at the costs.
Your First Option: DIY Repair ($50 – $200)
This is your cheapest path. If you have the tools and time, you can save a lot of money. You will need to buy things like solder, cleaner, and new coolant. Expect to spend $50 to $200 on these supplies.
Your Second Option: Pro Repair ($200 – $500+)
Don’t want to do it yourself? A good repair shop can handle it. A simple fix might cost around $200. A bigger job will cost more, maybe $500 or higher. The shop’s time and parts are what you pay for.
The Big Job: Recoring ($400 – $1,000+)
What if the radiator core is shot? But the top and bottom tanks are still good? Then we talk about recoring. A specialist will replace the leaky middle part (the core). They will reuse your original tanks. This saves the look of the old radiator. It is a great choice but costs more.
How I Help People Decide
To make the right call, I ask three key questions:
- Is Originality the Goal? For a true collector car, I almost always say “save the original.” A car’s original, date-coded radiator adds real value. In this case, a careful repair or a full recore is worth the cost. It keeps the car authentic.
- Is Modern Performance Better for You? But what if you drive your car a lot? Or you live in a hot place? A new, modern aluminum radiator will cool better. It is lighter and resists rust. It is often cheaper, too. This can be a very practical choice.
- How Bad is the Damage? This is the simple one. Does it have one or two small leaks? I would just solder those. Is the whole core weak, rusty, and full of leaks? That is a clear sign. You will need to recore it or replace it.
Data Check: Don’t just take my word for it. Big auto sites like RepairPal show similar costs for these jobs. This shows that these prices are fair for good work.
So, what’s the bottom line?
If you have a rare classic, I’d spend the money to keep it original. For a fun weekend driver, a new radiator can be a smart, worry-free choice. The right answer is the one that fits your car and how you enjoy it.
Should I repair or replace my classic car radiator?
Repair single leaks under $200. Recore valuable originals ($400-$1,000). Replace with modern aluminum for daily drivers. Always consider your car’s rarity and how you use it.
Keeping Your Classic Cool: My Simple Maintenance Plan
A good repair is only half the battle. Now you have to keep it that way. Over the years, I’ve developed a simple routine for all my cars. It prevents almost every problem before it can start. Here is my checklist.
The Right Lifeblood: Choosing Your Coolant
The coolant you use is the most important choice you will make for your radiator.
- Stick with Green Coolant. The old-school, bright green stuff (called IAT) is made for the brass and copper in your classic’s radiator. Do not use modern orange or pink coolants. They can harm older systems.
- Always Use Distilled Water. Tap water has minerals in it. These minerals cause rust and build up inside your radiator. Always buy distilled water for your 50/50 mix.
- Mix it 50/50. A half-and-half mix of green coolant and distilled water is the perfect blend. It protects your engine in both hot and cold weather.
My Routine Checkup: What to Do and When
This simple schedule will keep you ahead of any trouble.
Once a Month: I do a quick check. I look at the coolant level in the overflow tank. I also peek under the car for any new drips or stains on the garage floor.
Every Season (Spring & Fall): This is my deeper check.
- I squeeze the top and bottom radiator hoses (when the car is cool). They should feel firm, not mushy or brittle.
- I check the fan belt for cracks and make sure it’s tight.
- I inspect the rubber seal on the radiator cap. If it’s cracked or worn, I get a new one. A bad cap can’t hold pressure.
Once a Year: I do a full coolant flush. This is not optional in my garage. It gets all the old coolant and tiny bits of rust out of the system. This is the single best thing you can do for your car’s cooling health.
Pro Tips for Preventing Overheating
Most overheating is easy to prevent if you think ahead.
- Keep It Clean. Airflow is everything. I use a garden hose to gently wash bugs, leaves, and dirt out of the radiator fins. A clean radiator works much better.
- Listen to Your Engine. A well-tuned engine runs cooler. Regular tune-ups are a key part of cooling system health.
- Check Your Fan. Make sure your fan is pulling air. On a hot day at idle, you should feel a strong breeze behind the radiator. A bad fan clutch or a weak electric fan is a common cause of overheating in traffic.
Troubleshooting: What Your Car is Trying to Tell You When It’s Hot
Okay, so you’ve done the repairs, but the car is still running hot. Or maybe this is a new problem. Don’t panic. An overheating engine is trying to send you a message. My job is to teach you how to understand it. Let’s decode the most common signs.
The Temp Gauge is High
This is the classic warning sign. But it does not always mean the radiator is bad. It could be a stuck thermostat or a failing water pump. You need to look at the whole system.
You See Steam Coming From the Radiator
This is an emergency. It means your coolant is boiling. Pull over safely. Turn the engine off right away. Let it cool down for at least an hour before you check for leaks or low coolant.
The Coolant is Bubbling
Bubbles in your coolant are bad news. It could just be air in the system. But it often means a bad head gasket is forcing exhaust into your coolant. This is a serious issue that needs a professional test.
You Smell Something Sweet From the Exhaust
That sweet smell is burning antifreeze. This is another clear sign that coolant is leaking into your engine. It points to a blown head gasket or a crack somewhere.
The Engine is Knocking After Overheating
This is a very bad sign. A knocking sound means the extreme heat may have damaged internal engine parts. Turn the engine off and do not start it again. At this point, you need a professional mechanic to look at it.
The Car Feels Low on Power
If the car feels sluggish after overheating, it can point to several big problems. You could have a damaged head gasket, warped cylinder heads, or a badly clogged radiator.
You See White Smoke From the Exhaust
Thick white smoke is not like normal steam. It’s a sign that a lot of coolant is burning in the engine. This is another symptom of a major head gasket leak or crack.
The Heater Blows Cold Air
If the engine is hot but the heater blows cold, it’s a big clue. It means coolant is not moving through the system correctly. Look for a badly clogged radiator, a stuck thermostat, or a dead water pump.
You Can See a Coolant Leak
This is one of the most common causes. The leak could be from a hose, the water pump, or the radiator itself. Perform a pressure test to find the exact source.
The Radiator Cap is Leaking
A bad cap can’t hold pressure. This lowers the boiling point of your coolant, causing it to overheat. If the cap’s seal is cracked or worn, replace it. It’s a cheap and easy fix.
The Water Pump is Leaking or Noisy
A whining or grinding sound from the front of the engine is a classic sign of a failing water pump. If you see drips coming from the pump, it’s time to replace it.
You See Oil Mixed With Your Coolant
If your coolant looks milky, like a chocolate milkshake, stop driving immediately. This means oil is mixing with the coolant. This is a sign of a severe internal engine failure, usually a head gasket.
You Smell Something Burning
A sharp burning smell often means coolant is dripping onto a hot exhaust pipe or the engine block. Look carefully for the source of the leak before it causes more problems.
The Reality Check: Costs, Time, and When to Call a Pro
Let’s talk about what you want to know. The cost. A radiator job can be a cheap project. It can also cost a lot of money. It all depends on the damage. It also depends on the path you choose. I tell folks to be honest. Think about your money. Think about your time. And think about your skills.
Don’t Forget About Your Time
Your time is key, too. A job that looks simple can take a whole weekend.
- DIY Time: A fix can take a long time. Plan for a full weekend for your first fix. You have to take it out. Then you clean it. Then you fix it. Then you put it back. This all takes time. A stuck bolt can make a short job very long. A very long job. Trust me, I know!
- Shop Time: Now think about a shop. A good shop has done this job many times. They have all the right tools. They can often do the job in one day. Paying a pro can be worth it. It will save you a lot of time.
Knowing When to Call a Pro
I love to do my own work. But I know when to stop. There is no shame in calling a pro. It is a very smart thing to do.
I tell people to call a pro. Call them if you see these signs:
- The core has many leaks. It may look like Swiss cheese. A small patch will not fix it.
- The tanks are bent or cracked. This is a big problem. An expert must fix it.
- You tried to fix it. It still leaks. Do not fight a lost battle. A pro can find the real issue fast.
- You lack the right tools. Or your space is not safe. A torch in a small garage is a bad idea.
Do you need a pro? Find a shop that works on classic cars. Ask your local car club for help. A good expert is worth the money. They save you time. They save you worry. They save you money down the road.
FAQs – Classic Car Radiator Repair & Overheating Solutions
Can an old radiator be repaired?
Yes, for sure. You can fix most old radiators. I fix them all the time in my shop. You can patch leaks. You can clean out gunk. A good shop can make it like new again. This helps your classic car stay original.
Will JB Weld fix a hole in a radiator?
I get this question a lot. Yes, JB Weld can work. But it is not a real, long-term fix. Think of it as a patch to get you home. For a true fix, you need to solder the leak. Do not trust glue to keep your engine safe.
Can car radiators be fixed without replacing them?
Yes, most of the time you can. A full swap is not always the answer. A pro can fix leaks. They can clean out the tubes. They can fix broken parts. This will save you a lot of money. It also keeps your car’s old parts.
How do you restore old radiators?
To restore one, you do a few key things. First, you clean it inside and out. Then you fix all the leaks. You replace any parts that are worn out. Some shops can also recore it. This means they put a new core in the middle. This is the best way to save an old radiator.
Why is my engine running hot if the coolant is full?
This is a tricky one. I see it often in my garage. If your coolant is full but the car is hot, check other parts. It is often a bad thermostat. It may be stuck closed. It could be a failing water pump. The pump may not be moving the coolant. You could also have trapped air in the system. Check these simple things first.
My Final Thoughts on How to Repair a Classic Car Radiator
Do you love to know your car? Do you want to save money? Then this guide is for you. But if you need a quick fix with a warranty, then you should call a pro. I have spent years in the garage. Here is my last bit of advice.
Remember the key things. First, find the real problem. Do this before you start any work. Then, use the right fix for that problem. Good care is the best way to stop future trouble.
This is how I keep old cars cool. I have worked on so many of them. Do not be scared of that old radiator. You can bring it back to life. You just need to be patient.
Learning how to repair a classic car radiator is a great skill. This skill keeps your car on the road. And that is right where it belongs.