
This article was updated in January 15, 2026 with new products and information by Mark S. Taylor
Strange electrical issues can be very scary to deal with. I have seen many drivers worry about big repairs. But sometimes, the fix is just a small wire. Knowing the symptoms of a bad ground strap (cable) can save you a lot of cash. I have fixed this issue many times in my own garage. It is easy to spot if you know what to look for. We will cover the warning signs and how to fix them fast. Let’s find the problem and get your car back on the road.
Contents
What Is a Ground Strap and Why Does It Matter?
Ground Strap Function Explained
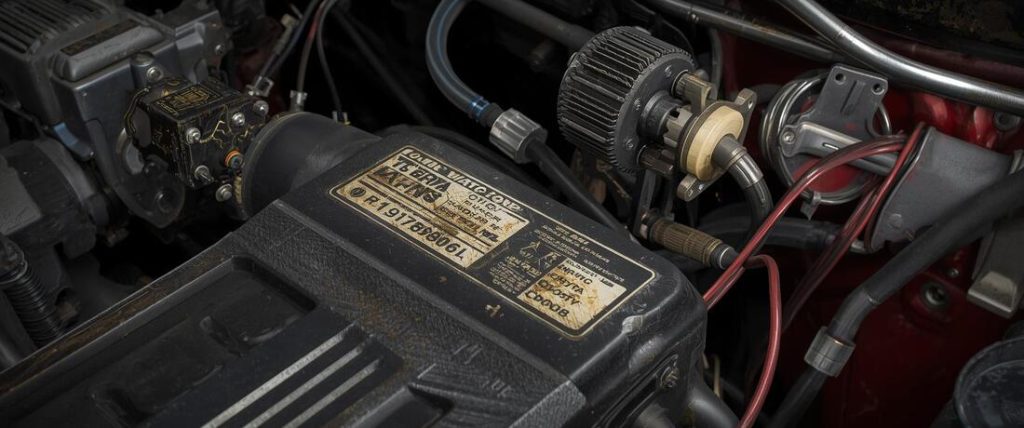
A ground strap connects the battery to the car’s metal frame. It completes the electrical circuit for your whole car. Every electrical device needs this to work. It is also called a negative battery cable or earth strap. You can spot it easily. It is the thick black cable attached to the battery.
Where Ground Straps Are Located
Most cars have more than one ground strap. The main one goes from the battery to the chassis. Another connects the engine block to the frame. You might find small ones on the firewall or fenders. On front-wheel drive cars, look on the driver’s side near the front. On rear-wheel drive cars, check the center undercarriage.
7 Symptoms of a Bad Ground Strap
1. Dim or Flickering Headlights
Your lights act strange when the ground is bad. Lights might dim when the car idles. They get bright when you rev the engine. You might see them flicker while driving. Dashboard lights do this too. It happens because voltage is inconsistent. The power is not flowing back to the battery properly.
2. Hard Starting or No Start Condition
The starter motor needs a strong ground to work. If the strap is bad, the starter might not spin fast enough. You might hear a clicking sound. The battery might be fine, but the car won’t start. It can crank slowly and fail. Sometimes it starts fine one time, then fails the next. This is a classic sign of a bad connection.
3. Dead Battery or Charging Problems
A bad ground can kill your battery. The alternator cannot charge the battery without a good ground. The battery dies repeatedly. You might see the battery light on the dash. Touch the battery terminals. If they feel warm, you have high resistance. This heat is caused by a poor connection.
4. Electrical Accessories Malfunctioning
Multiple electronic parts fail at the same time. Your radio might cut out randomly. Power windows might move very slowly. Gauges on the dashboard might give wrong readings. You might see the Check Engine, ABS, and Airbag lights together. Even climate control systems can act up. When the ground is lost, these devices get confused signals.
5. Rough Idle or Engine Stalling
The engine computer needs a solid ground to run right. If the ground is bad, the computer receives irregular signals. The engine might stall unexpectedly. You might feel hesitation when you press the gas pedal. The idle speed will be rough. The engine performance drops significantly.
6. Overheating Components
Resistance in the wire creates dangerous heat. Check your battery terminals. If they are hot, the ground is failing. The alternator housing might also be very hot. You might smell burning plastic near the battery. This heat is a fire hazard. It means electricity is fighting to get through the bad strap.
7. Visible Corrosion or Damage
You can often see the problem with your eyes. Look at the cable where it connects to the body. You might see green or white crusty buildup. This is corrosion. The braid inside the cable might look frayed or broken. The connection might be loose. Road debris can hit and damage the cable. If you see damage, fix it right away.
How to Test a Ground Strap (Multimeter Method)
Tools You’ll Need
You need a digital multimeter for this test. It costs about $20 to $50 at an auto store. You also need safety glasses and gloves. A wrench set helps to remove bolts.
Step-by-Step Testing Process
Testing the voltage drop is the best way to check. First, park the car in a dry spot. Remove metal jewelry. Set the multimeter to 20V DC.
- Test the battery terminals. You should read 12.6V.
- Connect the black probe to the negative battery terminal.
- Touch the red probe to the chassis connection point.
- Read the number. It should be very close to 12.6V.
- Test between the battery negative and the engine block.
What the Numbers Mean
A big difference in voltage means a bad ground. If the reading is 12.6V, your ground is healthy. If it is 12.0V to 12.4V, the connection is weak. If it is below 12.0V, the strap has failed. Any voltage drop over 0.5V means you should replace it immediately.
If you are new to tools, read our guide on essential automotive tools.
Ground Strap Replacement Cost Breakdown
The cost depends on your vehicle type. The part is usually cheap. The labor cost varies by how hard it is to reach.
| Vehicle Type | Parts Cost | Labor Cost | Total Cost | Time Required |
|---|---|---|---|---|
| Economy Cars | $10 – $30 | $50 – $100 | $60 – $130 | 20-45 min |
| Mid-size Sedans | $20 – $50 | $80 – $130 | $100 – $180 | 30-60 min |
| Trucks/SUVs | $25 – $60 | $90 – $150 | $115 – $210 | 45-90 min |
| Luxury/European | $40 – $80 | $130 – $250 | $170 – $330 | 1-2 hours |
Factors That Affect Replacement Cost
Luxury brands and hard-to-reach spots cost more. The main factor is the make and model. A Mercedes often has harder spots than a Toyota. The number of straps being replaced adds to the cost. Dealerships charge more than independent shops. Labor rates also change by region. You can choose OEM parts or aftermarket ones.
OEM vs Aftermarket Ground Straps
You can save money with aftermarket parts.
- OEM: These are made by the car company. They cost $40 to $80. They fit perfectly and have a warranty.
- Aftermarket: These are made by other companies. They cost $10 to $40. You might need to adjust them slightly.
- Performance: These cost $60 to $120. They have a copper core. They are very good for stopping corrosion.
How to Replace a Ground Strap (DIY Guide)
Difficulty Level by Vehicle
Most people can do this job themselves.
- Easy: Japanese cars and trucks usually take 20 to 30 minutes.
- Moderate: Domestic sedans take 45 to 60 minutes.
- Hard: European luxury cars can take 1 to 2 hours.
Tools Required
Gather these tools before you start. You need an 8mm or 10mm wrench. A socket set is very helpful. Have a can of WD-40 for rusty bolts. You need a wire brush to clean metal. You might use a baking soda solution to clean acid.
Step-by-Step Replacement
Always disconnect the battery first for safety.
- Disconnect the negative battery terminal.
- Locate the ground strap connection points.
- Remove the mounting bolts. Use WD-40 if they are stuck.
- Clean the metal surface with a wire brush. It must be shiny.
- Install the new ground strap. Make sure it is the right length.
- Tighten the connections very securely.
- Reconnect the battery and test the car.
Common DIY Mistakes to Avoid
Do not skip cleaning the metal. Many people forget to clean the rust off. This prevents a good connection. Do not over-tighten the bolts. You can strip the threads. Remember to replace all the ground straps. Using insulated wire instead of a braided strap is also a mistake. You need a thick cable to carry the load.
Ground Strap Problems by Vehicle Make
Vehicles With Known Ground Strap Issues
Some cars are famous for ground strap problems.
- Jeep Cherokee (2014+): The location is exposed to salt. They corrode quickly.
- BMW X5/X3: They use multiple straps. Dealer service is expensive.
- Honda Accord/Civic: These often fail after 150,000 miles.
- Chevrolet Silverado: The undercarriage rusts out.
- Ford F-150: They have multiple points with complex routing.
Preventing Ground Strap Failure
Check your grounds once a year. This is very important if you live in the “salt belt.” Snow and salt cause rust. Apply dielectric grease to the connections. It stops corrosion. Replace any corroded parts immediately. Clean your battery terminals when you change your oil.
Consider upgrading to thicker cables in harsh climates. They resist corrosion better.
Ground Strap vs Other Electrical Problems
Symptoms can be confusing. A bad ground often looks like a bad alternator. This table helps you tell them apart.
| Symptom | Bad Ground | Bad Alternator | Dead Battery | Bad Starter |
|---|---|---|---|---|
| Dim lights | ✓ | ✓ | ✓ | ✗ |
| No start | ✓ | ✗ | ✓ | ✓ |
| Clicking sound | ✓ | ✗ | ✓ | ✓ |
| Battery light on | ✓ | ✓ | ✗ | ✗ |
| Multiple electrical issues | ✓ | ✗ | ✗ | ✗ |
When to DIY vs Hire a Mechanic
Good Candidates for DIY
You can save money if you are handy. If you are comfortable with basic tools, try it. If the strap is easy to see, do it yourself. Economy and mid-size cars are usually easy. You just need to know how to use a multimeter.
Hire a Professional If
Some cars are too complex for a quick fix. Luxury and European cars can be tricky. If multiple straps are bad, let a pro check the whole system. If the strap is in a hard-to-reach spot, don’t struggle. If you are not confident with electrical work, hire someone. You want a warranty on the repair.
For more complex electrical issues, visit our car repair help section.
FAQ About Symptoms of a Bad Ground Strap (Cable)
How do I know if my ground strap is bad?
Look for dim lights, hard starting, or dead batteries. Check for corrosion on the cable. Test it with a multimeter to be sure.
How do you know if you have a bad ground wire?
A bad ground wire causes electrical weirdness. Lights flicker, or gauges jump around. The battery will not charge.
Can a bad ground strap cause no start?
Yes, it can. The starter needs a ground connection to turn the engine over. Without it, you just hear a click.
How to test if ground cable is bad?
Use a digital multimeter. Test the voltage between the battery negative and the engine block. A voltage drop means the cable is bad.
Can I use any cable as a ground strap?
No, you must use a heavy gauge cable. A regular wire will burn up. Use a braided strap or thick battery cable.
Bottom Line: Don’t Ignore Ground Strap Problems
A $20 fix can save you thousands of dollars. We covered 7 clear symptoms, from dim lights to no-start conditions. Check for them before buying a new battery or alternator. A simple fix prevents $500 or more in damage. Test the ground with a multimeter. Clean the connections or replace the strap. You should address this within a week of seeing symptoms. Most cars are very easy to fix yourself.
Quick Summary
- Look for symptoms: Dim lights and hard starts are common signs.
- Test it: Use a multimeter to check for voltage drop.
- Check visually: Look for corrosion on the cable ends.
- Cost: Parts are cheap ($10-$50). Labor adds to the bill.
- DIY: Most people can replace a strap in 30 minutes.
- Prevent: Clean terminals and check straps annually.
- Act fast: Fix it to save your alternator and battery.