
This article was updated in February 16, 2026 with new products and information by Mark S. Taylor
Did you spot a puddle of sweet-smelling green or orange liquid under your car? Or maybe you opened the hood and saw a big crack in the plastic tank.
Don’t panic. How to replace coolant reservoir, you simply drain the old fluid, remove a few hoses and bolts, put the new tank in, and refill it. This repair matters because a cracked tank leads to low coolant, which leads to a destroyed engine from overheating. Doing it yourself saves $150 to $300 in labor costs. This guide covers the tools you need, the exact steps to follow, and how to make sure you don’t trap air in the system.
You don’t need to be a pro. Grab your tools, and let’s get started.
Contents
- 1 When to Replace Your Coolant Reservoir
- 2 Tools and Materials Needed
- 3 Safety Precautions
- 4 Step-by-Step Coolant Reservoir Replacement
- 4.1 Step 1: Locate the Coolant Reservoir
- 4.2 Step 2: Drain the Coolant System
- 4.3 Step 3: Remove Hose Connections
- 4.4 Step 4: Disconnect Electrical Connections
- 4.5 Step 5: Remove Mounting Bolts
- 4.6 Step 6: Inspect Old Reservoir and Hoses
- 4.7 Step 7: Prepare New Reservoir
- 4.8 Step 8: Install New Reservoir
- 4.9 Step 9: Reconnect Hoses
- 4.10 Step 10: Reconnect Electrical Connections
- 4.11 Step 11: Refill Coolant System
- 4.12 Step 12: Bleed Air from System (Critical Step)
- 4.13 Step 13: Test for Leaks
- 4.14 Step 14: Final Checks and Test Drive
- 5 Troubleshooting Common Problems
- 6 Cost Breakdown: DIY vs Professional
- 7 Preventive Maintenance Tips
- 8 FAQs About How to Replace Coolant Reservoir
- 9 Bottom Line: Save $80-265 with a Simple DIY Repair
When to Replace Your Coolant Reservoir
Signs You Need Replacement
A bad reservoir is usually easy to spot.
Visible Cracks or Damage Plastic gets brittle over time. Look for:
- Hairline cracks: Small lines that look like spiderwebs.
- Splits: Big gaps where coolant seeps out.
- Stress marks: White lines near the bolt holes.
- Heat damage: Warped or melted spots.
Leaking Coolant Fluids belong inside the car.
- Puddles: Look for wet spots on your driveway.
- Low Level: You have to add coolant every week.
- Wet Seams: The edge where the plastic halves join is wet.
- Stains: Dried white or pink crust on the tank.
Age Factor Most plastic tanks last 5 to 10 years. The heat from the engine cooks the plastic. If your car is over 10 years old and the tank is original, it is living on borrowed time.
Tools and Materials Needed
Required Tools
You probably have these in your garage.
- Socket Set: Usually 8mm, 10mm, or 12mm.
- Screwdrivers: Flathead and Phillips.
- Pliers: To squeeze hose clamps.
- Drain Pan: Holds at least 2 gallons.
- Funnel: For mess-free pouring.
- Rags: To wipe up spills.
Materials to Purchase
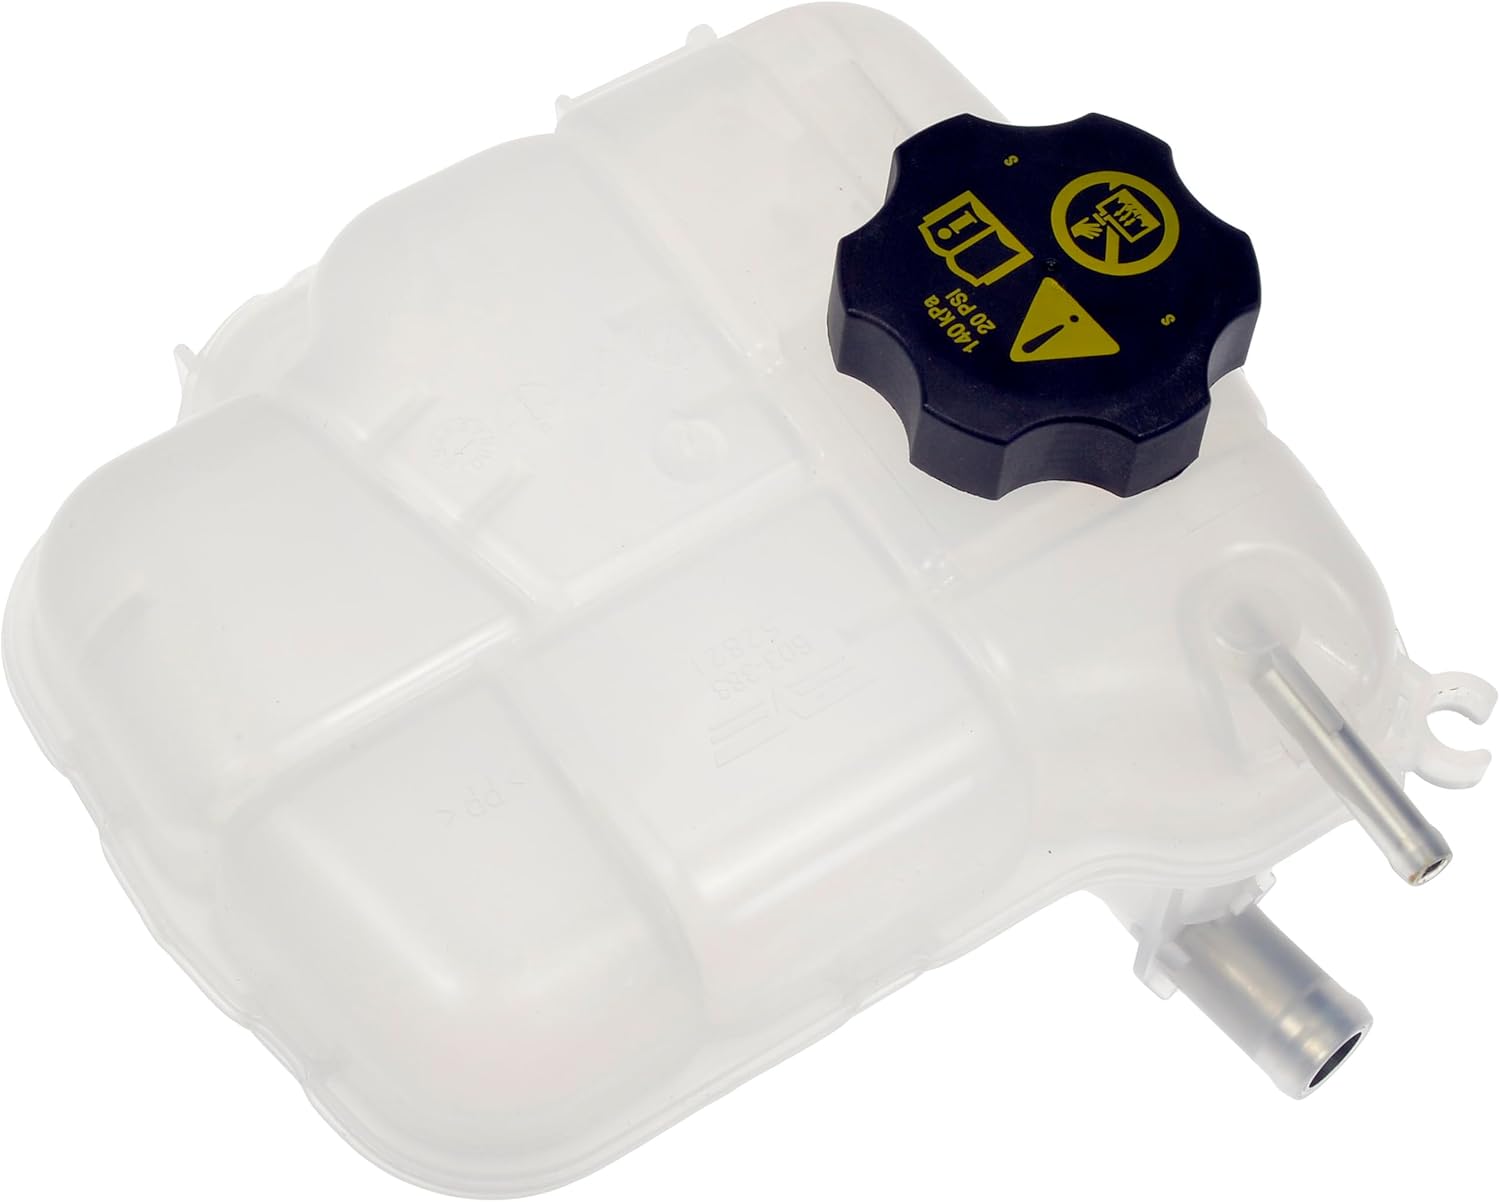
- New Reservoir: $20–$80. Check your make and model.
- Coolant: 1 gallon. Get the 50/50 pre-mixed kind to save time.
- Distilled Water: Only if you buy concentrated coolant.
- Hose Clamps: Buy new ones if the old ones look rusty ($5).
Note: Check your manual for the right coolant color (Green, Orange, Blue, or Pink). Mixing colors creates sludge.
Safety Precautions
Critical Safety Rules
Never open the cooling system when the engine is hot.
Hot coolant is under pressure. It will spray out and burn your skin. Wait at least 2 hours after driving before you start. The engine should feel cool to the touch.
Toxic Warning: Coolant tastes sweet but is deadly poisonous. Keep dogs and kids away. Clean up spills instantly.
Step-by-Step Coolant Reservoir Replacement
Step 1: Locate the Coolant Reservoir
Find the plastic tank.
It is usually translucent white or clear. It sits near the radiator. Look for markings that say “MIN” and “MAX.” Take a photo of it with your phone. This shows you exactly how the hoses route before you take them off.
Step 2: Drain the Coolant System
You need to get the fluid out.
Method 1: Radiator Drain (Best)
- Put your drain pan under the radiator.
- Find the drain plug (petcock) at the bottom corner.
- Turn it counter-clockwise to open.
- Let it drain for 10 minutes.
Method 2: Turkey Baster (Fastest) If you are lazy or the drain plug is stuck, use a turkey baster. Suck the old fluid out of the reservoir until it is empty. This is less thorough but works for a quick swap.
Step 3: Remove Hose Connections
Disconnect the rubber lines.
Most tanks have one or two hoses.
- Squeeze the clamp: Use pliers to pinch the tabs on the spring clamp.
- Slide it back: Move the clamp down the hose.
- Twist and pull: Twist the hose gently to break the seal, then pull it off.
Tip: If a hose is stuck, pry gently with a flathead screwdriver. Do not rip the rubber.
Step 4: Disconnect Electrical Connections
Check for sensors.
Some fancy cars have a “Low Coolant” sensor built into the tank.
- Look for a wire plug.
- Press the release tab.
- Pull the plug out.
- Move the wire aside so it stays dry.
Step 5: Remove Mounting Bolts
Unbolt the tank.
Look for bolts holding the tank to the car frame.
- Use your socket wrench (usually 10mm).
- Remove the bolts and put them in a magnetic tray or cup.
- Lift the reservoir straight up. You might need to wiggle it to clear other parts.
Step 6: Inspect Old Reservoir and Hoses
Check your other parts while they are exposed.
Look at the rubber hoses you just disconnected. Are they cracked? Do they feel crunchy? If yes, replace them now. A new hose costs $15 and saves you a headache later.
Step 7: Prepare New Reservoir
Get the new part ready.
Compare the new tank to the old one. Do the bolt holes match? Does it have the right number of hose nipples?
- Transfer the sensor (if your car has one).
- Transfer the cap (if the new one didn’t come with one).
- Remove any shipping plugs from the hose holes.
Step 8: Install New Reservoir
Put it back together.
- Drop the new tank into place.
- Line up the bolt holes.
- Install the bolts by hand first.
- Tighten them with your wrench. Do not overtighten. You can crack the new plastic. Hand-tight plus a quarter turn is enough.
Step 9: Reconnect Hoses
Hook up the plumbing.
- Push the hoses onto the new nipples. push them all the way on.
- Squeeze the clamps with pliers.
- Slide clamps back into their original grooves.
Step 10: Reconnect Electrical Connections
Click it back in.
If you removed a sensor wire, plug it back in now. Listen for the “click” to know it is locked.
Step 11: Refill Coolant System
Add the fresh fluid.
- Close the radiator drain plug (if you opened it).
- Put a funnel in the new reservoir.
- Pour in your 50/50 coolant mix.
- Fill it to the “MAX” line.
Note: Pour slowly. Glugging creates air bubbles.
Step 12: Bleed Air from System (Critical Step)
Air bubbles cause overheating. You must remove them.
How to Bleed Air:
- Leave the reservoir cap OFF.
- Start the engine.
- Turn your heater to HOT and the fan on High.
- Let the car idle for 10-15 minutes.
- Watch the bubbles rise in the tank. The fluid level will drop as air escapes.
- Keep adding coolant to maintain the “MAX” line.
- Once the bubbles stop and heat comes out of the vents, you are done.
- Put the cap back on tight.
Step 13: Test for Leaks
Double-check your work.
Run the car for another 5 minutes. Look at the hoses. Look at the drain plug. Is anything dripping? If it is dry, you did a great job.
Step 14: Final Checks and Test Drive
Take it for a spin.
Drive for 10 minutes. Watch your temperature gauge. It should stay right in the middle. If it climbs to “Hot,” pull over—you likely have an air bubble (see Troubleshooting below). When you get home, let the car cool down and check the level one last time.
Troubleshooting Common Problems
Coolant Still Leaking
Did you tighten everything?
- Check the hose clamps. They might be crooked.
- Check the hose end. If the rubber is split, cut the tip off or buy a new hose.
Engine Overheating After Replacement
You have trapped air. If the gauge goes high, air is blocking the flow. Wait for the engine to cool. Repeat Step 12 (Bleeding). Squeeze the upper radiator hose while the engine runs to help burp the air out.
Gurgling Sound from Dashboard
Water is rushing through air pockets. This means air is trapped in your heater core. Park the car with the nose uphill (on a driveway). Run the engine with the cap off and heater on. This helps bubbles escape.
Cost Breakdown: DIY vs Professional
DIY Costs
| Item | Cost |
| Reservoir | $20–$80 |
| Coolant | $15–$35 |
| Clamps/Hoses | $10–$20 |
| Total | $45–$135 |
Export to Sheets
Professional Service Costs
| Service | Cost |
| Parts | $50–$120 |
| Labor | $80–$300 |
| Total | $130–$420 |
Export to Sheets
Savings: You save about $150 by doing it yourself.
Preventive Maintenance Tips
Extending Reservoir Life
- Check often: Look at the tank every time you get an oil change.
- Don’t overfill: Too much fluid creates too much pressure.
- Use right fluid: Wrong coolant eats plastic seals.
- Flush it: Change your coolant every 5 years. Old coolant turns acidic.
Related Maintenance
While you are under the hood, check the radiator cap. If the rubber seal is cracked, replace it ($10). A bad cap lets coolant boil off. Check our maintenance guides for more tips.
FAQs About How to Replace Coolant Reservoir
Can I replace a coolant reservoir myself?
Yes, absolutely. It is one of the easiest engine repairs. You only need a wrench and pliers. If you can open a jar and turn a screw, you can do this.
How long does it take to replace a coolant reservoir?
It takes about 30 to 90 minutes. Removing the tank is fast. The longest part is waiting for the engine to cool down and then bleeding the air out at the end.
Do I need to drain all coolant to replace reservoir?
No. If your coolant is new, you can just drain the reservoir itself using a turkey baster or pump. However, if your coolant is old (brown or dirty), drain the whole radiator and start fresh.
What tools do I need to replace a coolant reservoir?
You need a socket set (usually 10mm), pliers for the clamps, a drain pan, and a funnel. You do not need any special mechanic tools.
What type of coolant should I use?
Check your owner’s manual. Most cars use a specific color (Green, Orange, Pink, Blue). If you are unsure, buy “Universal” coolant that mixes with any color. Always use a 50/50 mix with water.
Bottom Line: Save $80-265 with a Simple DIY Repair
Replacing a coolant reservoir is a perfect project for beginners.
You can save over $200 in one afternoon. The process is simple: drain, swap, refill, and bleed. The most critical step is safety—never open a hot radiator. The second most critical step is bleeding the air. If you skip this, your car will overheat.
Most reservoirs cost under $50 online. By fixing it yourself, you stop leaks and protect your engine from heat damage.
Final Step: Go check your engine right now. Is it cold? Touch the radiator hose. If it is cold, grab your phone and take a picture of the tank. Order the part today. You can have this fixed by the weekend.
Quick Summary
- Wait for cold: Never work on a hot cooling system.
- Photo first: Take a picture of the hoses before removing them.
- Drain safely: Catch old coolant in a pan; it is toxic.
- Swap it: Unbolt the old tank and bolt in the new one.
- Fill and Bleed: Refill with 50/50 mix and run the engine to remove air bubbles.
- Check leaks: Watch for drips after your first drive.