
This article was updated in June 27, 2026 with new products and information by Mark S. Taylor
The transmission of hydraulic force within an automotive braking system demands an absolute, uncompromised closed-loop liquid boundary. Modern braking layouts operate on the foundational principles of Pascal’s Law, which dictates that any pressure applied to a confined, incompressible fluid is transmitted equally and undiminished throughout the entire multi-wheel network.
Evaluating the status of your brake fluid reservoir requires no specialized garage tools and takes under five minutes. However, the critical diagnostic phase that most consumer guides completely omit is what the fluid level and chemical color shift are actually indicating about the physical safety boundaries of your vehicle.
As an ASE-Certified Master Technician, I have seen thousands of drivers mistakenly dump retail fluid into a low reservoir, unaware that a drop in fluid is a direct warning of severe brake pad friction wear or an active caliper line leak. In this workshop guide, we will detail how to locate the master cylinder block, execute a precise paper-towel color matrix test, prevent reservoir overflow disasters, and outline technical 2026 chemical specifications.
Contents
- 1 Where Is the Brake Fluid Reservoir Located?
- 2 How to Check Brake Fluid Level: A 5-Step Diagnostic Protocol
- 3 The Chemical Matrix: Decoding Brake Fluid Color and Condition
- 4 What Your Fluid Level Is Actually Telling You
- 5 Automotive Brake Fluid Chemical Specification Matrix
- 6 Brake Warning Light and Brake Fluid Level
- 7 Prevention Tips
- 8 FAQs About How to Check Brake Fluid Level
- 9 The Verdict: Verify the Level Context Before Adding Fluid
Where Is the Brake Fluid Reservoir Located?
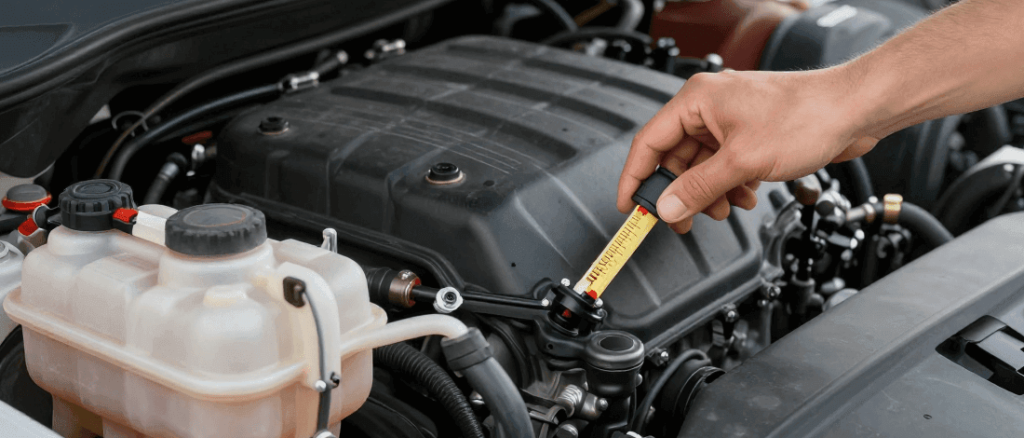
On virtually every passenger car, truck, and SUV manufactured after the mid-1980s, the brake fluid reservoir is positioned directly on top of the master cylinder brake booster assembly.
Open your vehicle’s hood and look toward the absolute rear of the engine bay on the driver’s side firewall—the heavy metal barrier separating the engine compartment from the passenger cabin. The master cylinder is bolted flat against this wall because it aligns inline with your foot’s mechanical brake pedal linkages inside the dash.
The reservoir is a compact, translucent white or clear yellow plastic tank topped with a round, screw-on or snap-on plastic cap. The cap is embossed with global warning icons and explicitly stamped with words like “BRAKE,” “DOT 3,” “DOT 4,” or “DOT 5.1.” Because the plastic tank walls are translucent, you can read the fluid volume lines from the outside under strong lighting without removing the cap, keeping atmospheric moisture locked out.
How to Check Brake Fluid Level: A 5-Step Diagnostic Protocol
Follow this precise technical sequence to analyze fluid displacement metrics accurately without cross-contaminating the hydraulic circuit:
1. Establish Frame Stabilization on Level Ground: 1 min.
Park the vehicle on a perfectly flat, level concrete surface, engage the parking brake, and turn the ignition switch fully off. If the chassis rests on a slope, gravity will tilt the fluid inside the plastic reservoir, rendering your MIN/MAX line calculations entirely inaccurate.
2. Allow the Under-Hood Thermal Zone to Cool: 2 min.
Let the engine bay sit cold for 10 minutes if the vehicle was driven recently. Under-hood heat cycles expand plastic components slightly. While waiting, use a clean microfiber cloth to thoroughly wipe away all dust, grease film, and grit from the exterior plastic shell of the reservoir box to ensure perfect optical clarity.
3. Read the Fluid Line Against the Stamped Increments: 1 min.
Shine a bright flashlight through the side wall of the plastic reservoir. Locate the two molded factory alignment lines:
MAX (FULL): The maximum safe hot fluid boundary capacity.
MIN (LOW): The absolute lowest safe hydraulic baseline before system aeration risks manifest.
Verify the fluid level sits comfortably between these lines. Sitting right at the MIN line indicates it is time to investigate underlying pad wear—not to blindly dump fluid into the neck.
4. Execute the Cap Isolation Extraction: 1 min.
If the plastic walls are heavily aged or dark, you must inspect the fluid directly. Wipe the perimeter of the cap perfectly clean before loosening it—allowing even a single grain of sand to fall into the master cylinder can score the internal rubber piston cups, destroying your braking power. Twist the cap counterclockwise and lift it straight up.
5. Perform the Master Paper Towel Color Check: 5 min.
Never evaluate fluid color by looking down into a deep plastic neck; the dark background alters your optical perception. Use a clean plastic pipette or the underside of the cap diaphragm to drop a single droplet of brake fluid onto a crisp, solid white paper towel. The white paper background provides an absolute neutral baseline to read the exact chemical state of the fluid.

The Chemical Matrix: Decoding Brake Fluid Color and Condition
Brake fluid is glycol-based and intensely hygroscopic, meaning it continuously acts like a chemical sponge, absorbing moisture directly from the atmosphere through microscopic pores in your rubber brake hoses and the reservoir cap seals. As water content scales upward, the fluid shifts color, indicating a severe drop in its chemical boiling threshold:
| Chemical Fluid Color | Physical System Internal Condition | Recommended Workshop Remediation |
| Clear to Ultra-Pale Yellow | Virgin fluid state; zero moisture contamination; high boiling point | No action required; system is optimal |
| Light Amber / Honey | Normal operational wear; minimal atmospheric moisture absorption | Serviceable status; monitor at next oil service loop |
| Medium to Dark Amber | Aged fluid; moisture levels approaching critical 2% to 3% limits | Schedule a full system hydraulic flush within 90 days |
| Deep Charcoal Brown | High water saturation; fluid boiling threshold severely compromised | Flush immediately (High risk of pedal fade under load) |
| Pitch Black / Opaque | Complete chemical breakdown; Internal Rubber Seal Degradation | Emergency Flush (Inspect all caliper lines and hoses) |
What Your Fluid Level Is Actually Telling You
Automotive brake fluid does not evaporate. If your fluid level has dropped down near the MIN marker, your braking loop is communicating one of two distinct mechanical scenarios:
1. Normal, Gradual Brake Pad Friction Wear
As your disc brake pads wear thinner over thousands of miles, the caliper pistons must extend significantly further out of their metal bores to keep the pads contacting the iron rotors. This extended piston displacement creates an empty void inside the caliper chamber.
Brake fluid moves downward out of your master cylinder reservoir to fill this newly created space. Therefore, a gradual drop to the MIN line over 6 to 12 months confirms your pads are nearing 20% to 30% remaining life. Get your pad linings checked.
2. An Active Hydraulic Line Leak Emergency
If your fluid level was resting perfectly at the MAX line last week and has suddenly plummeted to or below the MIN line today, you have a structural pressure leak. The fluid is escaping through a torn rubber hose crimp, a weeping caliper piston seal, or a rusted steel line section. Check your driveway for clear, slippery fluid puddles and do not drive the vehicle.
⚠️ THE CRITICAL OVERFILL WARNING NOBODY MENTIONS: If your fluid level is low because your brake pads are worn down, do not top the reservoir off to the MAX line. When you eventually take the vehicle in for a brake job, the mechanic will use a tool to push the caliper pistons back into their bores to fit the thick new pads. This piston retraction forces all the displaced fluid violently back up into the reservoir. If you topped it off to MAX earlier, the reservoir will instantly explode into a heavy overflow, dumping highly corrosive glycol fluid all over your painted engine bay, ABS wiring blocks, and vehicle frame rails, stripping paint on contact.

Automotive Brake Fluid Chemical Specification Matrix
| Chemical Fluid Rating | Core Fluid Base Foundation | Cross-System Compatibility | Typical Fleet Vehicle Application | Dry Boiling Threshold |
| DOT 3 | Glycol-Ether Blend | Compounded with DOT 4 & 5.1 | Older domestic sedans & light trucks | $401^\circ\text{F}$ |
| DOT 4 | Advanced Glycol-Ether | Backward compatible with DOT 3 | Modern passenger vehicles, imports, SUVs | $446^\circ\text{F}$ |
| DOT 5.1 | Borate Ester / Glycol | Matches DOT 3 and DOT 4 lines | High-weight towing platforms & Euro specs | $500^\circ\text{F}$ |
| DOT 5 | Pure Silicone Base | INCOMPATIBLE WITH ALL OTHERS | Specialized military vehicles & classic cars | $500^\circ\text{F}$ |
Never, under any circumstances, pour DOT 5 silicone fluid into a system engineered for DOT 3 or DOT 4 glycol fluid. They will not mix; instead, they chemically react to form a thick, thick jelly chemical sludge that completely plugs your ABS modulator valves, leading to total brake failure.
Brake Warning Light and Brake Fluid Level
Many drivers arrive at this article because a warning light came on. Here’s how to read the lights accurately.
The brake warning light — typically an exclamation point inside a circle, sometimes labeled “BRAKE” — monitors two things simultaneously: parking brake engagement and brake fluid level. If this light comes on while driving with the parking brake fully released, the first thing to check is the fluid reservoir. A sensor in the reservoir triggers the light when fluid drops below a threshold slightly above the MIN line.
Check the fluid immediately if this light comes on. If the level is low, determine the cause before adding fluid — sudden drops with this light on suggest a leak, not just worn pads.
The ABS warning light — typically the letters “ABS” in a box — is a completely separate system. It monitors the anti-lock braking system’s sensors and control module. A low fluid level alone does not trigger the ABS light. If the ABS light is on alongside a spongy or low pedal, the issue is likely air in the system or an ABS module fault — not simply a fluid level issue.
Both lights on simultaneously is a serious condition. It means the primary brake circuit and the ABS system are both flagging problems. Do not drive. Have the vehicle towed to a shop for a full brake system inspection.
One common confusion point: after replacing a battery or clearing fault codes, the ABS light may come on briefly during the first drive cycle as the system runs its self-check. If it goes off within a few minutes of driving, that’s normal. If it stays on, something in the ABS system needs attention.
Prevention Tips
- Check brake fluid at every oil change. Takes two minutes. Catches problems before they become expensive.
- Don’t top off without checking pad thickness first. If pads are near the end of their life, hold off on filling to MAX — fill to midpoint at most. Overfilling with worn pads causes overflow when pistons retract during the next brake job.
- Keep the cap tightly closed. Every second the reservoir is open, it’s absorbing moisture from the air. Open it only when adding fluid, replace the cap immediately after, and wipe up any spills instantly — brake fluid strips paint on contact.
- Replace fluid on schedule, not just when it looks dark. Color is a trailing indicator. Moisture content builds before color changes significantly. The 2-year interval catches fluid before it degrades enough to cause vapor lock.
- Use brake fluid test strips if you’re unsure. An $8 pack tells you definitively whether the fluid needs to go — no guessing based on color in dim lighting.
- Get the whole brake system inspected when fluid is consistently near MIN. Low fluid is almost always pad wear. Pad wear caught at 20% to 30% remaining is a planned repair. Pad wear caught at 0% — metal on metal — is an emergency repair that costs significantly more and damages rotors.
FAQs About How to Check Brake Fluid Level
Q: What should brake fluid look like?
New brake fluid is nearly clear with a very slight yellow tint — similar in color to light vegetable oil. As it ages and absorbs moisture, it darkens progressively through amber, then dark amber, then brown, then near-black. Clear to light amber is serviceable. Dark brown to black means it needs to be flushed regardless of when it was last changed. Use the paper towel test — let a drop fall on white paper — for the most accurate color read.
Q: Why is my brake fluid low but I don’t have a leak?
Almost certainly your brake pads are worn. As pads wear thinner, the caliper pistons extend further to maintain contact with the rotor, and the fluid reservoir compensates by dropping. This is a normal mechanical consequence of pad wear — not a malfunction. The fluid hasn’t gone anywhere; it’s redistributed within the system. Get your pad thickness checked. When new pads are installed and the pistons retract, the fluid will return to a higher level in the reservoir.
Q: Can I add brake fluid myself?
Yes, as long as you use the correct DOT specification (printed on the reservoir cap), don’t overfill, and keep the cap off for as short a time as possible. The cautions: don’t mix DOT 5 silicone into a glycol system, don’t fill past MAX if pads are worn, and don’t add fluid as a substitute for finding out why it’s low. If the level was fine last month and it’s low today, something in the system needs inspection before you add anything.
Q: How often should I check brake fluid?
Every oil change — roughly every 3 to 6 months depending on your vehicle. Takes two minutes. If your oil change interval is extended (7,500 to 10,000 miles), check brake fluid independently every 3 months. For replacement, most manufacturers recommend a full flush every 2 years or 24,000 to 30,000 miles.
Q: What happens if brake fluid gets too low?
At a slightly low level, nothing dramatic — brakes continue to function normally. As level drops further, the master cylinder can begin to pull air into the circuit, causing a spongy pedal. If the reservoir runs completely empty, the master cylinder draws pure air, hydraulic pressure collapses, and the brakes fail. A fully empty reservoir is a brake failure emergency. Don’t drive; call for a tow and a full brake system inspection.
The Verdict: Verify the Level Context Before Adding Fluid
Never treat a drop in brake fluid volume as a simple invitation to top off the plastic tank. A low reservoir is a clear mechanical window into the operational wear curve of your brake pads and line integrity. Take 5 minutes to verify the fluid level from the outside of the casing, execute a clean paper-towel color drop check annually to catch moisture accumulation before it induces destructive vapor lock, and keep your reservoir sealed tight to preserve your stopping metrics and vehicle control parameters.
(Want to ensure your vehicle’s alternative mechanical components, charging loops, and engine computer networks are operating with absolute factory precision? Read our master workshop guide on How to Read Check Engine Light Codes Without a Scanner or check out The Car Buzz Official Testing and Editorial Integrity Guidelines Page).