
This article was updated in July 8, 2026 with new products and information by Mark S. Taylor
A broken coil spring produces identifiable symptoms — a sagging corner, clunking over bumps, a pull to one side. Most drivers notice those symptoms and assume it’s a handling problem they can manage until the next service appointment. What they don’t know is that a broken spring coil end can rotate toward the inner tire sidewall and abrade through it over a few miles of driving, producing a tire failure with no warning and no external evidence until the wheel comes off the rim.
This is the full picture: what the broken coil spring symptoms mean structurally, the hidden tire risk most shops don’t mention, how to confirm the break yourself, and what the complete repair costs.
Contents
- 1 What a Coil Spring Does — and What Breaks When It Fails
- 2 Seven Symptoms of a Broken Coil Spring
- 2.1 Symptom 1 — One Corner of the Vehicle Sits Noticeably Lower
- 2.2 Symptom 2 — Clunking or Knocking Over Bumps
- 2.3 Symptom 3 — Vehicle Pulls Toward the Broken Spring Side
- 2.4 Symptom 4 — Harsh, Jarring Ride on the Affected Corner
- 2.5 Symptom 5 — Uneven or Accelerated Tire Wear on the Affected Corner
- 2.6 Symptom 6 — Grinding or Scraping Sound From the Wheel Area
- 2.7 Symptom 7 — A Tire Going Flat With No Visible External Cause
- 3 The Hidden Danger — How a Broken Spring Destroys a Tire From the Inside
- 4 Why Coil Springs Break — The Three Failure Mechanisms
- 5 Strut-Type Suspension vs. Separate-Spring Suspension — Why It Changes the Repair
- 6 How To Confirm a Broken Coil Spring Without a Lift
- 7 Can You See a Broken Coil Spring Without Removing Anything?
- 8 Is It Safe To Drive on a Broken Coil Spring?
- 9 Broken Coil Spring Repair Cost — Complete Bill by Scenario
- 9.1 Scenario 1 — Single Spring Replacement, Separate-Spring Suspension (Rear Multi-Link or Double-Wishbone)
- 9.2 Scenario 2 — Both Springs, Same Axle (Separate-Spring — Standard Recommendation)
- 9.3 Scenario 3 — Loaded Strut Assembly Replacement (MacPherson Strut, Single Corner)
- 9.4 Scenario 4 — Loaded Strut Assembly Pair (Front Axle — Standard Recommendation on Strut Suspensions)
- 9.5 Add-On Costs When Secondary Damage Is Present
- 9.6 The Spring Compressor Warning for DIY
- 10 Should You Replace One Spring or Both?
- 11 How To Prevent Coil Spring Failure
- 12 FAQs About Broken Coil Spring Symptoms
- 13 The Expert Verdict
What a Coil Spring Does — and What Breaks When It Fails
The coil spring carries the vehicle’s corner weight. Every pound of the vehicle that loads onto a wheel — the corner weight — is supported by the spring between the lower suspension and the chassis. The spring also controls suspension travel, allowing the wheel to move up over bumps and down into dips while keeping the tire in contact with the road.
On a MacPherson strut suspension — the most common front suspension design on passenger cars and crossovers — the coil spring is not just a ride comfort component. It is a structural load member integrated into the strut assembly. The spring sits between the lower strut body perch and the upper strut mount, and the vehicle’s corner weight transfers through the spring coil into the strut mount and into the chassis. When that spring breaks, the load path through the strut assembly changes — the strut body begins experiencing bending loads it was not designed to handle continuously.
On double-wishbone, multi-link, and solid axle rear suspensions, the coil spring mounts separately from the shock absorber — the spring sits between the lower control arm and the chassis spring perch, and the shock absorbs damping separately. A broken spring on these configurations doesn’t structurally affect the shock, but it drops the corner weight onto the jounce bumper and changes suspension geometry at every compression event.
The failure is not always dramatic. Many broken springs crack progressively — a fatigue crack propagates through the spring wire cross-section over weeks or months before the final fracture. The driver may hear a creak or tick that worsens gradually. The sudden bang when the final fracture completes catches most drivers by surprise even though the process started thousands of miles earlier.
Seven Symptoms of a Broken Coil Spring
These symptoms form the complete diagnostic picture. The first one is the fastest confirmation. The last one is the most dangerous.
Symptom 1 — One Corner of the Vehicle Sits Noticeably Lower
The most visually obvious symptom and the fastest to confirm without any tools. Stand back from the vehicle and look at the gap between the top of the tire and the fender lip at each corner. A broken spring drops the affected corner 1.0 to 3.0 inches relative to the opposite corner — an asymmetry visible to the eye from 20 feet. Confirm it with a tape measure: measure from the ground to the fender lip at the center of the wheel at all four corners. Any corner measuring more than 0.5 inches lower than its mirror-image corner on the opposite side indicates spring failure or advanced spring sag. A difference of 1.5 inches or more is a broken spring until proven otherwise.
Symptom 2 — Clunking or Knocking Over Bumps
A metallic clunk or knock timed with suspension compression events — bumps, dips, rough pavement, and driveway entrances. The clunk comes from the broken coil end moving within the spring perch area. When the spring compresses, the broken lower fragment shifts slightly against the adjacent coil or the spring perch surface, producing a sharp knock. The clunk is most pronounced on slow-speed impacts where the suspension travels through a larger portion of its range — it may be absent at highway speed on smooth pavement where suspension movement is minimal, leading the driver to underestimate the severity.
Symptom 3 — Vehicle Pulls Toward the Broken Spring Side
A continuous pull toward the affected corner under normal driving. The broken spring has dropped that corner’s ride height, changing the camber angle — more negative camber on the affected side as the steering knuckle tilts inward at the top under reduced spring force. Changed camber alters the tire’s contact patch geometry, generating a lateral force that pulls toward the low side. On strut suspensions, the reduced spring height also changes the caster angle by altering the strut inclination angle — altered caster on one side produces a steering pull that is load-sensitive, worsening under braking and lightening under acceleration.
Symptom 4 — Harsh, Jarring Ride on the Affected Corner
The broken spring has lost coil count — part of the spring is no longer contributing to the load. The effective spring rate increases on the remaining coils because the same load is distributed across fewer wire windings, making the remaining portion stiffer. Additionally, the reduced ride height means the jounce bumper — the polyurethane or rubber limit stop inside the coil — contacts earlier during compression events. A spring that used to absorb a pothole impact through 4 inches of travel may now contact the jounce bumper within 2 inches, transmitting the remaining impact energy directly into the chassis as a harsh thud.
Symptom 5 — Uneven or Accelerated Tire Wear on the Affected Corner
The camber change from the dropped corner produces inside edge wear on the affected tire — the same wear pattern as a severely out-of-specification negative camber alignment reading. The tire’s contact patch rolls on its inner edge rather than flat across the tread. This wear develops faster than alignment-induced camber wear because the camber error from a broken spring is typically larger than any alignment error within the adjustment range — camber changes of 1.5 to 3.0 degrees are common from a broken spring, versus typical out-of-spec alignment deviations of 0.5 to 1.0 degrees.
Symptom 6 — Grinding or Scraping Sound From the Wheel Area
A continuous grinding or scraping that sounds like worn brake pads but doesn’t respond to brake application — it’s present whether braking or not. This is a broken spring coil end that has rotated to a position where it contacts the brake rotor, the caliper, or the wheel barrel during rotation. The contact point produces a grinding sound that is indistinguishable from brake noise by ear alone. A broken spring grinding against a brake rotor can score the rotor surface severely within miles — adding rotor replacement to the repair scope.
Symptom 7 — A Tire Going Flat With No Visible External Cause
The most dangerous symptom and the one least connected to the broken spring in the driver’s mind. The broken spring coil end has rotated toward the inner tire sidewall and is abrading through it. The damage is on the inside of the tire — not visible without removing the wheel. The result is a slow leak from a sidewall that is structurally compromised. The driver finds a flat tire, looks for a nail, finds nothing, re-inflates, and drives on a tire whose inner sidewall cords are damaged. That tire can fail without warning at any speed.
The Hidden Danger — How a Broken Spring Destroys a Tire From the Inside
This is the failure mode that separates a broken spring from a manageable handling problem.
When a coil spring fractures, the broken lower section is no longer constrained by the continuous helical geometry of the spring. The broken end is free to rotate within the spring perch area. On most MacPherson strut applications, the space between the innermost point of the lowest coil and the inner tire sidewall measures 0.5 to 2.0 inches depending on the vehicle’s spring geometry and tire profile.
Every suspension compression event — every bump, every brake application that pitches weight forward, every corner that loads the outside spring — closes that gap temporarily. On a smooth road, a broken spring end pointing at the tire sidewall may not contact it. On a rough road, or during a compression event deep enough to bring the spring near its compressed height, the broken end contacts the inner sidewall and scrapes across it.
The scrape doesn’t penetrate immediately. Tire sidewall rubber is thick enough to absorb one or two contacts without catastrophic failure. But the spring end is sharp hardened steel, and the tire sidewall is rubber-coated fabric cord. After 50 to 200 wheel rotations — a distance of less than one mile at highway speed — the spring end has abraded a groove through the outer rubber layer and is contacting the structural cord underneath. The cord fabric thins. A slow leak develops from the cord layer that is now exposed rather than sealed under rubber.
The driver experiences a tire going flat. They inspect the exterior tread and sidewall — nothing visible. They take it to a tire shop for a leak inspection, where the wheel is submerged and bubbles are watched for. The slow leak from a cord-deep sidewall abrasion may not bubble visibly at low inflation pressure differentials. The tire is re-inflated and the driver is sent home.
The inspection protocol that catches this before it causes a failure:
Remove the wheel from the vehicle. Deflate the tire. Run your hand around the full inner circumference of the tire sidewall — the surface that faces the vehicle when the wheel is mounted. You’re looking for a linear abrasion mark 2 to 4 inches long, oriented in the direction the spring coil end would contact. The mark may appear as a scraped, whitened, or thinned area on the black rubber. In more advanced cases, you can see individual cord fibers exposed through the rubber.
A tire showing this abrasion mark is structurally compromised regardless of whether it holds air at the moment of inspection. The cord fabric has been damaged. Tire sidewall integrity depends entirely on intact cord construction — a compromised cord section is a delamination or blowout waiting for the right combination of load, speed, and temperature. That tire requires replacement before the vehicle is driven.
This inspection takes 10 minutes. No competitor article mentions it. It is the difference between catching a tire failure before it happens and discovering it at 65 mph.
Why Coil Springs Break — The Three Failure Mechanisms
A broken coil spring is not always a wear event. Understanding which mechanism caused the fracture tells the shop — and you — whether the opposite spring is at similar risk and whether there’s an underlying cause that needs addressing beyond the spring itself.
Mechanism 1 — Corrosion-Induced Fracture at the Lower Spring Perch (Most Common)
The bottom coil of the spring sits in a cup-shaped lower spring perch. In normal operation, road spray enters the wheel well and wets the contact zone between the lowest coil and the spring perch surface. On a vehicle driven on roads treated with road salt, that spray carries dissolved salt that concentrates in the contact area. The coil cannot lift off the perch during spring compression — the spring load keeps it firmly seated. Water and oxygen can reach the contact zone, but they cannot easily drain or evaporate. The result is a sustained electrochemical corrosion cell operating at the point of maximum stress concentration in the spring geometry.
The corrosion removes material from the spring wire cross-section progressively. A spring wire that started at 14mm diameter may lose 2 to 3mm of cross-section at the corroded contact zone — reducing the wire’s load-bearing area by 30 to 40 percent. Normal suspension compression stress that the original wire handled safely now exceeds the yield strength of the reduced cross-section. The spring fractures, typically with a loud bang during a routine suspension compression event — a dip in the road, a parking lot speed bump, or simply the vehicle’s weight settling during a direction change.
Per SAE J1121 spring material specifications, high-carbon chromium-silicon spring steel (SAE 9254) has a minimum tensile strength of 180,000 PSI when manufactured to specification. Corrosion-induced material loss that reduces the wire cross-section by 35 percent reduces the effective tensile strength proportionally — the remaining cross-section fails at stress levels the spring was designed to handle safely.
Mechanism 2 — Fatigue Fracture From Cyclic Loading
A coil spring on an average vehicle experiences approximately 1,500 to 3,000 suspension compression cycles per mile of driving on mixed road surfaces. Over 100,000 miles, that’s 150 to 300 million stress cycles. Metallurgical fatigue initiates at a stress concentration point — a corrosion pit smaller than the visible fractures above, a nick from road debris impact on the spring wire surface, or a microscopic surface defect from the manufacturing process. The concentration of stress at that point generates a microscopic crack with each loading cycle. The crack propagates incrementally — a few micrometers per thousand cycles — until the remaining cross-section cannot support the compressive load.
Fatigue fractures typically announce themselves. The driver hears a creak, a tick, or a subtle knock that worsens over weeks before the final fracture. The sound comes from the propagating crack flexing microscopically under load. Many drivers attribute this sound to a strut mount bearing or a stabilizer bar link and defer investigation — sometimes until the final fracture confirms it was the spring all along.
Mechanism 3 — Impact Overload Fracture
A single high-energy event generates instantaneous compression force exceeding the spring’s elastic limit. Large potholes at speed, curb strikes, severe bottoming events on off-road terrain, and road debris impacts can all produce instantaneous spring loads 3 to 5 times higher than the design operating range. The spring fractures immediately — the driver hears a sharp bang simultaneous with the impact event and usually feels the vehicle’s handling change instantly. This mechanism is independent of vehicle age or mileage — it can fracture a brand-new spring on the first occurrence of a sufficiently severe impact.
According to NHTSA’s safety recall database, several OEM spring applications have been subject to safety recalls for fracture-related failures, including cases of hydrogen embrittlement from the manufacturing process — a condition where hydrogen absorbed during electroplating treatment makes the spring steel brittle at very low mileage. If you have a broken spring on a vehicle with under 50,000 miles and no history of severe impacts, check the NHTSA recall database by VIN before paying for the repair — the replacement may be covered under an active recall.

Strut-Type Suspension vs. Separate-Spring Suspension — Why It Changes the Repair
The suspension configuration determines whether a broken spring is a spring-only repair or a spring-plus-strut assessment.
MacPherson Strut (Most front suspensions, some rear):
The spring and strut are a combined structural assembly. When the spring is intact, it carries the corner weight in pure compression and transfers it cleanly to the strut mount. When the spring breaks — particularly if the break is at the bottom coil — the strut body begins experiencing lateral bending moments at the lower spring perch weld during suspension compression. The strut tube is designed for axial compression loads along its centerline, not for lateral bending. Sustained abnormal bending loading from a cracked spring can initiate fatigue cracking at the strut body weld points.
According to Monroe/Tenneco suspension documentation, strut assemblies operating with a broken spring for extended periods should be inspected for deformation at the lower spring perch weld and at the strut-to-knuckle pinch bolt area before a spring-only replacement is approved. A strut showing any deformation, cracking, or abnormal scoring from the broken spring fragment requires replacement as an assembly — not just the spring.
Separate-Spring Suspension (Double-wishbone, multi-link, solid rear axle):
The spring mounts between the lower control arm or axle and a chassis spring pocket. The shock absorber mounts independently at separate upper and lower attachment points. A broken spring on this configuration doesn’t structurally affect the shock absorber — the shock continues to function normally (though it’s now operating at an incorrect ride height and at a different point in its travel range). Spring replacement on separate-spring suspensions is mechanically simpler — no spring compressor is needed on many designs because the spring is not preloaded when the suspension droops to full droop on a lift — and typically costs less than a strut assembly replacement.
| Factor | MacPherson Strut | Separate-Spring Suspension |
|---|---|---|
| Spring function | Structural load member in strut assembly | Isolated spring between control arm and chassis |
| Secondary damage risk | Strut body bending fatigue, strut mount bearing damage | Minimal — shock absorber unaffected |
| Special tool required | Spring compressor mandatory | Often not required on full-droop suspension |
| Repair scope | Spring or loaded strut assembly (inspect strut first) | Spring replacement only in most cases |
| Parts cost | $150–$450 per corner (loaded strut assembly) | $60–$180 per corner (spring only) |
| Labor time | 1.0–2.0 hours per corner | 0.8–1.5 hours per corner |
How To Confirm a Broken Coil Spring Without a Lift
Four checks. The first takes two minutes and gives you a strong directional indicator. The fourth takes ten minutes and tells you whether your tire is already damaged.
Check 1 — Corner Height Measurement
Measure from the ground to the fender lip at the center of the wheel at all four corners — front left, front right, rear left, rear right. Write down all four measurements. Compare front left to front right and rear left to rear right.
A symmetrical vehicle with no broken springs should measure within 0.25 inches corner-to-corner on the same axle. A measurement difference above 0.5 inches indicates a spring problem. A difference above 1.0 inch is likely a broken spring. A difference of 1.5 inches or more is diagnostic — the only things that drop a corner that far are a broken spring or a fully collapsed air spring on an air suspension vehicle.
Check 2 — Visual Spring Inspection Through the Wheel Well
With the vehicle on a flat surface and the wheel turned slightly outward for access, shine a flashlight into the wheel well and look at the coil spring. You’re looking for a gap irregularity — healthy springs have consistent coil spacing across their full height. A broken spring shows either a wider-than-normal gap at the break point (where the lower section has dropped slightly) or an overlapping gap where the broken fragment has shifted. On most MacPherson strut applications, the spring is visible from the front or rear of the wheel well opening without removing any components.
Look specifically at the bottom two coils — the most common fracture location. A rust-stained gap with a sharp metal edge visible at the break is the confirmation. On vehicles with thick inner fender liners, this inspection may require removing the liner to access the spring visually — a 10-minute job with a plastic trim removal tool.
Check 3 — Bounce Test on the Affected Corner
Push down firmly on the corner of the vehicle — on the fender or body above the affected wheel — and release. A vehicle with an intact spring and functioning shock absorber returns to ride height within 1 to 1.5 oscillations and stops. A broken spring that has dropped the corner produces a different behavior: the corner sits low even at rest, and the bounce test confirms that the low position is the spring’s resting height rather than a temporary anomaly. The bounce test also reveals a shock absorber that isn’t damping — the vehicle continues oscillating beyond 2 cycles — which is a separate but related finding on high-mileage suspensions.
Check 4 — Inner Tire Sidewall Inspection
Loosen the wheel’s lug nuts with the vehicle on the ground (to prevent wheel rotation). Jack the vehicle and support on a jack stand at the frame. Remove the wheel. Deflate the tire to below 10 PSI to allow the sidewall to relax and become palpable. Run your hand around the full inner circumference of the tire — the inside surface that faces the vehicle when the wheel is mounted.
Feel for any linear abrasion mark, thinned area, or scraped section on the inner sidewall. Look under a flashlight for any whitened, scraped, or cord-exposed area. A mark that runs 2 to 4 inches in a direction consistent with spring coil contact is a compromised sidewall — the tire requires replacement regardless of current air retention. Also look at the broken spring end itself while the wheel is off: confirm its position relative to where the tire sidewall was sitting. A spring end pointing directly at the sidewall contact zone confirms the abrasion source and tells you the tire was being contacted on every compression event.
Can You See a Broken Coil Spring Without Removing Anything?
On most MacPherson strut applications: yes, partially. The coil spring is visible through the wheel well opening from the front or rear access angle on most passenger cars and crossovers. You don’t need a lift, a jack, or tools. The inspection is a visual check with a flashlight.
What you’re looking for: the gap irregularity described in Check 2 above, plus any rust staining or discoloration at the fracture point (broken spring ends oxidize quickly), plus any fragment of spring wire that appears displaced from the helical geometry of the rest of the spring.
On vehicles with aggressive inner fender liners — fabric or plastic panels covering most of the wheel well interior — access is limited. The bottom of the spring may not be visible without removing the liner. Rear coil springs on independent rear suspension multi-link designs are often less accessible without raising the vehicle — the spring typically mounts in a pocket between the rear subframe and the lower control arm that isn’t visible from outside the wheel well.
If the visual inspection through the wheel well is inconclusive, the corner height measurement is definitive. A corner that measures 1.0 inches or more lower than its opposite side has a spring problem — that’s the finding that goes to a shop for confirmation and repair regardless of what you can or can’t see visually.
Is It Safe To Drive on a Broken Coil Spring?
The answer depends on one specific variable: where the broken coil end is pointing relative to the tire sidewall.
Everything else — the corner sag, the clunking, the pull, the harsh ride — is manageable degradation. A broken spring end contacting the inner tire sidewall is not manageable. It is an active tire destruction event that can produce a blowout without warning at any speed.
Before driving any distance on a confirmed or suspected broken spring, do this:
Remove the wheel on the affected corner. Look at where the broken spring end is pointing. Measure or estimate the clearance between the broken coil end and the inner sidewall contact zone. Check the inner sidewall for abrasion marks as described in Check 4 above.
- Broken coil end not pointing at the sidewall, no sidewall abrasion marks, corner drop less than 1.5 inches: driving 5 to 10 miles at reduced speed to a shop is reasonable. Use smooth roads. Avoid hard braking and sharp cornering that increase spring compression.
- Broken coil end pointing toward the sidewall but no abrasion marks yet, clearance above 0.5 inches: borderline. Driving to a shop is possible but not advisable — spring compression during normal driving will close that gap repeatedly. Call the shop and describe the situation; many shops will collect the vehicle rather than have you drive it in this condition.
- Any abrasion marks on the inner sidewall: do not drive. The tire is compromised. Have the vehicle towed. The sidewall damage from a broken spring is not repairable — the tire requires replacement, and the broken spring may cause further damage to a replacement tire installed on the same vehicle before the spring is repaired.
- Broken coil end contacting the brake rotor or caliper: do not drive. The grinding contact is scoring the rotor with every wheel rotation. Three miles of driving with a spring fragment on the rotor can score it deeply enough to require replacement, adding $150 to $350 in rotor costs to the repair bill.
The highway speed prohibition applies regardless of contact evidence:
A broken spring that passes all the above criteria as “drivable to a local shop” is still not a highway vehicle. At highway speed, suspension compression events from road irregularities happen faster and with less warning. A spring end that clears the sidewall at 30 mph on a smooth road may contact it during the sudden compression from a highway expansion joint at 65 mph. The consequences of a tire failure at highway speed are categorically different from a failure in a parking lot.
Broken Coil Spring Repair Cost — Complete Bill by Scenario
Labor rates: $120 to $210/hr at a US independent shop. Dealership rates: $160 to $280/hr. All pricing reflects 2026 US market.
Scenario 1 — Single Spring Replacement, Separate-Spring Suspension (Rear Multi-Link or Double-Wishbone)
| Component | Parts Cost | Labor Hours | Labor Cost | Total Estimate |
|---|---|---|---|---|
| Coil spring (one corner, OEM equivalent) | $60–$180 | 0.8–1.5 hrs | $96–$315 | $156–$495 |
| Four-wheel alignment (mandatory) | $0 parts | 0.8–1.0 hrs | $80–$175 | $80–$175 |
| Scenario 1 Total | $236–$670 |
Scenario 2 — Both Springs, Same Axle (Separate-Spring — Standard Recommendation)
| Component | Parts Cost | Labor Hours | Labor Cost | Total Estimate |
|---|---|---|---|---|
| Coil springs (pair, OEM equivalent) | $120–$360 | 1.2–2.5 hrs | $144–$525 | $264–$885 |
| Four-wheel alignment | $0 parts | 0.8–1.0 hrs | $80–$175 | $80–$175 |
| Scenario 2 Total | $344–$1,060 |
Scenario 3 — Loaded Strut Assembly Replacement (MacPherson Strut, Single Corner)
| Component | Parts Cost | Labor Hours | Labor Cost | Total Estimate |
|---|---|---|---|---|
| Loaded strut assembly (spring + strut + mount) | $150–$450 | 1.0–2.0 hrs | $120–$420 | $270–$870 |
| Four-wheel alignment | $0 parts | 0.8–1.0 hrs | $80–$175 | $80–$175 |
| Scenario 3 Total | $350–$1,045 |
Scenario 4 — Loaded Strut Assembly Pair (Front Axle — Standard Recommendation on Strut Suspensions)
| Component | Parts Cost | Labor Hours | Labor Cost | Total Estimate |
|---|---|---|---|---|
| Loaded strut assemblies (pair, front) | $300–$900 | 2.0–3.5 hrs | $240–$735 | $540–$1,635 |
| Four-wheel alignment | $0 parts | 0.8–1.0 hrs | $80–$175 | $80–$175 |
| Scenario 4 Total | $620–$1,810 |
Add-On Costs When Secondary Damage Is Present
| Secondary Damage | Parts Cost | Labor | Total Addition |
|---|---|---|---|
| Tire replacement (inner sidewall damage, one tire) | $100–$300 | $20–$40 mount/balance | $120–$340 |
| Brake rotor replacement (spring contact scoring, one corner) | $60–$180 | $60–$120 | $120–$300 |
| Strut mount replacement (if damaged separately, not loaded assembly) | $45–$120 | Included in strut labor | $45–$120 |
| EPS/ABS recalibration (if warning lights present post-repair) | $75–$150 | 0.5 hrs included | $75–$150 |
The Spring Compressor Warning for DIY
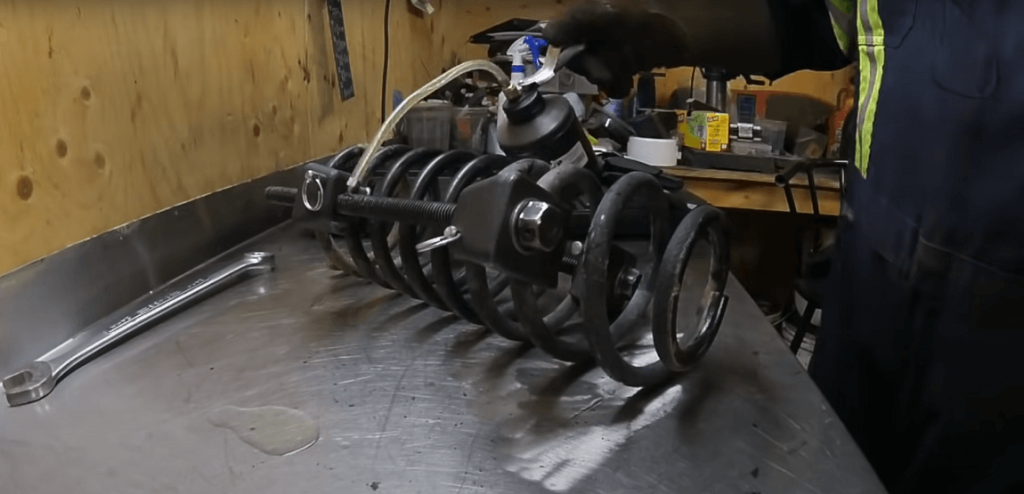
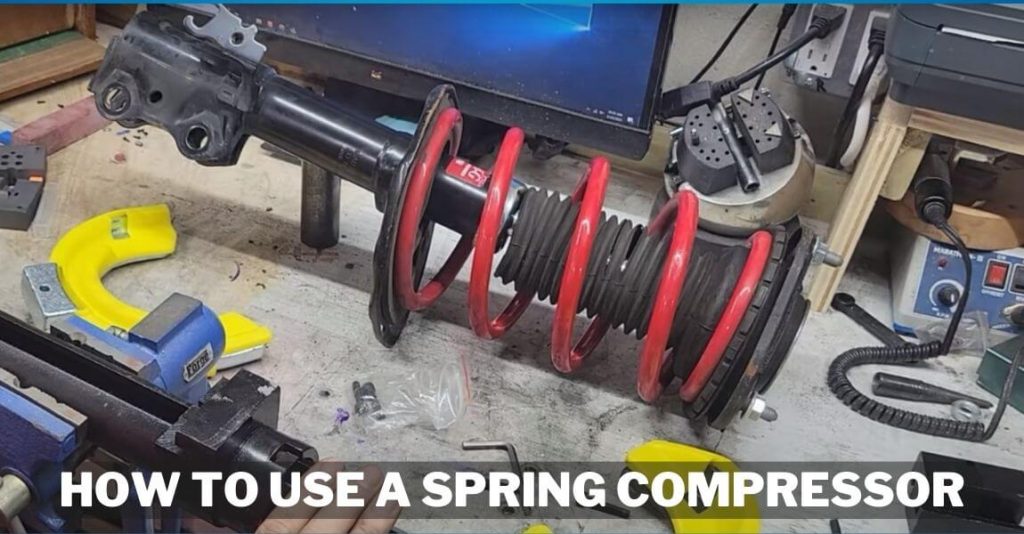
A coil spring under compression on a strut assembly stores significant energy — a compressed spring on a typical passenger car holds 400 to 800 ft-lbs of stored energy. A spring compressor failure, an incorrectly seated compressor hook, or a compressor that slips during removal can release that energy violently — the spring and related hardware become high-velocity projectiles. Multiple fatalities and serious injuries have been documented from improper spring compressor use in non-professional settings.
DIY spring replacement on a strut application is not a beginner job. The correct tool is a dedicated spring compressor designed for the specific strut geometry — not a generic C-clamp type compressor. If you are doing this yourself, rent the correct spring compressor from the parts store, follow the tool manufacturer’s procedure exactly, and work with a second person present. The cost difference between a DIY spring job and a professional strut assembly installation ($350–$700 shop cost vs. $120–$360 in parts) does not justify the risk of an improperly executed DIY procedure with stored spring energy.
Should You Replace One Spring or Both?
One spring is broken. The shop is recommending both. Is that a legitimate recommendation or a upsell?
On the same axle, both springs have accumulated the same mileage under the same load conditions. If the failure mechanism is corrosion at the lower spring perch — the most common cause — both springs have been exposed to the same road salt environment for the same number of years. The opposite spring has the same corrosion concentration developing at its lower perch contact zone. It is at a similar stage of material cross-section reduction. The only uncertainty is whether it’s at 60 percent of remaining life, 80 percent, or 95 percent.
The handling consequence of mismatched springs reinforces the replacement argument. A new spring paired with an old spring that has sagged 0.25 to 0.5 inches from fatigue and stress relaxation creates a vehicle with asymmetric corner heights. The higher corner — supported by the new spring at correct height — carries more than its nominal share of the corner weight because the opposite corner has dropped. That asymmetric load accelerates fatigue in the new spring and produces a steering pull that the alignment cannot fully correct because the root cause is the spring height mismatch rather than a geometric misalignment.
When single-spring replacement is reasonable:
- Impact-induced fracture on a low-mileage vehicle (under 50,000 miles) with no corrosion evidence on either spring — the failure was event-specific, not corrosion-progressive.
- Separate-spring rear suspension with one spring fractured from a specific impact event, opposite spring inspected and confirmed at full height with intact paint and no corrosion at the perch contact zone.
When paired replacement is the correct call:
- Any vehicle above 80,000 miles in a region with road salt use — both springs have the same corrosion exposure.
- Any fracture from the corrosion mechanism (fracture at the bottom coil with rust staining at the break) — the opposite spring has the same corrosion progression at its perch.
- Strut suspension where the loaded strut assembly (spring included) is being replaced — the cost differential to include the opposite loaded assembly is primarily parts cost since the labor covers both sides at reduced per-corner time.
How To Prevent Coil Spring Failure
Two practices significantly extend spring life. Neither requires any mechanical skill.
1. Wash the wheel wells regularly during winter months.
The corrosion concentration mechanism at the lower spring perch requires sustained salt exposure at the coil-to-perch contact zone. High-pressure washing of the wheel well — including directing the stream at the spring perch area from multiple angles — flushes salt solution from the contact zone before it can establish a sustained corrosion cell. Once per month during road salt season, with particular attention to the lower spring perch area, reduces the corrosion rate measurably. This is the only maintenance action that directly addresses the primary spring failure mechanism.
2. Don’t ignore clunking or creaking from the suspension.
Fatigue fractures announce themselves through sound before final failure. A new creak, tick, or knock from a wheel well that wasn’t there 2,000 miles ago is a spring, strut mount bearing, or stabilizer link asking for attention. Fatigue cracks that are caught and replaced before final fracture don’t produce the secondary damage — the inner sidewall abrasion, the rotor scoring, the strut body bending load — that a fully fractured spring causes. The inspection cost is $75 to $150. The repair cost for secondary damage from a broken spring can reach $300 to $500 on top of the spring replacement itself.
FAQs About Broken Coil Spring Symptoms
What does a broken coil spring sound like?
A broken spring that hasn’t fully separated produces a metallic clunk or knock timed with suspension compression — bumps, dips, and rough pavement. At the moment of final fracture, many drivers hear a single loud bang from the wheel well, similar to a gunshot or a tire blowout, followed by the vehicle settling lower on the affected corner. On fatigue fractures that progress slowly, the sound preceding final failure is a creak or tick that worsens over weeks — often misidentified as a strut mount bearing or stabilizer link.
Can a broken coil spring cause a blowout?
Yes. A broken spring coil end that rotates toward the inner tire sidewall abrades through the sidewall rubber and structural cord over 50 to 200 wheel rotations — less than one mile at highway speed. The result is a tire that fails structurally, either as a sudden blowout or as a slow leak from a cord-damaged sidewall. The damage is on the inside of the tire and is not visible without removing the wheel. Any vehicle with a broken spring should have the inner tire sidewall inspected before the vehicle is driven.
How long can you drive on a broken coil spring?
The only acceptable answer is: until you’ve confirmed the broken coil end is not contacting the inner tire sidewall. If the coil end is clear of the sidewall and no abrasion is present, driving 5 to 10 miles at reduced speed on smooth roads to a shop is reasonable. If there is any sidewall contact or abrasion evidence, do not drive — the tire is compromised and requires replacement before the vehicle moves. Highway driving is not appropriate under any broken spring condition.
Do coil springs need to be replaced in pairs?
On vehicles above 80,000 miles in Rust Belt states where the failure mechanism is corrosion at the lower spring perch, yes. Both springs have the same corrosion exposure and the same progressive cross-section reduction at the perch contact zone. The opposite spring is at an unknown but similar stage of that progression. On low-mileage vehicles with impact-induced fractures and no corrosion evidence on the intact spring, single-spring replacement is defensible — but the intact spring should be inspected carefully for corrosion at the lower perch before approving single-spring replacement.
How much does broken coil spring repair cost?
A single spring replacement on a separate-spring suspension runs $236 to $670 including alignment. A loaded strut assembly pair on a MacPherson strut front suspension runs $620 to $1,810 including alignment. Secondary damage — a tire with inner sidewall abrasion, a scored brake rotor — adds $120 to $640 to those ranges. The repair cost is the same whether the spring is caught early or discovered after secondary damage has occurred — except for the additional secondary damage repair cost, which is entirely avoidable by catching the broken spring before driving on it.
The Expert Verdict
A broken coil spring is not a “limp it to the next service” situation. The handling symptoms are manageable, the clunking is annoying, the corner sag is obvious — none of those are the real concern. The real concern is the broken coil end and where it’s pointing. Ten minutes with a flashlight and a removed wheel tells you whether you’re dealing with a spring replacement or a spring replacement plus a tire that is actively being destroyed from the inside.
Check the inner sidewall. Measure the corner heights. Look at the spring through the wheel well. Those three steps give you the complete diagnostic picture before you talk to a shop, before anyone tells you what it costs, and before you decide whether this is a drive-in or a tow-in.