
This article was updated in August 9, 2023 with new products and information by Mark S. Taylor
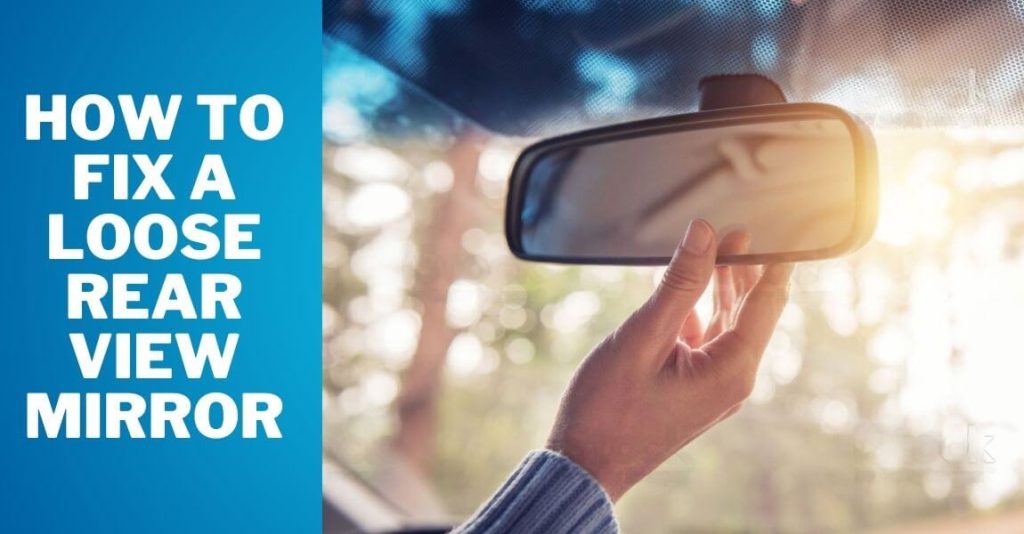
To fix a loose rear view mirror, start by removing the mirror’s mounting button from the windshield with a flathead screwdriver, then clean the glass and button thoroughly with rubbing alcohol. Apply a strong adhesive to the button, and press it firmly onto the windshield for at least one minute.
Finally, secure the mirror onto the button and allow the adhesive to dry for several hours before adjusting the mirror angle. Once the adhesive is fully cured, the mirror should be firmly in place. A loose rear view mirror can be a major inconvenience and a safety hazard while driving.
It’s essential to address this issue promptly to ensure optimal visibility while on the road. We will discuss useful tips on how to fix a loose rear view mirror effectively. By following these simple steps, you can regain stability and confidence in your mirror’s positioning, providing you with a safer driving experience. So, let’s delve into the process and get your rear view mirror securely fastened in no time.
Contents
- 1 Understanding The Problem
- 2 Gathering The Tools
- 3 Step 1: Assessing The Situation
- 4 Step 2: Removing The Mirror
- 5 Step 3: Inspecting And Cleaning
- 6 Step 4: Choosing The Right Adhesive
- 7 Step 5: Applying The Adhesive
- 8 Step 6: Reattaching The Mirror
- 9 Step 7: Allowing The Adhesive To Cure
- 10 Step 8: Checking The Stability
- 11 Frequently Asked Questions On How To Fix A Loose Rear View Mirror
- 12 Conclusion
Understanding The Problem
Rear view mirrors play a crucial role in ensuring our safety on the roads. However, over time, these mirrors may become loose, causing them to vibrate or shift while driving. Not only is this annoying, but it can also be a potential hazard.
In this section, we will explore the common reasons why a rear view mirror becomes loose and the dangers of driving with a loose mirror.
Common Reasons For A Loose Rear View Mirror
There are several factors that can contribute to a loose rear view mirror. Understanding these common causes can help you identify the underlying issue and find an appropriate solution. Here are a few reasons why your rear view mirror might be loose:
- Wear and tear: Over time, the adhesive that holds the mirror in place may weaken, leading to a loose connection. Daily exposure to sunlight, heat, and humidity can also cause the adhesive to deteriorate.
- Impact or collision: If your vehicle has been involved in an accident or experienced a significant impact, it is possible for the rear view mirror to become loose. The force of the impact can dislodge the mirror from its original position or damage the mounting hardware.
- Incorrect installation: Improper installation of the rear view mirror can result in a loose fit. If the mirror was not securely fastened or if the mounting hardware was not tightened adequately during installation, it can lead to a shaky or wobbly mirror.
Potential Dangers Of Driving With A Loose Mirror
Driving with a loose rear view mirror might seem like a minor inconvenience, but it can pose various risks to your safety on the road. Here are a few potential dangers associated with driving with a loose mirror:
- Reduced visibility: A loose rear view mirror can obstruct your line of sight by vibrating or shifting unpredictably. This can hinder your ability to see clearly behind you, increasing the risk of accidents or collisions.
- Distractions: A wobbly mirror can be an ongoing distraction while driving. Constant movement or rattling noises from the mirror can divert your attention away from the road and other essential driving tasks.
- Mirror detachment: In some cases, a loose mirror can detach completely from the windshield or fall down onto the dashboard. This sudden detachment can startle the driver and further compromise visibility.
- Delayed response: A loose mirror may not provide an accurate reflection of the road conditions behind you. This can lead to delayed reactions when changing lanes, merging, or making turns, potentially causing dangerous situations.
Understanding the common reasons for a loose rear view mirror and the potential dangers associated with driving in this condition is crucial. As we continue with this blog post, we will delve into the various methods and steps you can take to fix a loose rear view mirror and ensure safer driving experiences.
Stay tuned!
Gathering The Tools
Necessary Tools For Fixing A Loose Rear View Mirror
If you’ve been experiencing a wobbly or loose rear view mirror in your car, don’t worry – it’s a common issue that can be easily fixed. All you need are a few essential tools and a little bit of patience.
In this section, we’ll go over the necessary tools you’ll need to successfully fix your loose rear view mirror.
Here are the tools you’ll need:
- Screwdriver: A screwdriver with the appropriate head size is essential for removing screws that hold the mirror in place.
- Wrench: Depending on the type of mirror mount you have, you may need a wrench to loosen or tighten bolts.
- Cleaning supplies: It’s always a good idea to have some cleaning supplies on hand to give your mirror and its mounting area a thorough cleaning before proceeding with the fix. A mild cleaning solution and a soft cloth should do the trick.
- Adhesive: If the mirror is not securely attached to its mount, you might need an adhesive to reattach it. Look for an adhesive that is durable and specifically designed for automotive use.
Where To Find These Tools
Now that you know what tools you’ll need, let’s talk about where you can find them. Here are some common places where you can find the necessary tools for fixing a loose rear view mirror:
- Local hardware store: From screwdrivers to wrenches and adhesives, your local hardware store is likely to have all the tools you need. They usually have a dedicated automotive section where you can find the required items.
- Automotive supply store: These stores specialize in automotive products and accessories, so you’re likely to find the tools you need here. They often carry a wide range of options specifically for car maintenance and repairs.
- Online retailers: If you prefer the convenience of shopping from home, online retailers such as amazon offer a vast selection of automotive tools. You can easily browse and compare different brands and prices before making a purchase.
Remember to consider the quality and reliability of the tools you choose. Investing in high-quality tools might cost a bit more initially, but they will certainly last longer and serve you well in the long run.
Now that you know what tools you’ll need and where to find them, you’re ready to tackle the task of fixing your loose rear view mirror. In the next section, we’ll walk you through the step-by-step process of tightening the mirror securely in place.
So let’s get started!
Step 1: Assessing The Situation
Checking The Attachment Method Of The Mirror
When it comes to fixing a loose rear view mirror, the first step is to assess the situation and determine the best course of action. This will help you understand the attachment method of the mirror and identify any visible damage or wear.
Here are some key points to consider when checking the attachment method of the mirror:
- Start by examining how the mirror is attached to the windshield or the windshield mount. Look for any screws, clips, or adhesive that may be holding it in place.
- If there are screws, check to see if they are loose or missing. Use a screwdriver to tighten them if necessary. If any screws are missing, replace them with ones that are the same size and type.
- For mirrors that use clips, make sure they are securely attached and not broken. If the clips are damaged, you may need to replace them with new ones.
- In the case of adhesive attachment, inspect the adhesive pad or glue holding the mirror in place. Look for any signs of wear or detachment. If the adhesive is loose or worn out, you will need to remove the mirror and reapply fresh adhesive.
By carefully examining the attachment method of the mirror, you can determine the appropriate next steps for fixing the loose rear view mirror. In the following section, we will discuss how to identify any visible damage or wear. Stay tuned!
Identifying Any Visible Damage Or Wear
In order to successfully fix a loose rear view mirror, it is crucial to identify any visible damage or wear that may be contributing to the problem. By doing so, you will be able to address the underlying issues and ensure a long-lasting solution.
Consider the following points when looking for visible damage or wear on your rear view mirror:
- Inspect the mirror frame for any cracks, dents, or signs of breakage. If you notice any damage, it may be necessary to replace the entire mirror assembly.
- Pay close attention to the mirror glass itself. Look for scratches, chips or any other imperfections that may affect its clarity or visibility. If the damage is significant, replacing the mirror glass might be required.
- Examine the mirror mount or support bracket for any signs of bending, corrosion, or rust. If you notice any of these issues, you may need to replace the mount or bracket to ensure proper stability.
- Check the adjustment mechanism of the mirror. Ensure that it moves smoothly and securely locks into place. If the mechanism is faulty or worn out, it may need to be repaired or replaced.
By carefully assessing any visible damage or wear, you will have a clearer understanding of the issues affecting your loose rear view mirror. In the next steps, we will explain how to proceed with fixing the mirror based on our assessment.
So, let’s dive into it!
Step 2: Removing The Mirror
Safely Detaching The Mirror From The Windshield Or Windshield Mount
When it comes to fixing a loose rear view mirror, you’ll need to safely detach it from the windshield or windshield mount. Depending on the attachment method, there are different techniques you can use. Follow these steps to ensure a successful removal:
- Check for screws or clips: Start by examining the mirror for any visible screws or clips. Some mirrors are attached using screws, while others have clips that hold them in place. This will determine the method you should use for removal.
- Using a screwdriver or allen wrench: If your mirror is secured with screws, you’ll need a screwdriver or an allen wrench to loosen them. Carefully insert the appropriate tool into the screw heads and turn counterclockwise to loosen the screws. Be cautious not to apply excessive force, as it may damage the mirror or windshield.
- Pressing the release button or lever: In some cases, rear view mirrors are mounted onto a windshield mount that features a release button or lever. Pressing this button or manipulating the lever will disengage the mirror from the mount, allowing you to remove it easily. Refer to your vehicle’s manual for specific instructions on how to use the release mechanism.
- Releasing the mirror clips: For mirrors secured with clips, gently press or squeeze the clips to release their grip on the windshield or windshield mount. Use your fingers or a flathead screwdriver to carefully pry the clips apart and detach the mirror.
Remember, removing a rear view mirror requires caution and precision to prevent any damage. If you’re unsure about any step or encounter difficulties, consider seeking assistance from a professional.
Step 3: Inspecting And Cleaning
Now that you’ve removed the rear view mirror from your windshield, it’s time to examine the mirror bracket and windshield mount for any debris or adhesive residue. Follow these steps to ensure a thorough inspection and proper cleaning before reattaching the mirror securely.
Examining The Mirror Bracket And Windshield Mount For Any Debris Or Adhesive Residue:
- Carefully inspect the mirror bracket and windshield mount for any signs of dirt, dust, or debris that may be preventing a secure attachment.
- Look closely for any adhesive residue left behind from the previous attachment. Residue can create a weak bond and lead to a loose mirror.
- Ensure that both the mirror bracket and windshield mount are free of any obstructions that could hinder a secure fit.
Properly Cleaning The Surfaces For A Secure Reattachment:
- To clean the mirror bracket and windshield mount, start by using a soft cloth or sponge dampened with warm water.
- Gently wipe away any dirt, dust, or debris from both surfaces. Be thorough in your cleaning to ensure a secure bond between the bracket and mount.
- If there is stubborn adhesive residue on either surface, use a mild adhesive remover or rubbing alcohol. Apply a small amount to a cloth and gently rub the residue until it’s fully removed.
- Once both surfaces are clean and dry, apply a small amount of adhesive or mirror adhesive primer to the mirror bracket. This will ensure a strong bond when reattached to the windshield mount.
- Allow the adhesive or primer to dry according to the manufacturer’s instructions before proceeding with reattachment.
By examining the mirror bracket and windshield mount for any debris or adhesive residue, and properly cleaning the surfaces, you can ensure a secure reattachment of your rear view mirror.
Step 4: Choosing The Right Adhesive
When it comes to fixing a loose rear view mirror, choosing the right adhesive is crucial. It not only ensures the mirror stays securely in place but also determines how long the repair will last. Here are some key points to consider when selecting the adhesive:
- Durability: Look for an adhesive that provides strong and long-lasting adhesion. This will ensure the mirror stays in place even when subjected to vibrations and bumps while driving.
- Drying time: Consider the drying time of the adhesive. Opt for one that dries quickly, allowing you to reattach the mirror promptly and get back on the road.
- Compatibility: Check whether the adhesive is compatible with the materials of your rear view mirror and windshield. You don’t want to use an adhesive that could potentially damage the surfaces or cause discoloration.
Some suitable types of adhesives for rear view mirror repair include:
- Epoxy: Epoxy adhesives have excellent bonding strength and are highly durable. They work well on various materials and can withstand extreme temperatures.
- Polyurethane: Polyurethane adhesives offer strong adhesion and flexibility. They are resistant to vibrations and have good chemical resistance.
- Superglue: Superglue, or cyanoacrylate adhesive, is a quick-drying and strong-bonding option. It is suitable for small mirror repairs but may not be as durable as epoxy or polyurethane adhesives.
- Mirror adhesive: Specific mirror adhesives designed for rear view mirrors are also available. They offer a secure bond, ensuring that the mirror doesn’t come loose easily.
Remember to follow the manufacturer’s instructions when using any adhesive. Proper surface preparation and application techniques are essential for a successful repair.
By carefully selecting the right adhesive, you can ensure a sturdy and long-lasting fix for your loose rear view mirror.
Step 5: Applying The Adhesive
Applying A Small Amount Of Adhesive To The Mirror Bracket Or Windshield Mount
Once you have prepared the surface and positioned the rear view mirror securely, it’s time to apply the adhesive. This step is crucial in ensuring that the mirror stays in place, providing you with a clear view of the road ahead.
Here’s how you should go about it:
- Start by ensuring that you have chosen the right adhesive for the job. Look for a high-quality automotive adhesive that is specifically designed for bonding mirrors to windshields.
- Clean the mirror bracket and windshield mount thoroughly with rubbing alcohol to remove any dirt, debris, or residue. This will help the adhesive bond effectively.
- Apply a small amount of adhesive to the mirror bracket. Use a toothpick or a small brush to ensure precision and control. Remember, a little goes a long way, so avoid applying too much adhesive.
- Similarly, apply a small amount of adhesive to the windshield mount. Make sure the adhesive is evenly distributed and covers the entire surface.
- Attach the mirror bracket to the windshield mount, aligning them carefully. Apply gentle pressure to ensure a secure bond.
- Wipe away any excess adhesive with a clean cloth or cotton swab before it dries. This will give your installation a neat and professional finish.
- Allow the adhesive to cure for the recommended time mentioned on the product packaging. This will ensure a strong and durable bond.
- Avoid touching or disturbing the mirror during the curing process to prevent any accidental dislodging.
- Once the adhesive has fully cured, give the mirror a gentle tug to check its stability. If it feels solid and doesn’t move, congratulations! You have successfully fixed your loose rear view mirror.
- Finally, clean the mirror and windshield with glass cleaner to remove any fingerprints or smudges.
By following these simple steps and using the right adhesive, you can ensure that your rear view mirror stays securely in place, providing you with safe and unobstructed visibility while driving. Remember, properly maintaining your rear view mirror is essential for your safety on the road.
So don’t overlook this simple yet important maintenance task.
Step 6: Reattaching The Mirror
Aligning The Mirror With The Windshield Mount Or Windshield
Ensuring the rear view mirror is properly aligned and securely attached is crucial for your safety on the road. In this step, you’ll learn how to reattach the mirror to your windshield mount or windshield. Follow these simple steps to get the job done efficiently:
- Position the mirror: Start by holding the rear view mirror in the desired position, aligned with your line of sight. Make sure it’s at the correct height and distance for optimal visibility.
- Find the mount: Locate the metal mount on the windshield or the windshield mount already attached to the mirror. Align the mirror so that the metal mount and mounting bracket are facing each other.
- Attach the mirror: Carefully slide the mirror onto the mount, ensuring a snug fit. You may need to apply gentle pressure to snap the mirror into place.
- Test for stability: Once attached, give the mirror a light tug to ensure it is securely fastened. It should not move or wobble when properly fixed.
- Fine-tune the positioning: Adjust the mirror as needed to achieve the best possible view. Make sure it provides you with a clear rear view without obstructing your vision of the road ahead.
Remember, proper alignment and secure attachment of the mirror are essential for maintaining a clear view of what’s happening behind you while driving. Take the time to ensure it is correctly positioned to enhance your safety on the road.
Follow these steps and enjoy a well-secured rear view mirror that enhances your driving experience!
Step 7: Allowing The Adhesive To Cure
Once you have successfully reattached the rear view mirror using adhesive, it is crucial to allow ample time for the adhesive to cure fully. This will ensure that the mirror stays securely in place and does not become loose again.
Follow these guidelines to ensure a successful curing process:
- Following the recommended drying time: Pay close attention to the instructions provided with the adhesive product you used. Different adhesives may have varying drying times, so it is essential to follow the recommended drying time for the adhesive to completely cure. This will typically be mentioned on the product packaging or in the instructions.
- Avoiding any movements or touching during this period: It is essential to refrain from any movements or touching of the mirror during the curing period. Even slight disturbances can disrupt the adhesion process and compromise the strength of the bond. To avoid any mishaps, it is best to keep the mirror untouched until the adhesive has completely cured.
- Taking precautions to ensure proper curing: To ensure the adhesive cures effectively, consider the following precautions:
- Avoid extreme temperature changes: Exposure to extreme heat or cold can hinder the curing process. Therefore, it is advisable to keep your vehicle in a moderate temperature environment until the adhesive has completely cured.
- Prevent moisture contact: Moisture or humidity can also obstruct the curing process. Make sure to avoid any exposure to water or humidity during this time. It is recommended to park your car in a dry area and avoid rainy weather until the adhesive has fully cured.
- Maintaining stability: To avoid any unnecessary vibrations or disturbances, it is essential to drive cautiously and avoid rough roads during the curing process. This will help ensure that the mirror remains firmly in place and that the adhesive can cure undisturbed.
By following these guidelines and allowing the adhesive to cure properly, you can ensure that your rear view mirror stays securely attached without any risk of it becoming loose again. Remember to exercise patience and avoid any unnecessary movements or touching during the curing period to achieve optimal results.
Step 8: Checking The Stability
After reattaching your rear view mirror, it’s important to test its stability to ensure it won’t come loose again. Here’s how you can do that:
- Gently shake the mirror to see if it moves or rattles. This will give you an indication of its stability. If it feels loose or wobbly, you’ll need to make some adjustments.
- Check the adhesive or mounting bracket for any signs of wear or damage. If the adhesive has dried out or the bracket is broken, you may need to reapply adhesive or replace the bracket.
- Make any necessary adjustments to the mirror’s position. Sometimes, a loose mirror can be fixed simply by readjusting it to the correct angle. Use the mirror adjustment controls to fine-tune its position.
- If the mirror still feels loose, you may need to remove and reinstall it. Follow the earlier steps outlined in this guide to ensure a secure installation.
- Once you’ve made any necessary adjustments or reapplications, test the mirror’s stability again by shaking it gently. If it feels firm and doesn’t move, you’ve successfully fixed the loose rear view mirror.
Remember, a loose rear view mirror can be a safety hazard, so it’s important to address the issue promptly. By following these steps and ensuring the mirror is stable, you’ll have clear visibility while driving and peace of mind knowing your mirror is securely in place.
Now that you’ve successfully tested the stability of your rear view mirror, it’s time to move on to the next step: fine-tuning the mirror’s alignment. Stay tuned for step 9!
Frequently Asked Questions On How To Fix A Loose Rear View Mirror
How Do I Fix A Loose Rearview Mirror?
To fix a loose rearview mirror, first, remove the mirror by loosening the set screw at the base. Next, clean the windshield and the attachment area of the mirror. Apply a small amount of adhesive to the bracket or windshield attachment point and reattach the mirror.
Let it dry for the recommended time before repositioning the mirror.
What Causes A Rearview Mirror To Become Loose?
A loose rearview mirror is usually caused by vibrations or temperature changes that weaken the adhesive holding it in place. Over time, the adhesive can break down, causing the mirror to become loose and unstable. This can be particularly problematic if the mirror falls off while driving.
Can I Fix A Loose Rearview Mirror Myself?
Yes, you can fix a loose rearview mirror yourself by following a few simple steps. You will need adhesive, a screwdriver, and a clean cloth. By carefully removing the mirror, cleaning the attachment area, applying adhesive, and reattaching the mirror, you can fix the problem without the need for professional help.
How Long Does It Take For The Adhesive To Dry?
The drying time for adhesive used to fix a rearview mirror can vary. It is important to check the specific instructions provided with the adhesive you are using. In general, it is recommended to wait for at least 24 hours before repositioning the mirror to ensure that the adhesive has fully cured.
Can I Drive With A Loose Rearview Mirror?
Driving with a loose rearview mirror is not recommended as it can be dangerous. The mirror may vibrate, obstructing your view and making it difficult to see other vehicles. Additionally, if the mirror falls off while driving, it can cause distractions or even accidents.
It is best to fix the loose mirror before driving again.
How Much Will It Cost To Fix A Loose Rearview Mirror?
The cost to fix a loose rearview mirror can vary depending on whether you choose to do it yourself or hire a professional. If you choose to do it yourself, the cost will primarily be the price of adhesive, which is typically low.
Hiring a professional may cost more but can provide assurance of a properly fixed mirror.
Conclusion
To sum it up, fixing a loose rear view mirror doesn’t have to be a daunting task. By following these simple steps, you can easily secure your mirror and ensure a safe driving experience. As mentioned earlier, identifying the source of the looseness is crucial, whether it’s a loose screw or a worn-out adhesive.
Depending on the type of mirror, using epoxy or a mirror adhesive can provide a quick fix. It’s important to let the adhesive fully cure before adjusting the mirror. Regularly checking the tightness of the screws or adhesive can help prevent future issues.
Remember, safety should always be a top priority when it comes to your vehicle. With a little know-how and some patience, you can quickly and easily fix a loose rear view mirror, allowing you to keep your eyes on the road ahead.