
This article was updated in June 7, 2023 with new products and information by Mark S. Taylor
Drum brakes have been widely used in vehicles for many years, but disc brakes offer improved performance and reliability. If you’re considering upgrading your vehicle’s braking system, converting drum brakes to disc brakes can be a worthwhile modification. In this article, we will guide you through the process of changing drum brakes to disc brakes.
Contents
Understanding Drum Brakes and Disc Brakes
Drum brakes use brake shoes that press against the inner surface of a drum, while disc brakes use brake pads that squeeze against a rotating disc. Disc brakes provide better stopping power, improved heat dissipation, and easier maintenance compared to drum brakes.
Advantages of Converting Drum Brakes to Disc Brakes
Converting drum brakes to disc brakes offers several advantages, including:
- Enhanced Stopping Power: Disc brakes provide more stopping power, allowing for shorter braking distances and improved overall braking performance.
- Heat Dissipation: Disc brakes dissipate heat more efficiently than drum brakes, reducing the risk of brake fade during prolonged or heavy braking.
- Easier Maintenance: Disc brakes are generally easier to inspect, clean, and replace, making maintenance tasks simpler and more convenient.
- Improved Aesthetics: Disc brakes offer a sleek and modern appearance, enhancing the visual appeal of your vehicle.
Assessing the Conversion Feasibility
Before proceeding with the conversion, assess the feasibility of converting your vehicle’s drum brakes to disc brakes. Consider factors such as the compatibility of disc brake components with your vehicle’s suspension, wheel size, and available space.
Gathering the Necessary Parts and Tools
To convert drum brakes to disc brakes, you will need the following:
- Disc brake kit: Includes rotors, calipers, brake pads, brackets, and necessary hardware.
- Brake lines: These may require new brake lines or adapters to accommodate the disc brake setup.
- Master cylinder: Upgrading to a larger master cylinder may be necessary to ensure proper brake fluid pressure.
- Tools: Common tools include wrenches, sockets, pliers, and hydraulic jack and jack stands.
Ensure that you purchase parts that are compatible with your specific vehicle’s make, model, and year.
Read More: The Best Aluminum Floor Jacks: Lifting Heavy Loads with Ease
Preparing the Vehicle
Prepare your vehicle for the brake conversion by following these steps:
- Park the vehicle on a level surface and engage the parking brake.
- Loosen the lug nuts on the wheels but do not remove them yet.
- Lift the vehicle using a hydraulic jack and secure it with jack stands.
- Remove the wheels to gain access to the brake components.
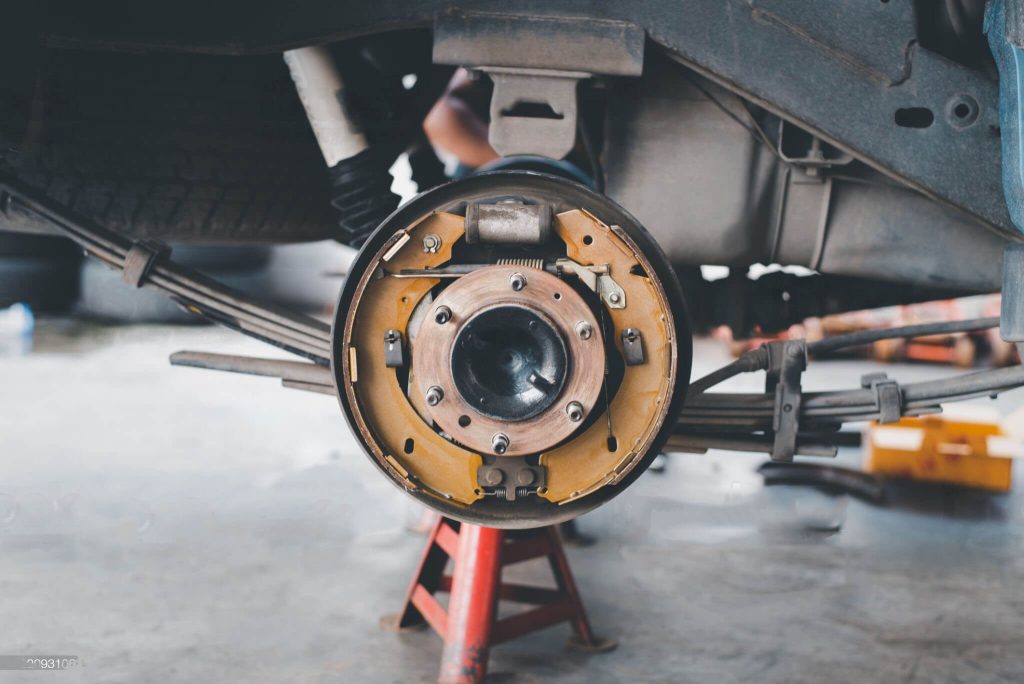
Removing the Drum Brakes
Follow these steps to remove the drum brakes:
- Locate the drum brake assembly.
- Remove the brake drum by sliding it off the wheel hub.
- Disconnect the brake line from the wheel cylinder or brake hose.
- Remove the brake shoes, springs, and hardware.
- Disconnect the parking brake linkage if applicable.
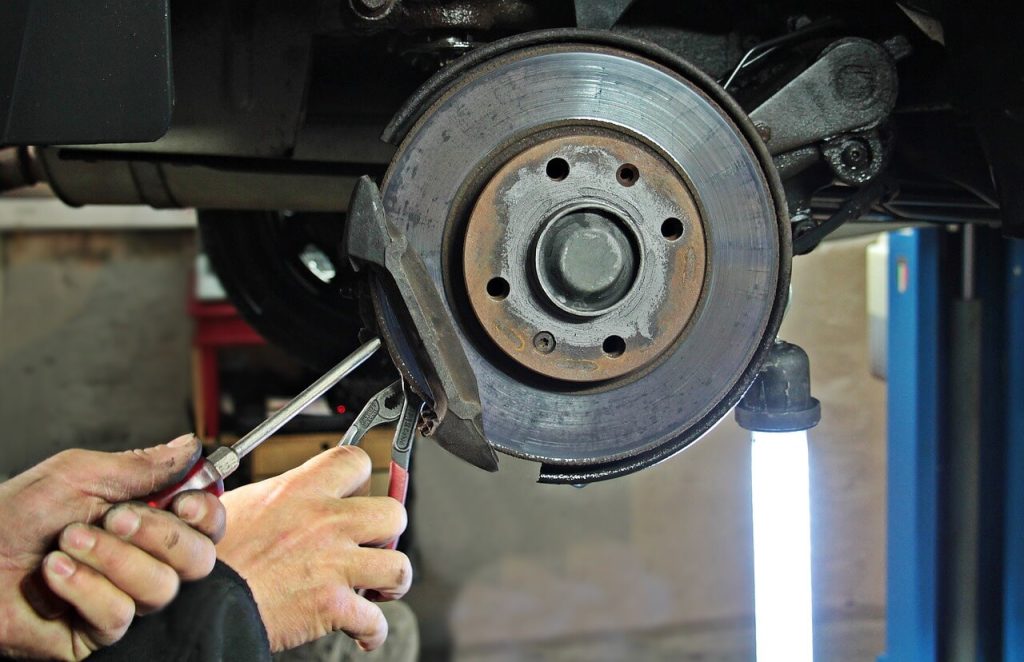
Installing the Disc Brakes
Proceed with the installation of the disc brakes using the following steps:
- Install the disc brake rotors onto the wheel hubs.
- Attach the disc brake calipers to the caliper brackets.
- Connect the brake lines to the calipers.
- Install the brake pads onto the calipers.
- Mount the caliper brackets onto the vehicle’s suspension or spindle.
- Ensure all components are securely tightened and aligned.
Bleeding the Brake System
After installing the disc brakes, it’s crucial to bleed the brake system to remove any air pockets. Follow these steps:
- Begin at the caliper furthest from the master cylinder.
- Attach a clear plastic hose to the brake bleeder valve.
- Place the other end of the hose into a container partially filled with brake fluid.
- Open the bleeder valve and have a helper press the brake pedal slowly.
- Close the bleeder valve once the brake pedal is fully depressed.
- Repeat the process until all air bubbles are eliminated from the system.
Testing and Fine-Tuning
After bleeding the brake system, conduct a thorough test to ensure proper functionality. Gradually apply the brakes to check for any abnormalities, such as excessive pedal travel or uneven braking. If necessary, fine-tune the brake components and system to achieve optimal performance.
Conclusion
Converting can significantly enhance your vehicle’s braking performance and reliability. By following the steps outlined in this article, gathering the necessary parts and tools, and paying attention to safety and precision, you can successfully complete the conversion. However, if you’re unsure or uncomfortable performing the conversion yourself, it’s recommended to seek professional assistance.
FAQs
Q: Can I convert any vehicle?
A: While disc brake conversion kits are available for many vehicle models, the feasibility depends on factors such as the vehicle’s suspension, wheel size, and available space. It’s advisable to research and ensure compatibility before attempting the conversion.
Q: How long does it take to convert?
A: The duration of the conversion process depends on various factors, including your experience, the complexity of the conversion, and the tools available. It can range from several hours to a full day.
Q: Do I need to upgrade the master cylinder when converting to disc brakes?
A: In some cases, upgrading to a larger master cylinder may be necessary to ensure sufficient brake fluid pressure. Consult the disc brake kit manufacturer or a professional for recommendations.
Q: Can I perform a disc brake conversion myself, or should I seek professional help?
A: Converting drum brakes to disc brakes requires a certain level of mechanical knowledge and experience. If you’re not confident in your abilities, it’s best to consult a professional mechanic who specializes in brake conversions.
Q: Are there any legal considerations when converting?
A: Brake system modifications may have legal implications depending on your location. Ensure that the conversion complies with local regulations and safety standards.