
This article was updated in November 1, 2023 with new products and information by Mark S. Taylor
To remove clear coat from a car, use sandpaper or a chemical remover.

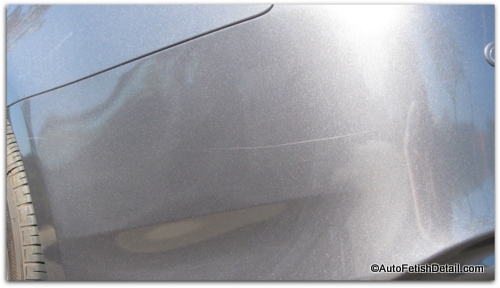
Credit: www.fortador-usa.com
Contents
- 1 Step 1: Prepare The Car’S Surface
- 2 Step 2: Choose The Right Clear Coat Removal Method
- 3 Step 3: Implementing The Chosen Method
- 4 Step 4: Buffing And Polishing
- 5 Frequently Asked Questions On How To Remove Clear Coat From Car
- 5.1 How Can I Remove Clear Coat From My Car Without Damaging The Paint?
- 5.2 Can I Remove Clear Coat From My Car By Hand?
- 5.3 Is It Possible To Remove Clear Coat From My Car Using Household Items?
- 5.4 Should I Use A Power Buffer To Remove Clear Coat From My Car?
- 5.5 Will Removing The Clear Coat From My Car Affect The Resale Value?
- 6 Conclusion
Step 1: Prepare The Car’S Surface
Washing And Drying The Car
Before removing the clear coat from your car, it’s important to start with a clean and dry surface. This will ensure that you achieve the best results possible. Here are the key points to follow when washing and drying your car:
- Start by using a car wash soap that is specifically formulated for automotive use. Avoid using household cleaners, as they can be too harsh and cause damage to the paint.
- Fill a bucket with water and add the car wash soap according to the instructions on the bottle. Use a wash mitt or sponge to gently scrub the entire surface of the car, working from the top down.
- Rinse the car thoroughly with a hose, making sure to remove all soap residue.
- After washing, it’s important to dry the car to prevent water spots. You can use a microfiber towel or a chamois cloth to do this.
- Start by drying the windows and then move on to the body of the car. Make sure to dry all surfaces, including the door jambs and wheels.
- To prevent scratching, gently blot the surface with the towel rather than rubbing it back and forth.
- Pay special attention to any areas that have a clear coat, as these are the areas that you will be working on next.
Masking Off The Affected Area
Masking off the affected area is an important step in the clear coat removal process. This will help protect the surrounding areas from accidental damage and ensure that you only remove the clear coat from the specific area that needs attention.
Here’s how to properly mask off the affected area:
- Start by gathering the necessary supplies, including painter’s tape and a plastic sheet or drop cloth.
- Use the painter’s tape to carefully outline the affected area. Make sure to leave a small margin around the area to ensure that no paint or clear coat is removed outside of the intended area.
- Once the area is taped off, cover the surrounding surfaces with a plastic sheet or drop cloth. This will protect them from any overspray or debris that may occur during the clear coat removal process.
- Make sure that the plastic sheet or drop cloth is secure and covers the entire area, leaving no gaps or openings that could allow debris to get through.
- Double-check that the tape is securely adhered to the car and that the plastic sheet or drop cloth is properly positioned before proceeding with the next steps.
By following these steps to wash and dry your car and properly mask off the affected area, you’ll be well-prepared to move on to the next step of removing the clear coat.
Step 2: Choose The Right Clear Coat Removal Method
When it comes to removing clear coat from your car, choosing the right method is crucial. Here are two effective methods you can consider:
Sanding The Clear Coat:
- Start by cleaning the area you want to sand, removing any dirt or debris.
- Use 1000-grit sandpaper and begin sanding in a circular motion, applying gentle pressure.
- Gradually switch to higher grit sandpaper (1500, 2000, and 3000) for a smoother finish.
- Keep the sandpaper wet while sanding to prevent excessive heat and damage to the paint.
- Rinse the area with water and inspect for any remaining clear coat.
- Repeat the sanding process if necessary, until the desired result is achieved.
Using Chemical Paint Strippers:
- Before using any chemical paint stripper, make sure to read and follow the instructions carefully.
- Park your car in a well-ventilated area to avoid inhaling fumes.
- Apply the chemical stripper to the clear coat, using a brush or sponge.
- Let the stripper sit for the recommended time, allowing it to break down the clear coat.
- Use a scraper or plastic spatula to gently scrape off the softened clear coat.
- Rinse the area with water and a clean cloth to remove any residue.
- Repeat the process if needed, until the clear coat is completely removed.
Remember, each method has its pros and cons. Sanding provides more control but requires manual labor, while chemical paint strippers offer convenience but may pose health risks if not used properly. Choose the method that suits your preferences and needs.
Removing clear coat from your car may seem like a daunting task, but with the right method and patience, you can achieve a clean surface ready for a fresh coat of paint.
Step 3: Implementing The Chosen Method
Now that you have chosen the method you want to use to remove the clear coat from your car, it’s time to put that plan into action. Whether you’re opting for proper sanding techniques or applying chemical paint strippers, it’s important to follow the right steps for a successful outcome.
Proper Sanding Techniques
If you decide to tackle the clear coat removal by using sanding techniques, here are the key points to keep in mind:
- Begin by thoroughly cleaning and drying the surface of your car. Removing any dirt or debris will ensure a smooth sanding process.
- Use high-grit sandpaper, such as 1000 to 2000 grit, to gradually remove the clear coat. Start with a coarser grit and gradually move to a finer grit for a smoother finish.
- Apply even pressure while sanding in a back-and-forth motion. Be careful not to apply too much pressure, as this can damage the underlying layers of paint.
- Regularly check your progress by wiping away the sanded area with a clean cloth. This will help you determine if you’ve removed enough clear coat.
- Once you’re satisfied with the results, thoroughly wash and dry the car to remove any residue from the sanding process.
- To achieve a polished finish, use a compound polish and a buffing pad to restore the shine to the paint surface.
Remember, proper sanding techniques require patience and attention to detail. Take your time and ensure you’re following the recommended steps for the best outcome.
Applying Chemical Paint Strippers
If you prefer to use chemical paint strippers to remove the clear coat from your car, here are the key points to consider:
- Start by wearing appropriate safety gear, such as gloves and goggles, to protect yourself from the chemicals.
- Choose a well-ventilated area to work in, as chemical paint strippers can emit strong fumes.
- Apply the chemical paint stripper evenly onto the clear coat using a brush or spray bottle, following the manufacturer’s instructions.
- Allow the stripper to sit on the surface for the recommended amount of time. This will allow it to break down the clear coat.
- Using a plastic scraper, gently remove the softened clear coat. Be careful not to scratch or damage the underlying layers of paint.
- Wipe away any remaining residue with a clean cloth and wash the car thoroughly to remove all traces of the chemical paint stripper.
When using chemical paint strippers, it’s important to exercise caution and strictly follow the instructions provided by the manufacturer. Always take the necessary safety precautions to protect yourself and your car.
By implementing the method of your choice, whether it’s proper sanding techniques or the application of chemical paint strippers, you’ll be well on your way to successfully removing the clear coat from your car.
Step 4: Buffing And Polishing
Restoring the car’s shine:
Once the clear coat has been removed, the next step is to restore the shine of your car’s paintwork. Buffing and polishing are essential processes to achieve a glossy finish. Here’s how you can do it:
- Begin by thoroughly washing your car to remove any debris or dirt that may have accumulated during the clear coat removal process.
- Dry the car using a microfiber cloth to avoid scratching the paintwork.
- Apply a small amount of compound or polish onto a foam or microfiber pad.
- Use the pad to gently buff the surface of the car in circular motions. Start with a light pressure and gradually increase if necessary.
- Pay extra attention to areas with scratches or imperfections, as buffing can help to reduce their appearance.
- Continue buffing the entire car until you achieve a smooth and glossy finish.
- Once you’re satisfied with the results, wipe off any compound residue with a clean cloth.
Applying a new clear coat:
After buffing and polishing, it’s recommended to apply a new clear coat to protect the paintwork and maintain its shine. Follow these steps:
Choose a high-quality clear coat that matches your car’s paint color.
Spray the clear coat evenly over the car, following the manufacturer’s instructions.
Apply multiple thin coats rather than a single heavy coat to prevent runs and drips.
Allow each coat to dry before applying the next one.
Once the final coat is applied, let the clear coat cure according to the manufacturer’s recommendations.
After the clear coat has fully cured, gently wash and wax your car to further enhance its appearance and provide additional protection.
By following these steps, you can successfully remove the clear coat from your car and restore its shine. Buffing and polishing will help eliminate imperfections, while applying a new clear coat will safeguard the paintwork for years to come. Remember to take your time and follow the instructions carefully to achieve the best results.
Frequently Asked Questions On How To Remove Clear Coat From Car
How Can I Remove Clear Coat From My Car Without Damaging The Paint?
To remove clear coat from your car without damaging the paint, start by washing the car and taping off the surrounding areas. Use sandpaper or a clear coat remover to gently scrub away the clear coat. Keep the surface wet and work in small sections.
Rinse and repeat until the clear coat is completely removed.
Can I Remove Clear Coat From My Car By Hand?
Yes, you can remove clear coat from your car by hand. Start by washing the car and taping off the surrounding areas. Use a clear coat remover and a clean, soft cloth to gently scrub away the clear coat. Work in small sections and apply even pressure.
Rinse and repeat until the clear coat is gone.
Is It Possible To Remove Clear Coat From My Car Using Household Items?
Yes, it is possible to remove clear coat from your car using household items. You can try using baking soda and water paste, toothpaste, or nail polish remover. Apply the chosen substance to a soft cloth, then gently scrub the clear coat.
Rinse and repeat until the clear coat is completely removed.
Should I Use A Power Buffer To Remove Clear Coat From My Car?
Using a power buffer to remove clear coat from your car is not recommended for beginners. It requires skill and experience to avoid damaging the paint. If you’re confident in your abilities, use a low-speed buffer with a clear coat remover, working in small sections.
Otherwise, it’s best to stick to manual methods for clear coat removal.
Will Removing The Clear Coat From My Car Affect The Resale Value?
Removing the clear coat from your car can potentially affect the resale value. If the clear coat is damaged or peeling, it’s better to remove it and give the car a fresh coat of paint. However, if the clear coat is in good condition, removing it may decrease the resale value as it offers protection against uv rays and other elements.
Conclusion
Removing clear coat from a car is no easy task, but with the right knowledge and tools, it can be done. By using sandpaper, automotive paint thinner, and a lot of patience, you can effectively strip away the damaged clear coat and restore your car’s appearance.
Remember to work in small sections, applying even pressure and avoiding excessive force that may damage the underlying paint. Taking regular breaks and wearing protective gear is also essential for both your safety and the quality of the work. Once the clear coat is removed, you can then apply a new layer of clear coat or opt for a professional paint job for a flawless finish.
With the right techniques and proper care, you can have your car looking like new again. So why wait? Get started on giving your car a fresh look today!