
This article was updated in July 1, 2026 with new products and information by Mark S. Taylor
Pulling window tint is a one-afternoon job if you do it right. Do it wrong — specifically, drag a metal razor blade across your rear window — and you’re looking at a defroster that doesn’t work anymore and a rear glass replacement bill between $200 and $600. The method matters, and it’s not the same for every window on your car.
This is the full procedure, differentiated by glass type, with the adhesive removal phase covered in the same depth as the film removal phase — because that’s the step most DIY guides treat as an afterthought.
Contents
- 1 Before You Start — The One Mistake That Costs $400
- 2 What Type of Glass Are You Working On?
- 3 What You’ll Need — Tools and Products by Glass Type
- 4 How To Remove Window Tint From Side Door Glass — Step by Step
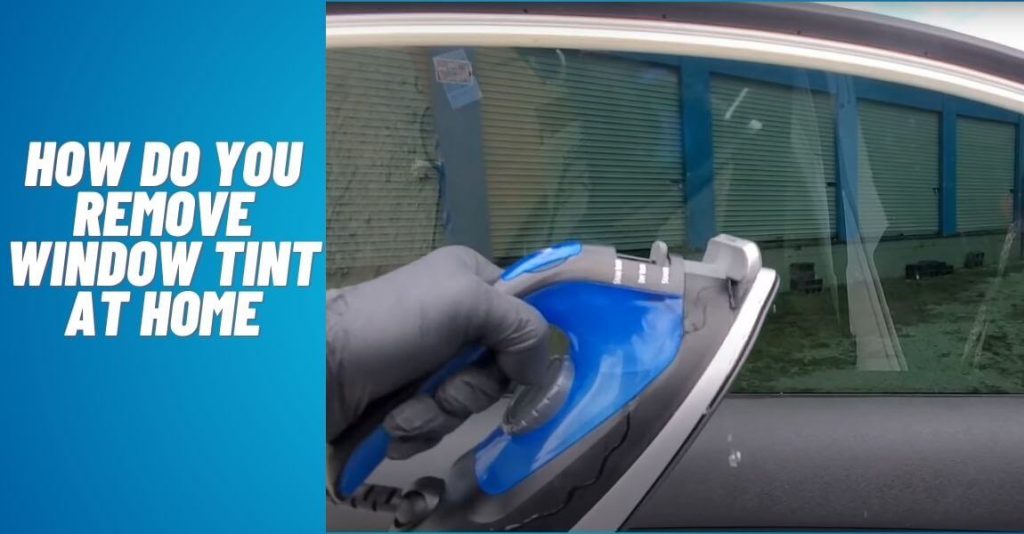
- 4.1 Step 1 — Heat the Glass (3–5 Minutes Per Window)
- 4.2 Step 2 — Start the Peel at a Corner
- 4.3 Step 3 — Keep Heat On the Film Ahead of the Peel
- 4.4 Step 4 — Handle the Tear
- 4.5 Step 5 — Remove Adhesive Residue (Side Glass)
- 4.6 Step 6 — Metal Razor for Stubborn Adhesive Patches
- 4.7 Step 7 — Final IPA Wipe
- 5 How To Remove Window Tint From Rear Glass With Defroster Grid — Step by Step
- 6 How To Check If You Damaged the Defroster Grid
- 7 How To Remove Window Tint Adhesive Residue — The Phase Most Guides Skip
- 8 The Ammonia and Trash Bag Method — What Nobody Tells You
- 9 How Much Does It Cost To Have Window Tint Removed Professionally
- 10 How To Prevent Tint Adhesive Problems in the Future
- 11 FAQs About How To Remove Window Tint
- 12 The Expert Verdict
Before You Start — The One Mistake That Costs $400
The rear window defroster grid is not embedded in the glass. It’s a silver-epoxy conductive ink printed directly onto the glass surface — those thin horizontal lines you see from inside the car. They sit on top of the glass, not inside it. A metal razor blade dragged across one of those lines removes it permanently.
A single broken defroster trace is repairable with a $12–$25 conductive epoxy kit from Permatex. Multiple broken traces — or a scraped bus bar — typically means rear glass replacement. On common domestic vehicles, rear glass runs $200–$400 at an independent shop. On late-model trucks and SUVs with heated glass, integrated antennas, or rain sensors, that number climbs to $400–$600 installed.
The fix costs less than $25. The mistake costs 20 times that. Keep metal blades away from any glass with defroster lines.
What Type of Glass Are You Working On?
Before you grab any tool, identify every window you’re removing tint from.
Side door glass (front and rear doors): No defroster grid. Smooth, flat or slightly curved glass with no printed elements on the surface. Metal razor blades are safe here. Heat guns are safe here. Ammonia-based solvents won’t contact interior rubber trim on this glass if you’re careful.
Rear windshield: Has the defroster grid — the horizontal lines. May also have a radio antenna integrated into the grid pattern on some vehicles. Metal blades are off the table. Ammonia is off the table. Plastic blades and isopropyl alcohol only.
Rear quarter glass (small fixed windows behind the rear door): Check for defroster lines. Some vehicles run defroster traces into the quarter glass; most don’t. Look before you pick your tool.
Front windshield: Tint is rarely applied here due to FMVSS No. 205 visible light transmission requirements — most states prohibit any film on the front windshield other than a narrow sun strip at the top. If you do have film on the front glass, treat it like side glass — no defroster grid, metal tools are safe.
The quick visual: from inside the car, put a flashlight behind the glass at an angle. If you see horizontal lines, you’re working on defroster glass. No lines — standard glass procedures apply.

What You’ll Need — Tools and Products by Glass Type
For Side Door Glass:
| Tool / Product | Purpose | Approximate Cost |
|---|---|---|
| Heat gun or clothes steamer | Softens adhesive for clean film peel | $25–$60 (steamer); $30–$80 (heat gun) |
| Metal razor blade scraper | Removes adhesive residue after film removal | $8–$15 |
| Isopropyl alcohol 91% | Final adhesive cleanup and glass prep | $4–$8 per quart |
| Goo Gone Automotive or 3M Adhesive Remover | Heavy adhesive residue from old tint | $8–$15 |
| Microfiber cloths (lint-free) | Solvent application and wipe-down | $8–$15 for a pack |
| Plastic drop cloth or old towels | Door panel and seat protection from drips | Already owned |
For Rear Glass With Defroster Grid:
| Tool / Product | Purpose | Approximate Cost |
|---|---|---|
| Clothes steamer | Preferred over heat gun — moist heat penetrates adhesive layer more effectively | $30–$60 |
| Plastic razor blades (50-count pack) | Safe on defroster traces; use fresh blades frequently | $6–$12 |
| Isopropyl alcohol 91% | Adhesive removal — safe on conductive traces | $4–$8 per quart |
| Goo Gone Automotive | Extended dwell for old crystallized adhesive | $8–$12 |
| Digital multimeter | Post-removal defroster grid integrity test | Already owned or $20–$40 |
| Permatex Rear Window Defogger Repair Kit | Emergency repair if traces are damaged | $12–$25 |
What not to use on any window:
- Ammonia-based glass cleaners (Windex) — degrades door rubber seals and attacks vinyl trim
- Acetone — dissolves adhesive but also attacks any tinted plastic, dashboard surface, or trim panel within drip range
- Steel wool — microscopic glass abrasion that causes new tint to bubble within weeks

How To Remove Window Tint From Side Door Glass — Step by Step
Roll the window down two inches before you start. That exposes the top edge of the tint film above the weatherstrip seal — the edge you’ll grab to begin the peel. Without that gap, the film tears flush with the rubber seal and leaves you picking at a millimeter-wide edge with your fingernail.
Step 1 — Heat the Glass (3–5 Minutes Per Window)
Hold a heat gun 4 to 6 inches from the glass surface and move it in slow overlapping passes. Target temperature at the glass surface is 150°F to 180°F — hot enough that touching the glass for more than two seconds is uncomfortable, but not hot enough that water beads and immediately evaporates. If using a steamer, hold the nozzle 2 to 3 inches from the glass and move it continuously. Do not hold it stationary — concentrated steam above 212°F on one spot risks thermal stress cracking on older glass with existing micro-fractures.
Step 2 — Start the Peel at a Corner
With the window dropped slightly, find the top corner of the film at the exposed edge above the weatherstrip. Use a fingernail or a plastic pry tool to lift the corner. Once you have a 1-inch flap, grip it with both hands. Pull the film back at a low angle — 20 to 30 degrees from the glass surface, not straight out perpendicular to the glass. Low-angle peeling keeps the adhesive bonded to the film as it releases. Perpendicular pulling shears the film from the adhesive and leaves the adhesive stuck to the glass in a solid sheet.
Step 3 — Keep Heat On the Film Ahead of the Peel
Don’t heat the entire window at once and then peel. The adhesive re-sets within 60 to 90 seconds of the heat source moving away. Keep the heat gun or steamer working 6 to 8 inches ahead of where you’re peeling — you’re softening the adhesive immediately before it comes off the glass. Work in sections across the window rather than racing to the bottom.
Step 4 — Handle the Tear
The film will tear. Every DIYer’s film tears. When it does, re-heat the torn edge, re-lift a corner, and continue. Fighting a cold tear by pulling harder shreds the film into thumbnail-sized fragments that each need individual re-heating to remove. Patience at the tear costs 2 minutes. Fighting a shredded film costs 45 minutes.
Step 5 — Remove Adhesive Residue (Side Glass)
Once the film is off, the glass will have a visible haze — the adhesive layer that stayed behind. On tint under 3 years old, spray 91% isopropyl alcohol on a microfiber cloth and wipe in straight horizontal passes. The residue comes off in one or two passes. On tint that’s been on 5 or more years, the adhesive has partially polymerized against the glass. Apply Goo Gone Automotive or 3M Adhesive Remover directly to the glass, cover with a small square of plastic wrap to prevent evaporation, and let it dwell 15 to 30 minutes. Remove the plastic wrap, wipe with a clean microfiber, and follow up with a 91% IPA wipe to remove solvent residue. The glass should be optically clear with no haze before you call it done.
Step 6 — Metal Razor for Stubborn Adhesive Patches
For localized patches of adhesive that the solvent didn’t fully release — common at the dot matrix border around the glass perimeter — hold a metal razor blade at 30 degrees to the glass surface and scrape with light, consistent pressure in one direction. Do not saw back and forth. Single-direction strokes at 30 degrees cut under the adhesive without scoring the glass surface. Wipe the loosened adhesive off the blade between strokes.
Step 7 — Final IPA Wipe
Wipe the entire glass surface with 91% IPA on a clean microfiber. Hold the cloth up to light at an angle and look for any remaining haze, streaks, or adhesive patches. The glass needs to be completely clear before re-tint or inspection. Any residue left behind creates an air pocket under new film that shows up as a bubble within the first 30 days.
How To Remove Window Tint From Rear Glass With Defroster Grid — Step by Step
The rear glass procedure is slower than side glass. Accept that before you start. Rushing this window is how defroster traces get destroyed.
Step 1 — Steam the Glass (Do Not Use a Heat Gun on Rear Glass)
A clothes steamer is the correct tool here. A heat gun delivers dry heat that can create localized hot spots above 230°F — the temperature at which the solder joints connecting the defroster wiring harness to the bus bars at the edges of the glass can begin to reflow. A steamer delivers moist heat that stays below 212°F at the glass surface and distributes more evenly across the defroster grid. Steam the entire rear glass in overlapping horizontal passes for 3 to 5 minutes before attempting the peel.
Step 2 — Peel at Low Angle, Working Horizontally
Start at a top corner. Lift the film edge and peel horizontally across the window — left to right or right to left — rather than pulling downward from top to bottom. Horizontal peeling keeps your peel direction parallel to the defroster traces. Pulling downward means the film tension runs perpendicular to the traces — increasing the risk that the film catches on a trace edge and lifts it. Keep the peel angle low: 15 to 25 degrees from the glass surface.
Step 3 — Re-Steam Frequently
The rear glass loses heat faster than side glass because it’s larger and you can’t keep the steamer on the peel zone as precisely. Re-steam every 60 to 90 seconds. If the film starts resisting — requiring hard pulling to advance the peel — it’s cooled off and the adhesive has re-set. Stop pulling. Re-steam. Resume. Hard pulling on a cold rear window film is the primary cause of defroster trace damage — the film sticks to the trace and pulls it off the glass when the adhesive hasn’t fully released.
Step 4 — Plastic Blades Only for Adhesive Residue
Once the film is off, use plastic razor blades on the adhesive residue. Hold the plastic blade at 30 degrees — same angle as a metal blade on side glass. Stroke horizontally, parallel to the defroster lines. Never stroke perpendicular to the traces. A plastic blade generates enough force to abrade a defroster trace if you press hard and run across it repeatedly — horizontal strokes between the traces eliminate that risk entirely. Change plastic blades frequently; a dull plastic blade requires more pressure, which increases the abrasion risk.
Step 5 — IPA Dwell for Adhesive Residue on Rear Glass
Spray 91% isopropyl alcohol directly on the rear glass adhesive residue. Do not use Goo Gone near the defroster bus bars at the glass edges — some solvent-based removers attack the epoxy bond between the bus bar and the glass. IPA is safe on all defroster components. For old crystallized adhesive, saturate a microfiber and lay it against the glass for 10 minutes before wiping. Multiple IPA passes are safer than switching to a stronger solvent near defroster components.
Step 6 — Final Horizontal Wipe Only
Wipe the rear glass with IPA on a microfiber in horizontal strokes only — parallel to the defroster traces. Circular scrubbing motions on rear glass apply diagonal force across the traces on every rotation. It takes more passes, but straight horizontal strokes are the only safe wipe direction on this surface.
How To Check If You Damaged the Defroster Grid
Run this test before you put the car away. It takes 5 minutes and tells you immediately whether a trace was damaged during removal.
Visual Check First:
Turn the defroster on and wait 3 minutes. Look at the rear glass from outside in cold weather — frost or condensation should clear uniformly from left to right across every horizontal band. A persistent horizontal strip of fog or frost that doesn’t clear indicates a broken trace in that band.
Voltage Test for Exact Break Location:
Set a digital multimeter to DC voltage. With the defroster on and the engine running (to ensure full battery voltage), touch the negative probe to a known ground — a bare metal bolt on the rear hatch or body. Touch the positive probe to each horizontal defroster trace at the far left edge of the glass (the feed bus bar side). A healthy trace reads full battery voltage (12.5–14.2V) at the left edge. Now slide the positive probe along that same trace toward the center of the glass. Voltage should drop smoothly to approximately 6 to 7V at the midpoint. If voltage drops abruptly to 0V at any point along the trace, the break is at that exact location. Mark it with a piece of masking tape on the outside of the glass.
Repair a Broken Trace:
Clean the break location with 91% IPA. Open a Permatex Rear Window Defogger Repair Kit. Apply the conductive silver epoxy paste across the break using the included applicator, overlapping the existing trace by at least 1/4 inch on each side. Allow to cure for 24 hours before testing. A properly applied repair restores full electrical conductivity through the trace — confirmed by re-running the voltage test and seeing the expected 6V reading at the midpoint.
How To Remove Window Tint Adhesive Residue — The Phase Most Guides Skip
The film is off the glass. The job is not done. What’s left on the glass is a pressure-sensitive acrylic adhesive layer — and depending on how long that tint has been on the car, that adhesive is either easy to wipe off or it’s chemically bonded to the glass surface at a level that requires a dedicated removal process.
Adhesive under 3 years old:
The acrylic hasn’t fully cured against the glass. One pass with a microfiber cloth saturated in 91% isopropyl alcohol clears it in most cases. Wipe in straight horizontal passes, not circles. Fold the cloth to a clean face after each pass — you’re lifting adhesive off the glass, not spreading it around. Two passes of IPA on fresh adhesive leaves the glass optically clear.
Adhesive from tint installed 3 to 5 years ago:
Partial polymerization. IPA alone may not fully clear it in one application. Apply IPA, let it sit for 5 minutes, wipe. Follow with a second IPA application. If haze remains after two passes, move to Goo Gone Automotive or 3M Adhesive Remover — apply directly, cover with plastic wrap for 15 minutes of dwell time, wipe with a clean microfiber, then finish with a final IPA wipe to strip the solvent residue.
Adhesive from tint installed 5 or more years ago:
This is the hard case. Acrylic adhesive that has been pressed against automotive glass for five or more years under UV exposure and temperature cycling has cross-linked at a molecular level against the silica surface of the glass. It won’t wipe off. It won’t respond to IPA alone. The procedure is:
- Apply Goo Gone Automotive or 3M Adhesive Remover generously to the affected area.
- Cover immediately with plastic wrap — the goal is to prevent the solvent from evaporating before it penetrates the adhesive layer.
- Let it dwell for 20 to 30 minutes minimum.
- Remove the plastic wrap and wipe with a clean microfiber in horizontal strokes.
- Apply a second round of solvent if adhesive remains — old adhesive often requires two full dwell cycles.
- Final wipe with 91% IPA to remove all solvent residue from the glass.
- Hold a clean microfiber up to the glass at an angle under strong light and inspect for any remaining haze before proceeding to re-tint or inspection.
The dot matrix border:
The black ceramic frit printed around the glass perimeter bonds adhesive more aggressively than clear glass because the frit surface is microscopically rough. Old adhesive in the dot matrix band often requires a plastic razor blade pass even after solvent dwell, because the adhesive fills the surface texture and the solvent can’t fully undercut it. Use a plastic blade on rear glass dot matrix; metal on side glass dot matrix. Short strokes, light pressure.
What not to use:
Acetone dissolves acrylic adhesive quickly — but it also dissolves tinted plastics and attacks vinyl, leather, and soft-touch dashboard surfaces on contact. One drip of acetone off the rear window onto the rear parcel shelf can leave a permanent dissolved patch in the vinyl. Stick to IPA and purpose-formulated automotive adhesive removers that are tested for compatibility with interior materials.
The Ammonia and Trash Bag Method — What Nobody Tells You
This method is all over YouTube. Black trash bags on the outside of the glass, ammonia sprayed on the inside, park in direct sunlight. It works — under specific conditions. Understanding why tells you exactly when to use it and when to skip it.
Why ammonia works on tint adhesive:
Ammonia (NH₃ in water solution) is an alkaline solvent that attacks ester bonds in acrylic polymer chains. Window tint adhesive is a pressure-sensitive acrylic — the same chemistry. Ammonia softens the adhesive by partially hydrolyzing those bonds, making the film easier to peel. The black trash bag absorbs solar radiation and converts it to heat, raising the glass surface temperature to the 150°F+ threshold needed for the adhesive to release.
Where it fails:
On a cloudy day, in a garage, or in winter — the solar heating element is gone. The ammonia is doing chemical work at ambient temperature. That’s not enough heat to fully release the adhesive, and you end up with a chemically softened film that still tears into fragments when you pull it. The method is entirely weather-dependent.
What it damages:
Ammonia degrades natural rubber door seals over repeated contact. If you spray ammonia on the inside of a door glass and it drips into the door weatherstrip, the rubber begins to stiffen and crack over a period of months — leading to water leaks at the door seal. Ammonia sprayed near the rear parcel shelf drips onto the fabric or vinyl. And if you use ammonia on a rear window with a defroster grid, the alkaline solution attacks the epoxy binder that holds the silver-epoxy traces to the glass over time — not immediately, but cumulative exposure degrades the trace adhesion. Use it once on rear glass and nothing obvious happens. Use it repeatedly as a cleaning method and you’ll see defroster trace lifting within two to three years.
When it’s the right call:
Full sun, ambient temperature above 75°F, side door glass only, tint that’s less than 5 years old. Under those conditions it’s a legitimate low-tool method. Outside those conditions, a $30 clothes steamer does the job faster and without the chemical risks.
How Much Does It Cost To Have Window Tint Removed Professionally
If the DIY route isn’t for you — or if you got partway through and made a mess — here’s what professional removal actually costs at a US independent tint shop in 2026.
| Service | Cost Range | Notes |
|---|---|---|
| Single window removal | $20–$45 per window | Front doors, rear doors, quarter glass |
| Full vehicle removal (all windows) | $75–$200 | 5-window sedan; larger vehicles toward top of range |
| Rear glass only | $35–$75 | Higher due to defroster grid care requirement |
| Defroster grid repair (if damaged) | $45–$150 | Depends on number of broken traces |
| Rear glass replacement (severe damage) | $200–$600 installed | Vehicle-dependent |
| Adhesive prep fee (DIY removal, incomplete) | $50–$100 | Charged on top of re-tint price if adhesive residue remains |
The hidden cost most people discover too late:
If you bring a car to a tint shop for a new install after a DIY removal that left adhesive on the glass, the shop will charge a prep fee before they touch the new film. That fee runs $50 to $100 per vehicle depending on how much residue is left. A complete DIY removal with clean glass costs nothing in prep fees. An incomplete DIY removal costs you the prep fee plus the DIY time you already spent — you paid twice for the same step.
When professional removal is worth the price:
Late-model vehicles where the rear glass is integrated with antenna systems, heated wiper park zones, or rain sensor cameras. Any glass where the tint has been on for more than 7 years and the adhesive is likely to be heavily crystallized. Vehicles with factory privacy glass where film was layered on top — that stack is harder to peel cleanly and the adhesive is typically thicker.
How To Prevent Tint Adhesive Problems in the Future
Two things extend the life of new tint and make the next removal easier when the time comes.
Buy film with a quality adhesive system.
Not all tint adhesive is the same. Cheap film uses low-grade acrylic adhesive that begins crystallizing against the glass within 3 years. Quality film from established manufacturers uses pressure-sensitive adhesive formulated to remain pliable and release cleanly for 7 to 10 years. According to 3M’s automotive window film technical specifications, their Crystalline and Ceramic series films use a multi-layer adhesive system designed for clean removal without adhesive splitting — meaning the adhesive stays bonded to the film when it’s pulled, not to the glass. That’s the specification to look for in any film you’re buying.
Change tint before it starts to fail visibly.
Tint that’s bubbling, peeling at the edges, or turning purple is past its service life. Film in that condition has degraded adhesive — the adhesive is splitting between layers, partially bonding to the glass and partially bonding to the film. Removal at this stage is the hardest scenario: no large-sheet peeling, all fragment picking, maximum adhesive residue. Removing tint while it still looks acceptable but is approaching end of life (typically 7–10 years for quality film, 3–5 years for cheap film) is exponentially easier than waiting until it’s visually failing.
FAQs About How To Remove Window Tint
Can I remove window tint myself without damaging the defroster?
Yes, if you use the right tools. Plastic razor blades, a clothes steamer, and 91% isopropyl alcohol on the rear glass — metal blades and heat guns stay on side glass only. Work in horizontal strokes parallel to the defroster traces and re-steam frequently to keep the adhesive warm. Run the defroster grid voltage test after removal to confirm no trace damage before the car goes back into service.
How long does it take to remove window tint yourself?
A single side door window takes 20 to 40 minutes including adhesive removal — longer if the tint is old. A full vehicle DIY removal runs 3 to 6 hours depending on number of windows, tint age, and how much adhesive residue requires solvent treatment. Budget a full afternoon and don’t start in cold weather.
What is the easiest way to remove window tint?
A clothes steamer on fresh tint (under 5 years old) is the cleanest method. Steam the glass for 3 to 5 minutes, peel at a low angle, and the film typically comes off in one or two large sheets. Old tint requires the same heat plus solvent dwell on the adhesive phase — there’s no shortcut that skips the chemistry on crystallized adhesive.
Will Goo Gone damage my car’s glass or defroster?
Goo Gone Automotive is safe on glass surfaces. Keep it away from the defroster bus bars at the glass edges — the solvent can attack the epoxy bond between the bus bar copper and the glass surface with extended contact. Apply it to the center of the glass, not directly on the vertical bus bar strips. Follow all Goo Gone applications with a 91% IPA wipe to prevent residue.
Can I use a razor blade on tinted windows to remove the film?
Metal razor blades are safe on side door glass — no printed elements on the surface. Never use a metal razor blade on rear glass with a defroster grid. The silver-epoxy conductive traces sit on the glass surface and a metal blade removes them in one pass. Plastic razor blades are the correct tool for rear glass.
The Expert Verdict
Window tint removal is a legitimate DIY job. The tools cost $30 to $60, the time investment is a weekend afternoon, and the result — if you follow the glass-type differentiation and handle the adhesive phase properly — is a clean surface that a shop would charge $75 to $200 to deliver. The one place DIYers lose that equation is the rear glass. One pass with the wrong tool across a defroster trace converts a $0 mistake into a $200 repair. Use plastic blades, steam only, horizontal strokes, and run the voltage test when you’re done. Everything else on this job is just patience and heat.