
This article was updated in June 16, 2026 with new products and information by Mark S. Taylor
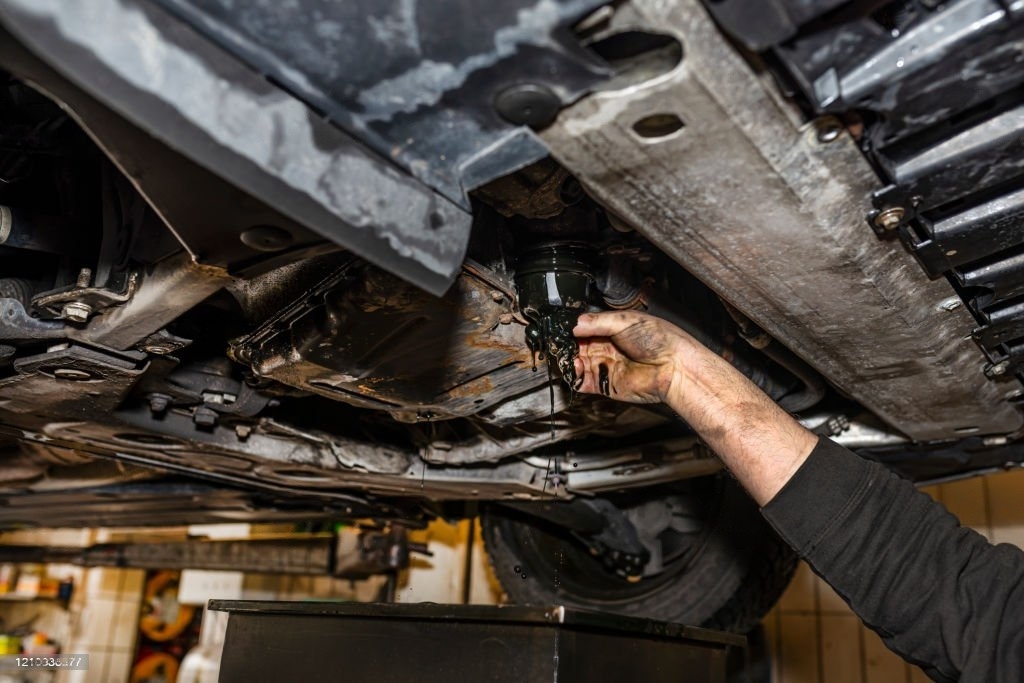
You are mid-way through a routine oil change in your driveway, the old oil is drained into the pan, and you suddenly realize your dedicated oil filter wrench is missing. Or worse, the last mechanic overtightened the canister so aggressively that your tool simply slips off the smooth metal casing.
This is an incredibly common automotive frustration, but a stuck canister does not mean you have to pack up and walk to an auto parts store. You can easily generate enough friction and mechanical leverage to break the factory seal using common household items.
As an ASE-Certified Master Technician, I have used these exact bypass methods in emergency roadside situations. In this comprehensive guide, we will break down 3 proven, tool-free methods to remove a stubborn oil filter safely, alongside crucial installation safety protocols.
Contents
- 1 Before You Start: Critical Safety Check
- 2 3 Proven Methods to Remove an Oil Filter Without a Tool
- 3 How to Install the New Filter Safely (Avoid Next-Time Seizure)
- 4 Oil Filter Change Frequency Matrix (US Metrics)
- 5 Common Mistakes to Avoid
- 6 Pro Tips From Experience
- 7 FAQs About Remove an Oil Filter Without a Tool
- 7.1 Q: Can I leave an old oil filter in place for two oil changes?
- 7.2 Q: Which direction do I turn an oil filter to remove it?
- 7.3 Q: How tight should I install the new oil filter?
- 7.4 Q: Is it safe to use a screwdriver to remove an oil filter?
- 7.5 Q: What happens if I don’t change my oil filter regularly?
- 7.6 The Bottom Line from the Shop Garage
Before You Start: Critical Safety Check
- Let the Engine Cool: Never attempt to touch a spin-on oil filter immediately after driving. Engine oil operates at over $90^\circ\text{C}$ to $105^\circ\text{C}$ ($200^\circ\text{F}+$ ) and will cause severe skin burns. Wait at least 30 to 45 minutes for the block to cool.
- Prep the Work Area: Park on a flat surface, engage the parking brake, wear nitrile safety gloves, and place a wide drain pan directly underneath the filter housing to catch residual oil drops.
3 Proven Methods to Remove an Oil Filter Without a Tool
Always try these methods in order. Method 1 is the cleanest and least destructive, while Method 2 is reserved strictly for heavily seized canisters.
Method 1: The High-Friction Paper Towel or Rubber Grip (Easiest)
- Best Suited For: Filters that are moderately tight and accessible with a full hand grip.
- The Science: The main reason your hands slip on an oil filter isn’t a lack of strength; it is the micro-layer of slippery oil film coating the smooth metal canister.
- The Process: Tear a thick strip of a shop paper towel roughly 2 inches wide and fold it over for extra durability. Wrap this strip tightly around the perimeter of the oil filter canister. The rough fibers of the paper towel create instant surface friction. Grip the wrapped filter firmly with both hands and twist counterclockwise (Lefty-Loosey) with steady, progressive force.
- Mechanic Pro-Tip: A rubber kitchen jar-opening pad or a pair of textured rubber mechanics gloves work even better than paper towels to instantly bite into the smooth metal casing.
Method 2: The Flathead Screwdriver Lever (For Heavily Seized Filters)
- Best Suited For: Overtightened or rusted filters that refuse to budge by hand.
- The Warning: This is a destructive method. It will puncture the metal canister, meaning your vehicle will be completely inoperable until a new filter is fitted.
- The Process: Ensure your drain pan is positioned directly under the filter, as this method releases oil immediately. Take a heavy-duty, long flathead screwdriver and place the tip against the upper third of the filter canister body (never pierce near the threaded base plate, or you will permanently destroy the engine block’s mounting threads). Use a hammer to drive the screwdriver completely through both sides of the metal canister. You can now use the handle of the screwdriver as a high-leverage breaker bar to force the filter counterclockwise.
Method 3: The Leather Belt or Ratchet Strap Wrench
- Best Suited For: Larger oil filters or tight engine bays where you lack the space to use a screwdriver handle.
- The Science: This replicates a professional commercial strap wrench.
- The Process: Take an old thick leather belt or a small cargo ratchet strap. Loop the strap around the middle of the oil filter canister in a counterclockwise direction. Pull the tail end of the belt through the buckle so it is snug against the metal. As you pull hard on the tail of the belt, the loop will automatically tighten and bite into the filter canister, multiplying your physical arm strength to break the structural seal.
How to Install the New Filter Safely (Avoid Next-Time Seizure)
Ninety percent of stuck filters happen because of poor installation habits. Follow these four workshop rules to ensure your new filter seals perfectly without locking up:
- Clean the Engine Flange Surface: Use a clean shop rag to wipe away old grit and sludge from the metal engine mounting seat. Ensure the old rubber gasket didn’t stick to the engine block—if you accidentally install a new filter over an old gasket (known as “double-gasketing”), it will instantly blow out and dump your engine oil under pressure.
- Lubricate the Gasket: Dip your finger into fresh, clean engine oil and smear a thin film across the entire rubber O-ring seal of the new filter. A dry gasket will bunch up, warp, and cause oil leaks.
- The Hand-Tight Rule: Never use a wrench or tool to tighten a new oil filter. Spin the filter on clockwise by hand until you feel the rubber gasket make initial contact with the metal engine flange. From that exact point, turn the filter an additional 3/4 to 1 full turn by hand. That is all the torque required to hold a lifetime seal.
- The Leak Check: Crank the engine and let it idle for 60 seconds. Inspect the base of the filter with a flashlight to verify no oil is seeping out.
Oil Filter Change Frequency Matrix (US Metrics)
| Vehicle Usage Pattern | Recommended Filter Change Interval | Primary Sign of Filter Failure |
| Standard Commuting | Every 5,000 to 7,500 Miles | Dark, gritty oil text on dipstick |
| Severe/Heavy Towing | Every 3,000 to 5,000 Miles | Low oil pressure light flashing on dash |
| Synthetic Oil Users | Up to 10,000 Miles Maximum | Drop in engine performance/louder idling |

Common Mistakes to Avoid
Removing the filter when the engine is still hot. Oil at operating temperature causes serious burns. Wait 30+ minutes.
Turning the filter clockwise. It’s easy to get disoriented under the car. Remember: counterclockwise to remove.
Forgetting the drain pan. Even a ‘dry’ filter holds residual oil — it will drip the moment it loosens.
Overtightening the new filter. Hand-tight plus three-quarters of a turn is all you need.
Skipping gasket lubrication. A dry gasket seals unevenly and causes oil leaks after just a few days of driving.
Pro Tips From Experience
Run the engine for 2–3 minutes before changing oil. Warm oil flows faster and drains more completely — but always let it cool before touching the filter.
Keep a record of each oil change: date, mileage, and oil/filter brand. This helps you stay on schedule and catch patterns.
If your filter is chronically overtightened by a shop, consider buying a dedicated strap wrench. They cost under $15 and work on almost any filter size.
Always match the new filter to your vehicle’s make and model — not just by size. Check your owner’s manual or use a parts lookup tool.

FAQs About Remove an Oil Filter Without a Tool
Q: Can I leave an old oil filter in place for two oil changes?
A: No. An old filter holds roughly half a quart of highly contaminated, dirty oil. Leaving it in place immediately pollutes your expensive new fresh engine oil. Furthermore, if the paper element inside the old filter clogs entirely, it will trigger an internal bypass valve, sending unfiltered abrasive sludge directly into your engine bearings.
Q: Which direction do I turn an oil filter to remove it?
A: Always rotate the filter counterclockwise to remove it. When laying on your back underneath a vehicle facing upward, it is incredibly easy to get visually disoriented. Always double-check your rotation vector before applying heavy force.
Q: How tight should I install the new oil filter?
A: Tighten by hand until the gasket contacts the mounting surface, then turn it another three-quarter to one full turn. Never use a wrench to install — overtightening damages the gasket and makes the next removal extremely difficult.
Q: Is it safe to use a screwdriver to remove an oil filter?
A: Yes, it’s safe — but it will pierce and ruin the old filter, which is being discarded anyway. Have your drain pan ready before you start because oil will spill immediately once you pierce the canister.
Q: What happens if I don’t change my oil filter regularly?
A: A clogged filter reduces oil flow, causing poor lubrication, increased engine wear, reduced performance, and eventually engine damage. Most manufacturers recommend replacing the filter at every oil change.
The Bottom Line from the Shop Garage
Don’t panic if you find yourself stuck without a filter wrench. Wrap a thick paper towel or an old leather belt around the casing to instantly gain the required frictional grip. Take your time, ensure your rotation direction is correct, and remember to always install the replacement filter strictly hand-tight to prevent a repeat headache down the road.
(Want to make sure your vehicle’s electronic engine control units and dashboard diagnostic systems are running flawlessly? Read our complete master guide on How to Read Check Engine Light Codes Without a Scanner or explore The Car Buzz Official Editorial Standards Page to see how we verify mechanical repair steps).