
This article was updated in July 18, 2026 with new products and information by Mark S. Taylor
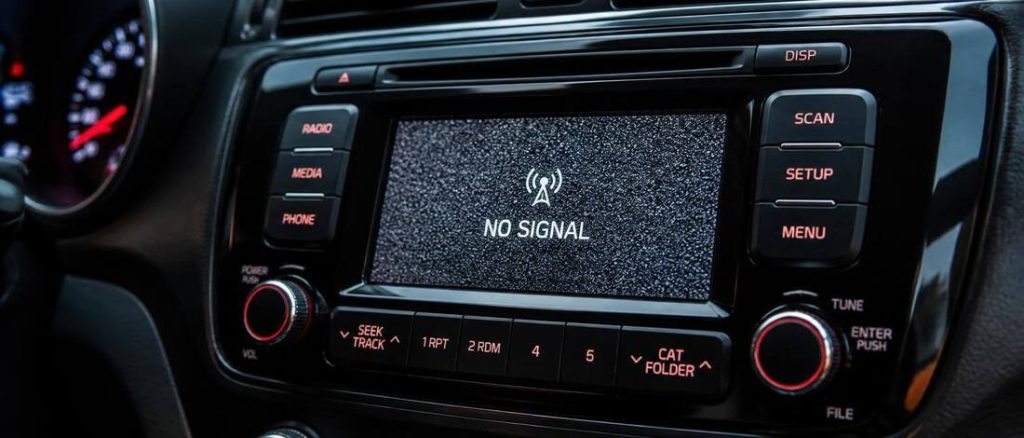
A car radio that doesn’t pick up stations has one of three problems: something wrong with the antenna system, something wrong with the cable connecting the antenna to the radio, or a failed tuner circuit inside the head unit. The gap between those three options is the gap between a free fix, a $15 fix, and a $200 fix. Getting to the right answer takes about 10 minutes of observation before any parts are considered.
The two most common causes — a loose antenna connector at the back of the head unit and an unpowered antenna amplifier after a stereo installation — require zero parts and zero money to fix. They should be confirmed or ruled out before anything else.
Contents
- 1 First — Is It the Antenna System or the Head Unit’s Tuner?
- 2 Eight Causes of Poor or No FM/AM Reception — In Order of Likelihood
- 2.1 Cause 1 — Disconnected or Loose Antenna Connector at the Head Unit
- 2.2 Cause 2 — Aftermarket Stereo Missing the Antenna Amplifier Power Connection
- 2.3 Cause 3 — Corroded or Broken Antenna Mast
- 2.4 Cause 4 — Broken or Pinched Antenna Coaxial Cable
- 2.5 Cause 5 — Corroded Antenna Body Ground
- 2.6 Cause 6 — Failed Power Antenna Motor (Power Antenna Systems)
- 2.7 Cause 7 — Delaminated Glass or Windshield Antenna Coupling Element
- 2.8 Cause 8 — Failed Head Unit Tuner Circuit
- 3 The Aftermarket Radio Antenna Amplifier Problem — Why New Stereos Get Worse Reception Than the Stock Radio
- 4 The Antenna Body Ground — The Failure Nobody Considers
- 5 How To Diagnose a Car Radio Reception Problem Yourself
- 5.1 Check 1 — Confirm the Source of the Problem (2 Minutes, No Tools)
- 5.2 Check 2 — Inspect and Reseat the Antenna Connector at the Head Unit (5 Minutes, No Tools)
- 5.3 Check 3 — The Antenna Mast Wiggle Test (2 Minutes, No Tools)
- 5.4 Check 4 — Check the Antenna Amplifier Power Wire (5 Minutes, DMM Required) — Aftermarket Installations Only
- 5.5 Check 5 — Test the Antenna Cable Continuity (10 Minutes, DMM Required)
- 6 Specific Scenarios — Which Situation Matches Yours?
- 6.1 Scenario A — Reception was fine, then became suddenly terrible with no work done on the car:
- 6.2 Scenario B — Reception got dramatically worse immediately after a new stereo was installed:
- 6.3 Scenario C — AM is much worse than FM:
- 6.4 Scenario D — Reception is intermittent — works sometimes, fails other times:
- 6.5 Scenario E — All FM stations are absent but AM works, or vice versa:
- 7 Glass Antennas and Shark Fin Antennas — How They Fail Differently
- 8 When the Problem Is the Head Unit’s Tuner — and Whether It’s Worth Replacing
- 9 Fix Costs — What Each Repair Actually Runs
- 10 How To Improve Reception Beyond Fixing the Basic Problem
- 11 FAQs About Car Radio Not Picking Up Stations
- 11.1 Why does my car radio only pick up a few stations?
- 11.2 Does a new aftermarket head unit always have worse FM reception than the factory radio?
- 11.3 Can I use a signal booster to fix poor car radio reception?
- 11.4 My car radio has static on some stations but not others — what does that mean?
- 11.5 Why does my car radio reception improve when I touch the antenna?
- 12 The Expert Verdict
First — Is It the Antenna System or the Head Unit’s Tuner?
One question eliminates half the diagnostic tree before you touch anything:
Does the radio play Bluetooth, USB, or auxiliary input normally?
If yes — audio output works, the head unit has power, and the audio amplifier stage is functional. The problem is in the FM/AM signal chain specifically: either the antenna system isn’t delivering signal to the head unit, or the head unit’s tuner circuit has failed. Both cause identical dashboard symptoms but require completely different repairs.
If no — all sources are dead, not just FM/AM. This is a power supply or ground fault in the head unit itself, not a tuner or antenna issue. Check the head unit’s fuse, the constant 12V supply, and the accessory 12V supply before investigating anything else.
The second confirming observation: are AM and FM both affected equally?
FM and AM use the same antenna and the same cable in most vehicles. If FM is much worse than AM or vice versa, it’s a specific clue about which part of the signal chain has failed — covered in each cause below. If both are equally dead across all stations, the fault is at the coaxial cable connector at the head unit (disconnected or corroded) or the head unit’s tuner module.
Write down your answer to these two questions before continuing. They determine which cause in the list below is most likely.
Eight Causes of Poor or No FM/AM Reception — In Order of Likelihood
Cause 1 — Disconnected or Loose Antenna Connector at the Head Unit
The coaxial antenna cable connects to the back of the head unit through a Motorola DIN connector or an ISO connector — a cylindrical or rectangular plug that pushes onto the antenna input jack. This connector can work loose from vibration, especially after a stereo installation or interior work where the head unit was moved. A partially-seated connector provides intermittent or no contact with the antenna center pin.
Symptom fingerprint: Complete or near-complete loss of FM and AM simultaneously. May be intermittent — works after bumps. No physical damage to the antenna visible from outside.
Fix: Push the antenna connector firmly onto the head unit’s antenna input until it clicks or seats fully. Takes 10 seconds. If the connector is seated but corroded — green or white buildup on the center pin or the inside of the connector — clean with electrical contact cleaner, allow to dry, and reseat.
Cause 2 — Aftermarket Stereo Missing the Antenna Amplifier Power Connection
This is the most common cause of reception loss specifically after a new stereo installation — and the one cause that no competitor article explains adequately. Every vehicle built after approximately 2005 uses an amplified antenna system. The factory radio supplies 12V power to a small preamplifier located near or integrated into the antenna. This amplifier takes the weak signal from the antenna element and boosts it before sending it down the coaxial cable to the head unit. Without this preamplification, the signal arriving at the head unit is too weak to receive distant stations.
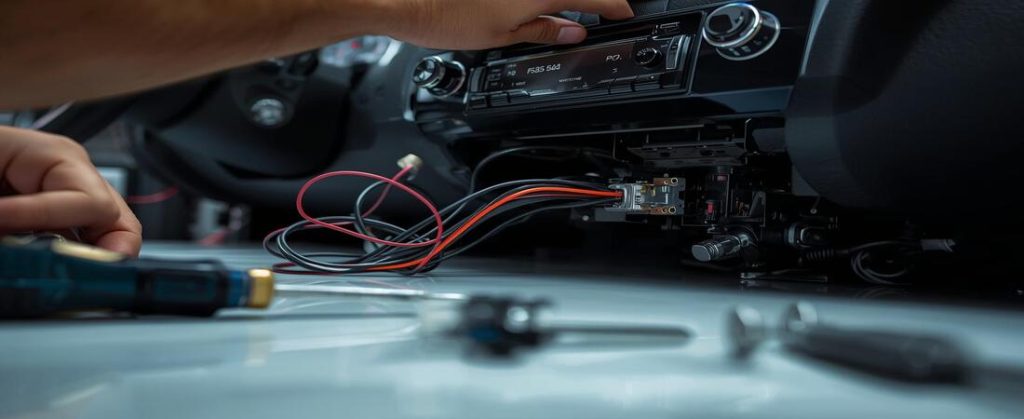
When an aftermarket head unit is installed, it must supply this 12V through its antenna amplifier output wire — the blue/white wire on virtually all aftermarket head unit wiring harnesses. This wire must be connected to the vehicle’s antenna amplifier power supply input, either through the wiring harness adapter or directly. When installers miss this connection, the antenna amplifier runs on zero volts and provides no gain.
Symptom fingerprint: FM and AM reception immediately and dramatically worse than the factory radio was. The radio receives the two or three strongest local transmitters (close towers, 100,000-watt stations) but not the 15 to 20 stations the factory radio received. The stations that do come in sound clean — it’s not a noise problem, it’s a range problem.
Fix: Connect the blue/white wire from the aftermarket head unit’s wiring harness to the antenna amplifier power feed. Check your harness adapter documentation — most quality adapters (Metra, Scosche, PAC Audio) include the antenna amplifier power routing in their compatibility notes and some include an antenna amplifier bypass plug. According to Metra Electronics installation documentation, every amplified antenna vehicle requires the antenna amplifier power wire to be connected as part of the head unit installation — it is never automatic through the audio channels of the harness adapter alone. Cost: $0 if the existing wiring just needs to be connected; $15 to $40 if a separate amplifier bypass adapter is needed for the specific vehicle.
Cause 3 — Corroded or Broken Antenna Mast
The antenna mast — the telescoping or fixed whip mounted on the fender or roof — is exposed to road salt, car washes, and physical impacts. The most vulnerable point is the threaded base where the mast screws into the antenna body. Corrosion at this joint creates resistance that attenuates the antenna signal. A mast with a severely corroded base is effectively disconnected from the antenna body even though it appears attached.
Symptom fingerprint: Gradual worsening of FM and AM reception over months or years. The mast may feel loose at its base, or it may be visibly darkened or crusted with corrosion at the threaded joint. Reception improves temporarily when you wiggle the mast.
The mast wiggle test: Tune to a weak or moderately strong station. Physically grip the antenna mast near its base and wiggle it gently. If reception improves, worsens, or crackles while you wiggle, the mast-to-antenna-body connection is the fault. Replace the mast — a threaded replacement mast costs $8 to $25 and screws on in seconds.
Cause 4 — Broken or Pinched Antenna Coaxial Cable
The coaxial cable runs from the antenna body through the vehicle’s body panels, along door sills and headliner, and into the dashboard where it connects to the head unit. It passes through grommets in the firewall, sheet metal holes, and door jambs. Any of these points can pinch, kink, or cut the cable — and the damage most often happens during other work (interior panel removal, speaker installation, alarm installation) where the cable route is disturbed.
Symptom fingerprint: Sudden, complete reception loss following other work on the vehicle’s interior. The installer of the other work likely cut or pinched the cable without realizing it. Also: if the cable has a visible kink (a sharp bend of more than 90 degrees), the inner conductor has likely broken at that point.
The cable continuity test: Set a DMM to continuity or resistance. Disconnect both ends of the antenna cable (at the antenna body and at the head unit). Test for continuity between the center conductor pin at one end and the center conductor at the other — should show continuity (near 0 ohms). Test continuity between the cable shield (outer braid) at one end and the shield at the other — should also show continuity. Any open circuit (infinite resistance) on either the center conductor or the shield confirms a broken cable. Note: continuity alone doesn’t confirm RF performance — a kinked cable may pass a DC continuity test while being severely attenuated at 100 MHz.
Cause 5 — Corroded Antenna Body Ground
The antenna body — the sealed housing that mounts through the fender or body panel — must make clean electrical contact with the vehicle’s body metal to provide the ground return path for the antenna system. This ground is made through the mounting flange of the antenna body pressing against the bare metal of the body panel hole. Over years of exposure, paint migrates under the flange, corrosion products accumulate, and the ground connection becomes resistive.
Symptom fingerprint: AM reception worse than FM, or both degraded but AM significantly more so. Gradual worsening over years, not sudden failure. May improve temporarily after loosening and retightening the antenna mounting nut. Since AM uses a vertically polarized signal where the vehicle’s body ground plane provides the signal return path, AM is more sensitive to antenna body ground resistance than FM.
Fix: Remove the antenna body from the mounting hole. Clean the mounting surface to bare metal with 220-grit sandpaper or a wire brush. Apply a thin coat of anti-seize compound to the mounting flange before reinstallation. Remount and check that the mounting nut is tight. The ground is now clean metal-to-metal contact. This fix costs $0 in parts and 30 minutes of time.
Cause 6 — Failed Power Antenna Motor (Power Antenna Systems)
Older domestic vehicles used a motor-driven telescoping antenna that extends when the radio is on and retracts when it’s off. A failed motor, a broken nylon drive rack, or a blown motor fuse leaves the mast in the retracted position permanently. The radio functions normally but receives poorly because the antenna element is only 4 to 6 inches long rather than 30 to 40 inches.
Symptom fingerprint: Reception dramatically reduced on a vehicle with a power antenna. The mast never rises when the radio is turned on. A visual check of the antenna confirms it’s fully retracted. The motor may make a grinding or clicking sound when the radio is switched on as it attempts to extend the mast.
Fix: Check the power antenna fuse first — it’s typically a 10–20 amp fuse in the fuse box labeled “ANTENNA” or “PWR ANT.” If the fuse is good and the motor makes no sound, the motor has failed. Power antenna motor replacement: $30–$80 in parts, 1–2 hours of labor at $120–$210/hr depending on mounting location accessibility.
Cause 7 — Delaminated Glass or Windshield Antenna Coupling Element
Modern vehicles increasingly use antennas embedded in the rear window glass (using the defroster grid lines) or in a separate printed element in the glass. The coaxial cable connects to this antenna through a small adhesive coupling element — a plastic clip or tape pad that transfers the signal capacitively from the glass to the cable. If this coupling element delaminations from the glass surface, the signal path is broken.
Symptom fingerprint: Complete FM and AM reception loss on a vehicle with no external mast antenna. Holding the coaxial cable end near the glass may partially restore a weak signal through direct capacitive coupling. The coupling element may be visibly lifted or detached from the glass surface.
Fix: Replace the coupling element with a new adhesive pad (OEM or aftermarket replacement). Clean the glass surface thoroughly, apply the new element, and allow 24 hours for the adhesive to cure before testing.
Cause 8 — Failed Head Unit Tuner Circuit
The FM/AM tuner module inside the head unit can fail independently of the audio output stage. Cause: thermal cycling damage to the tuner chip’s solder joints, electrostatic discharge damage, or component aging. The antenna system is intact but the tuner can’t process the incoming signal.
Symptom fingerprint: Complete FM and AM failure across all stations simultaneously, with all other head unit functions (Bluetooth, USB, auxiliary, navigation if equipped) working normally. No improvement when a known-good antenna is substituted. Signal strength display (if available in the tuner menu) shows zero or minimum signal despite a known-good antenna.
Fix: Head unit replacement. Tuner circuit repair at the component level is not economical for any head unit under $400. A basic replacement head unit with FM/AM/Bluetooth costs $50 to $200. The existing antenna system and wiring can be reused with a new head unit and the appropriate harness adapter.
The Aftermarket Radio Antenna Amplifier Problem — Why New Stereos Get Worse Reception Than the Stock Radio
This deserves its own section because it’s the most common post-installation complaint in car audio and the most consistently misunderstood.
The factory radio in your vehicle is calibrated to the specific amplified antenna system installed at the factory. The OEM radio supplies exactly the correct voltage to the antenna amplifier module, the antenna amplifier provides optimized gain for the antenna element’s specific length and frequency response, and the whole system is tuned to work together. The factory radio may receive 18 stations across the dial clearly.
An aftermarket head unit installed without properly connecting the antenna amplifier power wire receives those same 18 stations through an antenna system running on zero power. The preamplifier that boosted the antenna signal provides no gain. The aftermarket radio receives the 3 stations with transmitter towers within 10 miles of your vehicle — because those stations’ signals are strong enough to drive the unamplified signal from the antenna cable to a usable level. Stations 10 to 60 miles away disappear entirely.
The fix is connecting the blue/white wire from the aftermarket head unit to the antenna amplifier power input. On most vehicles, the wiring harness adapter includes this connection or the adapter documentation specifies where to make it. If you’re not sure whether your vehicle has an amplified antenna, assume it does — virtually every vehicle built after 2005 uses amplification somewhere in the antenna chain.
How to test whether the antenna amplifier is powered:
With the head unit installed and the radio turned on, set a DMM to DC voltage. Probe the blue/white wire at the head unit connector (the wire that exits the head unit, not the adapter side) — it should read 12V when the head unit is on and 0V when it’s off. This confirms the head unit is supplying antenna amplifier power. Now trace that wire to confirm it connects to the vehicle’s antenna amplifier power input — the adapter harness documentation shows this routing. If the blue/white wire ends at a blank connector cap or is taped off, it’s not connected to anything and the antenna amplifier is unpowered.
The Antenna Body Ground — The Failure Nobody Considers
The antenna body mounted to your vehicle’s fender or roof is electrically connected to the vehicle chassis through the metal-to-metal contact between the antenna’s mounting flange and the body panel. This ground connection is the return path for the RF signal the antenna receives.
For FM signals (88–108 MHz), the antenna body ground isn’t as critical — FM is horizontally or circularly polarized, and the antenna element itself carries most of the signal. For AM signals (530–1710 kHz), the situation is different. AM uses a vertically polarized signal, and the vehicle’s body acts as the lower half of a vertical dipole antenna. The antenna mast is the upper half; the body ground is the lower half. A resistive body ground chops the AM antenna’s efficiency in half.
The specific failure pattern: AM reception is noticeably worse than FM, or both are degraded with AM more severely affected. The radio receives local FM stations (strongest signals) but AM is completely absent or only receives the most powerful local AM transmitter. The problem has worsened gradually over the years you’ve owned the vehicle.
The fix requires removing the antenna from the body panel — typically a nut under the fender or inside the trunk — cleaning both the antenna body’s mounting flange and the body panel hole to bare metal, and remounting with the flanges making clean metal contact. A thin coat of dielectric grease or anti-seize compound on the contact surfaces prevents future corrosion while maintaining electrical contact.
On vehicles where the antenna is mounted on a rubber gasket (for aesthetics and vibration isolation), the gasket intentionally breaks the electrical ground path between the antenna body and the body panel. These vehicles have a separate ground wire from the antenna body to the chassis — if that ground wire is missing, corroded, or disconnected, the antenna floats electrically. Look for a small gauge wire attached to the antenna body’s mounting nut and grounded to a nearby sheet metal screw.
How To Diagnose a Car Radio Reception Problem Yourself
Five checks, ordered from fastest to most involved. Stop when one check identifies the fault.
Check 1 — Confirm the Source of the Problem (2 Minutes, No Tools)
Play music from Bluetooth, USB, or auxiliary. If these work normally, the fault is in the FM/AM signal chain — not the head unit’s power supply or audio output. If nothing works, the head unit has a power fault unrelated to the antenna.
Tune to the strongest local FM station. Note whether you receive any station at all or whether the radio shows static across the entire dial.
Check 2 — Inspect and Reseat the Antenna Connector at the Head Unit (5 Minutes, No Tools)
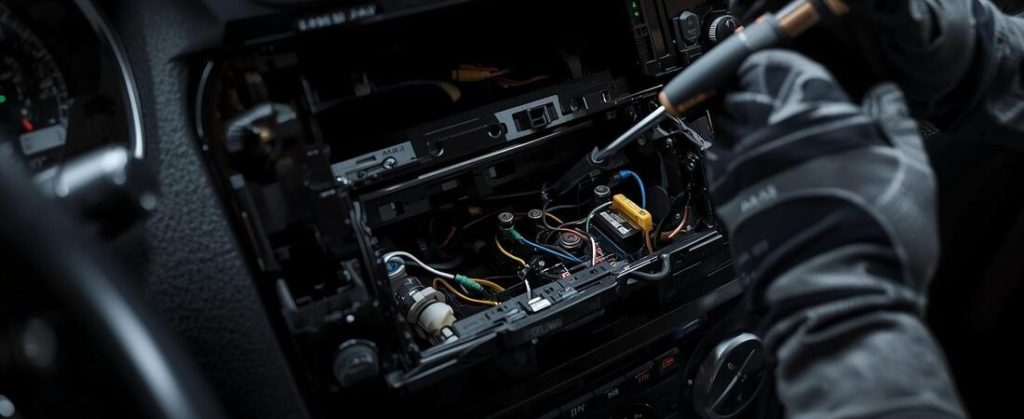
Access the back of the head unit — on DIN-mount radios, press the release buttons on the sides of the radio (using DIN removal tools or a bent coat hanger if the tools aren’t available) and slide the radio out 4 to 6 inches to access the back. Find the cylindrical antenna plug and confirm it’s fully seated. Disconnect it, inspect the center pin for corrosion (green or white oxidation), clean with electrical contact cleaner if corroded, and firmly reseat.
Retest reception. If reception improves, the connector was the fault.
Check 3 — The Antenna Mast Wiggle Test (2 Minutes, No Tools)
Tune to a weak or moderately strong station. Go outside and grip the antenna mast near its base. Wiggle gently in all directions. If reception changes — better, worse, or crackles — the mast-to-antenna-body connection is the fault.
If the mast is missing entirely (broken off at the base), this is the confirmed cause. Replacement masts are threaded and screw into the antenna body.
Check 4 — Check the Antenna Amplifier Power Wire (5 Minutes, DMM Required) — Aftermarket Installations Only
With the head unit on and tuned to an FM station, locate the blue/white wire on the head unit’s wiring harness (not the vehicle side — the wire coming out of the head unit itself). Set the DMM to DC voltage, probe this wire, and measure voltage.
- 12V: The head unit is supplying antenna amplifier power. The amplifier may still not be powered if the connection to the vehicle side isn’t made, but the head unit is doing its part.
- 0V: The head unit is not outputting antenna amplifier power. Check the head unit’s settings — some aftermarket head units require enabling the antenna amplifier output in the settings menu (typically under “general” or “system” settings).
If the head unit shows 12V on the blue/white wire, trace whether this wire connects to the vehicle’s antenna amplifier power input through the harness adapter. The adapter documentation identifies this connection — it’s frequently labeled “ANT PWR,” “AMP,” or described in a note about amplified antennas.
Check 5 — Test the Antenna Cable Continuity (10 Minutes, DMM Required)
Disconnect the antenna cable from both the head unit and the antenna body (or access point at the antenna). Set the DMM to continuity (beep) or resistance. Test:
- Center pin to center pin: should beep (continuity, near 0 ohms). No beep = broken center conductor.
- Shield braid at one end to shield braid at other end: should beep. No beep = broken shield.
- Center pin to shield at same end: should NOT beep. A beep here = center conductor shorted to shield — the cable is damaged.
A cable that passes all three tests has intact DC continuity but may still have RF attenuation from kinking or water damage. If the cable passes continuity but reception remains poor, substitute a known-good antenna cable to confirm RF performance.
Specific Scenarios — Which Situation Matches Yours?
These five scenarios cover the vast majority of car radio reception complaints. Match your situation to the description and go directly to the relevant fix.
Scenario A — Reception was fine, then became suddenly terrible with no work done on the car:
Check the antenna connector at the back of the head unit first (Check 2 above). A connector that worked its way loose from vibration is the most common cause of sudden reception loss without any apparent trigger. If the connector is seated, check whether the antenna mast is physically present and undamaged. If the mast is intact, the coaxial cable may have a break — this can happen from vibration fatigue at a sharp bend, usually where the cable passes through a grommet.
Scenario B — Reception got dramatically worse immediately after a new stereo was installed:
The antenna amplifier power wire is almost certainly not connected. Confirm 12V on the blue/white wire at the head unit (Check 4). If that’s present, trace whether it routes to the vehicle’s antenna amplifier supply through the harness adapter. This is a $0 fix in the majority of cases — it’s a wire connection that was skipped.
Scenario C — AM is much worse than FM:
The antenna body ground is the likely cause (Cause 5 above). Inspect the antenna body mounting — look under the fender or inside the trunk at the antenna base for corrosion around the mounting nut and at any separate ground wire. Also: AM signals are blocked by large metal structures and absorbed by terrain much more readily than FM. Before diagnosing a hardware fault, verify the AM problem occurs across many different AM stations and in multiple locations — it may be a coverage issue rather than an equipment fault.
Scenario D — Reception is intermittent — works sometimes, fails other times:
Intermittent faults point to either a loose connector (vibration-related, Check 2) or a power antenna motor that’s failing (Cause 6). On a vehicle with a power antenna, observe whether the mast is consistently extended when the radio is on — if it extends most of the time but occasionally fails to rise, the motor or rack is failing intermittently. Also check whether the intermittent failure correlates to temperature — a crack in the antenna cable or a corroded connector that makes contact at some temperatures but not others is a temperature-related intermittent.
Scenario E — All FM stations are absent but AM works, or vice versa:
FM and AM use different frequency ranges but the same antenna and cable. If one band works and the other doesn’t, the fault is inside the head unit’s tuner module — the FM section and AM section are separate circuits and one can fail while the other continues working. This is a head unit replacement scenario, not an antenna diagnosis.
Glass Antennas and Shark Fin Antennas — How They Fail Differently
A growing percentage of vehicles have no external mast antenna at all. If your vehicle has a shark fin housing on the roof, or if there’s simply no external antenna mast anywhere on the vehicle, the antenna is embedded in the glass or inside the shark fin.
Rear window glass antennas:
Some vehicles use the defroster grid lines in the rear window as part of the AM and FM antenna system. The coaxial cable connects to the glass through a coupling element — a small adhesive clip or tape pad that adheres to the glass surface and makes capacitive contact with the printed grid. Over time, this coupling element can delaminate from the glass, partially or completely breaking the signal path.
The diagnostic: look for the coupling element — a small rectangular plastic clip attached near the corner of the rear window, connected by a small coaxial cable. If it’s visibly lifted or detached from the glass, that’s the fault. Replacement coupling elements are available as adhesive pads for $10 to $25.
The antenna amplifier for rear window glass antennas is typically a small module mounted in the rear interior trim area near the window. It requires 12V power — the same blue/white antenna amplifier wire from the head unit powers this module. An aftermarket head unit installation that doesn’t power this amplifier module eliminates the glass antenna’s amplification in the same way as a mast antenna system.
Shark fin antennas:
The aerodynamic shark fin housing on the roof contains multiple antenna elements — typically separate elements for AM/FM, GPS satellite navigation, cellular data, and satellite radio. These elements are individual and a fault in one doesn’t affect the others.
The diagnostic advantage of a shark fin: if GPS continues to work but FM doesn’t, the FM-specific element inside the shark fin has failed — or the FM-specific amplifier module inside the shark fin has failed while the other modules remain functional. This is a shark fin assembly replacement rather than a cable or head unit replacement.
Shark fin replacement costs vary significantly by vehicle: $80 to $250 for the housing and internal elements on common domestic vehicles; $300 to $600 on European luxury vehicles where the shark fin integrates cellular and GPS modules with proprietary connectors.
The most common shark fin failure cause isn’t the antenna elements themselves — it’s water ingress. The shark fin housing has a gasket seal at its base where it mounts to the roof. A failed gasket allows water to enter the housing and corrode the antenna element connections and the amplifier PCB inside. If the shark fin shows water staining inside when removed, the gasket is the failure cause and the amplifier module inside is likely corroded.
When the Problem Is the Head Unit’s Tuner — and Whether It’s Worth Replacing
When all five diagnostic checks clear — the antenna connector is seated, the amplifier wire shows 12V, the mast tests good, the cable tests good, and substituting a known-good antenna makes no difference — the head unit’s tuner has failed.
FM/AM tuner failure inside a head unit is almost never economically repairable. The tuner function is integrated into the head unit’s main circuit board as a dedicated tuner chip or a tuner module — not a separate component that’s easily swapped. Replacing it requires component-level electronics work (desoldering the failed chip, sourcing a replacement, reflowing solder) that costs $150 to $300 at an electronics shop, approaching or exceeding the cost of a new entry-level head unit.
The replacement decision:
Before buying a new head unit, consider whether FM/AM radio is actually important for your use case:
- If you primarily use Bluetooth streaming from your phone for music and apps like Waze or Google Maps for traffic, a failed FM tuner may not warrant replacing the head unit at all.
- If you rely on FM for local news, traffic, and emergency alerts, the head unit needs replacement.
- If you listen to AM sports or news radio, note that many aftermarket head units have significantly inferior AM tuner performance compared to OEM radios — the FM-focused design of modern aftermarket units often means AM reception that, while functional, is worse than what a good OEM AM tuner delivered.
Replacement head unit cost ranges:
| Category | Price Range | What You Get |
|---|---|---|
| Basic AM/FM + Bluetooth | $50–$120 | Single-DIN, basic app connectivity |
| Double-DIN with touchscreen | $120–$300 | Large display, Android Auto / Apple CarPlay |
| Feature-rich with navigation | $300–$600 | Built-in maps, full smartphone integration |
The existing antenna cable and wiring harness from the failed head unit are reusable with a new unit of the same DIN size (single or double) plus the appropriate vehicle-specific harness adapter and antenna adapter.
Fix Costs — What Each Repair Actually Runs
The most important cost to know first: the two most common causes — a loose antenna connector at the head unit and an unpowered antenna amplifier wire — cost $0 to fix. Rule both out before spending anything.
| Cause | DIY Parts Cost | Shop Labor | Total DIY | Total Shop |
|---|---|---|---|---|
| Loose antenna connector (reseat only) | $0 | $45–$90 | $0 | $45–$90 |
| Unpowered antenna amplifier wire | $0–$15 | $45–$90 | $0–$15 | $45–$105 |
| Broken antenna mast | $8–$25 | $30–$60 | $8–$25 | $38–$85 |
| Corroded antenna body ground (clean/remount) | $0 | $45–$90 | $0 | $45–$90 |
| Failed power antenna motor | $30–$80 | $120–$420 | $30–$80 | $150–$500 |
| Delaminated glass antenna coupling element | $10–$25 | $45–$90 | $10–$25 | $55–$115 |
| Damaged antenna coaxial cable | $15–$45 | $60–$180 | $15–$45 | $75–$225 |
| Failed shark fin antenna assembly | $80–$600 | $45–$120 | $80–$600 | $125–$720 |
| Failed head unit tuner | $50–$600 (new HU) | $60–$180 (install) | $50–$600 | $110–$780 |
The shop labor for antenna connector reseating and amplifier wire connection assumes the shop correctly identifies the cause rather than replacing parts speculatively. A shop that immediately recommends a new antenna or new head unit without checking these two zero-cost causes should be asked specifically whether they tested the antenna amplifier power wire voltage and whether they confirmed the antenna connector was fully seated.
How To Improve Reception Beyond Fixing the Basic Problem
Once the specific fault is repaired, a few additional steps maximize the antenna system’s performance.
1. Route the antenna cable away from power wiring:
If the antenna coaxial cable runs parallel to power wires (amplifier power cables, speaker cables) for extended distances, the power wiring can induce noise into the antenna cable. Antenna signals are in the microvolt range — even small amounts of induced noise from nearby power conductors can overwhelm weak station signals. Where the antenna cable must cross power wiring, cross at 90 degrees rather than running parallel.
2. Ensure the head unit chassis is grounded:
The head unit’s metal chassis must make good electrical contact with the vehicle’s dashboard mounting hardware. Some aftermarket head unit installation kits use plastic mounting sleeves that isolate the head unit chassis from the dashboard metal — this can introduce noise from the head unit’s internal circuitry into the antenna system. If the installation kit includes a ground wire from the head unit chassis to the vehicle body, ensure it’s connected.
3. Consider an in-line FM amplifier for marginal systems:
An in-line FM amplifier ($15 to $50) installed between the antenna cable and the head unit input provides 10 to 20 dB of additional gain. This is useful for vehicles with long antenna cable runs (over 8 feet between antenna and head unit) or for systems where the original antenna amplifier has been removed or replaced with a passive mast. Note that adding gain to an already-adequate system introduces noise amplification along with signal amplification — only use an in-line amplifier when the system has confirmed inadequate signal level, not as a routine upgrade.
FAQs About Car Radio Not Picking Up Stations
Why does my car radio only pick up a few stations?
The most likely cause depends on your setup. For a vehicle with an aftermarket head unit recently installed: the antenna amplifier power wire (blue/white) isn’t connected, leaving the OEM amplified antenna running on no power. The fix is connecting that wire — zero cost. For a vehicle with the original factory radio: either the antenna mast has a corroded base connection, the antenna body ground has deteriorated, or the coaxial cable has been damaged. Run the mast wiggle test first — it takes 10 seconds and identifies mast base corrosion immediately.
Does a new aftermarket head unit always have worse FM reception than the factory radio?
Not if installed correctly with the antenna amplifier wire connected. A correctly installed aftermarket head unit should receive the same stations as the factory radio — often more, because many aftermarket head units have sensitive DSP-enhanced tuner circuits. Worse reception after aftermarket installation almost always means the antenna amplifier wire wasn’t connected, which is an installation error rather than a product limitation.
Can I use a signal booster to fix poor car radio reception?
An in-line signal booster addresses reception that is poor because the signal arriving at the head unit is too weak — typically a long cable run or an unamplified antenna on a vehicle that originally had an amplified system. It doesn’t help if the problem is a broken mast (no signal to amplify), a damaged cable (signal lost before the booster), or a failed head unit tuner (signal arrives but tuner can’t process it). Diagnose first — a signal booster on a system with a broken mast amplifies nothing.
My car radio has static on some stations but not others — what does that mean?
Static on specific stations while others come in clearly indicates the system is receiving signal but at marginal levels. The stations with static are at the edge of the antenna system’s range — strong enough to produce audio but not strong enough to suppress noise through the radio’s FM capture effect. This points to reduced antenna system gain (corroded mast, unpowered amplifier, antenna body ground issue) rather than a completely failed component. It’s the gradual deterioration pattern — the system works, it just doesn’t work as well as it should.
Why does my car radio reception improve when I touch the antenna?
Your body acts as an extension of the antenna element when you touch it, adding capacitance and effective antenna length. This improvement specifically when touching confirms that the antenna element itself is too short, disconnected, or missing — the mast has broken off, the coupling element has delaminated, or the antenna body is not receiving signal from its element. It also confirms that the cable and head unit tuner are functional (you’re receiving a station through your improvised body antenna).
The Expert Verdict
A car radio that doesn’t pick up stations has a short diagnostic path to the correct answer — but only if you test in the right order. Start with what’s free and immediate: confirm Bluetooth or USB still works (proves the head unit is alive), reseat the antenna connector (proves the cable is connected), wiggle the mast (finds corrosion at the base). For any recent aftermarket installation, check the blue/white antenna amplifier wire voltage before anything else — connecting that one wire resolves the majority of “new radio, terrible FM” complaints at exactly zero cost.
The only time a failed head unit tuner is the answer is after the antenna system has been confirmed functional — connector seated, cable tested intact, mast present and solid, amplifier powered. If all of that checks out and FM/AM is still absent while Bluetooth works fine, the tuner module has failed and a replacement head unit is the repair.