
This article was updated in October 6, 2026 with new products and information by Mark S. Taylor
When an engine loses power, the most expensive mistake is often the first one: replacing a part before confirming what failed.
Power loss can feel like a weak throttle, hesitation, bogging, surging, reduced acceleration, limp mode, or a complete stall. The cause may be in the air intake, fuel delivery, ignition, exhaust, sensors, charging system, transmission, or the vehicle’s protective control strategy. A code reader can narrow the search, but it cannot turn an unspecified symptom into a guaranteed diagnosis.
The safest approach to engine loses power DIY testing is a staged process:
- Decide whether the vehicle is safe to move.
- Record exactly when and how the power loss occurs.
- Perform non-invasive visual checks.
- Scan for diagnostic trouble codes without assuming a part is bad.
- Perform only basic electrical checks if you have the right equipment and skill.
- Leave pressurized fuel, compression, exhaust-restriction, high-voltage, and risky road tests to a qualified professional.
If the engine stalls in traffic, the check-engine light flashes, the oil-pressure or temperature warning appears, smoke or fuel odor is present, or the vehicle cannot accelerate safely, stop testing and arrange a tow.
Contents
- 1 What does “loses power” actually mean?
- 2 Step 1: Decide whether DIY testing is safe
- 3 Step 2: Record the symptom before touching anything
- 4 Step 3: Perform safe, non-invasive checks
- 5 Step 4: Scan for OBD-II codes
- 6 Step 5: Basic electrical checks—only if properly equipped
- 7 Step 6: Fuel-system tests—know when to stop
- 8 Step 7: Tests that usually belong to a professional
- 9 Use the symptom pattern to choose the next test
- 10 What not to do during DIY testing
- 11 How to prepare a useful shop handoff
- 12 How much does DIY testing cost?
- 13 FAQs About Engine Loses Power DIY Testing
- 14 Bottom line
What does “loses power” actually mean?
Before testing, define the symptom. Drivers often use “engine loses power” to describe different faults.
The engine bogs or hesitates
The engine remains running but responds slowly when you press the accelerator. It may stumble, surge, shake, or feel as if it cannot breathe or receive enough fuel.
The vehicle feels generally sluggish
Acceleration is weak across a wide range of speeds. Possible areas include air restriction, fuel restriction, sensor faults, exhaust restriction, mechanical wear, or a reduced-power strategy.
Power disappears only under load
The vehicle may feel normal at idle but lose power while accelerating, climbing, towing, or carrying passengers. Fuel delivery, ignition breakdown, boost problems, exhaust restriction, and transmission load become important areas to investigate.
The engine stalls
A stall is more serious than hesitation. The engine stops producing power, and steering or braking assistance may change depending on the vehicle’s design. Do not continue normal driving after a stall until the cause is assessed.
The engine revs but the vehicle does not accelerate
If engine RPM rises without a matching increase in road speed, the transmission or clutch may be slipping. That is not the same as the engine failing to make power.
The vehicle enters reduced-power or limp mode
Some vehicles intentionally limit throttle or torque after the control module detects a fault. The dashboard may show a reduced-power message, check-engine light, traction-control light, or another warning. The correct response is to record the warning and scan the relevant modules, not to keep forcing the vehicle to accelerate.
Step 1: Decide whether DIY testing is safe
Do this before opening the hood or connecting a tool.
Stop and arrange a tow when:
- The engine stalls while driving
- Power loss is sudden, severe, or repeated
- The vehicle cannot merge, climb, or maintain a safe speed
- The check-engine light is flashing
- The oil-pressure or temperature warning is illuminated
- Smoke, a fuel smell, burning odor, or an active leak is present
- The engine knocks, bangs, or makes a deep mechanical noise
- The steering or braking effort changes after the power loss
- The charging or battery warning appears with electrical symptoms
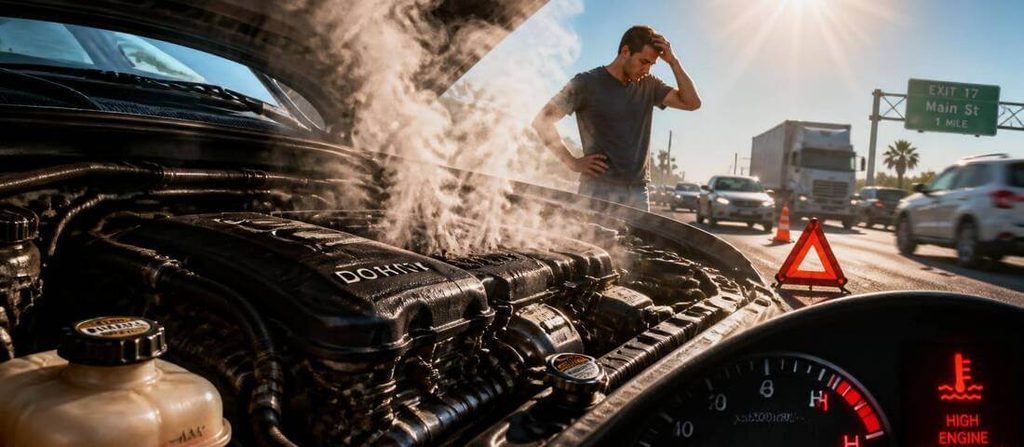
- The vehicle overheats or the temperature gauge moves into the danger zone
- A hybrid or electric vehicle shows a high-voltage or electrical-system warning
A reduced-power vehicle may still move, but that does not mean it is safe for a long trip, highway merging, towing, or heavy acceleration. Firestone Complete Auto Care advises prompt attention to reduced-power warnings and recommends stopping when sudden power loss, overheating, or unusual noises occur. See its reduced engine power guidance.
Do not reproduce the fault aggressively
Do not floor the accelerator on a public road, exceed the speed limit, take a corner quickly, or ask someone to hold a scan tool while you drive. A vehicle that cannot accelerate reliably can become a traffic hazard.
If a controlled road test is necessary, a technician should choose the location, equipment, and procedure. Your job is to provide the conditions that triggered the symptom, not to create a dangerous test.
Step 2: Record the symptom before touching anything
A useful symptom log can save diagnostic time and prevent a shop from chasing the wrong problem.
Record:
- Vehicle year, make, model, engine, and transmission
- Current mileage
- Whether the engine was cold, warm, or fully hot
- Fuel level and fuel used
- Outside temperature, if relevant
- Whether the problem occurred at idle, during acceleration, uphill, or at steady speed
- Whether it happened after refueling, after rain, or over bumps
- Whether the problem is intermittent or constant
- Whether the engine shook, misfired, surged, or stalled
- Whether RPM fell, rose, or stayed steady
- Warning lights and exact dashboard messages
- Unusual smells, smoke, whining, squealing, or rattling
- Recent repairs, maintenance, fuel, battery work, or modifications
Haynes recommends a calm, logical troubleshooting process that includes recording warning signs, gauge warnings, unusual noises, and smells. That approach is more useful than guessing from one symptom. See Basic Troubleshooting 101 from Haynes Manuals.
A simple symptom example
“Power loss” is too vague:
The engine ran normally for 15 minutes. After warming up, it hesitated while accelerating uphill. The check-engine light stayed off. RPM fell instead of rising. Fuel was near one-quarter tank. No smoke or unusual noise was present.
That description points a technician toward a different test sequence than:
The engine revved freely, but the vehicle barely gained speed, and the transmission felt as if it slipped.
Step 3: Perform safe, non-invasive checks
These checks may reveal a clue. They do not prove the final diagnosis.
Check the owner’s manual
Find the sections covering:
- Warning lights
- Reduced-power messages
- Correct fuel type
- Oil and coolant checks
- Air-filter service
- Fuse locations
- Battery and charging warnings
- Towing instructions
- Hybrid or electric-system precautions
The manual may also state whether a warning permits limited driving or requires immediate stopping.
Inspect the air filter
A heavily restricted air filter can reduce airflow and contribute to sluggish acceleration. Remove it only if the owner’s manual shows a safe procedure. Look for excessive dirt, water damage, oil contamination, collapse, or an incorrect fit.
Do not use a generic “looks dirty” judgment as proof that the filter caused the power loss. If the filter is due for replacement according to the maintenance schedule, replace it with the correct part. If the symptom remains, continue diagnosis rather than replacing unrelated components.
Inspect the intake tract
With the engine off and cool where applicable, look for:
- A disconnected intake tube
- Cracks near clamps or bends
- A loose airbox cover
- Damaged wiring or connectors
- An obvious hose pulled away from its fitting
- A collapsed or obstructed duct
Do not spray flammable chemicals into the intake. Do not unplug sensors while the engine is running unless the vehicle’s service procedure specifically instructs you to do so.
Look for obvious vacuum or emission-hose damage
A split hose, loose connection, or broken plastic fitting can create an air leak. Photograph the routing before moving anything. Do not remove hoses at random, and do not assume every unused-looking port is meant to be open.
Inspect battery terminals and visible grounds
With the vehicle off, look for loose battery terminals, heavy corrosion, damaged cables, or a ground strap that appears detached. Do not short the terminals with a tool. If the battery is swollen, leaking, hot, or damaged, stop and arrange professional service.
A visual inspection cannot prove that the charging system is healthy. It only identifies visible clues.
Inspect belts and visible leaks
Look for a belt that is frayed, missing, badly cracked, contaminated, or walking off a pulley. Check the ground for fresh fluid and note the color and location without touching an unknown substance.
Never reach toward a belt, fan, pulley, turbocharger, or hot exhaust while the engine is running. If a belt is missing or the engine overheats, do not continue driving.
Check the oil and coolant only as instructed
Use the owner’s manual for the correct checking procedure. Low oil, low coolant, or evidence of contamination may explain poor operation or indicate a serious mechanical risk.
Do not remove a hot coolant cap. Do not continue driving with an oil-pressure warning, severe coolant loss, visible steam, or overheating.
Step 4: Scan for OBD-II codes
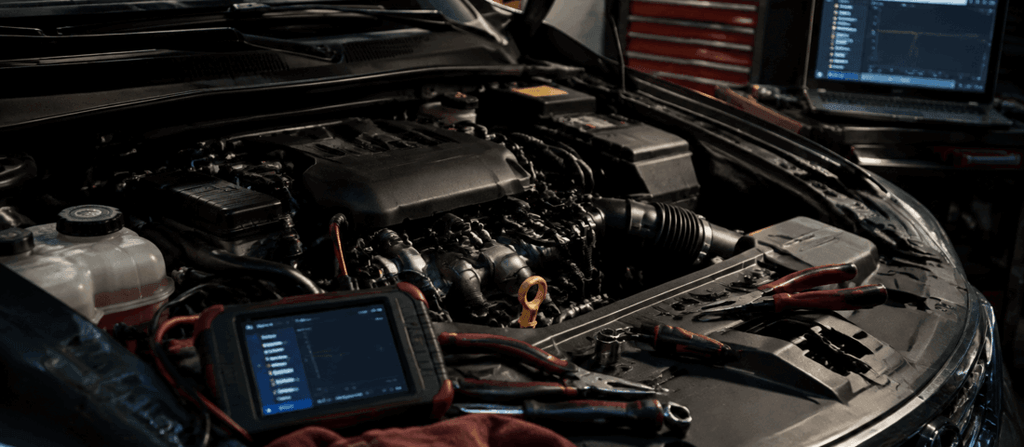
If the vehicle has a check-engine light or reduced-power message, an OBD-II scan is often the most useful next step for a basic DIY diagnosis.
A scan may show:
- Stored codes
- Pending codes
- Misfire information
- Freeze-frame conditions
- Emissions or sensor faults
- Throttle or airflow faults
- Communication or voltage-related faults
AutoZone’s guide to reduced engine power and diagnosis recommends scanning when the check-engine light is on and recording when the power loss occurs.
How to scan responsibly
- Park safely and switch the vehicle off.
- Locate the diagnostic connector using the owner’s manual if necessary.
- Plug in a compatible scanner without forcing the connector.
- Record every code before clearing anything.
- Save freeze-frame information if the scanner provides it.
- Note whether the light is steady or flashing.
- Do not clear codes just to make the light disappear.
- Compare the codes with the symptom and recent repairs.
What an OBD-II code can and cannot tell you
A code usually identifies a monitored system, circuit, range, performance condition, or misfire—not a guaranteed failed part.
For example, a sensor-related code may be caused by:
- The sensor itself
- A damaged connector
- A broken wire
- A vacuum or intake leak
- Low system voltage
- A fuel or mechanical problem that causes the sensor reading to move out of range
Do not replace a sensor solely because its name appears in a code. A code is a clue that directs the next test.
What if there are no codes?
No code does not mean no problem. Mechanical faults, fuel-pressure problems, transmission slip, intermittent wiring issues, some charging faults, and certain manufacturer-specific faults may not create an immediately visible generic code.
A no-code symptom should be documented and professionally tested if it affects safe acceleration or keeps returning.
Step 5: Basic electrical checks—only if properly equipped
Electrical faults can cause hesitation, reduced power, stalling, warning lights, or several systems to reset at once.
Clues include:
- Battery or charging light
- Headlights that dim or flicker
- Dashboard or radio resets
- Slow cranking after the incident
- Several unrelated warning lights appearing together
- Power loss after hitting a bump
- A fault that changes when wiring or a connector moves
A capable DIYer can perform a basic battery-voltage observation with a correctly configured multimeter, but the acceptable reading depends on the vehicle, battery state, temperature, charging strategy, and test condition. Do not rely on a universal number copied from a different vehicle.
Electrical safety rules
- Set the meter to the correct measurement mode before connecting it.
- Never place a meter set to current directly across the battery.
- Do not bypass a fuse with wire or metal.
- Do not probe unknown connectors without a wiring diagram.
- Keep test leads away from belts and fans.
- Do not probe yellow airbag wiring.
- Do not work on orange high-voltage wiring in a hybrid or EV.
- Stop if the battery is swollen, leaking, hot, or damaged.
A professional charging test should evaluate the battery, alternator or DC-DC converter where applicable, belt, grounds, cable voltage drop, and electrical load. A simple voltage reading cannot prove that all of those components work correctly.
Step 6: Fuel-system tests—know when to stop
Fuel delivery is a common area to investigate when power fades under acceleration or load. Possible causes include a restricted filter, weak pump, pump wiring, pressure regulation, injector problems, contamination, or a tank pickup issue.
However, a fuel-pressure test is not a universal beginner procedure.
Delphi warns that releasing fuel under pressure can cause fire and injury in its fuel-pressure and flow testing guide.
Do not open the fuel system unless all of these apply
- You have the correct vehicle-specific service procedure.
- You have the correct gauge and adapters.
- You understand how the system is depressurized and re-pressurized.
- You have suitable eye and hand protection.
- The work area is ventilated and free from ignition sources.
- You know how to contain and dispose of fuel safely.
- You can prevent fuel from contacting hot components.
- You understand whether the system uses a low-pressure or high-pressure circuit.
If any condition is missing, stop at the symptom log, visual inspection, and code scan. Have the fuel system tested by a qualified technician.
AutoZone’s fuel-pressure testing guide also emphasizes that the correct pressure range must come from vehicle-specific repair information. Do not use a generic pressure number as a diagnosis.
Step 7: Tests that usually belong to a professional
Some tests can be performed by experienced DIY technicians with the correct service information, but they should not be presented as universal driveway procedures.
Compression and leak-down testing
These tests help evaluate cylinder sealing, valves, rings, and mechanical condition. They require correct equipment, an appropriate procedure, and careful interpretation. A single low reading does not automatically identify the repair.
Exhaust-restriction testing
A restricted catalytic converter or exhaust can cause power to fade under load. Testing may require temperature comparisons, vacuum interpretation, pressure testing, or scan data. Do not drill holes or remove exhaust components as a casual test.
Ignition testing under load
A spark plug or coil may work at idle but break down under cylinder pressure. A visual inspection may find damage, but proving an ignition fault may require scan data, swap testing, or professional equipment.
Live-data and oscilloscope testing
Live data can help compare throttle position, airflow, fuel trim, engine speed, load, and sensor signals. An oscilloscope can reveal signal dropouts that a basic scanner misses. The values are vehicle-specific and need interpretation.
Loaded road testing
A vehicle that loses power only under acceleration may need a controlled road test or dynamometer test. That should be performed by a professional when the vehicle cannot accelerate safely or the symptom involves stalling, severe misfire, overheating, or unstable handling.

Use the symptom pattern to choose the next test
| Symptom pattern | Safe first step | Do not assume |
|---|---|---|
| Sluggish at all speeds | Check maintenance history, air filter, intake, and scan codes | That the air filter is the only cause |
| Hesitates only under acceleration | Record load and temperature; scan codes; inspect intake | That the fuel pump is bad without pressure testing |
| Power fades uphill or while towing | Stop unsafe testing; document fuel level and warnings | That a new sensor will fix it |
| Engine shakes and check-engine light flashes | Stop driving and tow | That clearing the code makes it safe |
| RPM rises but road speed does not | Arrange transmission or clutch diagnosis | That the engine has no power |
| Battery light appears with power loss | Stop when safe; inspect only visible belt/terminals | That a new battery alone fixes charging |
| Overheating with reduced power | Shut down safely and tow | That continued driving will “cool it down” |
| No codes but recurring power loss | Preserve the symptom record; arrange professional diagnosis | That no code means no fault |
| Problem begins after refueling | Stop if severe; preserve fuel receipt and details | That adding another additive will solve it |
What not to do during DIY testing
Avoid these common mistakes:
- Replacing several parts at once
- Clearing codes before writing them down
- Disconnecting the battery to hide a warning light
- Driving aggressively to reproduce the symptom
- Opening a fuel line without the correct equipment
- Testing a hot cooling system by removing the cap
- Probing unknown wires with a test light or meter
- Bypassing fuses or relays
- Spraying flammable cleaner around the engine
- Removing emissions equipment as a “test”
- Ignoring a flashing check-engine light
- Assuming a cheap code reader shows every manufacturer module
- Treating an internet symptom list as proof of a failed part
How to prepare a useful shop handoff
If DIY checks do not identify the cause, give the technician organized evidence:
- The exact symptom description
- When the event occurs
- Fuel level and recent fuel purchase
- Warning lights and dashboard messages
- All scan codes and freeze-frame information
- Photos of leaks, damaged hoses, or warning displays
- Recent repair and maintenance history
- Whether the engine stalls, misfires, or only feels weak
- Whether RPM rises, falls, or stays steady
- What you already tested or replaced
Ask the shop:
- Did you reproduce the symptom?
- Does the evidence point to the engine, transmission, charging system, or control system?
- Which test confirms the proposed repair?
- Were all relevant modules scanned?
- Was the charging system tested under load if electrical symptoms are present?
- Was fuel pressure tested before recommending a fuel pump?
- Could an exhaust restriction, ignition fault, or mechanical problem cause the same symptom?
- Is the vehicle safe to drive or should it be towed?
- What is the diagnostic fee, and is it separate from repair labor?
- What warranty applies to the proposed repair?
A good diagnostic process may take longer than replacing the most obvious part. That time is what prevents repeat repairs.
How much does DIY testing cost?
There is no universal figure. The cost depends on what you already own and what the vehicle requires.
Possible expenses include:
- A basic OBD-II scanner
- A quality multimeter
- Safety glasses and gloves
- Vehicle-specific service information
- A professional diagnostic fee
- Towing
- Fuel-pressure or other specialized testing
Do not buy a specialized tool merely because an internet list mentions it. First confirm that the test applies to your vehicle, that the tool is compatible, and that the result would change the repair decision.
FAQs About Engine Loses Power DIY Testing
What is the first DIY test when an engine loses power?
First decide whether the vehicle is safe to move. Then record when the power loss occurs, check warning lights and gauges, inspect obvious air-intake, belt, battery-terminal, fluid, and leak clues, and scan for OBD-II codes if appropriate.
Can an OBD-II scanner tell me which part is bad?
Not always. A code usually identifies a monitored system, circuit, range, performance condition, or misfire. The sensor, wiring, air leak, fuel problem, low voltage, or mechanical fault may still need to be tested before replacing a part.
Can I test fuel pressure myself?
Only if you have the correct vehicle-specific procedure, gauge, adapters, protective equipment, ventilation, and fuel-safety controls. Releasing pressurized fuel can cause fire and injury. If you are unsure, have a professional perform the test.
What if my car loses power but no check-engine light appears?
No warning light does not rule out a problem. Transmission slip, fuel-pressure loss, charging faults, intermittent wiring, exhaust restriction, and some mechanical problems may not immediately set a generic code. Document the symptom and arrange diagnosis if it returns or affects safe driving.
Is it safe to road-test a vehicle that loses power under acceleration?
Not if it cannot accelerate reliably, stalls, misfires severely, overheats, shows a warning light, or creates a control problem. Do not reproduce the fault aggressively on public roads. A professional should conduct a controlled road test when necessary.
Bottom line
When an engine loses power, safe DIY testing should collect evidence rather than encourage parts swapping.
Start with safety, define the symptom, record the conditions, inspect visible basics, and scan codes when appropriate. Treat codes as clues—not verdicts. Use vehicle-specific service information for any measurement, and leave fuel-pressure, compression, exhaust-restriction, high-voltage, and hazardous road testing to a qualified professional.
The best DIY diagnosis is not the one that uses the most tools. It is the one that identifies the next safe, useful test and stops before the risk becomes greater than the information gained.