
This article was updated in August 23, 2026 with new products and information by Mark S. Taylor
Plugging in your electric vehicle overnight only to wake up to a cold battery, a tripped circuit breaker, or an error light on your charger is frustrating. Home charging issues rarely happen without warning signs. In most cases, the root cause is an electrical mismatch, a worn outlet, or a communication timeout between your car and the charging station.
Most Common EV home charging problems stem from three issues: breaker trips caused by exceeding the 80% continuous load rule under NEC Article 625, melted residential-grade NEMA 14-50 outlets, or dual-GFCI nuisance tripping. First check for warm connections or burning smells, confirm app charging schedules, and test your vehicle at a public Level 2 charger to isolate the fault.

Contents
- 1 Can I Still Charge My EV Safely?
- 2 Common EV Charging Symptoms by Condition
- 3 Root Causes of Home EV Charging Failures
- 4 Stepwise Diagnostic Workflow for Home EVSE
- 5 Repair Options, Upgrades, and Cost Estimates
- 6 Repair Cost Blueprint
- 7 DIY vs. Licensed Electrician Decision Guide
- 8 Prevention Rules for Long-Term Reliability
- 9 FAQs About Common EV Home Charging Problems
- 9.1 Why does my EV charger keep tripping the circuit breaker?
- 9.2 Why is my Level 2 home charger charging slower than normal?
- 9.3 Why is my NEMA 14-50 outlet hot or discolored?
- 9.4 How do I fix dual-GFCI breaker nuisance trips on an EV charger?
- 9.5 Can a weak 12-volt car battery stop my EV from charging?
- 10 Technician’s Final Verdict
Can I Still Charge My EV Safely?
Do not ignore charging errors. A 240-volt charging station pulls high amperage for hours at a time, generating substantial heat. Use the guide below to determine whether it is safe to troubleshoot or if power must be disconnected immediately.
- STOP CHARGING IMMEDIATELY (Red Status): Turn off the dedicated breaker at your main panel if you notice a burning plastic odor, charred or discolored outlet faceplates, melted plug prongs, or warm wall surfaces. Never reset a breaker that trips instantly with a loud click or visible spark.
- DRIVE TO A PUBLIC CHARGER (Yellow Status): If your home charger displays a solid red fault light, stops charging intermittently, or throttles down to slow speeds in mild weather, your equipment is locking out for safety. Discontinue using the home unit and charge at a public commercial station while diagnosing the issue.
- SAFE TO CHARGE WITH ADJUSTMENTS (Green Status): If the charger stops due to an app schedule conflict, an unlatched charge handle, or a circuit breaker that trips only after running for several hours, you can safely continue after adjusting settings. Lower the vehicle charging amperage in your infotainment screen (for example, from 40A to 32A) and ensure the handle clicks firmly into place.
Common EV Charging Symptoms by Condition
Charging faults show up differently depending on weather, electrical demand, and equipment age. Identifying when your charger fails will pinpoint the defective component.
1. Faults at Initial Plug-In (Handshake Failures)
- Symptom: You plug the handle in, hear a single click, but the car never starts charging; the charger or charge port turns yellow or red.
- Cause: The control pilot signal failed to transition from State B (connected) to State C (charging). This happens when the handle latch is dirty, the pins are misaligned, or the vehicle’s 12-volt auxiliary battery is weak.
2. Tripping After 1 to 3 Hours of Charging (Thermal Overload)
- Symptom: Charging starts normally at full speed, but the circuit breaker trips midway through the session.
- Cause: Continuous electrical load overload. Standard circuit breakers are designed to handle continuous loads at only 80% of their rated capacity. Drawing 40 amps on a 40-amp breaker will cause internal thermal trip mechanisms to open after heat accumulates.
3. Immediate or Random Tripping (Dual-GFCI Nuisance Trips)
- Symptom: The breaker trips randomly within minutes of plugging in, even though the total power draw is well within circuit limits.
- Cause: Nuisance tripping between the ground-fault circuit interrupter (GFCI) breaker in your panel and the internal Charge Circuit Interrupting Device (CCID) inside your charging station.
4. Overheating Plugs and Outlets (Contact Resistance)
- Symptom: The NEMA 14-50 wall plug feels hot to the touch, smells like scorched plastic, or shows brown discoloration around the prongs.
- Cause: Loose terminal screws or worn receptacle contacts. Standard residential-grade outlets loosen after repeated thermal cycles, creating high electrical resistance that generates dangerous heat.
5. Charging Stalls in Wet Weather (Moisture Leakage)
- Symptom: Outdoor charging stations fail or trip ground faults only during rain, snow, or high humidity.
- Cause: Moisture ingress inside the charge coupler, worn weather seals on the wall unit enclosure, or water inside an outdoor-rated receptacle box.
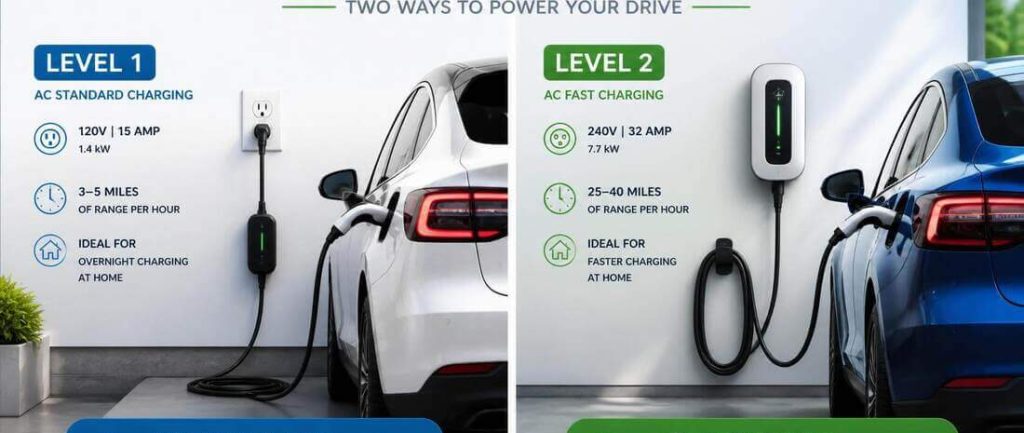
Root Causes of Home EV Charging Failures
Diagnosing charging faults requires understanding how power flows from your main panel to your vehicle’s battery. These four failure points account for the vast majority of home charging breakdowns.
1. Violating the 80% Continuous Load Rule (NEC Article 625)
Electric vehicle charging is classified under the National Electrical Code as a continuous load because power draws at maximum capacity for three hours or more. Under NEC 625.41, branch circuits and breakers must be rated at 125% of the charger’s continuous draw.
A charger pulling 40 amps requires a dedicated 50-amp circuit. If a 40-amp charger is connected to a 40-amp breaker, the breaker will inevitably trip from heat buildup.
2. Residential-Grade NEMA 14-50 Receptacle Failure
Many home installations use budget residential-grade NEMA 14-50 outlets designed for kitchen ranges. Ranges pull high power in short bursts, whereas an EV pulls high current continuously for hours.
As documented in Emporia Energy NEMA 14-50 Outlet Safety Analysis, budget outlets use thermoplastic bodies and thin copper blades. Under continuous heavy current, the metal expands and relaxes, loosening contact pressure. This creates contact resistance, which causes the receptacle to overheat and melt. Commercial-grade outlets like the Hubbell HBL9450A or Bryant 9450FR use thick thermoset composite housings and heavy brass jaws that withstand sustained thermal loads.
3. Dual-GFCI Nuisance Tripping
Modern electrical codes (NEC 2020 and NEC 2023) require GFCI circuit breakers on all 240-volt garage and outdoor receptacles. However, every certified EV charging station already contains built-in UL 2231 ground-fault protection (a CCID-20 system).
As explained by Qmerit EV Charging Technical Briefs, the EVSE sends tiny test pulses to check ground integrity before and during charging. The upstream GFCI breaker in your panel misinterprets these diagnostic pulses as actual current leaks and cuts the power. Hardwiring the charging station directly to the panel eliminates the receptacle requirement, allowing you to use a standard breaker that ends nuisance trips.
4. Control Pilot Handshake and 12V Battery Faults
Charging cannot start until the vehicle and the EVSE complete a low-voltage safety handshake over the SAE J1772 or NACS control pilot line. When plugged in, the car senses the connection and drops the circuit voltage from 12V to 9V (State B). When the car is ready to accept high-voltage current, it signals the station to drop the pilot voltage to 6V (State C), which triggers the station’s internal contactor relays.
If the vehicle’s 12-volt auxiliary battery is weak (resting below 11.8 volts), the vehicle control computers cannot energize the high-voltage pack contactors. As detailed in Repairs Advisor EV Port Diagnostics, the charging station will sit in a standby loop or throw a communication timeout code.

Stepwise Diagnostic Workflow for Home EVSE
Follow this step-by-step diagnostic workflow to isolate the source of the problem before spending money on replacement hardware.
Step 1: Visual and Physical Inspection
- Inspect the Receptacle and Plug: Look for browning, plastic deformation, or soot on the face of the outlet and the plug prongs. If any discoloration is present, discontinue use immediately.
- Inspect the Charge Handle: Check the five pin cavities inside the J1772 or NACS handle. Ensure no dirt, water, or bent pins are visible.
- Test the Latch Mechanism: Press and release the mechanical latch button. The button must spring back smoothly. If the latch is stuck down, the proximity sensor will prevent charging to avoid electrical arcing.
Step 2: Software and Charging Schedule Verification
- Compare App Schedules: Check your vehicle’s mobile app and your EVSE’s dedicated app. If your car is set to charge only during off-peak hours (e.g., midnight to 6:00 AM), plugging in during the afternoon will appear as a failed charge.
- Check Charge Limits: Ensure your vehicle’s target charge limit has not been set below the current state of charge.
- Turn Off Utility Demand Control: If your smart charger is enrolled in a utility demand-response program, verify whether the utility has temporarily throttled charging during peak grid demand.
Step 3: Station Reset and 12V Battery Check
- Power Cycle the Circuit: Switch off the EVSE breaker in your main panel. Wait 60 full seconds to allow all internal capacitors to discharge, then turn the breaker back on. This clears transient logic faults.
- Test 12-Volt Auxiliary Voltage: Pop the vehicle hood and measure the resting voltage across the 12-volt battery terminals using a digital multimeter. A healthy battery should read between 12.4V and 12.8V. If the reading is below 12.0V, charge the auxiliary battery using a 12V battery maintainer before attempting to charge the vehicle.
Step 4: Public Level 2 Isolation Test
- Drive to a Known-Good Public Level 2 Station: Plug your vehicle into a commercial public Level 2 charger (such as a ChargePoint or Flo station).
- Evaluate the Result:
- If the car charges normally: Your vehicle’s onboard charger, charge port, and 12V battery are operating properly. The failure is located on your home circuit (the EVSE unit, receptacle, or breaker).
- If the car fails to charge on the public station: The failure is vehicle-side. Contact your dealership or an independent certified EV repair shop to inspect the charge port assembly and onboard charger (OBC).
Repair Options, Upgrades, and Cost Estimates
Once you isolate whether the fault is in your home wiring or the charging hardware, use the cost blueprint below to plan repairs.
1. Upgrade to an Industrial-Grade NEMA 14-50 Receptacle
If you want to keep a plug-in setup, replace any builder-grade outlet with an industrial-rated receptacle, such as the Hubbell HBL9450A or Bryant 9450FR. Ensure the electrician torques the terminal screws to the manufacturer’s specification (typically 75 in-lbs) and verifies that 6 AWG copper wiring is installed.
2. Convert to a Dedicated Hardwired Station
Hardwiring your EVSE directly to the electrical panel is the most reliable long-term solution. Hardwiring eliminates the plug-and-socket connection point, removing contact resistance risks. Under electrical code, hardwired chargers do not require upstream GFCI breakers, which permanently eliminates dual-GFCI nuisance trips and allows you to charge at up to 48 amps on a 60-amp circuit.
3. Install Dynamic Load Management (Energy Management Systems)
If your circuit breaker trips because your home’s 100-amp service panel is overloaded when your air conditioner or clothes dryer runs, you do not necessarily need a full service upgrade. Installing a dynamic load management system (such as an Emporia Vue with EVSE control or a smart load shedder) automatically pauses or throttles your EV charging when total household demand approaches panel capacity.
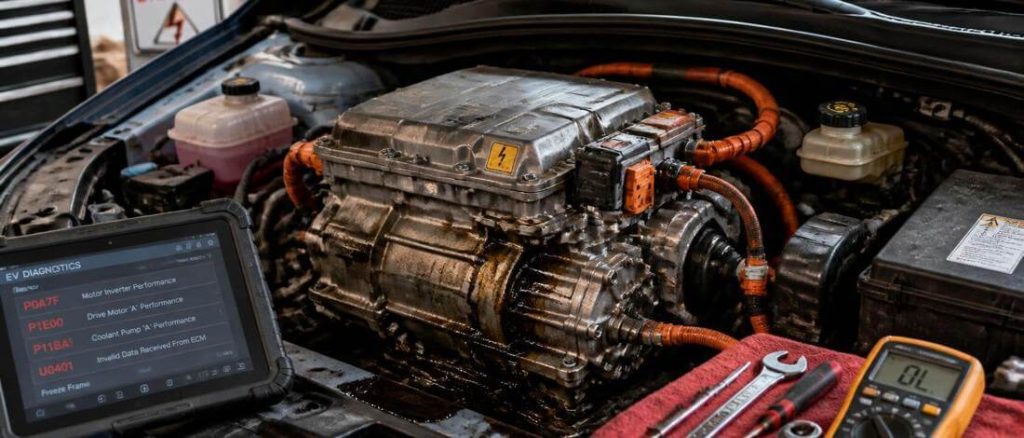
Repair Cost Blueprint
| Failure Point / Repair | Parts Cost Range | Labor Cost Range | Total Estimated Cost | Key Assumptions & Market Notes |
| Industrial Receptacle Upgrade | $50 – $90 | $130 – $260 | $180 – $350 | Replacing damaged outlet with Hubbell/Bryant; assumes existing 6 AWG copper wire is intact. |
| Hardwire Conversion | $20 – $50 | $150 – $300 | $170 – $350 | Removing 14-50 box and connecting flexible conduit directly to EVSE terminals. |
| Dedicated Breaker Replacement | $20 – $80 | $100 – $170 | $120 – $250 | Swapping worn or undersized breaker for standard 50A/60A unit in existing panel. |
| EVSE Cable / Handle Replacement | $120 – $220 | $0 (DIY) – $100 | $120 – $320 | User-serviceable J1772/NACS cordset on modular chargers (e.g., Grizzl-E). |
| Dynamic Load Shedder Installation | $400 – $700 | $400 – $800 | $800 – $1,500 | Avoids panel upgrade; monitors whole-home load and throttles EVSE automatically. |
| Main Panel Upgrade (100A to 200A) | $800 – $1,500 | $1,700 – $3,000 | $2,500 – $4,500 | Full service replacement including utility disconnect, grounding rods, and city permits. |
| Vehicle 12V Auxiliary Battery | $180 – $300 | $0 (DIY) – $80 | $180 – $380 | AGM or deep-cycle 12V auxiliary battery replacement for EV control systems. |
| Vehicle Charge Port Assembly | $250 – $500 | $200 – $400 | $450 – $900 | Dealership or specialist repair of broken latch pin or damaged thermal sensors. |
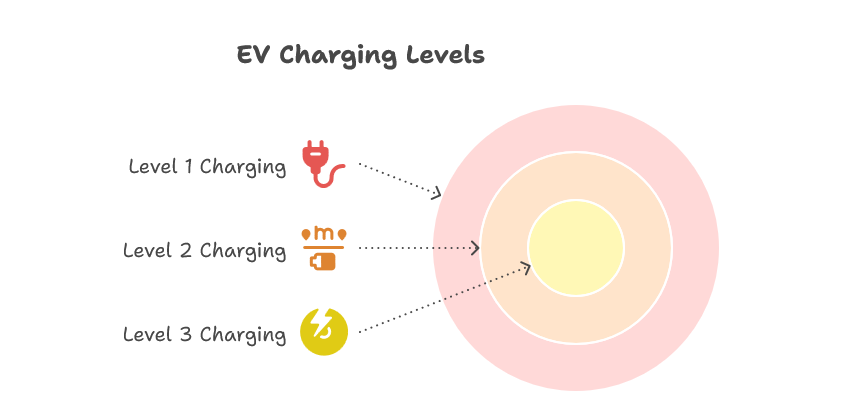
DIY vs. Licensed Electrician Decision Guide
High-voltage AC power carries severe shock and fire risks. Use this decision matrix to determine what you can safely handle yourself versus what requires a licensed professional.
| Task / Job | Tools & Skill Required | Typical Time | Safety Risk Level | Recommended Choice |
| Clearing App Schedule Conflicts | Smartphone app; Basic knowledge | 5–10 mins | Zero Risk | DIY |
| Cleaning Handle & Port Contacts | Contact cleaner & soft brush; Basic | 15 mins | Low Risk | DIY (Power Off) |
| Testing 12V Auxiliary Battery | Digital multimeter; Basic | 10 mins | Low Risk | DIY |
| Reducing Amperage Settings | EV Infotainment / EVSE App; Basic | 5 mins | Zero Risk | DIY |
| Receptacle Inspection & Replacement | Torque screwdriver, insulated tools; Advanced | 1–2 hours | High (240V Arc Flash) | Licensed Electrician |
| Hardwiring EVSE to Panel | Conduit benders, wire pullers; Advanced | 2–4 hours | High (Mains Shock) | Licensed Electrician |
| Main Panel Load Calculations | Electrical engineering / NEC knowledge | 1 hour | Moderate | Licensed Electrician |
| Breaker Installation / Sizing | Panel access, hot bus work; Master skill | 1–2 hours | Severe (Electrocution) | Licensed Electrician |
Prevention Rules for Long-Term Reliability
- Rule 1: Never Use Extension Cords on Level 2 Chargers: Heavy continuous current causes extension cord gauge undersizing, voltage drops, and severe fire hazards.
- Rule 2: Support the Weight of the Cable: Hang your charging cord on a wall holster. Letting heavy cables hang unsupported from the vehicle charge port damages internal terminal pins over time.
- Rule 3: Perform Quarterly Thermal Checks: After your car has been charging for two hours, touch the plug handle and the wall receptacle faceplate. They should feel warm, but never uncomfortably hot to the touch.
- Rule 4: Keep Outdoor Handles Holstered: Store the charging connector in a downward-facing holster to prevent rainwater, snow, or dust from accumulating inside the control pilot pins.
FAQs About Common EV Home Charging Problems
Why does my EV charger keep tripping the circuit breaker?
The breaker is likely tripping because continuous charging current exceeds the 80% continuous load threshold under NEC Article 625, such as running a 40-amp charger on a 40-amp breaker. It can also be caused by nuisance tripping between a panel GFCI breaker and the charger’s internal ground monitor, or loose wiring generating excessive heat inside the panel.
Why is my Level 2 home charger charging slower than normal?
Charging speed drops when the vehicle or EVSE detects high temperatures and throttles current to protect components, or when utility demand-response settings restrict power. It also occurs if your vehicle’s onboard settings have been accidentally adjusted to a lower amperage limit.
Why is my NEMA 14-50 outlet hot or discolored?
Sustained 32A to 40A charging generates heat that weakens the thin contact blades in budget residential-grade outlets, increasing electrical resistance. This loose connection creates dangerous thermal buildup that will melt the outlet housing if not replaced with an industrial-grade receptacle.
How do I fix dual-GFCI breaker nuisance trips on an EV charger?
The permanent code-compliant solution is to hardwire the charging station directly to your electrical panel instead of using a plug-in receptacle. Hardwired installations do not require upstream GFCI breakers under electrical code, preventing conflicts with the charger’s internal ground-fault monitor.
Can a weak 12-volt car battery stop my EV from charging?
Yes, the 12-volt auxiliary battery powers the vehicle’s onboard computers, communications modules, and high-voltage contactor relays. If the 12V battery’s resting voltage drops below approximately 11.8 volts, the vehicle cannot complete the safety handshake to initiate charging.
Technician’s Final Verdict
- Do First (Zero Cost): Disconnect power at the breaker, visually inspect the plug and outlet for thermal damage, verify app charging schedules, and test the vehicle at a public Level 2 charger to confirm your car’s onboard charger is working.
- Can Wait (Monitor & Schedule): If your breaker trips only after several hours of continuous use, lower your charging current via your vehicle’s infotainment menu (e.g., from 40A to 32A or 24A) to stay within safe thermal limits while you arrange for an electrical inspection.
- Immediate Attention (High Hazard): If you notice burning smells, soot marks on the outlet, buzzing sounds from the panel, or warm wiring, keep the breaker turned off and hire a qualified electrician to inspect the branch circuit and hardwire your unit.