
To fix car dents and dings inexpensively, you can try using hot water or a plunger to pop out small dents, or use a hairdryer and compressed air to fix larger dents.
Contents
- 1 Understanding The Common Causes Of Car Dents
- 2 Assessing The Severity Of The Dent Or Ding
- 3 Gathering The Tools And Materials Needed For The Job
- 4 Applying The Hot Water Method For Minor Dents
- 5 Using A Plunger To Remove Small Dents And Dings
- 6 Fixing Dents With A Hairdryer And Compressed Air
- 7 Employing The Boiling Water Method For Plastic Bumpers
- 8 Trying Out The Dry Ice Method For Deep Dents
- 9 Seeking Professional Help For Complex Or Extensive Damage
- 10 Preventing Future Car Dents And Dings
- 11 Frequently Asked Questions For How To Fix Car Dents And Dings Inexpensively
- 12 Conclusion
Understanding The Common Causes Of Car Dents
Road hazards and debris:
- Potholes: These can cause significant damage to your vehicle, resulting in dents and damage to your suspension system.
- Rocks and gravel: Flying debris on the road can easily create dents and scratches on your car’s exterior.
- Speed bumps: Hitting speed bumps at high speeds can cause dents or dings on the undercarriage or body of your car.
Parking mishaps and accidents:
- Door dings: Unintentionally hitting the side of your car against another vehicle, shopping carts, or even walls can leave unsightly dents.
- Minor collisions: Collisions with other cars or objects, such as poles or barriers, can result in noticeable dents and body damage.
Hail and severe weather conditions:
- Hailstorms: Large hailstones can leave numerous dings and dents on your car’s body.
- Falling branches or debris: During strong winds or storms, fallen tree branches or other debris can dent your car if they come into contact with it.
Understanding the common causes of car dents helps you take precautions and be aware of potential risks. By being cautious on the road, parking carefully, and being mindful of severe weather conditions, you can minimize the chances of acquiring dents and dings on your car.
Remember, prevention is always key when it comes to maintaining your vehicle’s appearance. However, if you do find yourself with a dent, there are cost-effective ways to fix them inexpensively. Stay tuned for our upcoming tips and tricks on how to repair car dents without breaking the bank.
Assessing The Severity Of The Dent Or Ding
When it comes to fixing car dents and dings inexpensively, it’s essential to assess the severity of the damage before attempting any repairs. By properly evaluating the dent or ding, you can determine the most effective and cost-efficient way to fix it.
Here are some key factors to consider:
Identifying Shallow And Deep Dents:
- Shallow dent: A dent that has only affected the car’s outermost layer, usually without any damage to the paintwork. These dents are less severe and easier to fix.
- Deep dent: A dent that has caused visible damage to both the outer layer and the underlying metal. These dents often require more extensive repairs.
Gauging Damage To The Paintwork:
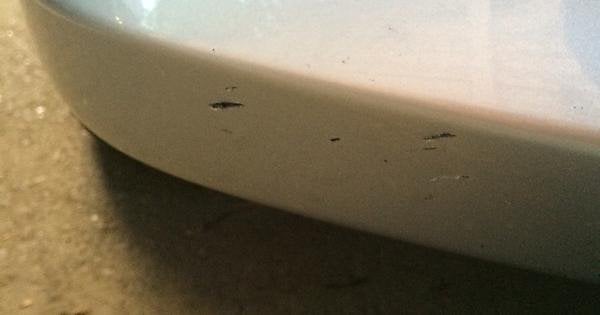
- Minimal paint damage: If the dent or ding has not caused any paint chipping or cracking, it’s considered minimal paint damage. This type of damage is typically easier to address.
- Paint damage: When the dent or ding has resulted in paint chipping, cracking, or even peeling, it requires additional attention during the repair process. Proper paint matching is crucial to achieve a seamless finish.
Evaluating The Accessibility Of The Dent:
- Easy access: Dents or dings on flat surfaces or areas with ample space around them, such as the side panels, are often easier to repair. Accessible dents are more suitable for diy fixes or inexpensive repair methods.
- Limited access: Dents on curved or hard-to-reach areas, such as car roofs or wheel wells, may require professional intervention due to their complexity. Restricted accessibility can impact the cost and difficulty of repairing the dent.
To summarize, properly assessing the severity of a car dent or ding is crucial for determining the most suitable approach for repair. Identifying whether the dent is shallow or deep helps to understand the extent of the damage, while gauging the paintwork damage ensures the appropriate measures are undertaken.
Additionally, evaluating the accessibility of the dent will help you decide whether a diy fix or professional intervention is necessary.
Gathering The Tools And Materials Needed For The Job
Dent Removal Kits And Tools:
- Dent removal kits and tools are essential for fixing car dents and dings inexpensively. Here are some tools you should gather for the job:
- Dent puller: A dent puller helps in pulling out dents from the car body.
- Dent removal rods: These rods are used to gently push out dents from the inside of the car panels.
- Rubber mallet: A rubber mallet can be used to softly tap and massage the dented area to restore its original shape.
- Body filler: Body filler helps in filling and smoothing out deep dents.
- Sandpaper: Sandpaper is needed to remove any rough edges or excess body filler.
- Primer and paint: After fixing the dent, primer and paint can be used to blend the repaired area with the rest of the car’s body.
Heat Guns And Hairdryers:
Heat guns and hairdryers can be useful in fixing minor car dents and dings. Here’s how:
- Heat the dented area: Use a heat gun or hairdryer to warm up the dented area. The heat helps to expand the car body’s metal, making it easier to reshape.
- Use a plunger or suction cup: Once the area is heated, attach a plunger or suction cup to the dent and pull with force to pop it back into shape.
- Coldwater or compressed air: After removing the dent using heat, use cold water or compressed air to cool down the area, which helps the metal contract and retain its new shape.
Household Items For Diy Dent Repairs:
- If you don’t have professional tools or heat guns, there are some household items you can use for diy dent repairs:
- Boiling water: Boil water and pour it over the dented area. This can help soften the metal, making it easier to push the dent out from the inside.
- Vacuum cleaner and bucket: Create a vacuum effect by attaching the vacuum cleaner’s hose to a bucket and placing it over the dent. Turn on the vacuum cleaner, and the suction can help pop out the dent.
- Hairdryer and compressed air: Use a hairdryer to heat the dented area, then quickly turn it to the coldest setting and blast compressed air onto the dent. The temperature change may cause the dent to pop out.
- Plunger or hammer: If the dent is small and accessible, a plunger or rubber mallet can be used to push or tap the dent out.
By gathering the right tools and materials, you can tackle car dents and dings inexpensively at home. Whether you choose dent removal kits, heat guns, or household items, these methods can help restore your car’s appearance without breaking the bank.
Applying The Hot Water Method For Minor Dents
Have you ever come back to your car only to discover an unsightly dent or ding? Luckily, there’s an inexpensive solution that can help you fix minor dents with just hot water and a few simple steps. Read on to learn how to apply the hot water method and get your car looking smooth and dent-free in no time.
Preparing Hot Water And A Towel:
- Boil a kettle of water until it is steaming hot.
- Grab a clean towel and ensure it is large enough to cover the dent area.
- Make sure the towel is thick enough to hold the hot water without burning your hands.
Pouring The Hot Water Over The Dent:
- Find the dent on your car and carefully pour the hot water over it.
- Ensure the entire dent area is soaked with the hot water.
- Leave the towel soaked in hot water on the dent for a few minutes to allow the heat to work its magic.
Applying Pressure To Pop Out The Dent:
- After a few minutes, remove the towel and examine the dent.
- Using your hands or a plunger, apply gentle pressure to the center of the dent.
- Slowly push and pull until you feel the dent pop back into place.
- Be careful not to apply too much force, as it can damage the paint or cause the dent to worsen.
Remember, the hot water method works best on minor dents and dings. For larger or more severe damage, it’s recommended to consult a professional auto body repair specialist. Now that you know how to use this simple and inexpensive technique, you can confidently tackle minor dents on your own, saving both time and money.
So next time you encounter an annoying car dent, give the hot water method a try and restore your car’s appearance with ease.
Using A Plunger To Remove Small Dents And Dings
Everyone dreads seeing a dent or ding on their car. The cost of professional repairs can be daunting, but did you know that you can fix small dents and dings inexpensively using a plunger? Yes, that everyday household item can come to the rescue and save you money! In this guide, we’ll walk you through the process of using a plunger to remove those pesky dents and dings from your car.
So, let’s get started and say goodbye to those unsightly blemishes!
Preparing The Plunger And The Car Surface:
To ensure a successful dent removal with a plunger, it’s important to properly prepare both the plunger and the car surface. Follow these steps:
- Choose the right plunger: Opt for a basic, cup-style plunger that has a solid rubber cup on the end. This type of plunger provides the best suction for dent removal.
- Clean the surface: Thoroughly wash the area around the dent using soap and water. This will remove any dirt or debris that could interfere with the suction.
- Wet the plunger: To increase the suction power, wet the rubber cup of the plunger. This will create a tighter seal against the car surface.
Creating A Suction With The Plunger:
Once you have prepared the plunger and the car surface, it’s time to create a suction that will allow you to pull out the dent. Here’s how:
- Position the plunger: Place the plunger over the center of the dent, ensuring that the entire rubber cup is in contact with the car surface.
- Press firmly: Apply firm, even pressure to the plunger while pushing it down. This will create a vacuum seal between the plunger and the car surface.
- Create suction: Pull up on the plunger handle slowly to create suction. You may feel resistance as the plunger adheres to the dent.
Pulling Forcefully To Release The Dent:
Now that you have established a strong suction, it’s time to use force to release the dent and restore your car’s smooth surface. Follow these steps:
- Pull forcefully: Pull the plunger handle upward with a quick, forceful motion. The suction created should pop the dent back into place.
- Repeat if necessary: If the dent doesn’t fully release on the first attempt, repeat the process until it does. Don’t be discouraged if it takes a few tries – persistence pays off!
- Inspect the results: Once you have successfully removed the dent, inspect the area to ensure that it looks smooth and undamaged.
Using a plunger to remove small dents and dings from your car is a cost-effective and convenient solution. With the right plunger and proper technique, you can save money and restore your car’s appearance without professional help. So, the next time you come across a minor dent or ding, remember this handy diy method.
Give it a try and be amazed at the results!
Fixing Dents With A Hairdryer And Compressed Air
Have you ever returned to your car only to find an unsightly dent or ding on the bodywork? Don’t fret! With a hairdryer and compressed air, you can fix those dents inexpensively and restore your car’s smooth appearance. Here’s a step-by-step guide on how to use these tools effectively:
Warming The Dent With A Hairdryer:
- Begin by setting your hairdryer to its highest heat setting.
- Hold the hairdryer a few inches away from the dent and move it around, ensuring that the hot air is evenly distributed.
- Continue warming the dent for about two minutes or until the area feels hot to the touch.
- Heating the dent with a hairdryer expands the metal, making it more pliable and easier to fix.
Applying Compressed Air To Freeze The Dent:
- Switch off the hairdryer and set it aside.
- Grab a can of compressed air, readily available at most hardware or automotive stores.
- Hold the can upside down to release the liquid carbon dioxide.
- Direct the nozzle towards the dent and spray the liquid over the warm metal.
- The rapid cooling caused by the compressed air will cause the metal to contract and pull the dent outward.
Knocking The Dent Out Gently:
- Take a soft rubber mallet or a rubber-covered block and lightly tap around the edges of the dent.
- Start from the outermost parts of the dent and gradually move inward.
- Use gentle but firm taps, ensuring not to apply excessive force that could further damage the car’s bodywork.
- Continue tapping until the dent is level with the surrounding surface.
- This method works best on smaller, shallower dents. For larger or more severe dents, it is advisable to seek professional assistance.
By following these steps, you can easily fix dents and dings on your own without breaking the bank. However, it’s important to note that this method may not guarantee flawless results. If you want a perfect finish, it’s always recommended to consult a professional auto body technician.
With a little patience and careful execution, you can restore your car’s exterior to its former glory.
Employing The Boiling Water Method For Plastic Bumpers
Fixing car dents and dings can be quite a hassle, not to mention expensive. Luckily, there are some inexpensive methods you can try at home to tackle this issue. One such method is the boiling water method, which is particularly effective for plastic bumpers.
In this section, we will walk you through the steps of using this technique to remedy dents and dings on your car’s plastic bumper.
Boiling A Kettle Of Water:
To begin this process, you will need access to a kettle and a source of boiling water. Follow these steps to get started:
- Fill a kettle with water and set it on a heat source, such as a stove.
- Wait for the water to come to a rolling boil. You’ll want the water to be as hot as possible for optimal results.
Pouring The Boiling Water Over The Bumper:
Once you have the boiling water prepared, it’s time to pour it over the affected area of your car’s plastic bumper. Here’s how to do it:
- Make sure you have suitable protective gear, such as heat-resistant gloves, before proceeding.
- Safely and slowly pour the boiling water over the dent or ding on your plastic bumper.
- Ensure that the water covers the entire affected area.
Reforming The Bumper With Gloved Hands:
After pouring the boiling water and with caution, it’s time to reform the plastic bumper to its original shape. Follow these steps carefully:
- Put on your heat-resistant gloves to protect your hands from the hot bumper.
- Gently and gradually use your hands to push and mold the heated plastic bumper back into its original form.
- Continue shaping the bumper until the dent or ding is no longer visible.
Remember, patience is key when using this method. Take your time and be gentle to avoid causing further damage to your car’s plastic bumper.
By following these simple steps, you can effectively fix car dents and dings on plastic bumpers without breaking the bank. Remember to exercise caution, wear protective gear, and take your time throughout the process. Now you have the knowledge to confidently try the boiling water method on your own and restore your car’s plastic bumper to its previous glory.
Trying Out The Dry Ice Method For Deep Dents
Has your car suffered a deep dent that’s making you cringe every time you see it? Don’t worry, there’s a cost-effective solution that involves using dry ice to restore your vehicle’s appearance. You can try out the dry ice method yourself and save some bucks on expensive repairs.
Here’s how you can go about it:
Obtaining Dry Ice And Gloves
To start with, you’ll need to get your hands on some dry ice and a good pair of gloves. Follow these steps to make sure you’re well-prepared:
- Visit your local grocery store or ice supply shop to purchase dry ice.
- Ask for a block of dry ice that’s large enough to cover the dent on your car.
- Put on a sturdy pair of gloves before handling dry ice.
- Remember to exercise caution, as direct contact with bare skin can cause burns.
Applying The Dry Ice To The Dented Area
Now that you have your dry ice and gloves ready, it’s time to apply the magic. Follow these steps carefully:
- Place the block of dry ice directly onto the dented area of your car.
- Ensure that the dented surface is exposed to the dry ice.
- Hold the dry ice against the dent, maintaining firm and continuous pressure.
- Move the dry ice around slightly to cover the entire dent evenly.
- Do not apply excessive force; gentle and consistent pressure is key.
Waiting For The Dent To Pop Back Into Shape
Now comes the waiting game. Be patient and let the dry ice work its magic. Follow these steps to maximize your chances of success:
- Keep a close eye on the dent and observe any changes.
- Wait for the dry ice to cause a significant temperature change on the dented surface.
- The extreme cold from the dry ice will cause the panel to contract, potentially popping the dent back into shape.
- It might take a few minutes for the dent to fully pop out, so be patient.
Remember, this method works best for deep dents that haven’t caused any paint damage. If your car’s paint has chipped or cracked, it’s best to seek professional help. This inexpensive diy technique can save you money and help restore your car’s appearance.
Give it a try, and watch that unsightly dent disappear right before your eyes!
Seeking Professional Help For Complex Or Extensive Damage
Recognizing When Professional Intervention Is Necessary
When it comes to car dents and dings, some damages may be too complex or extensive to fix on your own. Recognizing when professional intervention is necessary can save you time, money, and potential further damage to your vehicle. Here are some signs that indicate it’s time to seek professional help:
- Irreparable damage: If the dent or ding has caused deep creases, cracked paint, or extensive metal deformation, it is best to let the experts handle it. Attempting to fix such damages on your own could lead to more harm than good.
- Paint damage: If the dent has resulted in chipped or scratched paint, a professional repair service can ensure that the paint is properly matched and blended, providing a seamless repair.
- Structural damage: Dents and dings that have altered the vehicle’s structural integrity, such as damage to the frame or significant impacts to the doors or panels, should be assessed by a professional. They have the necessary tools and expertise to restore the structure back to its original form.
- Limited access to the dent: Some dents may be located in areas that are challenging to reach, such as behind panels or in tight spaces. Professionals have specialized tools and techniques to access these areas without causing further damage.
Researching Reputable Dent Repair Services
When seeking professional help for car dents and dings, it’s crucial to research and choose a reputable dent repair service. Consider the following steps to find the right professionals for the job:
- Ask for recommendations: Seek advice from friends, family, or neighbors who have had similar repairs done in the past. Their personal experiences can provide valuable insights and help you make an informed decision.
- Read online reviews: Look for reviews and testimonials from previous customers. Websites like yelp, google, or specialized automotive forums can offer insights into the quality of service provided by different repair shops.
- Check credentials: Ensure that the repair service is properly licensed and certified. Look for affiliations with reputable organizations such as the national institute for automotive service excellence (ase) or the international automotive technicians network (iatn).
- Request estimates: Contact a few repair shops and request written estimates for the repair work. Compare the prices and services offered to ensure you’re getting a fair deal. Keep in mind that the lowest price may not always guarantee the best quality.
- Inquire about warranties: Ask about any warranties or guarantees provided for the repairs. A reputable repair service should stand behind their work and offer some form of warranty coverage.
Considering Insurance Coverage For Repairs
In addition to researching reputable dent repair services, it’s important to consider your insurance coverage for car dent repairs. Here are some factors to consider:
- Contact your insurance provider: Reach out to your insurance company to determine if the damage is covered under your policy. They can provide guidance on the claims process and any deductible that may apply.
- Assess your coverage limits: Understand the specific coverage limits for car dent repairs in your insurance policy. Some policies may have a maximum amount they will cover, while others may only cover certain types of damage.
- Determine if filing a claim is necessary: Depending on the extent of the damage and your deductible amount, it may be more cost-effective to pay for the repairs out of pocket. Consider the impact on your insurance premiums and weigh the costs before filing a claim.
- Follow the claims process: If you decide to file a claim, make sure to follow the proper procedures outlined by your insurance provider. This typically involves providing documentation, such as photos of the damage and repair estimates, and cooperating with their assessment process.
- Seek pre-approved repair shops: Some insurance companies may have a list of pre-approved repair shops. Utilizing these shops can streamline the claims process and ensure that the repairs are performed by reputable professionals.
Remember, comprehensive coverage is typically required for insurance to cover car dent repairs. Review your policy details or consult with your insurance provider for more information.
Preventing Future Car Dents And Dings
Parking defensively and choosing safer spots:
- When finding a parking spot, try to select one that provides ample space around your vehicle, reducing the risk of other cars accidentally bumping into it.
- Park away from shopping cart corrals or areas where people are likely to gather.
- Avoid parking directly under trees or areas with low-hanging branches, as falling twigs or branches can cause dents.
- Look for parking spots away from high-traffic areas or near parking lot entrances where the risk of other drivers rushing or maneuvering can increase the chances of dents and dings.
- Utilize designated parking spaces and avoid parking on the side of the road whenever possible.
Utilizing protective car accessories:
- Invest in a car cover to protect your vehicle when parked for extended periods, particularly outdoors. A car cover acts as a shield against natural elements, such as hail, bird droppings, or falling branches, significantly reducing the risk of dents and dings.
- Consider using door edge guards or bumper protectors, which are adhesive strips that help prevent scratches and minor impacts. These accessories can absorb and distribute the force of an impact, minimizing the potential for dents and dings.
- Install mud flaps behind your vehicle’s wheels to minimize debris from flying up and hitting the body, causing dents or scratches.
- Apply paint protection film to susceptible areas, such as the hood, front bumper, or door edges. This clear film acts as a barrier, safeguarding against small impacts.
Regularly inspecting and maintaining your vehicle:
- Perform routine inspections of your car’s exterior, paying close attention to vulnerable areas that are prone to dents and dings. Promptly address any signs of damage to prevent further deterioration.
- Keep your vehicle clean and wash it regularly. This not only enhances its appearance but also removes potentially damaging elements like dirt, debris, and road salt that could accelerate rusting or cause dents.
- Regularly wax or polish your car’s exterior. The wax creates a protective layer that can absorb and minimize the force of minor impacts, reducing the risk of dents and dings.
- Take care when opening your vehicle’s doors, ensuring they don’t hit walls, columns, or other vehicles nearby. Being mindful of your surroundings while entering or exiting your car can help prevent accidental dings.
- Address any existing dents or damage promptly by consulting professional automotive technicians who specialize in paintless dent repair or dent removal techniques.
Frequently Asked Questions For How To Fix Car Dents And Dings Inexpensively
How Can I Fix Car Dents And Dings Inexpensively?
There are several inexpensive methods to fix car dents and dings. You can try using a plunger, boiling water, dry ice, or even a hairdryer. These diy techniques can help restore your car’s original appearance without breaking the bank.
Is It Possible To Fix Car Dents And Dings Without Professional Help?
Yes, you can fix car dents and dings without professional help. By using tools like suction cups, dent pullers, or even household items like boiling water and a hairdryer, you can try to restore your car’s surface on your own.
However, it’s important to note that this depends on the severity of the dent or ding.
What Are The Risks Of Fixing Car Dents And Dings On My Own?
Fixing car dents and dings on your own may come with risks. If not done properly, you could potentially cause more damage to your car’s surface. Additionally, some diy methods may work better on certain types of dents and dings, while others may not be as effective.
It’s important to weigh the risks and consider professional assistance if necessary.
Conclusion
Fixing car dents and dings doesn’t have to break the bank. By following these inexpensive methods, you can restore your vehicle’s appearance without draining your wallet. Whether you opt for the hot water or vacuum method, or try your hand at using a plunger or hairdryer, there are plenty of diy options to choose from.
Remember to exercise caution and take your time when attempting these techniques, as rushing could lead to further damage. And if all else fails, don’t hesitate to seek professional help. While their services may come at a higher cost, they have the expertise and tools to effectively repair even the most stubborn dents and dings.
With a little patience and resourcefulness, you can have your car looking as good as new in no time.