
This article was updated in November 20, 2026 with new products and information by Mark S. Taylor
A foggy headlight does not always mean the housing has a leak. A thin mist inside the lens can form when temperature and humidity changes cause moisture to condense. Many headlight assemblies use vents or other moisture-management features.
Water pooling, persistent droplets, streaks, corrosion or reduced light output are more concerning. These conditions may indicate water intrusion or another problem that needs inspection.


Contents
- 1 Is Condensation Inside a Headlight Normal?
- 2 Why Do Headlights Fog Up Inside?
- 3 Normal Condensation vs a Possible Water Leak
- 4 What Manufacturer Service Bulletins Show
- 5 How to Check Headlight Condensation Safely
- 6 What Should You Avoid?
- 7 What Should a Repair Shop Inspect?
- 8 FAQs About Headlight Condensation Inside
- 9 Bottom Line
Is Condensation Inside a Headlight Normal?
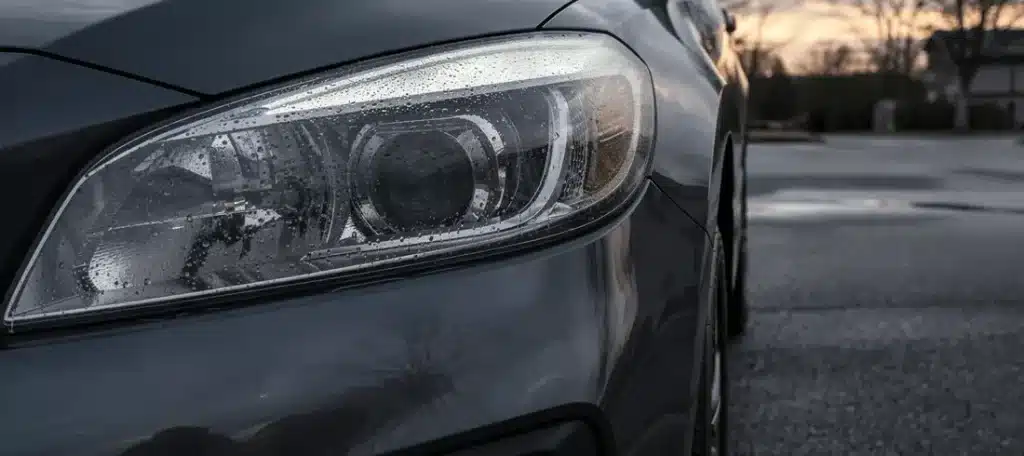
Sometimes. A light mist inside a headlight can be normal after rain, a car wash or a temperature change. Many modern lamp assemblies allow air exchange through vents or use other moisture-management features.
When the air inside the housing reaches the dew point, moisture can condense on the inner surface of the lens. This may create a cloudy appearance even when the lamp is functioning properly.
Temporary condensation does not automatically mean the headlight seal has failed.
However, water collecting inside the housing, persistent droplets, visible streaks or electrical problems deserve closer inspection.
Why Do Headlights Fog Up Inside?
Headlamp assemblies contain air and may use vents or other moisture-management components. When the temperature of the lens or air inside the housing changes, moisture can condense.
This may happen after:
- A car wash.
- Rain or snow.
- Parking outside in cold weather.
- A warm vehicle entering a colder environment.
- Temperature changes between day and night.
Condensation may appear in one headlight and not the other. Sunlight, airflow, lamp temperature and surrounding conditions can affect how moisture forms and clears.
The presence of fog alone does not prove that a seal has failed.
Normal Condensation vs a Possible Water Leak
The appearance of moisture can help you decide whether the headlight needs further inspection.
| What you notice | What it may mean | Next step |
|---|---|---|
| Thin mist or light haze | Normal condensation may be present | Observe under normal operating conditions |
| Moisture near a corner or edge that comes and goes | Environmental condensation is possible | Follow the owner’s manual or applicable OEM guidance |
| Water streaks inside the lens | Possible water intrusion | Arrange an inspection |
| Water collecting at the bottom of the housing | Possible leak or excessive moisture | Arrange prompt inspection |
| Condensation that remains after the manufacturer’s procedure | Possible leak or moisture-management fault | Follow vehicle-specific service information |
| Corrosion, flickering, a warning light or reduced light output | Possible electrical or lamp-component damage | Have the lamp inspected |
There is no universal percentage of lens coverage or clearing time that proves a headlight has a leak. The correct criteria depend on the lamp design and the manufacturer’s service information.

What Manufacturer Service Bulletins Show
Automotive manufacturers use different procedures to evaluate headlight condensation. Their guidance can help distinguish a normal moisture condition from a leak, but it should not be applied universally.
Hyundai’s Lamp Condensation Bulletin
Hyundai’s November 2025 bulletin 25-BD-012H supersedes 23-BD-002H and provides guidance for condensation affecting headlamps, rear combination lamps, daytime running lamps and fog lamps.
The bulletin describes normal condensation and inspection criteria, including water pooling, water streaks and condensation that remains after the prescribed drying procedure.
These are Hyundai’s vehicle-specific criteria. They should not be treated as a universal diagnostic test for every headlight.
GM’s Exterior Lamp Condensation Bulletin
GM bulletin 01-08-42-001Q provides guidance for distinguishing normal condensation from water leaks in specified passenger cars and trucks.
The bulletin includes a 60-minute observation under specified dry-environment conditions for certain normal-condensation situations. It also explains that clearing time depends on lamp design and environmental conditions.
This is GM’s procedure for vehicles covered by its bulletin. It is not a universal test for other manufacturers.
These examples illustrate why manufacturer-specific service information matters. Do not apply a Hyundai or GM observation time to another vehicle without checking its service information.
How to Check Headlight Condensation Safely
You can make a few observations without opening the headlight assembly.
1. Record When the Condensation Appeared
Think about what happened before you noticed the fog.
Did it appear after rain, a car wash, cold parking or a large temperature change? These conditions can help explain why moisture formed inside the lens.
2. Look for Water Pooling
A thin haze is different from a large amount of water collecting at the bottom of the housing.
Pooling is a stronger reason to arrange an inspection. Excess moisture may affect internal components, coatings or electrical connections.
3. Look for Water Streaks
Check for visible trails, deposits or obvious staining inside the lens.
Water streaks may indicate moisture movement inside the housing. They do not identify the exact source of a leak, so further inspection may be needed.
4. Check Light Performance
Look for changes in brightness, uneven illumination or a warning light on the dashboard.
If the lamp flickers or other vehicle lights are also acting strangely, see our guide to car lights flickering while driving for additional electrical troubleshooting guidance.
5. Observe Whether the Moisture Clears
Follow the owner’s manual or applicable manufacturer service information.
Do not use an arbitrary clearing time to determine whether the headlight has failed. Different assemblies have different moisture-management designs.
6. Avoid Opening the Assembly
Do not remove sealed components or open the headlight unless the manufacturer provides an appropriate service procedure.
Some lamp assemblies contain serviceable moisture-absorbent packs or other components. Their location and replacement procedure vary by vehicle.
If the headlight cannot provide adequate illumination, avoid driving at night until the problem is addressed.
What Should You Avoid?
Do not drill holes in the headlight housing.
Do not apply silicone around the lens as a generic repair.
Do not use a heat gun, open flame or unapproved chemical to dry the assembly.
These methods can damage the lens, internal coatings, vents, wiring or electronic components. They may also interfere with the headlight’s designed moisture-management system.
Use the manufacturer’s service procedure or have a qualified technician inspect the assembly.
What Should a Repair Shop Inspect?
If water pools inside the lamp, condensation persists or lighting performance changes, a technician may need to inspect:
- The lens and housing for cracks or damage.
- The housing-to-lens seam.
- Dust caps and access covers.
- Vents and moisture-management components.
- Wiring connectors and electrical modules.
- Internal coatings or desiccant, where applicable.
- Aftermarket modifications.
The technician should confirm the cause before recommending a complete lamp assembly.
Normal condensation may not require replacement. A damaged housing, failed sealing component, blocked vent or internal electrical problem may require a different repair.
As part of your regular vehicle inspection, check that all exterior lights work properly and look for visible damage. See our car maintenance guide for other routine checks.
FAQs About Headlight Condensation Inside
Is a little fog inside a headlight bad?
Not necessarily. A thin mist that comes and goes after weather or temperature changes may be normal for a vented lamp. Persistent water, pooling, streaks or electrical problems need inspection.
How long should headlight condensation take to clear?
There is no universal time. Lamp design, humidity, temperature, airflow and driving conditions affect clearing. Follow the owner’s manual or the manufacturer’s applicable service bulletin.
Can headlight condensation damage the bulb or LED?
Excess water or a persistent leak can create corrosion or electrical problems. Normal temporary condensation does not automatically mean the lamp is damaged. Inspect the lamp if light output changes, warnings appear or water accumulates.
Should I replace a headlight if it fogs up?
Not based on fog alone. Confirm whether the condition is normal condensation or water intrusion. Some lamp designs have serviceable moisture-management components, while others require different procedures.
Can I seal the headlight with silicone?
Do not use silicone as a generic fix. The venting, sealing and service design vary. Incorrect sealant can block vents or damage the assembly. Follow the manufacturer’s procedure.
Bottom Line
Headlight condensation is not automatically a failed headlight. A thin mist that comes and goes may be a normal response to temperature and humidity changes.
Water pooling, persistent droplets, streaks, corrosion or reduced light output are stronger reasons for inspection. Use the correct vehicle-specific guidance and confirm the cause before replacing the lamp.