
This article was updated in September 14, 2023 with new products and information by Mark S. Taylor
To clean brake calipers, first, remove the wheels. Then, spray brake cleaner on the calipers and scrub off the dirt using a stiff brush.
Contents
- 1 The Importance Of Brake Caliper Cleaning
- 2 Tools And Materials Needed
- 3 Step 1: Preparing The Vehicle
- 4 Step 2: Removing The Wheel And Brake Caliper
- 5 Step 3: Cleaning The Brake Caliper
- 6 Step 4: Cleaning The Brake Pads And Rotor
- 7 Step 5: Lubricating And Reassembling
- 8 Step 6: Repeat For Remaining Brake Calipers
- 9 Bonus Tips: Maintaining Clean Brake Calipers
- 10 Frequently Asked Questions For How To Clean Brake Calipers
- 11 Conclusion
The Importance Of Brake Caliper Cleaning
Keeping your brake calipers clean is crucial for ensuring optimal performance and safety of your vehicle. Neglecting this important maintenance task can have negative effects on your braking efficiency and even the lifespan of your brake system. By understanding the importance of brake caliper cleaning, you can protect your investment and enhance the overall driving experience.
Why Keeping Your Brake Calipers Clean Is Crucial For Performance And Safety
- Improves braking performance: Clean brake calipers ensure that the brake pads make proper contact with the rotors, allowing for maximum friction and effective stopping power. This is particularly important during emergency braking or in adverse weather conditions.
- Prevents brake fade: Over time, brake dust and debris can accumulate on the calipers, leading to overheating and reduced braking performance. Regular cleaning prevents brake fade, keeping your brakes responsive and reliable.
- Reduces the risk of brake failure: Clean brake calipers help prevent the corrosion and rusting that can occur due to exposure to road salt, moisture, and other contaminants. This reduces the risk of brake failure and ensures your vehicle’s safety on the road.
The Negative Effects Of Dirty Brake Calipers On Braking Efficiency
- Reduced stopping power: When brake calipers become clogged with dirt, dust, and grime, they cannot exert the necessary force on the brake pads. This results in reduced braking efficiency and longer stopping distances, putting you and your passengers at risk.
- Uneven brake pad wear: Dirty brake calipers can cause uneven wear on the brake pads, leading to uneven braking and potential brake pad damage. This can result in costly repairs and compromises the overall performance of your braking system.
Protecting Your Investment And Extending The Lifespan Of Your Brake System
- Avoids premature wear: Cleaning your brake calipers regularly helps remove contaminants that can accelerate wear and tear on your brake pads, rotors, and other components. By extending the lifespan of your brake system, you can save money in the long run.
- Prevents costly repairs: Neglected brake calipers can lead to more serious issues, such as brake fluid leaks, seized calipers, and rotor damage. By maintaining a clean and properly functioning brake system, you can prevent costly repairs and ensure your vehicle’s longevity.
- Enhances resale value: A well-maintained brake system, including clean calipers, demonstrates that you have taken care of your vehicle. This can boost its resale value and attract potential buyers who prioritize safety and performance.
The importance of brake caliper cleaning cannot be overstated. Regular maintenance and cleaning not only improve braking performance and safety but also protect your investment and extend the lifespan of your brake system. By incorporating this simple task into your vehicle maintenance routine, you can ensure a smooth and reliable driving experience for years to come.
Tools And Materials Needed
Cleaning brake calipers is an essential maintenance task that can help improve the performance and lifespan of your vehicle’s braking system. Regular cleaning not only removes dirt and debris but also prevents corrosion and ensures smooth operation. To get started, you’ll need a few tools and materials to make the process easier and more effective.
Here’s a detailed list with descriptions and recommendations to help you gather everything you need.
Essential Tools And Materials Required For Cleaning Brake Calipers
- Brake cleaner: Opt for a high-quality brake cleaner that is specifically designed to remove brake dust, dirt, and grease. Look for a non-chlorinated formula that is safe for use on various brake components.
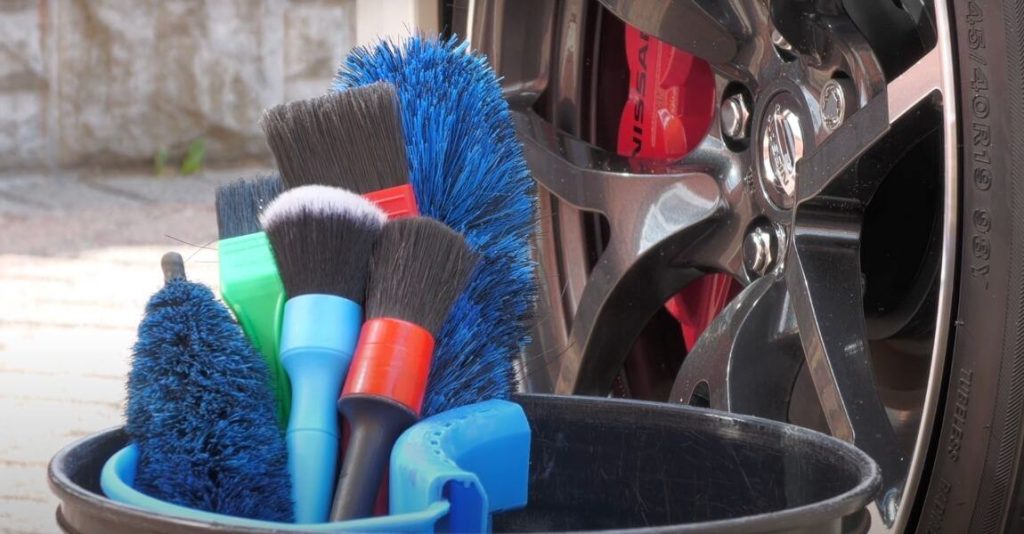
- Wire brush: A stiff wire brush is essential for scrubbing away stubborn brake dust and grime from the calipers. Choose a brush with durable bristles that can withstand rigorous cleaning.
- Disposable gloves: To protect your hands from brake cleaner and potential exposure to harmful chemicals, always wear disposable gloves during the cleaning process. Latex or nitrile gloves are recommended for their durability and resistance to chemicals.
- Microfiber cloth: Use a soft microfiber cloth to wipe down the calipers and remove any residue left by the brake cleaner. Microfiber is gentle on the surface and minimizes the risk of scratching.
- Brake grease: After cleaning the brake calipers, applying a thin layer of brake grease helps prevent future corrosion and ensures smooth movement. Look for a high-temperature, silicone-based brake grease for optimal performance.
- Jack and jack stands: To access the brake calipers easily, you’ll need a jack to lift the vehicle and jack stands to secure it in an elevated position. Safety should always be your top priority when working under a vehicle.
- Lug wrench: If you have alloy wheels, a lug wrench is necessary for removing the wheel to gain access to the brake calipers.
- C-clamp or brake piston tool: If you need to compress the brake pistons back into the caliper during reassembly, a c-clamp or a dedicated brake piston tool will come in handy. This ensures proper fitment of new brake pads.
Safety Precautions To Keep In Mind
Before beginning the cleaning process, it’s crucial to keep these safety precautions in mind:
- Working in a well-ventilated area: Brake cleaner contains volatile substances, so make sure you’re working in a well-ventilated space to avoid inhaling fumes. Open windows or doors, or consider working outdoors if possible.
- Eye protection: Wear safety goggles or glasses to protect your eyes from any spray back or debris while cleaning.
- Brake cleaner handling: Follow the manufacturer’s instructions on handling and using the brake cleaner. Avoid direct contact with your skin or eyes and keep it away from open flames or sources of ignition.
- Safety gear and positioning: Use appropriate safety gear, such as gloves, to protect your hands and avoid injury. Always position yourself in a stable and safe manner when working under a raised vehicle.
Cleaning brake calipers doesn’t have to be a daunting task if you have the right tools and materials on hand. By gathering these essentials and adhering to safety precautions, you’re well-prepared to tackle this maintenance task and ensure your brake calipers stay in top condition.
Stay tuned for the next steps in our blog post on how to clean brake calipers effectively.
Step 1: Preparing The Vehicle
Before you can start cleaning your brake calipers, it’s important to properly prepare your vehicle. Follow these steps to ensure everything is set up correctly:
- Parking the vehicle on level ground: Find a flat surface to park your vehicle on. This will ensure stability and safety while you work on your brakes.
- Ensuring the engine is cool and the ignition is off: Before you begin any maintenance on your vehicle, make sure the engine has had time to cool down and that the ignition is turned off. This will prevent any accidents or injuries.
- Lifting the vehicle safely using appropriate methods: When lifting your vehicle, it’s crucial to use the proper methods to ensure the safety of both yourself and your vehicle. Here are a few guidelines to follow:
- Use a jack that is suitable for your vehicle’s weight and size.
- Place the jack under the recommended lifting points, as specified in your vehicle’s manual.
- Make sure the jack is positioned securely on a flat surface before starting the lifting process.
- Use jack stands or other supports to provide additional stability while working on your brakes.
Remember, proper preparation is essential in any vehicle maintenance task. By following these steps, you’ll have a solid foundation for cleaning your brake calipers effectively. Stay tuned for the next steps in our guide on how to clean brake calipers!
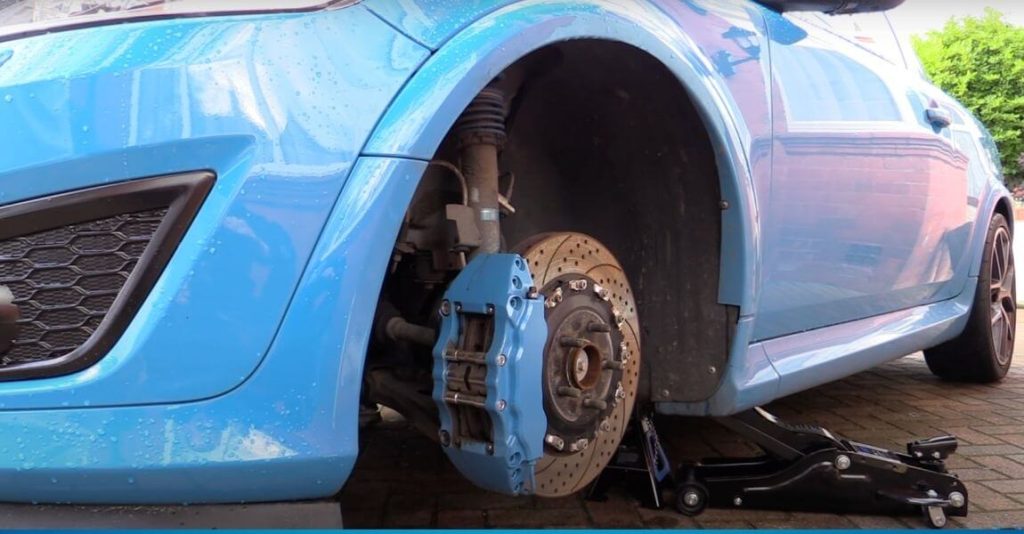
Step 2: Removing The Wheel And Brake Caliper
Loosening The Lug Nuts And Removing The Wheel:
Before you can start removing the brake caliper, you need to first loosen the lug nuts and take off the wheel. Here are the key steps to follow:
- Grab a lug wrench or a socket wrench with the appropriate socket size for your lug nuts.
- Use the wrench to turn the lug nuts counterclockwise. Apply firm pressure until you feel them start to loosen.
- Make sure not to fully remove the nuts at this stage. Just loosen them enough to make it easier to remove later.
- Once the lug nuts are loosened, use a car jack to raise the vehicle off the ground. Place the jack at the designated jacking points specified in your vehicle’s manual.
- Carefully lift the vehicle until the wheel is slightly off the ground, ensuring it is secure in place.
- Now, you can proceed to fully remove the lug nuts and take off the wheel. Place the lug nuts in a safe place, as you will need them later when reassembling.
Remember, safety is essential when working with a vehicle, so make sure to take precautions and use proper equipment.
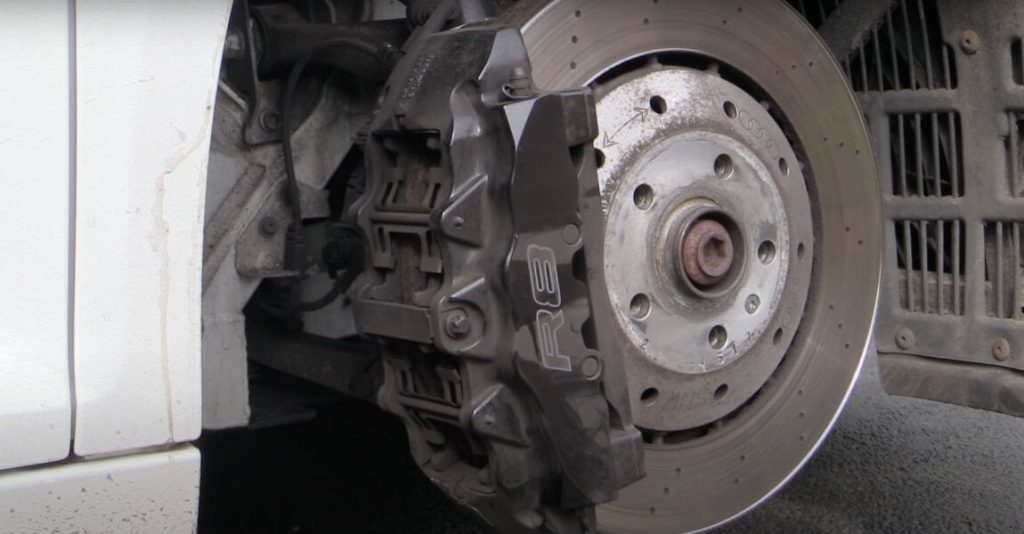
Identifying And Locating The Brake Caliper:
Once the wheel is off, you can easily identify and locate the brake caliper. Here’s what you need to do:
- Take a moment to visually inspect the area behind the wheel where the brake rotor is located. The brake caliper will be positioned just above the rotor, and attached to the brake bracket or spindle.
- Depending on your vehicle, you may have front and rear brake calipers. Both types will be visible once the wheel is removed.
- The brake caliper is a rectangular or U-shaped component that houses the brake pads and applies pressure to the rotor to stop the vehicle.
- Identify the brake caliper by its distinctive shape and the presence of brake lines and pistons connected to it.
If you’re having trouble locating the brake caliper, refer to your vehicle’s manual for a diagram or look at resources online for your specific make and model.
Removing The Brake Caliper Carefully Without Damaging Any Components:
Now that you know where the brake caliper is located, it’s time to remove it. Follow these steps to ensure a careful removal process:
- Begin by inspecting the brake caliper for any signs of damage, leaks, or excessive wear. If you notice any issues, it may be necessary to replace the caliper entirely.
- Locate the bolts or slide pins securing the brake caliper to the brake bracket/spindle. These bolts/pins are usually found on the backside of the caliper.
- Using an appropriate socket or wrench, loosen and remove these bolts/pins one at a time. Keep track of their position, as they may be different lengths.
- Once the bolts/pins are removed, carefully slide the brake caliper off the brake bracket/spindle. Take caution not to put strain on the brake lines or damage any other components.
- With the caliper off, inspect the brake pads for wear, thinness, or unevenness. If necessary, replace the brake pads to ensure optimal braking performance.
- If you’re only working on one side, avoid hanging the brake caliper by the brake line. Instead, use a wire or bungee cord to suspend it from a nearby suspension component (ensuring it doesn’t dangle or apply tension on the brake line).
By following these steps, you can safely and effectively remove the wheel and brake caliper, setting the stage for further brake maintenance or repairs. Remember to always consult your vehicle’s manual for specific instructions and refer to reputable resources for additional guidance.
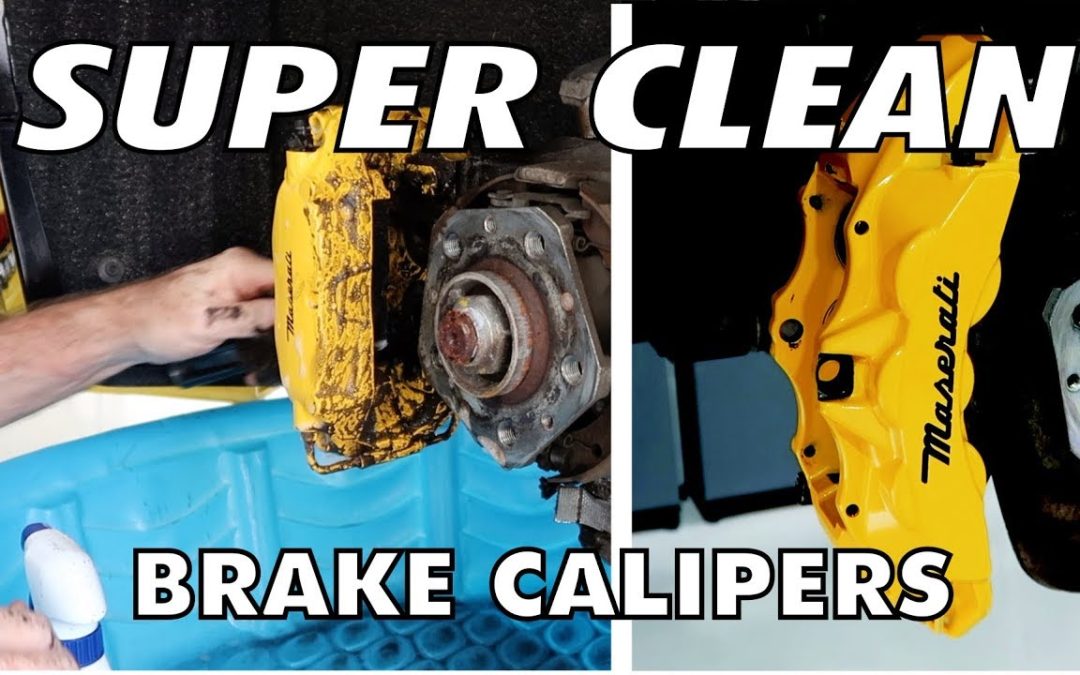
Step 3: Cleaning The Brake Caliper
Now that you have inspected the brake caliper for signs of wear and damage, it’s time to move on to the next crucial step: cleaning the brake caliper. This step is essential to ensure the proper functioning of your brakes and extend their lifespan.
Here are the key points to keep in mind when cleaning the brake caliper:
- Removing excess dirt and debris: Before applying any cleaning solutions, it’s important to get rid of any loose dirt and debris. This can be done using either compressed air or a brush. By removing this excess buildup, you’ll be able to effectively clean the caliper surface.
- Using a brake cleaner: Brake cleaner is specifically formulated to dissolve grease, dirt, and brake dust accumulated on the caliper surface. To thoroughly clean the caliper, spray the brake cleaner onto the surface and let it sit for a few minutes. Make sure to cover all areas, including the pistons, bolts, and crevices.
- Scrubbing and rinsing: Once the brake cleaner has done its job, use a brush or a clean cloth to scrub away any remaining dirt or grime. Pay attention to hard-to-reach areas and stubborn stains. After scrubbing, rinse the caliper with clean water to remove any residue.
- Drying the caliper: To prevent moisture buildup and potential rusting, make sure to dry the caliper completely before reassembling it. You can use compressed air or a lint-free cloth for this purpose. Ensure that all components, including the pistons and brake pad contact points, are dry and free from any cleaning solutions.
- Inspecting for any missed spots: Before proceeding with further steps, take a close look at the cleaned caliper to ensure that no dirt or debris has been missed. Double-check all areas, especially around the pistons and braking surfaces. If necessary, repeat the cleaning process until you are satisfied that the caliper is completely clean.
Remember, cleaning the brake caliper is an important maintenance task that should not be overlooked. A clean caliper will not only enhance the longevity of your braking system but also contribute to safer and more efficient braking. Taking the time to clean your brake calipers regularly will pay off in the long run.
Step 4: Cleaning The Brake Pads And Rotor
After removing the brake caliper and inspecting it thoroughly, it’s time to move on to cleaning the brake pads and rotor. This step is crucial as it ensures optimal braking performance and extends the lifespan of your brake components. Here’s how you can effectively clean the brake pads and rotor:
Removing The Brake Pads For Inspection And Cleaning
- Carefully remove the brake pads from the caliper using a suitable tool, ensuring not to damage the pads or the surrounding components.
- Inspect the brake pads for any signs of wear, unevenness, or damage. If the pads are heavily worn or have deep grooves, it’s recommended to replace them.
- Check for any brake dust buildup on the pads. Excessive brake dust can affect braking performance.
Cleaning The Brake Rotor Using A Brake Cleaner And A Wire Brush
- Before cleaning the brake rotor, make sure to secure the vehicle on jack stands or a solid surface to prevent it from rolling.
- Spray a brake cleaner on the rotor surface to remove any dirt, oil, or contaminants. Allow the cleaner to penetrate for a few minutes.
- Scrub the rotor surface gently with a wire brush to remove any stubborn debris. Be cautious not to apply excessive force that could damage the rotor.
- Rinse off the residue from the brake cleaner using clean water or brake cleaner once again.
- Wipe the rotor dry with a clean lint-free cloth.
Reinstalling The Brake Pads Securely
- Check the brake caliper to ensure it is clean and clear of any debris or brake dust.
- Carefully place the cleaned brake pads back into the caliper, matching the inner and outer pads correctly.
- Push the pads evenly to ensure they are seated properly within the caliper.
- Double-check that the caliper slides smoothly on its guide pins without any binding.
With the brake pads and rotor now thoroughly cleaned and inspected, you are one step closer to achieving smooth and efficient braking performance. Remember to always follow the manufacturer’s recommendations and guidelines for your specific vehicle model. Regular maintenance and cleaning of your brake calipers, pads, and rotors will not only keep your braking system in top shape but also contribute to your safety on the road.
Step 5: Lubricating And Reassembling
Applying A Coat Of Brake Caliper Lubricant To Necessary Parts
Properly lubricating your brake caliper is a crucial step in the reassembly process. This helps ensure smooth and efficient brake system performance. Here are the key points to keep in mind when applying a coat of brake caliper lubricant:
- Use a high-quality brake caliper lubricant: Opt for a lubricant specifically designed for brake systems to ensure optimal performance and longevity.
- Clean the contact points: Before applying the lubricant, thoroughly clean the contact points on the brake caliper where it comes into contact with the brake pads and brake hardware. Use a brush or a clean cloth to remove any dirt or debris.
- Apply a thin and even coat: Apply a thin layer of lubricant to the contact points using a brush or your gloved finger. Avoid applying too much lubricant as excess lubrication can attract dirt and debris, leading to potential brake system issues.
- Pay attention to the slider pins: Apply a small amount of lubricant to the slider pins as well, ensuring they move smoothly and freely within the caliper bracket.
- Reinstall the brake pads: Once the lubricant is applied, reinsert the brake pads into the caliper bracket, ensuring a snug fit.
Reinstalling The Brake Caliper Onto The Rotor And Securing It
With the brake caliper lubricated and the brake pads in place, it’s time to reinstall the brake caliper onto the rotor. Here are the steps to follow:
- Position the caliper: Carefully align the brake caliper over the rotor, ensuring that it is properly seated and aligned with the brake pads.
- Attach the caliper bolts: Insert the caliper bolts and tighten them by hand to secure the caliper in place. Double-check that the caliper is aligned correctly before tightening the bolts further using a suitable wrench or socket.
- Torque the caliper bolts: Refer to your vehicle’s specifications or the manufacturer’s recommendations to determine the proper torque value for the caliper bolts. Use a torque wrench to tighten the bolts to the specified torque.
- Verify proper caliper placement: Once the caliper is securely attached, ensure that it is properly aligned and positioned, allowing sufficient clearance between the brake pads, rotor, and wheel.
Tightening The Lug Nuts And Testing The Brake System For Proper Function
After reinstalling the brake caliper, it’s essential to tighten the lug nuts and thoroughly test the brake system for proper function. Follow these steps to ensure everything is in order:
- Tighten the lug nuts: Use a lug wrench or socket wrench to tighten the lug nuts in a crisscross pattern. Tighten them snugly, but avoid over-tightening, as this can lead to rotor warping or stud damage. Refer to your vehicle’s torque specifications for the appropriate torque values.
- Test the brake system: Before hitting the road, it’s crucial to test the brake system’s functionality. Carefully depress the brake pedal a few times to ensure proper brake pad engagement and a firm pedal feel. Listen for any unusual noises and pay attention to any warning lights on the dashboard.
- Perform a road test: Take your vehicle for a short drive in a safe and controlled environment to assess the braking performance. Test the brakes at various speeds and check for any signs of brake drag, squealing, or pulsation. If you notice any issues, recheck your work or consult a professional.
With a thorough understanding of these steps and proper attention to detail, you can successfully lubricate, reinstall, and test your brake calipers, ensuring a smooth and safe braking experience. Remember, if you’re uncertain or uncomfortable performing these tasks, it is always recommended to seek assistance from a qualified automotive professional.
Stay safe on the road!
Step 6: Repeat For Remaining Brake Calipers
Following The Same Process For Cleaning The Remaining Brake Calipers
Once you have finished cleaning one brake caliper, it’s time to move on to the next one. It’s important to ensure consistency and thoroughness throughout the cleaning process to maintain the proper functioning of your brake system. Here’s a step-by-step guide on how to clean the remaining brake calipers effectively:
- Start by inspecting the remaining brake calipers. Look for any signs of dirt, grime, or corrosion that may have accumulated on the caliper surface.
- If you notice any buildup, gather your cleaning supplies and put on a pair of gloves to protect your hands. Remember, safety first!
- Prepare a cleaning solution by mixing warm water with a mild detergent. This solution will help loosen and remove any stubborn dirt or brake dust.
- Dip a soft brush or sponge into the cleaning solution and gently scrub the caliper surface. Pay close attention to the areas around the brake pistons and brake pads, as these are common areas for dirt and debris to accumulate.
- Use a toothbrush or small brush to access hard-to-reach areas and crevices. This will ensure a thorough clean and prevent any buildup from causing future brake issues.
- Rinse the caliper thoroughly with clean water to remove any residual soap or cleaning solution. Make sure all areas are rinsed properly to avoid any potential damage to the brake system.
- Use a clean, lint-free cloth to dry the brake caliper completely. Moisture and brake dust can lead to corrosion if left on the caliper surface.
- Apply a thin layer of brake caliper lubricant to the moving parts of the caliper, such as the slide pins and pistons. This will help ensure smooth operation and prevent sticking or binding.
- Finally, visually inspect the brake caliper once more to ensure a thorough cleaning. Double-check for any missed spots or remaining dirt that may affect the performance of the brake system.
By following these steps and cleaning each brake caliper with care, you can maintain optimal brake performance and prolong the lifespan of your brake system. Remember to always prioritize safety and consult a professional if you encounter any difficulties or uncertain situations.
Now that you have successfully cleaned all your brake calipers, you can rest assured knowing that your braking system is in good shape. Regular maintenance and cleaning will not only improve the longevity of your brake calipers but also contribute to your overall driving safety.
So, take the time to clean your brake calipers, and enjoy a smooth and reliable braking experience on the road.
Bonus Tips: Maintaining Clean Brake Calipers
Regular cleaning schedule to prevent excessive build-up:
- Brake calipers should be cleaned regularly to prevent the build-up of dirt, debris, and brake dust.
- Follow a cleaning schedule based on your driving conditions and frequency of use.
- Aim to clean your brake calipers at least every three to six months.
- Schedule a cleaning session whenever you complete any major brake work or notice excessive dirt or grime on your wheels or calipers.
Monitoring for any signs of brake caliper issues:
- Regularly inspect your brake calipers for any signs of wear, damage, or malfunction.
- Look for fluid leaks, uneven brake pad wear, or unusual noises when applying the brakes.
- Any signs of brake caliper issues should be addressed immediately to prevent further damage and ensure optimal brake performance.
- If you notice any abnormalities, consult a professional mechanic for a thorough inspection and necessary repairs.
Other maintenance practices for optimal brake performance:
- Keep your wheels and tires clean to prevent the accumulation of brake dust, which can lead to dirty calipers.
- Use a specialized brake cleaner or a mild soapy water solution and a soft brush to clean the calipers thoroughly.
- Avoid abrasive materials that can cause damage to the caliper finish.
- After cleaning the calipers, dry them thoroughly to prevent any moisture-related issues.
- Apply a high-quality brake caliper paint or heat-resistant coating to protect the caliper finish and reduce the likelihood of corrosion.
- Regularly inspect and lubricate brake caliper slides and pins to ensure smooth operation and prevent sticking or seizing.
- Lastly, never forget to follow manufacturer recommendations and consult a professional if you are unsure about any maintenance procedures.
By adhering to a regular cleaning schedule, monitoring for signs of brake caliper issues, and following other maintenance practices, you can maintain clean and properly functioning brake calipers. Regular care and attention will contribute to optimal brake performance, ensuring your safety on the road.
So, don’t wait any longer! Incorporate these bonus tips into your brake maintenance routine to prolong the lifespan of your brake calipers and enhance your overall driving experience.
Frequently Asked Questions For How To Clean Brake Calipers
Is it safe to clean brake calipers?
Yes, it is safe to clean brake calipers as long as you follow proper procedures and safety precautions. Cleaning brake calipers helps maintain your vehicle’s braking efficiency, ensuring safety on the road. Just make sure to lift and secure your vehicle properly, wear safety gear, and use the right cleaning products to avoid any mishaps.
Can I Clean Brake Calipers Without Removing The Wheels?
Yes, you can clean brake calipers without removing the wheels. By turning the steering wheel and using a mirror or taking advantage of the vehicle’s design, you can access the calipers and clean them using brake cleaner and a brush.
However, more thorough cleaning may require wheel removal.
How do you clean sticky brake calipers?
Cleaning sticky brake calipers involves following these steps:
- Lift and secure the vehicle.
- Remove the wheels to access the calipers.
- Use a brake cleaner specifically designed for this purpose to spray and clean the calipers.
- Gently scrub off sticky residue using a wire brush.
- Wipe away loosened dirt and residue with a clean rag.
- Apply brake caliper grease to ensure smooth movement.
- Reassemble the wheels and lower the vehicle.
How do you clean brake pads and calipers?
To clean both brake pads and calipers:
- Lift and secure the vehicle.
- Remove the wheels to access the calipers and pads.
- Clean the calipers using a brake cleaner and wire brush.
- For the brake pads, use a brake pad cleaner spray and a wire brush to remove residue.
- Wipe away dirt and residue from both the calipers and pads with clean rags.
- Apply brake caliper grease to the caliper pins for smooth movement.
- Reassemble the wheels and lower the vehicle.
Can I use petrol to clean brake calipers?
Using petrol to clean brake calipers is not recommended. It’s safer and more effective to use a brake cleaner specifically designed for this purpose. Brake cleaner is formulated to dissolve brake dust, grease, and contaminants without causing harm to the brake components. Using petrol or other inappropriate solvents may damage the calipers or compromise your safety while driving. Stick to the recommended brake cleaning products for the best results.
Conclusion
Cleaning brake calipers is an essential part of regular maintenance for any vehicle. By keeping your brake calipers clean, you can prolong their lifespan and ensure optimal braking performance. Remember to gather all the necessary tools and materials before starting the cleaning process.
Begin by removing any excess dirt and debris from the calipers using a wire brush or compressed air. Then, apply a brake cleaner solution to dissolve any built-up grime and brake dust. Use a clean cloth or brush to scrub the calipers thoroughly.
Once the calipers are clean, apply a high-temperature brake caliper paint to protect them from rust and corrosion. Regularly cleaning your brake calipers will not only enhance the appearance of your vehicle but also improve braking efficiency and safety. Take the time to properly clean and maintain your brake calipers, and your vehicle will thank you with smooth and responsive braking.