
This article was updated in June 21, 2026 with new products and information by Mark S. Taylor
Your engine is idling erratically at a stoplight, the RPM needle is bouncing between 500 and 1,100 RPM, and pressing the gas pedal results in a lazy, bogged-down hesitation. A split second later, the dashboard illuminates the Check Engine Light. While many vehicle owners immediately panic and suspect a failing fuel pump or blown spark plugs, the actual culprit is often a silent, unmetered stream of atmospheric air bypassing your filtration line—a vacuum leak.
An internal combustion engine operates as a closed vacuum pump. To achieve complete, clean combustion, the engine computer requires a mathematically perfect stoichiometric air-to-fuel ratio of exactly 14.7 parts air to 1 part fuel ($14.7:1$). A vacuum leak occurs when unmetered air enters the intake plenum downstream of the Mass Airflow (MAF) sensor through a cracked rubber hose or a degraded gasket. Because the computer didn’t measure this extra oxygen, the fuel mixture runs critically lean, causing erratic idle cycles and potential engine damage.
As an ASE-Certified Master Technician, I have diagnosed thousands of driveability faults. In this workshop guide, we will break down the precise chemical symptoms of vacuum leaks, how to safely track them using intermediate diagnostic hacks, and a step-by-step repair sequence that won’t score your engine parts.
Contents
- 1 What Is a Vacuum Leak (And Why Your Engine Cares)
- 2 Critical Symptoms of a Engine Vacuum Leak
- 3 Can You Safely Drive With a Vacuum Leak?
- 4 How to Find a Vacuum Leak: 2 Master Methods
- 5 Step-by-Step Vacuum Hose Replacement Sequence
- 6 Vacuum Leak Component Cost Matrix (2026 US Estimates)
- 7 DIY vs. Mechanic Decision Guide
- 8 FAQs About How to Fix Vacuum Leak in Car
- 9 The Verdict: Trace the Puncture Before Buying Parts
What Is a Vacuum Leak (And Why Your Engine Cares)
Think of your engine’s air intake exactly like a high-speed checkout line at a grocery store. The Mass Air Flow (MAF) sensor behaves like the cashier, counting exactly how much air (groceries) is entering the system. The engine computer uses that real-time count to inject the precise micro-volume of fuel (money) needed for combustion.
A vacuum leak is an un-monitored back door that lets raw air sneak into the intake plenum after the cashier. The computer still adds fuel only for the air it originally counted, leaving a massive volume of extra oxygen in the mix that has no balancing fuel fuel lines. The result is a critical “lean condition”. Your engine runs rough, surges, or stalls entirely because the internal air-fuel ratio is chemically destroyed.
These leaks manifest because modern engines rely on intense vacuum pressure to operate various secondary sub-systems—including power brakes, PCV valves, and EVAP carbon canisters. Flexible rubber hoses carry that vacuum, and over years of extreme engine bay thermal cycling, that rubber hardens, becomes brittle, and splits open.
Critical Symptoms of a Engine Vacuum Leak
Not every rough idle is a vacuum leak, but if your vehicle exhibits several of these symptoms simultaneously, you must inspect your vacuum loops immediately:
- Rough or Surging Idle: The RPM needle bounces up and down erratically at a stoplight, or the whole engine block shakes. This occurs because unmetered air has the single biggest percentage impact at low engine speeds when the main throttle plate is closed.
- High Idle That Won’t Drop: The computer senses the extreme lean condition and commands the electronic throttle body or idle air control to dump extra fuel to compensate, which frequently overshoots and locks the engine speed at 1,500 to 2,000 RPM.
- Check Engine Light with Active Lean Codes: Pulling the system codes using an OBD2 scanner will surface diagnostic trouble codes P0171 (System Too Lean Bank 1) and P0174 (System Too Lean Bank 2). If you see both codes logged together, it confirms a shared intake leak rather than a single failing fuel injector.
- An Audible Hissing Sound Under the Hood: Large cracks in main brake booster lines or the intake manifold shell emit a distinct, sharp hissing or sucking noise, especially at idle.
- A Hard, Stiff Brake Pedal: Your power brake booster relies on deep vacuum to multiply your foot’s stopping force. A ruptured booster hose or a failed internal rubber booster diaphragm pulls vacuum away, making the pedal incredibly hard to compress and threatening your active safety.
Can You Safely Drive With a Vacuum Leak?
Short answer: To a local repair shop or garage, yes. On your daily highway commute for the next month, absolutely no.
A prolonged lean condition forces your engine cylinders to operate at significantly higher temperatures than normal. While the computer will try to protect itself by adding extra fuel (often causing a heavy fuel smell at the tailpipe) and retarding ignition timing, it can only compensate so far.
If you drive with a significant vacuum leak for weeks, you run a massive risk of cooking and melting your catalytic converter. The unburned fuel from the uneven lean misfires will ignite inside the converter’s ceramic honeycomb matrix, melting the internals and resulting in an expensive $1,000 to $2,500 replacement bill.

How to Find a Vacuum Leak: 2 Master Methods
Before attempting any repairs, you must precisely isolate the puncture site. Use one of these two technician methods:
Method 1: The Carburetor Cleaner RPM Dip Test (Driveway Method)
Start the engine and let it idle smoothly. Take a can of aerosol Carburetor Cleaner or starting fluid and spray highly targeted, short bursts directly at individual vacuum hose connections, around the intake manifold gasket seams, and at the base flange of the throttle body.
When the volatile chemical spray hits an active leak zone, the high internal vacuum suction draws the flammable mist straight into the cylinders. The engine’s combustion dynamics will immediately shift—manifesting as a sudden, audible surge in RPM numbers or a temporary stumble on your tachometer.
⚠️ CRITICAL FIRE SAFETY WARNING: Carburetor cleaner is highly volatile and flammable. Never spray it near the exhaust manifold, which can glow red-hot. Do not spray it directly onto cracked ignition coils or frayed spark plug wires where an electrical arc can ignite the fumes. Always keep a shop fire extinguisher within arm’s reach inside your garage.
Method 2: The Pressurized Smoke Machine Test (Professional Method)
This is the absolute gold standard utilized by professional repair facilities. With the engine completely turned off, a shop smoke machine forces thick, pressurized dense vapor directly into the engine’s main intake duct. If even a microscopic pinhole crack is hidden deep beneath a wiring harness or an EVAP line, bright white smoke will visually plume out of the puncture coordinate within seconds, pinpointing the fault safely with zero fire risk.
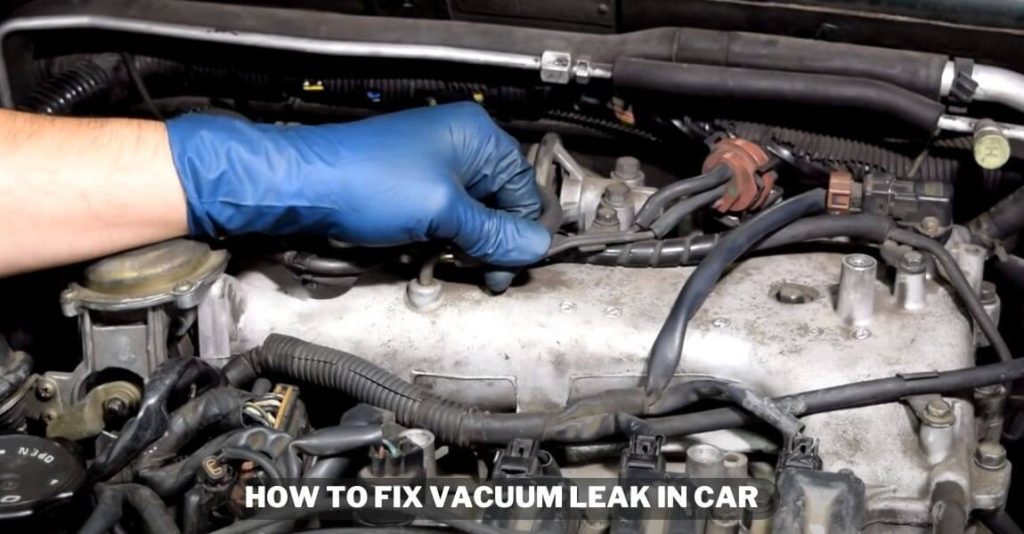
Step-by-Step Vacuum Hose Replacement Sequence
If your diagnostic test isolated a cracked, hardened, or disconnected rubber vacuum line, follow this straightforward 10-minute replacement sequence:
1. Remove the Old Hardened Hose Carefully: 2 min.
Slide a pair of hose pliers over the fitting. Twist the old rubber hose gently back and forth to break its internal heat-seal before sliding it off the barb. Never yank a stuck hose aggressively, or you will snap the brittle plastic indexing nipples on the intake manifold, turning a $5 hose swap into a $400 manifold replacement.
2. Measure the Inside Diameter and Length: 2 min.
Cut off a small clean section of the old hose and measure its internal diameter—standard automotive vacuum sizes are typically 3/16 inch, 1/4 inch, or 5/16 inch. Buy a length that gives you a few inches of extra slack.
3. Cut the New Silicone Line with Clean Squares: 3 min.
Use a brand-new, sharp utility razor blade to execute your cuts. Avoid standard household scissors, which crush the hose walls during cutting. You want a perfectly clean, square 90-degree cut to ensure the rubber seats completely flush against the base flange of the fitting.
4. Seat the New Hose and Clamp Securely: 3 min.
Push the new line onto the fittings. If it is an incredibly tight fit, dip the rubber tip into hot water for 30 seconds to soften the material. Never use petroleum jelly or WD-40 to lubricate the hose, as petroleum compounds permanently dissolve rubber structures over time. Secure the ends with a spring clip or a small zip-tie to prevent engine bay vibrations from walking the line off the barb.

Vacuum Leak Component Cost Matrix (2026 US Estimates)
The final bill to fix a vacuum leak depends entirely on engine accessibility and component engineering:
| Leaking Component Source | Average DIY Parts Cost | Professional Shop Bill (Labor Included) | Technical Profile |
| Single Rubber Vacuum Line | $2 – $5 | $50 – $100 | Fast 10-minute simple hose swap |
| Multiple Hoses / Vacuum Caps | $10 – $15 | $75 – $150 | Complete refresh of front vacuum loops |
| Intake Manifold Gasket (4-Cyl) | $20 – $40 | $250 – $450 | Requires partial fuel rail disassembly |
| Intake Manifold Gasket (V6/V8) | $30 – $80 | $450 – $800+ | High labor; tight access near firewall bulkhead |
| Power Brake Booster Assembly | $80 – $200 | $300 – $600 | Requires unbolting the master cylinder |
DIY vs. Mechanic Decision Guide
- DIY Approved Repairs: If your smoke test isolated a cracked rubber hose, a loose vacuum cap, or a degraded PCV valve grommet, fix it yourself. These are entry-level driveway tasks requiring zero advanced tools. Paying a shop $120 flat-rate labor to push a $3 piece of rubber onto a fitting is an unnecessary expense.
- Professional Mechanic Repairs: If the leak is confirmed to be coming from the lower intake manifold gaskets—especially on a transverse-mounted V6 engine crammed against the rear firewall—pay a professional shop. Replacing an intake manifold gasket requires disconnecting hot fuel rails, bleeding coolant loops, and executing an exact, sequential multi-stage foot-pound torque specification. Over-tightening a single manifold bolt will instantly crack the plastic manifold shell or warp the aluminum cylinder head tracks.
FAQs About How to Fix Vacuum Leak in Car
Will a vacuum leak throw a check engine light?
Usually, yes. A significant vacuum leak triggers P0171 (System Too Lean Bank 1) or P0174 (System Too Lean Bank 2), or both. The computer sees the oxygen sensors reporting a lean mixture and sets the code. Very small leaks might not trigger a light immediately, but they’ll show up as elevated short-term and long-term fuel trims if you scan live data.
Can a vacuum leak cause misfires?
Yes. A lean mixture burns hotter and slower. In severe cases, the fuel-air mix in one cylinder might not ignite at all, causing a misfire code (P0300 for random misfires, or P0301, P0302, etc. for specific cylinders). If you have both lean codes and misfire codes, the misfires are likely caused by the lean condition from the vacuum leak. Fix the leak first — the misfires will probably go away.
What does a vacuum leak sound like?
A large vacuum leak at a major hose or the intake manifold makes a distinct hissing or sucking sound, especially at idle. You might hear it change when you rev the engine. But here’s the problem: small leaks — the ones that still cause rough idle and check engine lights — often don’t make any audible sound at all. Don’t assume there’s no leak just because you can’t hear anything.
Can I use WD-40 to find a vacuum leak?
You can, but it’s less effective than carb cleaner or starting fluid. WD-40 is less flammable and less volatile, so the RPM change when it hits a leak is subtler and harder to notice. It works in a pinch, but carb cleaner gives a much more obvious response. The same fire safety rules apply — keep it away from hot exhaust and ignition sources.
How long does it take to fix a vacuum leak?
A rubber hose replacement takes 5–10 minutes if you can easily access the hose. An intake manifold gasket replacement takes a professional 2–6 hours depending on the engine configuration. If a shop has to diagnose the leak first using a smoke test, add another 30–60 minutes to the job.
The Verdict: Trace the Puncture Before Buying Parts
Never blindly throw parts at an active check engine light. A vacuum leak is a physical hole, not an electronic component failure. Take 15 minutes to run a systematic soap or carburetor cleaner sweep across your hoses, or budget $50 for a professional shop smoke machine test. Upgrading hardened rubber factory lines with high-performance silicone vacuum tubing for under $15 stabilizes your idle speed, eliminates lean error codes, and guarantees your catalytic converter stays cool and safe on the highway.
(Want to ensure the rest of your vehicle’s engine modules, oxygen sensors, and dashboard monitoring networks are running with absolute factory precision? Read our master workshop guide on How to Read Check Engine Light Codes Without a Scanner or check out The Car Buzz Official Testing and Editorial Integrity Guidelines Page).