
This article was updated in July 17, 2023 with new products and information by Mark S. Taylor
To install anti rattle clips on brake pads, follow these steps: 1) remove the brake pads, 2) insert the anti rattle clips into the brake caliper, and 3) reinstall the brake pads into the caliper. When it comes to brake pads, it’s essential to ensure they are properly installed to prevent any unwanted noise or vibration.
One effective method to achieve this is by using anti rattle clips. These small metal or plastic clips help to secure the brake pads in place and prevent any rattling or movement. In this article, we will guide you through the process of installing anti rattle clips on brake pads, ensuring a smoother and quieter braking experience.
So let’s get started and make the installation process a breeze!
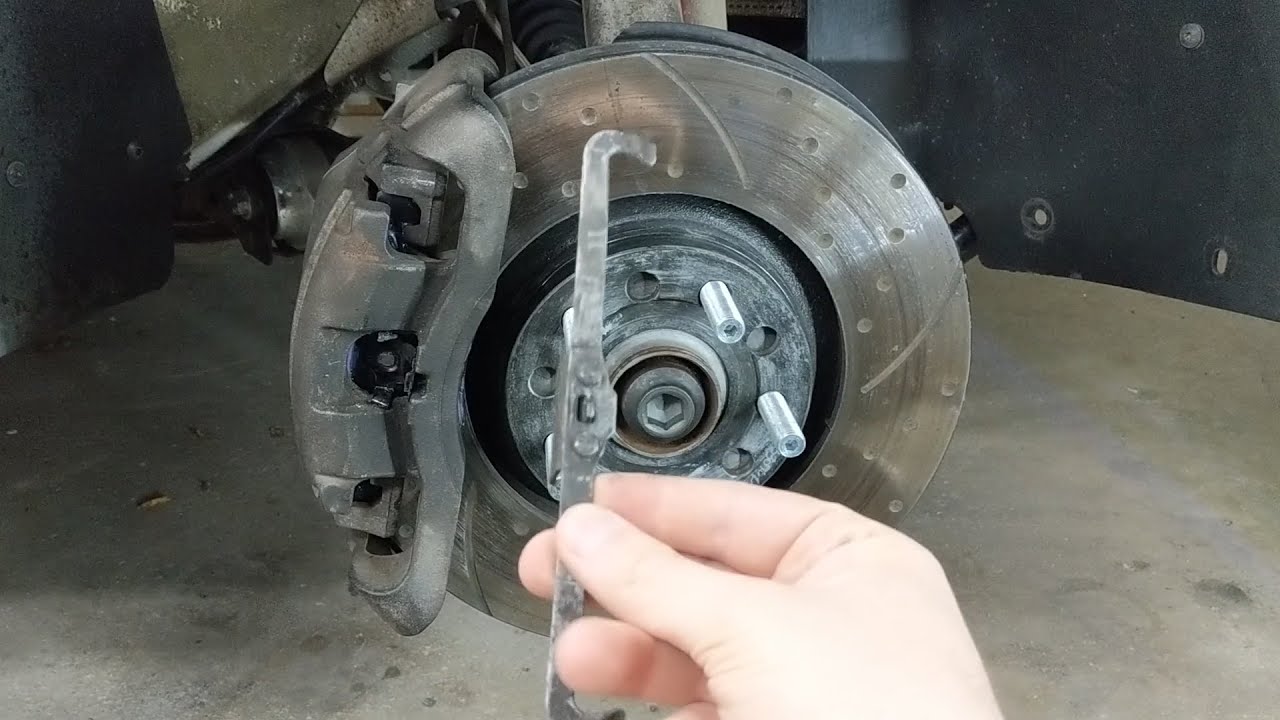
Credit: www.youtube.com
Contents
- 1 Understanding The Importance Of Anti Rattle Clips
- 2 Tools And Materials Needed
- 3 Step-By-Step Guide For Installing Anti Rattle Clips
- 4 Common Mistakes To Avoid
- 5 Troubleshooting And Tips For A Successful Installation
- 6 Best Practices For Maintaining Anti Rattle Clips
- 7 Frequently Asked Questions On How To Install Anti Rattle Clips On Brake Pads
- 7.1 How Do Anti-Rattle Clips Work On Brake Pads?
- 7.2 Why Is It Important To Install Anti-Rattle Clips On Brake Pads?
- 7.3 Can I Install Anti-Rattle Clips On Brake Pads Myself?
- 7.4 What Tools Do I Need To Install Anti-Rattle Clips On Brake Pads?
- 7.5 Are Anti-Rattle Clips Compatible With All Types Of Brake Pads?
- 8 Conclusion
Understanding The Importance Of Anti Rattle Clips
Why Anti Rattle Clips Are Crucial For Brake Pad Installation
When it comes to keeping your vehicle’s brakes in optimal condition, installing anti rattle clips on the brake pads is crucial. These small but mighty clips play a significant role in ensuring that your brake pads stay securely in place and perform at their best.
Here’s why anti rattle clips are essential in brake pad installation:
- Prevent noise and vibration: Anti rattle clips are designed to reduce or eliminate the annoying noise and vibration that can occur when braking. These clips help to minimize the chances of the brake pads rattling against the caliper bracket or the brake rotor, resulting in a smoother and quieter braking experience.
- Enhance brake pad lifespan: By holding the brake pads firmly in place, anti rattle clips help to distribute the pressure evenly. This prevents premature wear and tear on the brake pads, thus extending their lifespan. With well-maintained brake pads, you’ll enjoy safer and more efficient braking for longer periods.
- Improve brake performance: When brake pads are securely attached, they make better contact with the rotor, allowing for improved braking performance. Anti rattle clips ensure that the brake pads maintain optimal positioning, enabling consistent and responsive braking power when you need it most.
- Reduce brake squeal: One of the most common issues with brake systems is brake squeal. This high-pitched noise can be caused by the vibrations between the brake pads and the caliper bracket. Anti rattle clips act as a buffer, reducing this vibration and minimizing brake squeal.
- Minimize uneven brake pad wear: Without anti rattle clips, brake pads may have a tendency to move or shift, resulting in uneven wear. By keeping the brake pads securely in place, these clips help to ensure even distribution of pressure, preventing premature wear and the need for frequent pad replacements.
Installing anti rattle clips on your brake pads is a crucial step in maintaining brake performance, reducing noise and vibration, and extending the lifespan of your brake pads. Don’t underestimate the importance of these small components – they can make a significant difference in your overall braking experience.
So, when it comes to brake pad installation, make sure to include anti rattle clips for optimal results.
Tools And Materials Needed
Installing anti rattle clips on brake pads is an essential step in ensuring a smooth and noise-free braking experience. These clips help to minimize vibrations and rattling noises that can occur when the brake pads are in use. To successfully install these clips, there are a few tools and materials that you will need.
Let’s take a look at what they are:
List Of Tools Required For Installing Anti Rattle Clips On Brake Pads:
- Socket wrench set: This will be used to remove the wheel and access the brake caliper.
- Brake cleaning spray: You’ll need this to clean the brake caliper and brake pads before installing the clips.
- Needle-nose pliers: These will come in handy for removing the old clips and installing the new ones.
- C-clamp or brake caliper compression tool: You’ll need one of these tools to compress the brake caliper piston, making room for the new brake pads and clips.
- Wire brush: This tool will help you clean any rust or debris from the brake caliper bracket.
- Anti-seize compound: Applying a small amount of this compound to the caliper bolts will prevent corrosion and make future brake pad replacements easier.
Necessary Materials For A Successful Installation:
- Anti rattle clips: These are the star of the show! Make sure you have the correct clips that are compatible with your vehicle’s brake system.
- Brake pads: While you’re at it, it’s a good idea to replace the brake pads as well. Installing new brake pads along with the anti rattle clips will ensure optimal braking performance.
- Brake grease: A small amount of brake grease should be applied to the brake pad ears to reduce friction and noise.
- Brake fluid: It’s always a good idea to have some extra brake fluid on hand in case you need to top up the reservoir during the installation process.
Now that you have a clear list of tools and materials needed, you’re ready to tackle the installation process and enjoy a quieter and smoother braking experience. So let’s get started!
Step-By-Step Guide For Installing Anti Rattle Clips
Are you experiencing annoying brake pad rattle? Don’t worry, because installing anti rattle clips can be a simple and effective solution to keep your brake pads in place. In this step-by-step guide, we’ll walk you through the process of properly installing anti rattle clips on your brake pads.
By following these instructions, you’ll be able to secure the clips in place for optimal performance, ensuring a smooth and noise-free braking experience.
Preparing The Brake Pad Assembly For Installation:
- Start by removing the old brake pads from the caliper bracket. Carefully slide them out and set them aside.
- Take a moment to inspect the caliper and bracket for any signs of wear or damage. If necessary, clean the surfaces to ensure a proper fit for the new clips.
- Once the bracket is clean, apply a thin layer of high-temperature brake grease to the contact points. This will help reduce friction and prevent squeaking.
- Now, it’s time to insert the anti rattle clips. Make sure they are clean and free from any debris or corrosion.
- Place the clips onto the caliper bracket, ensuring they align with the designated slots. Pay attention to the orientation of the clips and position them accordingly.
Proper Positioning Of The Anti Rattle Clips:
- When positioning the clips, ensure that they are centered and aligned with the brake pads. This will help distribute the pressure evenly and minimize any potential rattling.
- Take your time to double-check the alignment of the clips before moving on to the next step. It’s crucial to get this right for optimal performance.
Securing The Clips In Place For Optimal Performance:
- With the clips in the correct position, gently press them against the brake pads. This will secure them in place and prevent any unwanted movement during braking.
- Make sure the clips are firmly attached to the pads, but be careful not to apply excessive force that could damage the clips or brake components.
- Once the clips are securely in place, reassemble the brake pad assembly. Slide the new brake pads into the caliper bracket, ensuring they fit snugly against the clips.
- Finally, reinstall the caliper onto the bracket and tighten the bolts to the manufacturer’s specifications.
By following these simple steps, you can successfully install anti rattle clips on your brake pads, effectively reducing brake pad rattle and enhancing your overall braking experience. Remember, proper positioning and secure attachment are key to achieve optimal performance. Say goodbye to annoying brake pad noise and enjoy a smoother, quieter ride.
Common Mistakes To Avoid
When it comes to installing anti rattle clips on brake pads, it’s important to do it correctly to ensure optimal performance and safety. However, there are some common mistakes that people make during this process. In order to avoid these pitfalls, it is crucial to understand the proper installation techniques.
Let’s take a look at some key points to keep in mind:
- Not installing the clips in the correct position:
- One of the most common mistakes made when installing anti rattle clips is not placing them in the correct position. This can lead to improper engagement with the brake pad assembly, resulting in noise and reduced braking efficiency.
- Ensure that the clips are positioned precisely as instructed by the manufacturer. Refer to the user manual or installation guide for the recommended placement.
- Incorrectly aligning the clips with the brake pad assembly:
- Another mistake to avoid is aligning the clips incorrectly with the brake pad assembly. Inaccurate alignment can cause the clips to interfere with the movement of the brake pads, leading to potential damage and poor performance.
- Take the time to carefully align the clips with the designated slots or grooves in the brake pad assembly. Double-check the positioning before final installation.
Remember, proper clip installation is vital for the overall functionality and longevity of your brake pads. By avoiding these common mistakes, you can ensure smooth operation and enhanced braking performance.

Troubleshooting And Tips For A Successful Installation
Anti rattle clips are an essential component of brake pad installation, ensuring a secure fit and minimizing noise and vibration. However, like any installation process, there can be common issues that arise. In this section, we will discuss troubleshooting tips to overcome these challenges and provide recommendations for a successful installation.
So, let’s jump right in!
Troubleshooting Common Issues Encountered During Installation:
- Misaligned clips: Check if the anti rattle clips are properly aligned with the brake pad and caliper bracket. Incorrect alignment can cause noise or poor performance.
- Clip damage: Inspect the clips for any signs of damage, such as bending, rusting, or distortion. Damaged clips may need to be replaced to ensure proper functionality.
- Excessive pad movement: If you notice excessive movement of the brake pads after installation, it could indicate that the clips are not securely holding the pads in place. Double-check the installation and clip position.
- Clip interference: Ensure that the clips are not interfering with any other components in the brake assembly, such as the rotor or caliper. Any interference can lead to performance issues or damage.
Tips For Ensuring A Secure And Effective Installation:
- Clean and lubricate: Before installing the anti rattle clips, make sure to clean the brake pad contact areas and caliper bracket thoroughly. The presence of dirt or debris can impede proper installation and functionality. Apply a light coating of brake lubricant to the contact points for smooth movement.
- Proper positioning: Ensure that the clips are positioned correctly on the brake pad and caliper bracket. Refer to your vehicle’s manufacturer guidelines or service manual for the specific positioning instructions.
- Verify fitment: Double-check that the anti rattle clips are the correct size and fit for your brake pads and caliper bracket. Using the wrong clips can lead to ineffective installation and potential brake performance issues.
- Secure fastening: Ensure that the clips are securely fastened to the brake pad and caliper bracket. Loose or improperly fastened clips can result in noise and reduced braking performance.
- Test after installation: After installing the anti rattle clips, take your vehicle for a test drive to check for any unusual noise or vibration. If any issues arise, reevaluate the installation and make necessary adjustments.
By troubleshooting common issues and following these tips, you can have confidence in a successful anti rattle clip installation. Enjoy a quieter and smoother braking experience with properly installed brake pads!
Best Practices For Maintaining Anti Rattle Clips
Installing anti-rattle clips on brake pads is an essential part of maintaining a smooth and quiet braking system. These clips are designed to hold the brake pads securely in place and prevent any rattling or unwanted noise during braking. While the installation process itself is relatively straightforward, it is equally important to understand the best practices for maintaining these clips to ensure their longevity and optimal performance.
Regular Inspection And Cleaning Of The Clips
- Inspect the clips periodically to ensure they are securely fastened and in good condition.
- If there is any dirt, debris, or corrosion on the clips, clean them using a mild brake cleaner and a brush.
- Regularly inspect the brake pad area for any signs of wear or damage that may affect the clips’ performance.
- Ensure that the clips are properly aligned and seated against the caliper and brake pads.
Replacing Worn-Out Or Damaged Clips
- If the clips show signs of wear or damage, such as cracks, deformation, or excessive corrosion, they should be replaced.
- Use high-quality replacement clips that are specifically designed for your vehicle make and model.
- During the replacement process, pay attention to the correct positioning and alignment of the clips.
- Ensure that the new clips are securely fastened and provide proper tension to hold the brake pads firmly in place.
By following these best practices for maintaining anti-rattle clips, you can ensure that your brake system functions smoothly and quietly. Regular inspection, cleaning, and timely replacement of worn-out clips will help prolong the life of your brake pads and contribute to a safer driving experience.
Don’t forget to consult your vehicle’s manual or seek professional assistance if you’re unsure about the installation or maintenance process.
Frequently Asked Questions On How To Install Anti Rattle Clips On Brake Pads
How Do Anti-Rattle Clips Work On Brake Pads?
Anti-rattle clips on brake pads work by reducing the vibration and noise that occur when the brake pads come into contact with the rotor. They help to keep the brake pads in place and prevent them from moving around during braking.
Why Is It Important To Install Anti-Rattle Clips On Brake Pads?
Installing anti-rattle clips on brake pads is important because they help to eliminate noise and vibration that can occur when the pads are not held securely in place. This ensures smooth and quiet operation of the brakes, providing a better driving experience and improved safety.
Can I Install Anti-Rattle Clips On Brake Pads Myself?
Yes, installing anti-rattle clips on brake pads can typically be done as a diy project. However, it is important to refer to the specific instructions provided by the manufacturer or consult a professional if you are unsure about the process.
Proper installation ensures optimal performance and safety of the brake system.
What Tools Do I Need To Install Anti-Rattle Clips On Brake Pads?
To install anti-rattle clips on brake pads, you will typically need a few basic tools such as a wrench or socket set, pliers, and a brake cleaner. Additionally, it is recommended to have some brake lubricant to apply to the clips during installation.
Are Anti-Rattle Clips Compatible With All Types Of Brake Pads?
Anti-rattle clips are designed to be compatible with most types of brake pads. However, it is important to check the specific compatibility requirements and recommendations provided by the manufacturer. Different vehicles and brake systems may have variations in design and compatibility.
Conclusion
To sum it up, installing anti-rattle clips on brake pads is a simple yet crucial task that can improve the overall performance and safety of your vehicle. By following the step-by-step guide provided in this blog post, you can ensure a smooth and quiet ride, free from annoying brake noise.
Remember to gather the necessary tools and materials beforehand, and take your time to properly position and secure the clips. Regularly inspecting and maintaining your brake pads will also contribute to their longevity and efficiency. So, don’t neglect this important aspect of vehicle maintenance.
By investing a little time and effort, you can enjoy a more enjoyable and safer driving experience. Feel free to share your experiences or ask any questions in the comments section below. Happy driving!
Here are some articles that might interest you:
Using Brake Cleaner Without Removing the Tire: Step-by-Step Guide
A Step-by-Step Guide on How to Change Drum Brakes to Disc Brakes