
This article was updated in November 3, 2023 with new products and information by Mark S. Taylor
Mounting a headache rack can be done by following these steps: measure and mark the desired height on the front truck bed rail, position the mounting brackets accordingly, attach the brackets securely to the truck bed, and finally, mount the headache rack onto the brackets. This simple process will ensure the headache rack is properly secured to your truck and ready for use.
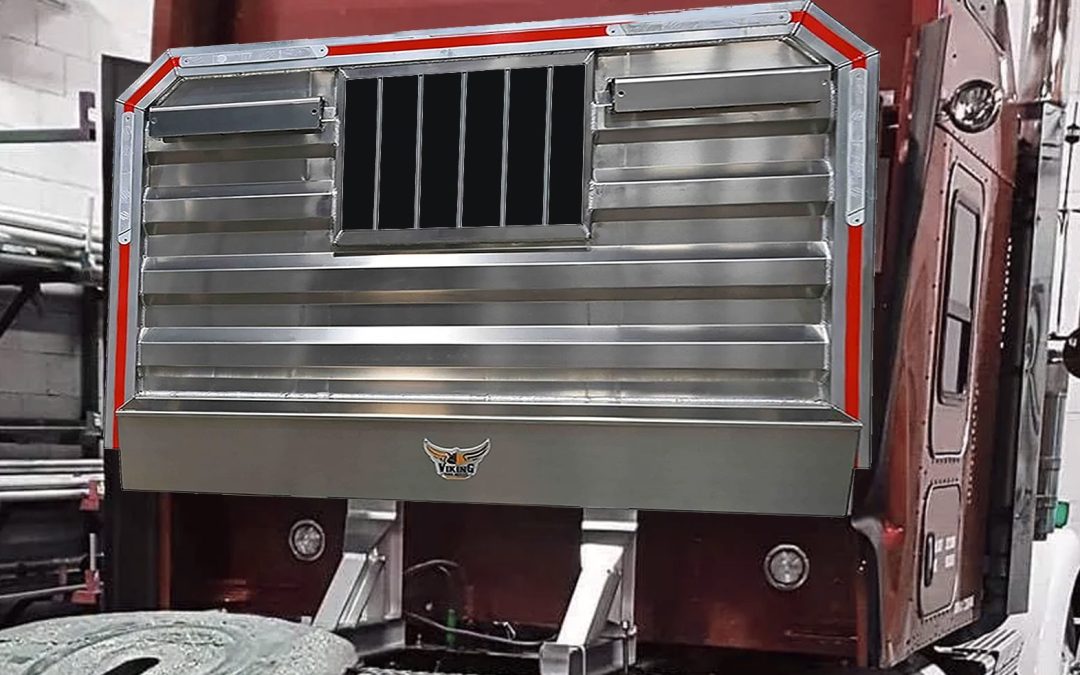
An essential accessory for any truck owner, a headache rack provides added protection, versatility, and functionality. Whether you use your truck for work or simply enjoy off-roading adventures, a headache rack is perfect for preventing damage to your rear window, securing cargo, and adding a rugged aesthetic to your vehicle.
By understanding how to mount a headache rack, you can easily enhance your truck’s capabilities and protect your valuable assets. Follow the steps outlined above to successfully mount your headache rack and enjoy the benefits it brings.

Contents
Step 1: Gather The Necessary Tools And Equipment
Identify The Tools And Equipment Needed For The Installation
Before you start mounting a headache rack, it is crucial to gather all the necessary tools and equipment. Having everything ready will make the installation process much smoother and save you time. Here are the items you’ll need:
- Measuring tape: This will help you ensure proper placement and alignment of the headache rack on your vehicle.
- Wrenches: Depending on your specific rack, you may need a set of wrenches to tighten bolts and secure the rack in place.
- Socket set: A socket set will come in handy for fastening nuts and bolts during the installation.
- Screwdriver: You may require a screwdriver for certain types of headache racks that use screws or other fasteners.
- Drill and drill bits: If your rack requires drilling holes into the vehicle, you will need a drill and corresponding drill bits.
- Level: It’s essential to have a level to ensure your headache rack is installed correctly and does not tilt.
- Safety glasses: Protect your eyes from any debris while working on the installation.
- Gloves: Wearing gloves will provide comfort and protection during the process.
- Workbench or sawhorses: Having a sturdy surface to work on will make installation easier, particularly if you need to assemble any parts beforehand.
- Step ladder or stool: These will help you reach higher areas of your vehicle during the installation.
By gathering all the necessary tools and equipment before you start, you’ll have everything at your fingertips, making the installation process efficient and hassle-free.
Step 2: Prepare Your Vehicle
Before mounting a headache rack on your truck, it is important to properly prepare your vehicle. Follow these steps to ensure a smooth installation process:
- Park your vehicle on a flat and stable surface: Find a level area where you can easily maneuver around your truck. This will provide stability and make the installation process easier.
- Clean the truck bed and remove any debris or obstacles: Before installing the headache rack, it is essential to clear the truck bed of any dirt, dust, or debris that may interfere with the mounting process. Remove any loose items or obstacles that could get in the way.
- Measure the dimensions of your truck bed: Take accurate measurements of your truck bed to ensure the headache rack is compatible with the size of your vehicle. This will help you select the appropriate rack and avoid any fitting issues.
- Check for any existing hardware: Look for any existing hardware or accessories in the truck bed that might hinder the installation. Remove or adjust them as necessary.
- Inspect your truck bed for damage: Take a close look at your truck bed to check for any signs of damage, such as dents or rust. Repair or address any issues before proceeding with the installation.
- Gather the necessary tools and equipment: Make sure you have all the required tools and mounting hardware before beginning the installation. This may include wrenches, sockets, a drill, and any specific components that came with your headache rack.
- Follow manufacturer instructions: Consult the instructions provided by the headache rack manufacturer for any specific recommendations or guidelines. Adhering to these instructions will help ensure a proper and secure installation.
By properly preparing your vehicle before mounting the headache rack, you can ensure a successful installation and enhance the functionality and safety of your truck. Now that you’ve prepared your vehicle, it’s time to move on to the next step – mounting the headache rack.
Step 3: Position The Headache Rack
Before mounting the headache rack on your truck bed, it’s important to measure and mark the desired position. This will ensure proper alignment and functionality. Follow these steps to ensure a successful installation:
- Measure and mark the desired position of the headache rack on the truck bed:
- Use a tape measure to determine the optimal placement of the headache rack according to your needs.
- Mark the positions where the mounting brackets or holes will be installed on the truck bed.
- Position the headache rack according to the manufacturer’s instructions:
- Refer to the installation manual provided by the manufacturer for specific guidelines on how to position the headache rack.
- Ensure that the rack is aligned properly with the marked positions on the truck bed.
- Align the rack with the truck bed:
- Make sure that the headache rack is centered and level with the truck bed.
- Check for any obstructions or obstacles that may interfere with the installation.
- Secure the rack in place:
- Use the appropriate mounting hardware provided by the manufacturer to secure the headache rack to the truck bed.
- Follow the recommended tightening torque specified in the installation manual to ensure a secure fit.
By following these steps and positioning the headache rack correctly, you can ensure that it will provide the necessary protection and functionality.
Step 4: Secure The Headache Rack
Installing the mounting brackets or hardware provided with the headache rack is an important step to ensure its stability. Here are the key points to consider:
- Ensure proper alignment: Before securing the headache rack, make sure it is properly aligned with the bed of your truck. This will ensure that it fits correctly and provides optimal protection.
- Use appropriate tools: To secure the headache rack firmly in place, you’ll need the right tools for the job. Some common tools include a wrench, socket set, and a drill. These tools will help you effectively tighten the mounting brackets and screws.
- Follow the manufacturer’s instructions: Each headache rack may have specific mounting instructions provided by the manufacturer. It is important to carefully read and follow these instructions to ensure proper installation and avoid any potential damage.
- Tighten the mounting brackets: Secure the mounting brackets or hardware to the truck bed using the appropriate tools. Make sure to tighten them firmly to ensure the headache rack stays in place during transit.
- Test the stability: Once the headache rack is securely mounted, give it a gentle shake to test its stability. If there is any noticeable movement, tighten the brackets further to eliminate any looseness.
- Check for any missed steps: After securing the headache rack, double-check that you have followed all the necessary steps for installation. This includes ensuring all bolts and screws are properly tightened, and there are no loose or missing components.
Remember, a securely mounted headache rack is crucial for maximum protection and safety while on the road. By following these steps and using the appropriate tools, you can ensure a secure installation of your headache rack.
Step 5: Test The Mounting
Test The Stability And Sturdiness Of The Installed Headache Rack
After successfully mounting your headache rack onto your truck, it’s essential to ensure that it is stable and secure. Testing the stability of your headache rack will give you peace of mind knowing that it can withstand the pressures of everyday use and unexpected events.
Here’s how you can test the mounting to ensure a secure fit:
- Check for any visible movement: Take a close look at the installed headache rack. Scan for any noticeable wobbling or shifting when you apply pressure or shake it gently.
- Push and pull test: Apply steady pressure in different directions, pushing and pulling the rack. Observe if there is any give or movement that shouldn’t be there. A securely mounted headache rack should remain steady without budging.
- Consider load capacity: If you plan to carry heavy loads or equipment on your truck bed, make sure to test the stability with an appropriate load. Add some weight to the rack and verify if it can handle the extra burden without any strain or sagging.
- Inspect fasteners and bolts: Examine all the bolts and fasteners used to secure the headache rack. Ensure that they are tightened properly, as loose connections can jeopardize the stability of the rack. Tighten any loose bolts that you come across.
- Monitor vibration and noise: Pay attention to any unusual vibrations or noises while driving with the headache rack installed. Excessive vibrations or rattling could indicate a problem with the mounting, which needs further inspection and adjustment.
- Drive on uneven surfaces: Take your truck for a short drive on bumpy or uneven terrain. This will simulate the strain that the headache rack may experience during off-roading or rough conditions. Note any excessive movement or instability during the drive.
- Periodic retesting: Regularly test the mounting of your headache rack after installation, as well as periodically throughout its lifespan. This will help you identify any potential issues early on and ensure that the rack remains securely mounted over time.
Remember, a properly mounted headache rack enhances safety by protecting your truck’s cab and occupants. By following these steps and making necessary adjustments, you can enjoy the peace of mind knowing that your headache rack is securely installed and ready for the road ahead.
Frequently Asked Questions On How To Mount Headache Rack
How To Mount A Headache Rack On A Truck?
To mount a headache rack on a truck, first, gather the necessary tools and materials. Then, position the rack against the truck’s cab and secure it using bolts or clamps. Make sure it is centered and level before tightening all the bolts.
Finally, double-check the rack’s stability and make any necessary adjustments.
What Are The Benefits Of Installing A Headache Rack?
Installing a headache rack on your truck comes with several benefits. It provides additional protection for your truck’s rear window and cab. It also helps secure your cargo and prevents it from damaging the truck’s cab during sudden stops or accidents.
Additionally, a headache rack can serve as a mounting point for other accessories such as lights or tie-downs.
What Materials Are Used To Make Headache Racks?
Headache racks are commonly made from sturdy materials such as aluminum or steel. Aluminum racks are lightweight and corrosion-resistant, making them a popular choice. Steel racks are heavier but offer greater durability and strength. Both options can effectively protect your truck’s cab and occupants while adding a stylish touch to your vehicle.
Conclusion
Mounting a headache rack is a simple yet crucial task for ensuring safety and protection while on the road. By following the step-by-step guide outlined in this blog post, you can confidently install your headache rack and enjoy the peace of mind that it brings.
Remember to gather all the necessary tools and equipment beforehand, and take your time to accurately measure and align the rack. By securely fastening it to your truck, you can prevent potential headaches caused by shifting cargo. Additionally, make sure to regularly inspect and maintain your headache rack to ensure its optimal performance.
With its sturdy construction and ability to withstand heavy loads, a properly mounted headache rack is a valuable investment for any truck owner. Stay safe on the road by following these instructions, and enjoy the added convenience and protection that a headache rack provides.