
This article was updated in September 18, 2023 with new products and information by Mark S. Taylor
Installing a bike rack for your car is a simple process. First, choose a compatible rack for your car and bike type.
Then, follow the manufacturer’s instructions to secure the rack onto your car’s trunk, roof, or hitch.
Contents
Planning And Preparation
When it comes to installing a bike rack for your car, careful planning and preparation are crucial to ensure a successful and hassle-free process. Before you dive into the installation, take the time to research the right bike rack for your car and gather the necessary information.
Here are the key steps to get you started:
Researching The Right Bike Rack For Your Car
When researching the right bike rack for your car, consider the following:
- Types of bike racks available: There are various types of bike racks, including roof-mounted, hitch-mounted, trunk-mounted, and spare tire-mounted racks. Each type has its own advantages and considerations, so it’s essential to choose the one that best suits your car and needs.
- Compatibility with your car: Not all bike racks are compatible with every car model. Check the manufacturer’s specifications to ensure the rack is suitable for your specific car make and model.
- Bike capacity: Determine how many bikes you need to transport. Bike racks have different carrying capacities, ranging from one to five bikes. Choose a rack that can accommodate the number of bikes you plan to transport.
- User reviews and ratings: Read reviews and check ratings from other users to get an idea of the rack’s quality and ease of use. Look for feedback from users who have a similar car model to ensure a reliable and secure fit.
- Price and budget: Set a budget for your bike rack and consider the price range of available options. While it’s important to find a rack that fits your budget, prioritize quality and durability to ensure the safety of your bikes during transportation.
Taking Measurements And Assessing Car Requirements
Before installing your bike rack, it’s vital to take accurate measurements and assess your car’s requirements. Here’s what you need to do:
- Measure the available space: Measure the dimensions of your car, including the roof, trunk, or hitch area where the bike rack will be installed. This will help you determine the maximum size and capacity of the rack that can fit your car.
- Check weight limits: Every car has weight limits, and it’s important to know the maximum weight your car can handle. Consider the weight of the bike rack itself, along with the weight of the bikes you plan to transport, to ensure you stay within the car’s weight limits.
- Consider aerodynamics: If you opt for a roof-mounted bike rack, consider the aerodynamics of your car. A sleek and low-profile rack will minimize wind resistance and improve fuel efficiency.
- Assess installation requirements: Different bike racks have different installation requirements. Some may require additional equipment or modifications to your car. Make sure you understand the installation process and any necessary adjustments before making your final decision.
By thoroughly researching the right bike rack for your car and taking accurate measurements, you’ll be well-prepared to install a bike rack that not only fits your car perfectly but also ensures the safety and security of your bikes during transportation.
So, let’s move on to the next steps and get that bike rack ready for your next adventure!
Tools And Materials Needed
Installing a bike rack on your car provides the perfect solution for transporting your bicycles safely and conveniently. Before you get started, it’s important to gather the necessary tools and materials to ensure a smooth installation process. In this section, we will discuss the required tools for installation as well as the necessary hardware and accessories.
Required Tools For Installation
To install a bike rack on your car, you will need the following tools:
- Tape measure: A tape measure will help you accurately measure the dimensions of your car and the bike rack, ensuring a proper fit.
- Socket set: A socket set will be useful for tightening bolts and securing the bike rack to your car securely.
- Screwdriver: Depending on the type of bike rack, you may need a screwdriver to attach certain components or secure screws.
- Adjustable wrench: An adjustable wrench will allow you to tighten nuts and bolts more effectively.
- Drill (optional): If your bike rack requires drilling into your car for installation, a drill will be necessary.
- Level: A level will help you ensure that the bike rack is installed correctly, preventing any imbalance or instability.
Necessary Hardware And Accessories
In addition to the tools mentioned above, you will also need the following hardware and accessories:
- Mounting brackets: These brackets are essential for attaching the bike rack to your car. They come in various sizes and styles, so make sure you choose the ones that are compatible with your car and bike rack model.
- Straps or cables: Depending on the bike rack, you may need straps or cables to secure your bicycles to the rack and prevent them from wobbling or falling off during transportation.
- Hitch pin or lock: If you are installing a hitch-mounted bike rack, a hitch pin or lock will be necessary to secure the rack to your car’s hitch receiver.
- Foam padding: Foam padding or protective covers will help prevent any scratches or damages to your car and bicycles while they are being transported.
- Reflectors or safety lights: Adding reflectors or safety lights to your bike rack will enhance visibility and ensure that other drivers can see your rack and bicycles, especially during nighttime travel.
Remember, having the right tools and materials is crucial for a successful bike rack installation. By gathering everything you need beforehand, you can ensure a smoother and more efficient installation process, allowing you to hit the road with confidence.
Installing The Bike Rack
Installing a bike rack on your car is a great way to transport your bicycle safely and securely. Whether you choose to install the bike rack on the roof, trunk, or hitch, it’s important to follow the recommended steps to ensure a successful installation.
In this section, we will guide you through the process of installing a bike rack on your car, covering three common installation methods: roof, trunk, and hitch.
Preparing The Car:
Before installing the bike rack, there are a few preparatory steps you should take to ensure a smooth installation process. Follow these key points to get your car ready:
- Cleaning the car’s roof or trunk: Thoroughly clean the surface of the car’s roof or trunk where the bike rack will be installed. Remove any dirt, dust, or debris that may interfere with the attachment of the rack.
- Removing obstacles and pre-existing accessories: Take a moment to remove any obstacles or pre-existing accessories from the roof or trunk of your car. This includes roof racks, roof rails, or any other items that may hinder the installation process.
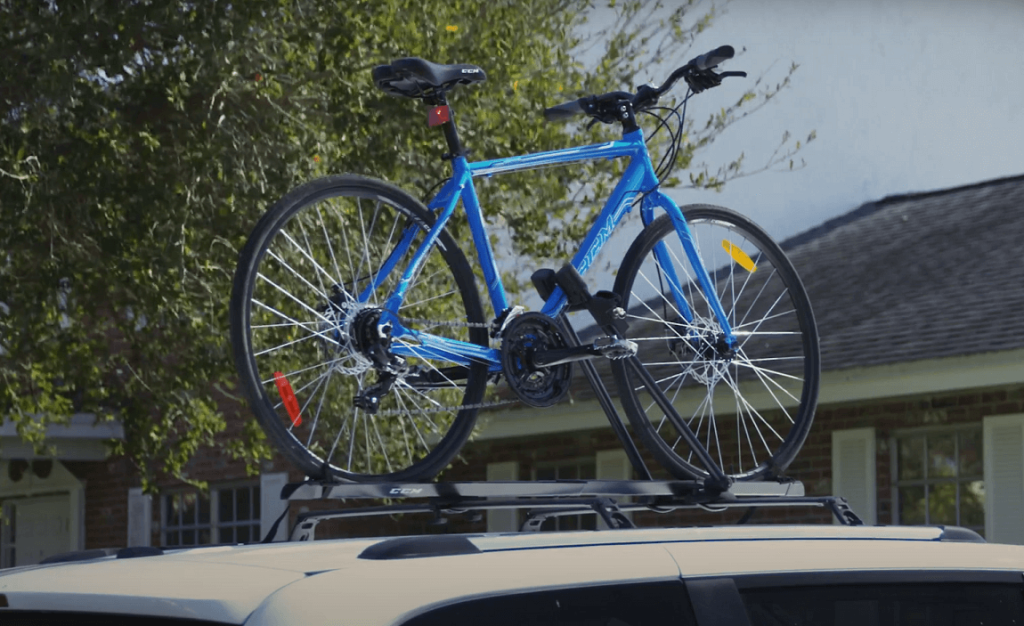
Installing The Bike Rack On The Roof:
Installing a bike rack on the roof of your car provides a convenient way to transport your bike while preserving trunk space for other items. Follow these steps to install the bike rack on the roof:
- Securing the crossbars or roof rails: If your car is equipped with crossbars or roof rails, ensure they are properly secured and aligned before attaching the bike rack. Make sure they are tightened securely to prevent any movement during transportation.
- Attaching the bike rack to the crossbars: Carefully position the bike rack on the crossbars, aligning it with the mounting holes. Insert the mounting bolts provided with the bike rack and tighten them securely using a wrench or screwdriver. Ensure the bike rack is firmly attached to the crossbars to prevent any wobbling.
- Securing the rack properly: Once the bike rack is mounted, double-check that all bolts and fasteners are tightened properly. Test the stability of the rack by giving it a slight shake. It should remain securely in place without any excessive movement.
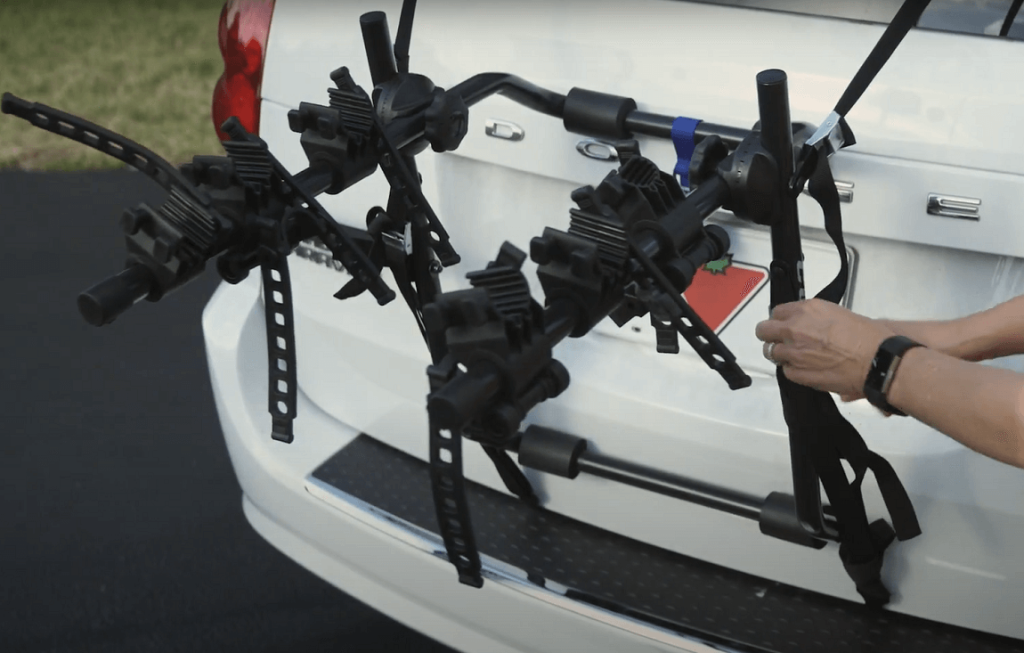
Installing The Bike Rack On The Trunk:
For those who prefer a rear-mounted option, installing a bike rack on the trunk is a popular choice. Here’s how you can do it:
- Positioning the rack on the trunk: Place the bike rack on the trunk of your car, making sure it is centered and level. Adjust the rack so that it sits securely on the trunk without obstructing the rear window or license plate.
- Attaching straps and hooks: Wrap the straps provided with the bike rack around the edges of the trunk and attach them securely to the appropriate hooks on the rack. Ensure the straps are tightened adequately to prevent any movement during transportation.
- Ensuring stability and security: Once the bike rack is attached, check that it is stable and secure. Give it a gentle push to test its stability. It should stay firmly in place without shifting or wobbling.
Installing The Bike Rack On The Hitch:
If your car is equipped with a hitch receiver, installing a bike rack on it is a popular and convenient option. Follow these steps for a successful installation:
- Understanding hitch types and compatibility: Determine the type of hitch receiver on your car and ensure it is compatible with the bike rack you intend to install. Refer to the manufacturer’s guidelines or consult with a professional if necessary.
- Mounting the hitch and receiver: If the hitch receiver is not already mounted on your car, follow the manufacturer’s instructions to mount it properly. Ensure the hitch is securely attached to the frame of the car.
- Attaching the bike rack to the hitch: With the hitch receiver in place, insert the shank of the bike rack into the receiver. Align the holes on the rack’s shank with the hitch pin holes, and insert the hitch pin or bolt provided by the manufacturer. Tighten the pin or bolt securely using the appropriate tools.
By following these installation steps based on the location of your choice, you can safely and securely attach a bike rack to your car. Remember to always refer to the manufacturer’s instructions for your specific bike rack model, as installation processes may vary slightly.
Happy biking and safe travels!
Tips For A Secure Installation
Installing a bike rack for your car is a great way to transport your bicycles safely and conveniently. However, a secure installation is crucial to ensure that your bikes remain safe during travel. Here are some important tips to keep in mind when installing a bike rack on your car:
Checking And Double-Checking Before Use
Before hitting the road with your bikes, it’s essential to thoroughly check and double-check your bike rack installation. Taking these steps will help prevent any accidents or damage along the way. Follow these guidelines to ensure a secure installation:
- Read the instructions carefully: Start by reading the manufacturer’s instructions provided with the bike rack. While it may seem tempting to skip this step, it is crucial to understand the specific requirements and recommendations for your particular bike rack model.
- Inspect your vehicle: Before installing the bike rack, inspect your car for any components that may interfere with the installation process. Check for spoilers, bumpers, or other attachments that may obstruct the bike rack’s secure fit.
- Prepare the car and bike rack: Clean the area where the bike rack will be mounted on your car. Remove any dirt, debris, or wax that may hinder the attachment. Also, make sure that the bike rack itself is clean and free from any obstructions.
- Test the attachment points: Check the attachment points on your car for stability and security. Ensure that the straps, hooks, or mounts align properly and engage securely. Double-check that everything is tight and in the correct position before proceeding.
- Load the bikes onto the rack: Once the bike rack is securely installed, load your bicycles onto the rack following the manufacturer’s instructions. Make sure to distribute the weight evenly, securing each bike individually to avoid unnecessary movement during transit.
Maximizing Stability And Preventing Damage
To ensure a safe and secure journey with your bikes, it’s important to maximize stability and take precautions to prevent any damage. Follow these recommendations to keep your bikes and car protected during transport:
- Secure the bikes properly: Use additional straps, bungee cords, or bike locks to secure the bikes tightly to the bike rack. This extra step will prevent any movement or shifting during transit, reducing the risk of damage to both your bikes and car.
- Keep an eye on the bikes: Periodically check your rearview mirror to ensure that the bikes remain securely in place during your journey. If you notice any signs of movement or instability, pull over safely to assess and readjust the bikes and rack as necessary.
- Avoid excessive speeds and sudden maneuvers: While driving, it’s crucial to maintain a steady and cautious pace. Avoid sudden accelerations, hard braking, or sharp turns, as these can put unnecessary stress on the bike rack and potentially damage your bikes.
- Regularly inspect the bike rack: After a trip, inspect the bike rack for any signs of wear and tear. Check the straps, hooks, and mounts for any damage or weakness. Address any issues promptly to maintain the longevity and safety of your bike rack.
Remember, a secure installation is critical when using a bike rack for your car. By following these tips and thoroughly checking your installation, you can have peace of mind knowing that your bikes will arrive at your destination safe and sound.
Wrapping Up
Final Safety Checks And Adjustments
Before hitting the road with your bike rack installed, it is crucial to perform some final safety checks and make any necessary adjustments. Ensuring the safety of your bikes and other road users should be your primary concern. Here are some key points to keep in mind:
- Double-check the stability of the bike rack: Give it a firm shake sideways and forward to ensure it is securely attached to your car. If it wobbles excessively, readjust the straps or mounting system to make it more stable.
- Verify the security of the bikes: Make sure that the bikes are properly secured to the rack using straps or clamps. Give each bike a gentle tug to test its stability. If a bike feels loose, tighten the straps or clamps accordingly.
- Test the functionality of the rack: If your bike rack comes with additional features like tilt or swing functions, test them out before hitting the road. Ensure that these mechanisms are working smoothly to prevent any unexpected issues during your journey.
- Check for any obstructions: Before driving away, inspect the rack and bikes for any obstructions such as loose straps, pedals sticking out, or handlebars protruding. These can pose a hazard to pedestrians, cyclists, or other motorists, so it is vital to address them before setting off.
Ensuring The Bike Rack Meets Legal Requirements
Adhering to legal requirements is necessary to ensure a safe and hassle-free journey, while also avoiding any potential fines or penalties. Here are some important considerations when it comes to legal requirements for bike racks:
- Check state-specific regulations: Different states may have varying laws regarding the use of bike racks and their specific requirements. Familiarize yourself with the regulations in your state to ensure compliance.
- Maintain clear visibility: The bike rack should not obstruct the driver’s view through the rearview mirror or rear window, as this is essential for safe driving. Adjust the placement of the rack if necessary to maintain good visibility.
- Display warning signs if required: Some states require the use of warning signs or flags on the back of the bike rack to alert other drivers about the extended length of your vehicle. Check your local regulations to determine if this is necessary.
- Be mindful of weight limits: Ensure that the weight of the bikes and the bike rack itself is within the specified limits set by the manufacturer. Exceeding these limits can contribute to accidents and damage to your vehicle.
Remember, following these final safety checks and ensuring that your bike rack meets all legal requirements guarantees a smoother and worry-free journey with your bikes. So, take the time to assess and make any necessary adjustments before embarking on your next cycling adventure.
Frequently Asked Questions Of How To Install Bike Rack For Car
How Do I Choose The Right Bike Rack For My Car?
Choosing the right bike rack for your car depends on factors such as the type of car, number of bikes you want to carry, and the type of rack you prefer (roof, trunk, hitch). Consider the weight capacity, security features, and ease of installation to make the best choice for your needs.
Can I Fit a Bike Rack to My Car?
In most cases, yes, you can fit a bike rack to your car. Many cars are equipped with a roof rack, hitch receiver, or trunk mount, which can be used to attach a bike rack. However, the type of bike rack you can use will depend on your car’s specific make and model. It’s essential to check your car’s manual or consult with the manufacturer or a professional to ensure compatibility and determine which type of bike rack is suitable for your vehicle.
Are Bike Racks Easy to Install?
The ease of installing a bike rack depends on the type of rack you choose and your familiarity with the installation process. Here are the main types of bike racks and a brief overview of their installation difficulty:
- Roof-Mounted Bike Rack: These racks attach to the crossbars on your car’s roof. They can be relatively easy to install if your car already has crossbars in place. If not, you may need to purchase and install crossbars separately, which can be more complex.
- Hitch-Mounted Bike Rack: Hitch racks are generally straightforward to install if your car has a hitch receiver. You insert the rack’s hitch mount into the receiver and secure it with a pin and lock. Some hitch racks may require more assembly than others, but they are often considered easier to use.
- Trunk-Mounted Bike Rack: Trunk racks are typically the easiest to install. They use straps and hooks to attach to the trunk or rear hatch of your car. However, the installation process may vary depending on the specific rack design and your car’s trunk configuration.
- Spare Tire-Mounted Bike Rack: If your car has a spare tire on the rear, you can use this type of rack. Installation usually involves securing the rack onto the spare tire and adjusting the arms to hold the bikes.
While some bike racks are easier to install than others, it’s crucial to follow the manufacturer’s instructions carefully to ensure that the rack is securely attached and that your bikes are properly mounted for safe transportation.
How Do You Install a 3-Bike Rack?
The installation process for a 3-bike rack, or any bike rack, will depend on the specific model and type of rack you have. Generally, here are the steps to install a typical hitch-mounted 3-bike rack:
- Locate the Hitch Receiver: Ensure your car has a hitch receiver. If not, you’ll need to have one installed by a professional.
- Position the Bike Rack: Slide the hitch mount of the bike rack into the hitch receiver until it clicks or locks into place.
- Secure the Rack: Use the provided pin and lock to secure the bike rack in the hitch receiver. Ensure it’s tight and secure.
- Adjust Bike Cradles: Most bike racks have adjustable cradles to hold the bikes. Adjust these to accommodate your three bikes, ensuring they are evenly spaced and secure.
- Secure the Bikes: Carefully load your bikes onto the rack, securing them using straps, clamps, or cradles provided by the rack. Make sure each bike is stable and won’t wobble during transportation.
- Check for Clearance: Ensure there is enough clearance between the bikes, the rack, and your car’s rear, especially if you have a rear-mounted spare tire.
Always consult the specific installation instructions provided by the manufacturer of your 3-bike rack, as the steps may vary slightly depending on the brand and model. Additionally, it’s a good practice to double-check that the rack is securely installed and that your bikes are fastened tightly before hitting the road.
Can I Still Access My Car’S Trunk With A Bike Rack Installed?
Yes, you can still access your car’s trunk with certain types of bike racks. Trunk-mounted racks are designed to offer trunk access by tilting or swinging away from the car. However, roof-mounted racks may obstruct trunk access, so it’s important to consider this before choosing a rack if trunk access is a priority for you.
Conclusion
Installing a bike rack for your car is a simple and practical solution to transport your bikes safely and conveniently. By following the step-by-step instructions outlined in this guide, you can successfully install a bike rack and be ready for your next cycling adventure in no time.
Remember to choose a rack that is suitable for your car and can accommodate the number of bikes you need to transport. Take your time to securely fasten the rack to your car and ensure that the bikes are properly secured and stable.
Additionally, regularly check the rack and its attachment points to ensure everything is still in good condition. With a well-installed bike rack, you can enjoy the freedom of exploring new cycling routes and destinations without worrying about how to transport your bikes.
So, get ready for the road and let the adventures begin!