
This article was updated in June 25, 2026 with new products and information by Mark S. Taylor
A bad fusible link symptoms can look completely normal on the outside and still leave your car totally dead. That is the frustrating reality of automotive electrical engineering—and it is the primary reason why thousands of daily drivers waste hundreds of dollars replacing perfectly healthy batteries and alternators on vehicles that only required a simple $15 wire repair.
The symptoms of a blown fusible link overlap seamlessly with almost every other catastrophic electrical component failure: immediate no-start conditions, dead accessory grids, and complete charging system dropouts. What differentiates a failed link from a dead component isn’t what you observe on the dashboard—it is the highly specific pattern of what works and what doesn’t, combined with what a digital multimeter reads when you probe both sides of the line.
As an ASE-Certified Master Technician, I have diagnosed hundreds of mysterious power loss faults. In this comprehensive workshop guide, we will break down the structural physics of fusible link design, decode the 5 definitive symptoms of internal melting, and outline a step-by-step continuity test loop you can execute in your driveway in under 10 minutes.

Contents
- 1 What Is a Fusible Link?
- 2 5 Critical Symptoms of a Blown Fusible Link
- 3 The Invisible Failure Trap: Flexing vs. Continuity Testing
- 4 High-Current Electrical Failure Isolation Matrix
- 5 How to Test a Fusible Link with a Multimeter in 4 Steps
- 6 Charging Circuit and Wiring Repair Cost Matrix (US Estimates)
- 7 What Triggers a Fusible Link to Explode or Melt?
- 8 DIY vs. Professional Mechanic Service Boundaries
- 9 Prevention & Routine Battery Maintenance
- 10 FAQs About Bad Fusible Link Symptoms
- 10.1 Q: Where is the fusible link located on my car?
- 10.2 Q: Can a bad fusible link cause a no-start with no other symptoms?
- 10.3 Q: Where exactly is the fusible link located on my specific vehicle?
- 10.4 Q: Can a bad fusible link cause an engine to fail to crank while accessories run completely fine?
- 10.5 Q: Is a cartridge maxi-fuse identical to a wire-type fusible link?
- 11 The Verdict: Verify the Sacrificial Path Before Major Component Swaps
What Is a Fusible Link?
A fusible link is a highly specialized, short section of sacrificial wire—typically measuring between 3 to 6 inches long—engineered directly into a vehicle’s high-current wiring harness. Its primary function is to protect the main power distribution grid from catastrophic thermal fires during massive electrical overloads.
A fusible link is manufactured using a core conductor wire that is exactly four gauge sizes smaller than the wire circuit it is designated to protect. It is then wrapped in an incredibly thick, non-flammable, heat-resistant chlorosulfonated polyethylene (Hypalon) insulation jacket. When current ($\text{Amperage}$) spikes past safe design thresholds—due to a reversed battery jumpstart or a dead short to ground—the thin internal alloy core melts open instantly. This breaks the circuit completely before the primary wiring harness can superheat and catch fire.
Modern vehicles manufactured within the last 10 to 15 years increasingly utilize large cartridge Maxi-Fuses or multi-fuse blocks mounted directly inside the under-hood fuse box instead of traditional wire-type fusible links. If your vehicle was engineered after 2015, verify the status of these high-amperage cartridge links before hunting for raw inline wiring splices.

5 Critical Symptoms of a Blown Fusible Link
The vehicle operational patterns vary completely based on exactly which high-amperage circuit line has experienced an open-circuit failure:
1. Absolute and Total Power Blackout
This is the most common presentation of a blown main supply link. You insert the key or press the start button and absolutely nothing happens—there are zero dashboard illumination lamps, no dome lights, no chime tones, and zero clicking sounds from the starter solenoid. The vehicle acts completely dead despite the battery testing at full charge. When the primary link feeding the main cabin fuse block melts open, it cuts off every downstream accessory simultaneously, frequently leading to unnecessary battery or ignition switch replacements.
2. Vehicle Accessories Activate Normally, But the Engine Refuses to Crank
This specific pattern points straight to a failure inside the starter circuit fusible link. When you switch the ignition to the “ON” position, your radio plays, the windows roll down, and the dashboard lights up perfectly. However, the moment you transition the switch to “START,” the engine does not crank at all. The lower-amperage cabin accessories are fed by a separate line, but the heavy current path to the starter solenoid has been severed at the link.
3. Alternator Fails to Charge (Active Battery Light)
A blown fusible link positioned inline between the alternator output stud (B+ terminal) and the battery positive terminal completely isolates the charging path. The vehicle will start normally on stored battery reserve, but zero current transfers from the spinning alternator back into the battery cells. The dashboard battery warning light will glow solid within seconds of engine startup, accompanied by a running voltage metric that drops below 12.4V DC.
4. Isolated System Failure Fields
In specific vehicle architectures, independent fusible links protect dedicated high-draw sub-systems—such as the power window regulator grid, the dual climate control blower matrix, or the electronic power steering rack. When one of these sacrificial paths blows, it creates a clean, isolated system blackout while the rest of the vehicle’s electrical components operate flawlessly.
5. Visible Smoke or Meltdown Marks Near the Battery Terminal
If a high-current short-circuit remains actively grounded under the hood, the fusible link will enter its active thermal failure phase. You will observe wisps of white smoke rising near the positive battery cable, smell an intense burning rubber chemical odor, or notice the link casing swelling and blistering. The link is performing its job by melting to isolate a catastrophic fire risk.

The Invisible Failure Trap: Flexing vs. Continuity Testing
The single biggest diagnostic trap surrounding wire-type fusible links is their visual presentation. Because the Hypalon rubber jacket is explicitly engineered to withstand intense volcanic heat without scorching or tearing open, a fusible link can be completely melted and severed on the inside while looking perfectly clean and smooth on the outside.
To diagnose this hidden open-circuit condition without tools, execute the Technician Flex Test:
Disconnect the battery negative terminal, grip the suspect fusible link wire between your fingers, and gently bend it along its 4-inch length. A healthy link feels incredibly rigid and stiff. A blown link will feature a distinct, soft, rubbery “floppy spot” in the center where the internal alloy wire has liquefied, leaving only the hollow rubber jacket behind.
High-Current Electrical Failure Isolation Matrix
| Diagnostic Observation | Blown Main Fusible Link | Failed Alternator Unit | Severely Sulfated Battery |
| Cabin Accessories Run? | ❌ No | ✅ Yes | ❌ No (Or extremely dim) |
| Engine Crank Status | Absolute Silence | ✅ Yes (Until battery drains) | Rapid Clicking or Slow Labor |
| Running Multimeter Volts | N/A (Engine cannot start) | $\le 12.6\text{V}$ (Flat Pool) | 13.8V to 14.8V (Charging Line Good) |
| Fusible Link Resistance | Infinite ($\text{OL}$ Overload) | $\le 0.2\ \Omega$ (Continuity Good) | $\le 0.2\ \Omega$ (Continuity Good) |
| Will a Jumpstart Work? | ❌ No | ✅ Temporarily | ✅ Yes (Engine stays running) |
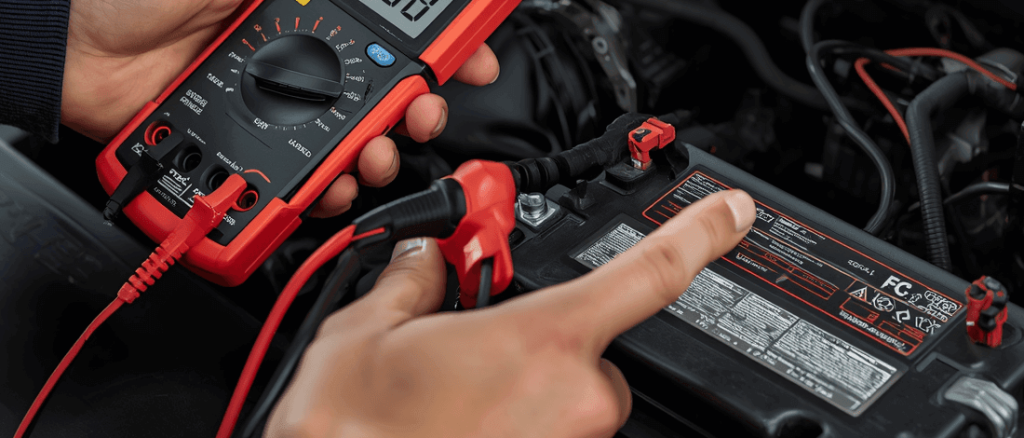
How to Test a Fusible Link with a Multimeter in 4 Steps
Follow this rigorous technical sequence to isolate the electrical path accurately without introducing false resistance readings:
1. Isolate the Power Line and Disconnect the Negative Terminal: 2 min.
Before introducing diagnostic probes, ensure all live power is neutralized. Use a wrench to unbolt the negative battery cable clamp and pull it completely off the post. Next, unbolt the ring terminal at one end of the fusible link from its junction block stud—isolating one side is mandatory to prevent back-feeding resistance through the rest of the car’s harness wiring.
2. Calibrate and Set Up the Digital Multimeter: 2 min.
Switch your digital multimeter dial to the Resistance scale (Ohms, select the lowest range like 200 $\Omega$) or select the audible Continuity Beep mode. Touch your red and black meter probes together firmly first; verify the screen flashes zero and the meter emits a solid tone, confirming a perfect circuit.
3. Probe Both Extremes of the Sacrificial Link Wire: 2 min.
Press the red multimeter probe tightly onto the isolated metal eyelet terminal of the fusible link, and press the black probe onto the opposing side wire connector barb. Ensure your fingers do not touch the bare metal probe tips, as human skin resistance can alter lower Ohm calculations.
4. Interpret the Resistance Digits: 2 min.
Reading $\le 0.2\ \Omega$ / Solid Beep: The alloy core is fully intact and healthy under zero load.
Reading “OL” (Overload) / Infinite Ohms / Absolute Silence: The internal wire is melted open. The link is completely blown and must be snipped and replaced immediately.
Charging Circuit and Wiring Repair Cost Matrix (US Estimates)
| Isolated Component / Repair Vector | Average DIY Product Cost | Professional Shop Labor Cost | Total Estimated Service Bill |
| Pre-Made Vehicle Specific Pigtail Link | $10 – $30 | $50 – $120 (Simple terminal swap) | $60 – $150 |
| Bulk Roll Fusible Link Wire (Per Foot) | $8 – $20 | $100 – $200 (Buried harness extraction) | $108 – $320 |
| Heavy-Duty Crimp & Heat-Shrink Kit | $15 – $35 | N/A | $15 – $35 |
| High-Current Short-Circuit Diagnosis | N/A | $90 – $150 (Diagnostic flat rate) | $90 – $150 |
| Replacement High-Output Alternator | $150 – $400 | $200 – $500 | $350 – $900 (If shorted diode caused failure) |
Labor values reflect the current 2026 independent US mechanical shop average of $115 to $175 per hour. If a vehicle’s internal alternator diode has shorted out, it will instantly blow a new replacement link upon initial battery connection. Always trace the root cause if a new wire snaps immediately.

What Triggers a Fusible Link to Explode or Melt?
A fusible link is an incredibly reliable engineered component; it will never fail or drop continuity without an immense external electrical overload. Tracing the root cause is mandatory to prevent blowing your new pigtail on initial battery connection:
- Reversed Polarity Jumpstart Spikes: The number one cause of sudden fusible link failure. Accidentally clamping jumper cables backward (Positive to Negative) even for a micro-second creates a massive direct short across the terminal lines, instantly blowing the charging links to save the vehicle’s computer processors.
- Shorted Alternator Ground Diode: If an internal silicone diode inside the alternator housing breaks down thermally and seizes closed, it creates a massive low-resistance ground path. Current surges backward out of the battery, melting the alternator line link instantly.
- Chafed B+ Wiring Harness Contact: Over years of mechanical engine vibration, the heavy plastic conduit surrounding primary current wires can rub thin against sharp engine blocks or transmission housing lips. If raw copper meets bare metal ground, the link melts down to isolate the line.
- Unmanaged Aftermarket Electrical Loads: Splice-connecting high-draw electronics—such as dual-motor off-road winches, multi-kilowatt car audio amplifiers, or heavy-draw snowplow hydraulic motors—directly onto factory terminal lines forces sustained current metrics past factory link boundaries.
DIY vs. Professional Mechanic Service Boundaries
- DIY Approved Scope: If the blown link wire sits highly visible and accessible right off the positive battery post or terminal clamp stud. Swapping it simply requires cutting away the damaged segment and crimping on a pre-made pigtail block utilizing heavy-duty insulated splice links. Never use a regular copper jumper wire or coat hanger to bypass a link, as this removes all fire protection from the harness.
- Professional Shop Scope: If your vehicle features hidden fusible link blocks buried deep within the wire looming running along the firewall bulkhead beneath the intake manifold. Furthermore, if you splice in a fresh link and it instantly sparks and pops open the microsecond the battery is reconnected, you are fighting an active dead short. Hand the vehicle to a shop equipped with specialized short-circuit localization equipment.
Prevention & Routine Battery Maintenance
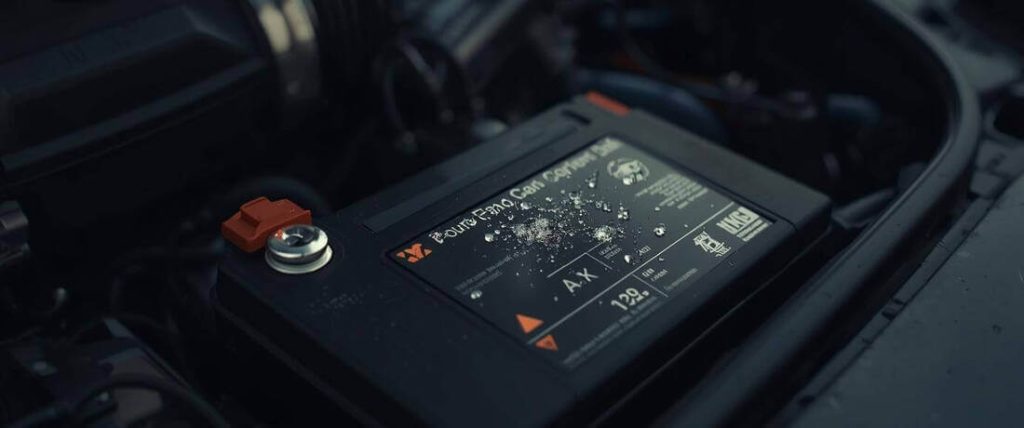
- Inspect Links Accurately During Battery Swaps: Every 3 to 5 years when installing a fresh battery cell, take 60 seconds to inspect adjacent fusible links for green wire corrosion at the eyelet contacts or heat-induced casing deformation.
- Adhere to Rigid Jumpstart Routing Protocols: Always establish connections in the precise order: Positive to Positive, then Negative donor to a clean chassis engine ground point away from the dead battery terminal. Never slide jumper clamps free while engines are actively running.
- Clean Battery Acid Scale Regularly: Spray localized terminal blocks with baking soda neutralizer sprays annually to prevent acidic scale from introducing electrical resistance across the link terminals.
FAQs About Bad Fusible Link Symptoms
Q: Where is the fusible link located on my car?
Most vehicles have one or more fusible links near the positive battery terminal, either spliced directly into the positive battery cable or inline on the wire running to the underhood fuse box or alternator. Some vehicles bury fusible links inside the wiring harness near the firewall. Check your owner’s manual or a vehicle-specific wiring diagram for exact locations. On 2005 and newer vehicles, high-current protection may be handled by maxi-fuses in the underhood fuse box rather than traditional wire-type fusible links.
Q: Can a bad fusible link cause a no-start with no other symptoms?
Yes, and this is one of the most disorienting failure patterns. If the fusible link supplying the starter circuit is open, the car will not crank at all — but every accessory, every dash light, and every other electrical system will work normally. Turning the key to start produces nothing. No click, no crank. This gets misdiagnosed as a bad starter or ignition switch regularly. A two-minute continuity test on the starter circuit fusible link rules it out immediately.
Q: Where exactly is the fusible link located on my specific vehicle?
The primary high-amperage fusible links are almost always positioned within 12 inches of the positive battery terminal post, mounted directly inline along the heavy branch wires feeding the alternator or the main under-hood fuse block box. Check your owner’s manual wire routing schematics for specific locations. Note that on post-2015 model vehicles, these are frequently replaced by color-coded maxi-fuse cartridges.
Q: Can a bad fusible link cause an engine to fail to crank while accessories run completely fine?
Yes, absolutely. This clean isolation occurs when the independent link dedicated solely to the starter solenoid feed circuit blows open. Because lower-amperage electronics like the radio, headlights, and dash cluster pull power from separate fuse lines, they will operate flawlessly—tricking drivers into replacing functional starter motors. A 2-minute continuity check resolves the puzzle.
Q: Is a cartridge maxi-fuse identical to a wire-type fusible link?
Functionally, they serve the exact same sacrificial purpose by breaking current overloads. Structurally, a maxi-fuse is a clean plastic plug-in cartridge block held inside an established engine bay junction rail, making it significantly faster to visually check and pop out without cutting wires. A fusible link is a raw section of insulated wire wire wrapped in Hypalon directly inside the wiring loom run.
The Verdict: Verify the Sacrificial Path Before Major Component Swaps
Never authorize a costly starter motor or alternator installation based solely on an isolated power blackout symptom. A fusible link is an active, engineered mechanical gatekeeper—if its internal alloy core is isolated by an electrical spike or thermal age creep, installing a brand-new $600 alternator will completely fail to restore charging current down the line. Take 5 minutes to run a systematic continuity loop with a digital multimeter, check for hidden rubber soft spots across your battery cables early, and preserve your critical drivetrain infrastructure from premature replacement errors.
(Want to ensure your vehicle’s alternative mechanical components, charging loops, and engine computer diagnostics are functioning with absolute factory precision? Read our master workshop guide on How to Read Check Engine Light Codes Without a Scanner or check out The Car Buzz Official Testing and Editorial Integrity Guidelines Page).