
This article was updated in July 7, 2026 with new products and information by Mark S. Taylor
A bad tie rod produces specific, identifiable symptoms — and which symptoms you have tells you whether it’s the inner end, the outer end, how worn it is, and whether you have days or weeks before it becomes a safety emergency rather than a repair inconvenience.
Most articles on this topic list five generic symptoms and tell you to go to a shop. This one tells you how to differentiate between the two ends, how to test the joint yourself before you talk to anyone, and exactly what the repair should cost so you’re not walking in blind.
Contents
- 1 What a Tie Rod Does — and Why Failure Is a Steering Emergency
- 2 Seven Symptoms of a Bad Tie Rod — What Each One Tells You
- 2.1 Symptom 1 — Steering Wanders or Drifts on Straight Roads
- 2.2 Symptom 2 — Steering Pulls to One Side
- 2.3 Symptom 3 — Clunking or Knocking Noise on Turns or Rough Pavement
- 2.4 Symptom 4 — Loose or Vague Steering Feel — Excessive Free Play
- 2.5 Symptom 5 — Uneven or Feathered Tire Wear
- 2.6 Symptom 6 — Vibration Through the Steering Wheel at Speed
- 2.7 Symptom 7 — EPS Warning Light or Erratic Power Steering Assist
- 3 Inner Tie Rod vs. Outer Tie Rod — Different Symptoms, Different Repairs
- 4 How To Test a Tie Rod Yourself — Three Physical Checks
- 5 How Urgent Is a Bad Tie Rod — The Speed-Load Separation Risk
- 6 What a Tie Rod Inspection Looks Like — What the Shop Should Actually Do
- 7 Tie Rod Replacement Cost — What the Complete Job Should Cost
- 7.1 Scenario 1 — One Outer Tie Rod End (Single Side)
- 7.2 Scenario 2 — Both Outer Tie Rod Ends (Recommended When One Is Confirmed Worn)
- 7.3 Scenario 3 — One Inner Tie Rod End (Single Side)
- 7.4 Scenario 4 — Complete Tie Rod Service (Both Inner and Both Outer Ends)
- 7.5 The Hidden Cost — Tire Replacement From Delayed Repair
- 8 Do You Always Need an Alignment After Tie Rod Replacement?
- 9 How Long Do Tie Rods Last and What Kills Them Early
- 10 FAQs About Bad Tie Rod Symptoms
- 11 The Expert Verdict
What a Tie Rod Does — and Why Failure Is a Steering Emergency
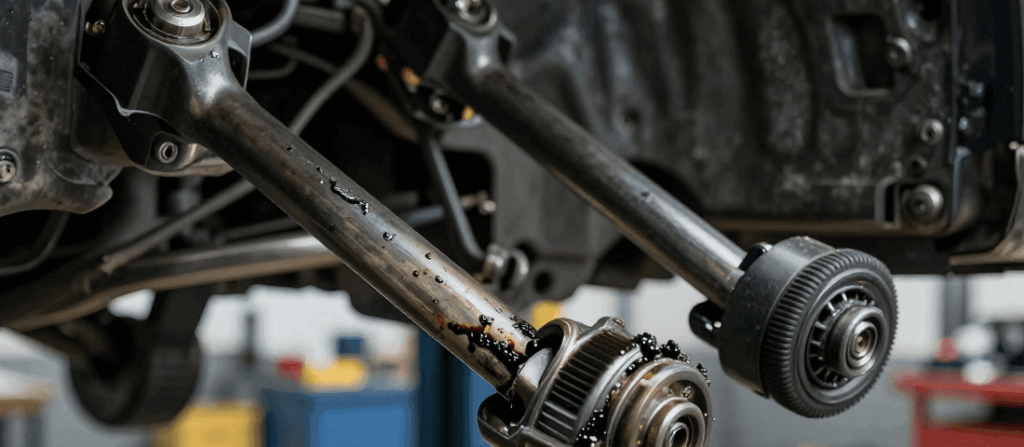
Every time you turn the steering wheel, the rack-and-pinion unit converts that rotational input into a lateral push or pull. The component that transfers that lateral force from the rack to the wheel — that actually moves the wheel left and right — is the tie rod. One tie rod per side, each consisting of an inner end threaded into the steering rack and an outer end bolted to the steering knuckle through a ball-and-socket joint.
The tie rod does two things simultaneously: it steers the wheel and it maintains toe angle. Toe is the degree to which the front wheels point inward or outward relative to straight ahead. Correct toe keeps the tire scrubbing evenly across the tread, rolling in a straight line, and responding predictably to steering input. A worn tie rod end with play in the ball socket allows the toe angle to change dynamically as the wheel hits road irregularities — the wheel steers itself in response to bumps rather than in response to the driver.
Under FMVSS No. 204, steering control is a federally regulated safety standard because loss of steering is a primary cause of uncontrolled vehicle departure from the roadway. A worn tie rod degrades steering control progressively. A separated tie rod ends it completely — the wheel on the affected side steers freely to full lock under road crown forces and vehicle weight. At highway speed, that event is not recoverable.
Seven Symptoms of a Bad Tie Rod — What Each One Tells You
Each of these symptoms has a specific mechanical cause. Knowing the mechanism tells you which end is likely failing and how far along the wear is.
Symptom 1 — Steering Wanders or Drifts on Straight Roads
The vehicle requires constant small steering corrections to hold a straight line. The road isn’t cambered enough to explain it, and it happens on flat highway surfaces where it didn’t before. A worn tie rod end with radial play allows the steering knuckle to drift slightly under the lateral force of road crown and tire scrub — the wheel momentarily points fractionally outward or inward from straight ahead before the driver corrects. The correction happens, the play cycles again, the vehicle wanders continuously. This symptom correlates to outer tie rod end wear in most cases — inner tie rod wear produces a different wander pattern with more steering wheel free play accompanying it.
Symptom 2 — Steering Pulls to One Side
A consistent pull toward one side under normal driving — not wind-induced drift, not brake pull, but a steady deviation that requires constant wheel correction. A worn tie rod end allows the toe on the affected side to drift toward toe-out under driving loads — toe-out causes the vehicle to pull toward the toe-out side. This can also indicate a bent tie rod from a prior impact that set incorrect static toe without anyone adjusting for it. The distinction: worn joint produces a pull that varies slightly with speed and load; bent tie rod produces a consistent pull that’s identical regardless of speed or surface.
Symptom 3 — Clunking or Knocking Noise on Turns or Rough Pavement
A metallic clunk, knock, or pop from the front end. The location of where you feel it in the vehicle differentiates inner from outer failure. A clunk felt through the floor, the firewall, or the front of the chassis — transmitted structurally — originates at the outer tie rod end. The outer end connects to the steering knuckle, which loads through the wheel bearing into the subframe and chassis. A clunk felt through the steering wheel itself — transmitted through the rack and steering shaft — originates at the inner tie rod end, which connects directly to the rack housing. This distinction is the most useful pre-inspection differentiator available to the driver.
Symptom 4 — Loose or Vague Steering Feel — Excessive Free Play
The steering wheel rotates a noticeable amount before the front wheels respond. Measure it by gently rotating the wheel from the center position until you feel the front tires begin to respond to the input — any rotational movement at the wheel rim before that response is free play. Factory specification for most passenger vehicles is less than 1.5 inches of free play measured at the steering wheel rim. Above 2.0 inches indicates inner tie rod wear, worn rack-and-pinion bushings, or steering shaft U-joint wear — not outer tie rod end wear, which doesn’t produce significant free play because the outer end is downstream of the rack.
Symptom 5 — Uneven or Feathered Tire Wear
Two distinct wear patterns. One-sided shoulder wear — the inner or outer edge of the tread worn significantly faster than the center — indicates a static toe error from a misadjusted or worn tie rod holding the wheel in a toe-in or toe-out position constantly. Feathering — a sawtooth pattern across the tread blocks where one side of each block is rounded and the other is sharp when you run your hand across the tread — indicates a dynamic toe change. The wheel is being forced to toe-out and back repeatedly as the suspension cycles over road irregularities, scrubbing the tread sideways. Feathering is the tire wear signature of inner tie rod wear because the inner end wear allows the rack-to-tie-rod connection to flex under load, producing exactly that cyclic toe change.
Symptom 6 — Vibration Through the Steering Wheel at Speed
A shimmy or vibration felt through the steering wheel during highway driving — distinct from a wheel balance vibration because it’s directional and steering-sensitive rather than a consistent amplitude buzz. A worn outer tie rod end with significant radial play allows the wheel to oscillate in toe — tiny steering inputs from the road surface feed back through the worn joint, amplify through the steering geometry, and return to the wheel as a shimmy. This is different from tie rod end-induced wander — wander is slow and low-frequency, shimmy is rapid and high-frequency. Shimmy at highway speed from a tie rod end indicates the joint is worn beyond marginal — it’s generating dynamic instability in the steering geometry.
Symptom 7 — EPS Warning Light or Erratic Power Steering Assist
On vehicles with electric power steering, the EPS control module monitors steering torque input continuously. A worn tie rod end that binds intermittently — particularly a corroded ball stud that seizes in the steering knuckle taper on cold mornings — generates irregular torque inputs that the EPS system interprets as a steering fault. The EPS reduces or eliminates assist and stores a steering-related DTC. The warning light appears and the steering feels heavy. This symptom is most common on Rust Belt vehicles during the first steering input of the day on cold mornings — the corroded ball stud binds in the taper until thermal expansion of the joint loosens it, typically after the first mile of driving.

Inner Tie Rod vs. Outer Tie Rod — Different Symptoms, Different Repairs
The inner and outer tie rod ends fail differently, produce different symptoms, and require different tools and labor time to replace. Knowing which end is failing before you call a shop determines whether you’re looking at a 45-minute job or a 2-hour job.
| Factor | Outer Tie Rod End | Inner Tie Rod End |
|---|---|---|
| Location | Between the inner tie rod shaft and the steering knuckle | Between the steering rack and the tie rod shaft |
| Primary symptom | Clunk through floor/chassis on turns; play at 9-and-3 on wheel | Clunk through steering wheel on bumps; free play at wheel rim above 2.0 inches |
| Tire wear pattern | One-sided shoulder wear from static toe error | Feathering (sawtooth) from dynamic toe change under load |
| Physical test | Grasp tire at 9 and 3 o’clock, push-pull laterally — detectable movement | Grasp inner tie rod shaft through boot, feel for lag between wheel input and rod movement |
| Special tooling required | No — standard sockets and wrenches | Yes — 35mm crowfoot or inner tie rod removal tool; rack bellows boot replacement |
| Boot replacement required | No — outer boot is separate component | Yes — rack bellows boot must be replaced at inner tie rod service |
| Labor time | 0.5–1.0 hours per side | 1.0–2.0 hours per side |
| Parts cost | $35–$120 per side | $45–$150 per side (plus $20–$45 for rack boot) |
| Alignment required after | Yes — always | Yes — always |
According to Moog/Federal-Mogul installation documentation, inner tie rod replacement without a dedicated inner tie rod removal tool risks damaging the steering rack housing threads — the tool applies force to the correct surface of the tie rod body rather than to the threads or the boot sealing surface. Any shop replacing inner tie rods should have this tool; any shop that quotes inner tie rod replacement without mentioning rack boot replacement has missed a mandatory associated service.
How To Test a Tie Rod Yourself — Three Physical Checks
These three checks take 10 minutes and give you enough information to walk into a shop knowing what you’re dealing with. They don’t require a lift — the most important test is performed with the wheels on the ground.
Safety first: checks 1 and 2 require the vehicle to be safely supported. Use jack stands rated for your vehicle’s weight — never perform undercar work with the vehicle supported only by a floor jack.
Check 1 — The 9-and-3 Wheel Shake Test (Outer Tie Rod End)
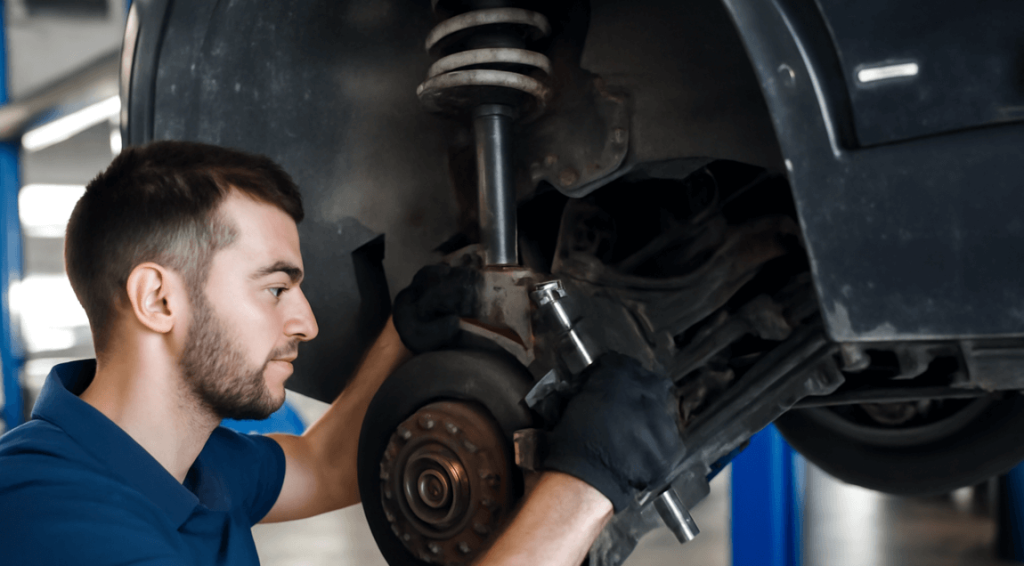
Jack the front of the vehicle and support it on jack stands at the frame or pinch weld points. Grasp the tire firmly at the 9 o’clock and 3 o’clock positions — hands on opposite sides of the tire at the equator. Push one hand toward the vehicle while pulling the other away — apply 20 to 30 lbs of lateral force. Then reverse: push where you pulled, pull where you pushed. You’re testing for lateral play in the tie rod end ball joint.
A healthy outer tie rod end: no perceptible movement in response to this input. The wheel assembly feels solid.
A worn outer tie rod end: detectable lateral movement — the wheel shifts slightly in response to your hand force. You may also hear a faint knock as the ball stud reaches the limit of its worn socket travel.
Measurement standard per SAE J490: acceptable radial play is less than 0.040 inches at the joint. Any play detectable by hand exceeds this threshold — human hands can detect approximately 0.010 to 0.020 inches of movement with the wheel loaded.
Check 2 — The 12-and-6 Wheel Shake Test (Differentiate Tie Rod from Ball Joint)
With the vehicle still on jack stands, reposition your hands to the 12 o’clock (top) and 6 o’clock (bottom) positions on the tire. Apply the same push-pull force vertically.
Vertical play indicates ball joint or wheel bearing wear — not tie rod wear. Tie rod ends have no vertical load path; their ball sockets are oriented to control lateral and fore-aft movement only. If the 12-and-6 test shows play and the 9-and-3 test also shows play, both the ball joint and tie rod end are worn — a common finding on vehicles above 100,000 miles that haven’t had steering component service.
Check 3 — Steering Wheel Free Play Measurement (Inner Tie Rod)
Perform this check with wheels on the ground, engine off. Sit in the driver’s seat and gently rotate the steering wheel from the center position in one direction until you feel the front tires begin to respond — you’ll feel resistance build as the tie rod begins to push the steering knuckle. The distance the wheel rim travels before that resistance appears is free play.
Measure it approximately by using your hand span as a reference — the rim of a standard 14- to 15-inch steering wheel has a circumference of approximately 44 to 47 inches. Two inches of free play represents less than 5 degrees of wheel rotation and is at the acceptable limit. Three inches or more represents a definite problem — inner tie rod wear, rack bushing wear, or both.
The loaded vs. unloaded distinction — why the wheel-in-the-air test misses worn joints:
A worn tie rod end ball joint with the wheel jacked off the ground may show no detectable play because gravity pulls the ball stud to the bottom of its socket. With no lateral load on the joint, the stud sits in a neutral position that doesn’t reveal the worn portion of the socket. The same joint with the wheel on the ground — carrying the vehicle’s corner weight and experiencing the lateral forces of tire scrub against the pavement — pushes the ball stud against the worn socket wall. The wear becomes detectable. Always perform the 9-and-3 test with the wheel bearing the vehicle’s weight if possible — lower the vehicle off the jack stands and have an assistant push laterally on the front bumper while you watch the outer tie rod end joint for movement.

How Urgent Is a Bad Tie Rod — The Speed-Load Separation Risk
A worn tie rod is not equally dangerous at all speeds. Understanding the load relationship tells you whether you’re managing a repair that can wait a week or a component that should not be on a highway today.
The lateral force on a tie rod end ball joint scales with the lateral acceleration the vehicle is experiencing. Lateral acceleration is generated by cornering, road crown, and steering corrections. At 30 mph on a flat road driving straight, the lateral force on the tie rod end might be 50 to 100 lbs. At 65 mph with a lane change maneuver on a slightly crowned highway, that force can exceed 600 to 800 lbs on the loaded side. The joint that holds at 100 lbs may not hold at 800 lbs.
Add a pothole or road discontinuity to that scenario and the instantaneous load spikes further. A pothole impact transmits a vertical force through the ball joint that adds to the lateral load through geometric coupling in the steering knuckle. The combination of highway lateral load plus pothole impact load is the event profile that separates worn-but-functional tie rod ends from worn-and-failed ones.
The three-event failure scenario: highway speed (maximum baseline lateral load) + pothole or expansion joint impact (instantaneous load spike) + steering input (additional lateral load addition) = peak load event. A joint showing 0.060 inches of radial play — borderline by measurement standards — has 50 percent of its ball socket material removed at the wear point. That remaining socket material has a finite load capacity. Under the three-event scenario, it may not be enough.
The practical guidance from this analysis:
- Marginal wear, no play detectable by hand, symptoms only under load: Drive normally, schedule repair within 2 weeks. Avoid highway speeds if the vehicle shimmies or wanders noticeably.
- Play detectable by hand, clunking present: Schedule repair within days. No highway driving. No towing.
- Visible play, clunking on every turn, boot torn: Tow the vehicle. Do not drive it. The joint has progressed past the point where continued use is defensible.
A cotter pin check takes 5 minutes and provides one additional data point. Locate the outer tie rod end at the steering knuckle — the ball stud threads through the knuckle arm and is secured by a castellated nut with a cotter pin through the stud. Confirm the cotter pin is present and not severely corroded. A missing cotter pin allows the castellated nut to back off under vibration — the ball stud backs out of the knuckle without the socket itself wearing through. This is the failure mode that produces sudden separation on a joint that showed no play in the socket test, because the joint itself was fine but the retention hardware had failed.
What a Tie Rod Inspection Looks Like — What the Shop Should Actually Do
A proper tie rod inspection takes 15 to 20 minutes and involves specific physical tests — not a visual glance from across the pit. If a shop quotes a tie rod replacement after a 5-minute inspection without demonstrating any of the following steps, ask them to show you the play in the joint before you approve the job.
Step 1 — Loaded wheel inspection at the outer tie rod end
With the vehicle on a lift at a height that keeps the wheels on the ground (a drive-on lift, not a frame-contact lift with wheels hanging), a technician grabs the tire at 9 and 3 and attempts lateral movement. The wheel-on-ground position keeps the joint loaded. Any movement visible at the outer tie rod end ball socket — the joint where the ball stud enters the steering knuckle arm — confirms outer end wear. A joint with only marginal wear may require the technician to watch the joint while an assistant applies lateral force to the bumper. Wheel movement without corresponding tie rod movement equals play at the outer end.
Step 2 — Inner tie rod sock test
With the engine running and the steering in the center position, a technician wraps their hand around the inner tie rod shaft — accessible through the accordion rubber bellows boot on each side of the rack housing — and holds firm while an assistant turns the steering wheel. The inner tie rod should move immediately and smoothly in sync with the steering wheel input. Any lag between when the steering wheel turns and when the inner tie rod moves is play at the inner tie rod ball joint. Any roughness or grinding felt through the boot during this movement indicates the inner tie rod ball socket surface is damaged. This test requires no tools, takes 2 minutes, and definitively evaluates inner tie rod condition.
Step 3 — Visual boot inspection
Both the outer tie rod end boots and the inner rack bellows boots should be visually inspected for tears, cracks, collapsed sections, or missing clamps. A torn outer tie rod boot doesn’t justify immediate tie rod replacement if the joint tests clean — but it justifies urgent boot replacement to prevent the joint from failing within the next 6,000 to 12,000 miles. A collapsed or torn rack bellows boot on the inner end means the inner tie rod has been exposed to road contamination — accelerated wear is occurring regardless of whether play is detectable yet.
Step 4 — Alignment reading as diagnostic tool
A pre-replacement alignment measurement tells the technician which direction the toe has drifted and by how much. Toe outside of ±0.10 degrees from specification with no collision history points to worn steering components. The alignment reading also establishes the baseline — a technician replacing a tie rod without a pre-replacement alignment reading has no reference point for how far off the toe was, and therefore no way to verify whether the new installation is correctly set.
What the shop should show you:
A credible tie rod recommendation comes with a physical demonstration — the technician shows you the play in the joint with your hand on the component, or shows you the alignment printout with the out-of-spec toe measurement, or both. A recommendation backed only by “we inspected it and it’s worn” without a demonstration is not a complete diagnosis.

Tie Rod Replacement Cost — What the Complete Job Should Cost
Labor rates: $120 to $210/hr at a US independent shop. Dealership rates: $160 to $280/hr. All pricing reflects 2026 US market.
The alignment is not optional. It is not an upsell. A tie rod replacement changes the toe angle — the adjustment sleeve or the thread engagement depth on the new outer tie rod end will not match the old setting precisely enough for safe driving. The alignment must be measured and corrected on an alignment machine after every tie rod replacement, period.
Scenario 1 — One Outer Tie Rod End (Single Side)
| Component | Parts Cost | Labor Hours | Labor Cost | Total Estimate |
|---|---|---|---|---|
| Outer tie rod end (OEM equivalent) | $35–$120 | 0.5–1.0 hrs | $60–$210 | $95–$330 |
| Four-wheel alignment | $0 parts | 0.8–1.0 hrs | $80–$175 | $80–$175 |
| Scenario 1 Total | $175–$505 |
Scenario 2 — Both Outer Tie Rod Ends (Recommended When One Is Confirmed Worn)
| Component | Parts Cost | Labor Hours | Labor Cost | Total Estimate |
|---|---|---|---|---|
| Outer tie rod ends (pair, OEM equivalent) | $70–$240 | 1.0–1.5 hrs | $120–$315 | $190–$555 |
| Four-wheel alignment | $0 parts | 0.8–1.0 hrs | $80–$175 | $80–$175 |
| Scenario 2 Total | $270–$730 |
The both-sides math. When one outer tie rod end is confirmed worn at, say, 90,000 miles, the opposite outer end has the same 90,000 miles on it under the same road conditions. It will fail within 6 to 18 months in most cases. The additional parts cost to replace it simultaneously is $35 to $120. The additional labor cost while the vehicle is already on the alignment rack is $40 to $80. The alignment has to happen regardless — no additional alignment cost for the second side. Compare that to the cost of the second repair as a standalone: $175 to $505 including a second alignment fee. The math favors doing both simultaneously in every scenario except a very low-mileage vehicle where one end failed due to a specific impact event rather than general wear.
Scenario 3 — One Inner Tie Rod End (Single Side)
| Component | Parts Cost | Labor Hours | Labor Cost | Total Estimate |
|---|---|---|---|---|
| Inner tie rod end | $45–$150 | 1.0–2.0 hrs | $120–$420 | $165–$570 |
| Rack bellows boot (mandatory) | $20–$45 | Included in inner tie rod labor | — | $20–$45 |
| Four-wheel alignment | $0 parts | 0.8–1.0 hrs | $80–$175 | $80–$175 |
| Scenario 3 Total | $265–$790 |
Scenario 4 — Complete Tie Rod Service (Both Inner and Both Outer Ends)
| Component | Parts Cost | Labor Hours | Labor Cost | Total Estimate |
|---|---|---|---|---|
| Inner tie rod ends (pair) | $90–$300 | 2.0–3.5 hrs | $240–$735 | $330–$1,035 |
| Outer tie rod ends (pair) | $70–$240 | Included above | — | $70–$240 |
| Rack bellows boots (pair) | $40–$90 | Included | — | $40–$90 |
| Four-wheel alignment | $0 parts | 0.8–1.0 hrs | $80–$175 | $80–$175 |
| Scenario 4 Total | $520–$1,540 |
The Hidden Cost — Tire Replacement From Delayed Repair
A vehicle driven 8,000 to 12,000 miles with a worn outer tie rod end holding the front wheels in a toe-out position typically shows 3/32 to 5/32 inches of inside shoulder wear — the inside tread edge worn to near the wear bars while the outside and center tread remain serviceable. That tire cannot be rotated to the rear — it will wear the rear inside shoulder immediately. It requires replacement as a pair (always replace tires in pairs on the same axle). Add $400 to $800 to the repair cost if the delay in addressing the tie rod wear has consumed the tires. The tie rod repair costs the same regardless of when you do it. The tire replacement is entirely avoidable.
Do You Always Need an Alignment After Tie Rod Replacement?
Yes. Every time. No exceptions.
The outer tie rod end threads onto the inner tie rod shaft and is locked with a jam nut. When a technician removes the worn outer end, standard procedure is to count the number of exposed threads on the inner shaft and thread the new end to the same depth. This preserves approximate toe — close enough that the vehicle drives in a straight line leaving the shop — but not precise toe. Thread pitch on a standard tie rod is 1.5mm per revolution. One additional or fewer revolution of engagement changes the tie rod length by 1.5mm, which changes toe by approximately 0.10 to 0.15 degrees per side depending on the steering geometry. That deviation produces measurable tire wear and steering pull.
The only way to confirm correct toe — and confirm that the steering wheel is centered at the straight-ahead wheel position — is an alignment machine. A shop that offers to skip the alignment to save money is offering to leave your new tie rod end in an unknown toe position. The $80 to $175 alignment fee is a mandatory component of the repair, not a discretionary add-on.
On vehicles with electric power steering, some platforms require a steering angle sensor reset after alignment — the EPS system’s center position reference must be relearned with the new toe setting. The alignment shop will advise on this. Cost: $75 to $150 for EPS calibration on applicable vehicles.
How Long Do Tie Rods Last and What Kills Them Early
Under normal driving conditions with intact boots and no impact damage: 80,000 to 150,000 miles. That range covers the variation between conservative driving on smooth pavement and aggressive driving on rough roads — both with intact dust boots keeping contaminants out of the ball socket.
Boot failure is the primary life reducer. A torn tie rod end boot exposes the ball socket to road grit, salt water, and road debris. Grit in a precision ball socket acts as an abrasive — it laps the hardened steel ball stud against the socket surface continuously. A joint that would have lasted another 60,000 miles with an intact boot can fail within 6,000 to 12,000 miles after the boot tears. Boot replacement costs $15 to $35 in parts and 20 to 30 minutes of labor as a standalone service. The math comparison — $50 to $100 for a boot replacement versus $175 to $505 for a tie rod end replacement plus alignment — makes boot replacement the highest return-per-dollar preventive maintenance item on the front steering system.
Rust Belt road salt accelerates failure through a different mechanism. Salt water penetrates the boot-to-housing interface and corrodes the ball stud and socket surface. More critically, salt attacks the ball stud taper where it sits in the steering knuckle bore. A corroded taper seizes the ball stud in the knuckle — the stud will not separate from the knuckle even when the retaining nut is removed. This makes tie rod replacement significantly more difficult (the taper must be broken loose with a pickle fork or ball joint press, which can damage surrounding components) and more expensive in labor time.
Pothole and curb impact damage can bend a tie rod or fracture the ball socket in a single event regardless of the tie rod’s age or mileage. A bent tie rod holds static toe error and produces a consistent pull regardless of load. It’s not detectable by the play tests — the joint itself tests clean. It shows up on the alignment machine as a toe error that cannot be corrected by adjustment because the tie rod length is mechanically wrong. Alignment shops that see toe error that the adjustment range can’t reach look for a bent tie rod as the first explanation.
FAQs About Bad Tie Rod Symptoms
How do I know if I have a bad tie rod or a bad ball joint?
The 9-and-3 vs. 12-and-6 wheel shake test differentiates them physically. Grasp the tire at 9 and 3 o’clock and push-pull laterally — play here indicates tie rod wear. Grasp at 12 and 6 o’clock and push-pull vertically — play here indicates ball joint or wheel bearing wear. The clunk location provides a secondary indicator: tie rod end clunks are most pronounced on steering inputs and turns; ball joint clunks are most pronounced over bumps with no steering input. Both can be worn simultaneously on high-mileage vehicles — a positive result on both tests means both components need attention.
Can I drive with a bad tie rod?
Marginally worn, play not detectable by hand, symptoms only under maximum load: short local trips only, no highway driving, repair within 1 to 2 weeks. Play detectable by hand, clunking on normal roads: repair within days, no highway driving, no towing. Visible play, clunking on every turn, torn boot: do not drive. Have the vehicle towed. A tie rod that separates at highway speed causes sudden, unrecoverable steering loss on the affected side.
Do I need to replace both tie rod ends at the same time?
Not always — but the math strongly favors replacing both outer ends when one is confirmed worn. Both ends have the same mileage. The second replacement will require another alignment fee as a standalone job. The additional parts cost to replace both outer ends simultaneously is $35 to $120. The alignment is happening regardless. On inner tie rod ends, the decision depends on whether the opposite inner end tests clean — inner tie rods are more labor-intensive and the both-sides argument is weaker unless both ends show play.
What happens if a tie rod breaks while driving?
The wheel on the affected side loses steering control completely. Under road crown and vehicle weight forces, the wheel steers to one extreme of its travel — typically toward the curb side. At low speed in a parking lot, the vehicle pulls hard to one side and becomes difficult to control but remains manageable. At highway speed, the sudden lateral force input from the freed wheel causes the vehicle to swerve violently toward the failed side. Recovery from a tie rod separation at highway speed is extremely difficult and depends entirely on speed, traffic, and road conditions.
How long does a tie rod replacement take?
Outer tie rod end only: 45 minutes to 1.5 hours for the replacement itself, plus 45 minutes to 1 hour for the alignment. Total shop time: 1.5 to 2.5 hours. Inner tie rod end: 1.5 to 3 hours for replacement plus rack boot work, plus alignment. Total shop time: 2.5 to 4 hours. Full set of four ends: 3 to 5 hours for replacement plus alignment. Plan for a full shop day for a complete tie rod service on a first-time visit.
The Expert Verdict
A bad tie rod is one of the clearest diagnoses in front-end work — the play is either there or it isn’t, the clunk location tells you which end before you touch anything, and the urgency is determined by how much play is present. What makes it complicated for most drivers is the inner vs. outer distinction that most articles skip, the alignment fee that shows up as a surprise at the counter, and the shop’s tendency to recommend four ends when two are worn.
Run the 9-and-3 test. Check the steering wheel free play. Listen for where the clunk transmits — through the floor or through the wheel. Those three inputs tell you which end is failing, roughly how worn it is, and whether you’re scheduling a repair appointment or calling a flatbed.