
This article was updated in July 1, 2026 with new products and information by Mark S. Taylor
Most guides on this topic tell you to pull the starter and bench test it. That’s the last step, not the first — and doing it backwards means removing a part that might be perfectly fine while the real problem sits in a cable, a relay, or the ignition switch.
Here’s the right order: listen first, test the battery second, check the cables third, test the solenoid fourth, run a voltage drop test fifth. The bench test comes only if everything else passes and you still suspect the starter. In most cases, you’ll have a definitive answer before the starter ever leaves the engine.
This guide walks you through all five steps in sequence, explains what each result means, and tells you exactly when to stop testing because you’ve already found your answer.
Contents
- 1 What the Sound Tells You Before Any Testing
- 2 Normal crank speed, engine won’t start
- 3 Heat Soak: Why Your Starter Fails When the Engine Is Hot
- 4 Bad Starter vs. Bad Battery vs. Bad Ignition Switch
- 5 Is It Safe to Drive With a Bad Starter?
- 6 Repair Cost Breakdown
- 7 DIY vs. Mechanic Decision Guide
- 8 Prevention Tips
- 9 FAQs About How to Test a Starter Motor
- 10 Verdict
What the Sound Tells You Before Any Testing
What your car does when you turn the key is diagnostic information. Don’t skip past it.
One loud click — then nothing
A single click means the solenoid received the start signal and activated — but either the solenoid couldn’t complete the circuit, or the starter motor itself failed to spin. The most common causes: a seized starter motor, a failed solenoid contact, or occasionally a severely discharged battery that can only energize the solenoid but not the motor. This is the pattern that most directly points at the starter or solenoid as the fault.

Rapid clicking — click-click-click-click
Multiple rapid clicks almost always point at the battery or cable connections, not the starter. The solenoid is receiving enough power to activate repeatedly but not enough to hold the contacts closed and crank the motor. Check the battery voltage and cable terminals before doing anything else. This sound is the battery telling you it’s done — or a corroded terminal creating enough resistance to prevent sustained current flow.
Grinding noise
Grinding during cranking usually means the starter drive (Bendix gear) is failing to engage cleanly with the flywheel ring gear, or the ring gear teeth are damaged. The motor is spinning but the mechanical engagement between the starter pinion and flywheel is the problem. Occasionally this sound indicates a worn starter drive that slips rather than engaging fully. Either way, mechanical failure rather than electrical — the starter motor itself may be fine.
Complete silence
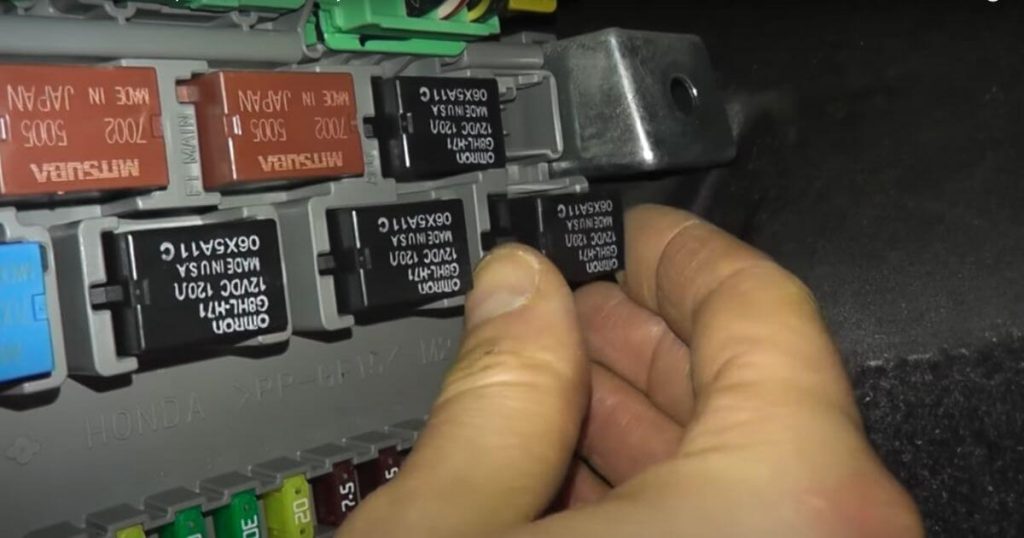
Nothing at all — no click, no crank, no noise. This is the most deceptive result because it has the most possible causes: a dead battery, a blown fuse or fusible link in the starter circuit, a failed ignition switch, a failed neutral safety switch (automatic) or clutch switch (manual), a failed starter relay, or open wiring between those components. Complete silence doesn’t point at the starter until everything upstream has been ruled out. Start with the fuse box before touching the starter.
Normal crank speed, engine won’t start
If the starter cranks the engine at normal speed but the engine won’t fire, the starter is working. The problem is ignition, fuel, or compression — not the starting system. Stop testing the starter and move on.
Step 1 — Confirm the Battery First
Before doing anything else, confirm the battery is delivering adequate voltage under load. A battery that reads 12.5V at rest can drop to 9V or lower when the starter tries to draw current — this looks exactly like a bad starter from the driver’s seat.
Resting voltage check: With the engine off and the car sitting at least two hours, check battery voltage. A healthy battery reads 12.4V to 12.6V. Below 12.0V means the battery is significantly discharged and needs to be charged or replaced before any starter testing is meaningful.
Headlight test: Turn the headlights on and attempt to start the car. If the headlights go completely dim or extinguish when you try to crank, the battery can’t sustain the current load. That’s a battery or cable problem, not a starter problem.
Cranking voltage check: Connect a multimeter to the battery terminals and have someone crank the engine. Voltage should not drop below 10.5V during cranking. Anything lower and the battery is failing under load — the starter is not getting adequate voltage to operate correctly regardless of its own condition.
Load test: A free battery load test at AutoZone, O’Reilly, or NAPA gives the most accurate battery health assessment. If the battery fails a load test, replace it and retest the starting system before condemning the starter.
Step 2 — Check the Starter Cables and Connections
The starter needs two things to work: a clean, low-resistance positive cable from the battery, and a solid ground path back through the engine and chassis. Either one compromised means the starter can’t function properly — regardless of its own internal condition.
What to check at the battery terminals: Remove both battery cables and look at the terminals and cable ends. White or blue-green corrosion at either terminal creates resistance that limits current flow. Wire brush the terminals clean, reinstall, and retest before moving forward.
Positive cable to starter: Trace the heavy positive cable from the battery to the starter motor. Look for fraying, melted insulation, loose connections at either end, and any point where the cable contacts a heat source. A cable that looks fine externally can have internal corrosion that creates resistance under load.
Ground circuit: The engine block must have a solid ground path to the battery. Check the engine ground strap — a heavy cable running from the engine block or cylinder head to the chassis or battery negative. A loose or corroded ground strap causes the same symptoms as a bad starter: slow cranking, single click, or no-crank. Wiggle every connection and look for green or white corrosion at the attachment points.
Why this matters before the starter test: A resistance problem in the supply circuit will make a good starter perform like a bad one during every subsequent test. Find and fix resistance in the cables first, then retest.
Step 3 — Test the Starter Solenoid On the Car
The starter solenoid does two jobs simultaneously: it completes the high-current circuit between the battery and starter motor, and it engages the starter drive gear into the flywheel. On most vehicles the solenoid is mounted directly on the starter body. On some older vehicles (many Fords, for example) it’s mounted remotely on the firewall or fender.
The solenoid has three external connections to test:
- Battery terminal (B+): Connected to the heavy positive cable from the battery — should have battery voltage at all times
- Motor terminal (M): Connected to the starter motor — should have battery voltage only when the solenoid is activated
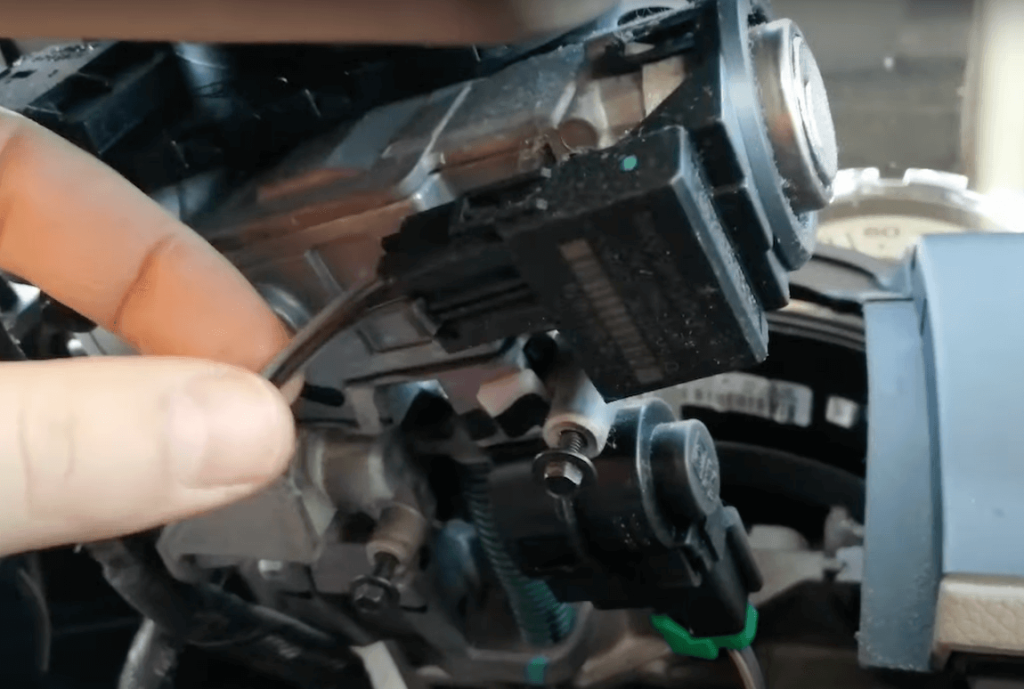
- S terminal: The small terminal that receives the start signal from the ignition switch through the neutral safety switch
Test 1 — Voltage at the S terminal during cranking:
Connect a multimeter between the S terminal and a good ground. Have someone turn the key to start. You should see battery voltage (11.5V or higher) at the S terminal. If you don’t, the problem is upstream — ignition switch, neutral safety switch, starter relay, or wiring — not the starter or solenoid.
Test 2 — Jump the S terminal directly:
If voltage reaches the S terminal but the starter doesn’t crank, you can confirm the solenoid by applying 12V directly to the S terminal using a jumper wire from the positive battery terminal. Use a fused jumper or a remote starter switch ($10 to $20 at any auto parts store). The vehicle must be in park or neutral with the parking brake set. If the starter cranks when you bypass the ignition circuit this way but not when turning the key normally, the fault is in the ignition switch, neutral safety switch, or relay — not the starter.
Test 3 — Bridge the solenoid main terminals (use caution):
With the vehicle in park/neutral, parking brake set, and confirmed it can’t roll — you can carefully bridge the two large terminals on the solenoid using a screwdriver with an insulated handle or a remote starter switch. This bypasses the solenoid contacts entirely and applies battery voltage directly to the starter motor. If the starter spins when you do this but not when the solenoid activates normally, the solenoid contacts are burned or failed. If the starter doesn’t spin at all, the motor itself is the problem.
Step 4 — The Voltage Drop Test
This is the test most mechanics use and no general-audience article explains. It doesn’t require removing anything, and it catches two important faults: resistance in the supply cables (Step 2 catches obvious resistance; this catches hidden resistance) and excessive current draw from the starter motor itself.
Why voltage drop reveals hidden problems:
Every conductor has some resistance. When starter current — typically 100 to 200 amps on a healthy system — flows through that resistance, it creates a measurable voltage drop. A good cable drops less than 0.5V under that current load. A corroded or undersized cable drops more. A starter drawing excessive current due to internal shorts or worn brushes also shows up as a drop, because the cable can’t carry the abnormal load without voltage falling.
Testing the positive supply circuit:
Connect the multimeter positive probe to the battery positive terminal and the negative probe to the starter motor’s main positive terminal (the B+ post where the heavy cable connects). Crank the engine. You’re measuring the voltage difference between the battery and the starter — the voltage lost in the cable and connections between them. Under 0.5V is acceptable. Over 0.5V means you have resistance to find and fix before the cable can supply the starter properly.
Testing the ground circuit:
Connect the positive probe to the starter motor body (bare metal, not a painted surface) and the negative probe to the battery negative terminal. Crank the engine. Again, under 0.5V is acceptable. Over 0.5V means resistance in the ground path — engine ground strap, chassis ground connections, or corroded battery negative terminal.
If both voltage drop tests pass but the starter still won’t crank properly, the fault is internal to the starter motor. Proceed to the bench test.
Step 5 — The Bench Test
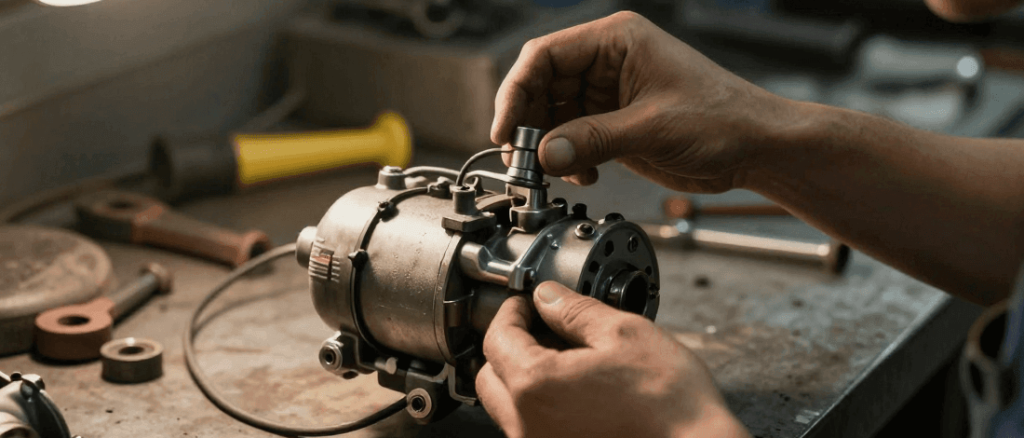
The bench test is the definitive confirmation when on-car tests leave any doubt. It tests the starter motor in isolation, removed from all other vehicle systems.
You need: the removed starter motor, a fully charged 12V battery (12.5V or higher — not a jump box, which can’t sustain the required current), heavy-gauge jumper cables, and a vise or a helper to hold the starter securely. Keep hands and clothing clear of the pinion gear before energizing — it extends suddenly and spins fast.
Step 1 — Secure the starter
Mount the starter in a vise by the mounting flange, or have a helper hold it firmly by the body. It will try to rotate when power is applied — the reaction torque is real and the pinion gear extends at speed.
Step 2 — Connect the positive cable
Connect one jumper cable from the positive battery terminal to the large battery terminal (B+) on the starter solenoid. This powers the starter motor circuit.
Step 3 — Connect the ground
Connect the second jumper cable from the battery negative terminal to the body of the starter motor (bare metal). This completes the ground circuit.
Step 4 — Activate the solenoid
Using a short jumper wire, touch one end to the positive battery terminal and the other end to the small S terminal on the solenoid. The starter should activate immediately.
Three possible results:
- Pinion extends and motor spins fast and freely: The starter is good. The fault is elsewhere in the vehicle — cables, solenoid wiring, ignition circuit, or neutral safety switch.
- Pinion extends but motor spins very slowly: The starter motor has an internal problem — worn brushes, shorted armature, or a seized bearing. Replace the starter.
- Click only, nothing else: The solenoid activated but the motor didn’t spin. Either the solenoid contacts are failed, or the motor is seized internally. Replace the starter.
Heat Soak: Why Your Starter Fails When the Engine Is Hot
If your car starts fine in the morning but won’t start 20 or 30 minutes after a hot shutdown — and then starts again after sitting for an hour — heat soak is the likely explanation.
When the engine is running, underhood temperatures climb significantly. After shutdown, heat radiates from the engine block and exhaust into the surrounding components — including the starter, which is often mounted low on the block near the exhaust manifold. A starter with worn brushes or weakened field windings operates marginally at ambient temperature. When that same starter reaches 200°F or higher from underhood heat, the increased resistance in the worn components pushes it past the threshold where it can no longer spin reliably.
The starter cools down over the next 45 to 60 minutes. Resistance drops back to normal. It works again — until the next hot shutdown.
This is one of the hardest starter failures to diagnose with a cold bench test, because the bench test at room temperature may show a perfectly functional starter. The failure only presents when the starter is hot. If this pattern describes your situation exactly — starts cold every time, fails consistently after a hot soak — the starter is the fault. A shop can perform a hot-soak test by heating the starter before bench testing, or you can use the symptom pattern alone as sufficient evidence for replacement.
Bad Starter vs. Bad Battery vs. Bad Ignition Switch
These three failures produce overlapping symptoms that trap drivers into replacing the wrong part. The diagnostic sequence above separates them — but here’s the summary.
| Condition | Sound | Battery Voltage | S-Terminal Voltage | Starter Spins on Bench |
|---|---|---|---|---|
| Bad starter motor | Single click or nothing | 12.4V+ at rest, holds under crank | Voltage present | ❌ No — slow or nothing |
| Failed solenoid | Single click | 12.4V+ at rest, holds under crank | Voltage present | ✅ Yes (bridge test) |
| Dead/weak battery | Rapid clicks or slow crank | Below 12.0V or drops under crank | May be reduced | ✅ Yes with good battery |
| Bad ignition switch | Silence | 12.4V+ at rest | ❌ No voltage at S terminal | ✅ Yes |
| Bad neutral safety switch | Silence | 12.4V+ at rest | ❌ No voltage at S terminal | ✅ Yes |
| Failed starter relay | Silence | 12.4V+ at rest | ❌ No voltage at S terminal | ✅ Yes |
| Open fusible link | Silence or dim lights | 12.4V+ at rest | ❌ No voltage anywhere | N/A |
The S-terminal voltage test is your fastest filter. Voltage present at the S terminal with no cranking = starter or solenoid. No voltage at the S terminal = problem is upstream in the ignition circuit, relay, or safety switch.
The single most common misdiagnosis in the starting system: a driver hears one click, assumes it’s the starter, buys a remanufactured starter for $120, installs it, and the car still doesn’t start — because the solenoid wiring had a loose connection that was actually the fault all along. Two minutes of voltage testing would have found it before any parts were purchased.
Is It Safe to Drive With a Bad Starter?
Technically yes — until it fails completely. But “safe to drive” here really means “will the car start reliably enough that you won’t get stranded at an inconvenient time and place.”
A starter that’s beginning to fail gives you warning signs before it quits entirely — slow cranking, occasional single clicks before catching, or the heat-soak pattern of failing on hot starts. These symptoms are the window to get it replaced on your schedule rather than a tow truck’s schedule.
A starter that has intermittent failures will eventually fail completely and without warning. It may start fine for weeks and then refuse to start one morning with no prior indication. There’s no way to predict when the final failure happens.
The practical risk: Being stranded with a failed starter is genuinely inconvenient but not dangerous. Unlike brake or steering failures, a bad starter doesn’t create a safety hazard while you’re driving — it only stops you from starting in the first place. If you’re in a situation where a tow would be very difficult or expensive (remote location, frequent long trips, daily driver with no backup vehicle), address it sooner rather than later.
Manual transmission vehicles can push-start if the starter fails — a useful backup that buys time to get to a shop. Automatics cannot.
Repair Cost Breakdown
Starter replacement cost varies significantly based on two factors: the vehicle and where the starter is physically located on the engine.
| Item | DIY Cost | Shop Cost |
|---|---|---|
| Remanufactured starter (most vehicles) | $80–$180 | Included in total |
| New OEM or premium aftermarket starter | $150–$350 | Included in total |
| Labor — accessible starter (1–2 hours) | N/A | $150–$300 |
| Labor — buried starter (3–5 hours) | N/A | $300–$600 |
| Total — accessible starter | $80–$180 parts | $250–$500 installed |
| Total — buried starter | $150–$350 parts | $450–$950 installed |
| Remote starter switch (diagnostic tool) | $10–$20 | N/A |
| Multimeter (if needed) | $15–$40 | N/A |
Accessible starters — visible from above or below with reasonable clearance — are typically 1 to 2 hour jobs. Buried starters on some V6 and V8 engines sit behind the intake manifold, below the exhaust, or in locations that require partial engine disassembly to reach. On those vehicles, labor is the majority of the cost.
Remanufactured starters are the most common replacement choice — they’re rebuilt to OEM specifications, come with a core charge you recover when you return the old unit, and typically carry a 1-year or lifetime warranty at major auto parts retailers. For most applications they’re entirely sufficient.
If a shop quotes you significantly more than the ranges above, ask for a labor time breakdown. Starter jobs that get expensive usually involve buried locations with legitimate labor requirements — but it’s worth confirming that before approving.
DIY vs. Mechanic Decision Guide
Do it yourself if:
- The starter is accessible — visible from above or below without removing other major components
- You’ve completed the diagnostic tests above and are confident the starter is the fault
- You have basic hand tools (sockets, extensions, ratchet) and can safely lift and support the vehicle if needed
- You’re comfortable disconnecting the battery first and managing heavy gauge wiring connections
Call a mechanic if:
- The starter is buried — behind the intake manifold, sandwiched against the firewall, or otherwise requiring major disassembly to reach
- On-car tests haven’t conclusively identified the fault — spending labor hours removing a starter that might be fine is expensive guesswork
- You’re not confident working under a lifted vehicle with jack stands (never use a floor jack alone as a vehicle support)
- You found voltage drop issues that suggest wiring problems you’re not comfortable tracing
One practical note: before buying any starter, confirm the physical location on your specific year and model. The same engine in different model years or trim levels sometimes has meaningfully different starter accessibility based on what else is mounted nearby. A 10-minute search for your specific application prevents a situation where a $150 part turns into a $500 shop job because the location was worse than expected.
Prevention Tips
- Address slow cranking immediately. Slow cranking — the engine turning over sluggishly before catching — means either the battery is weakening or the starter is beginning to draw excessive current. Both deserve immediate attention, because both get worse before they get better, and both can leave you stranded.
- Keep battery terminals clean. Corrosion at the terminal adds resistance into the starter circuit. The starter works harder, draws more current, and generates more heat as a result. Cleaning terminals at every battery replacement or every 2 years takes five minutes and extends starter life.
- Address heat-soak symptoms when they first appear. A starter that fails on hot starts but works fine cold is telling you it has reduced margin. The next stage is failing on cold starts too. Replace it while the pattern is still predictable rather than after the first complete failure.
- Don’t use a jump box as a long-term starter substitute. Repeatedly jump-starting a vehicle with a marginal battery stresses the starter with abnormal voltage conditions during each crank event. Fix the battery; don’t bridge the symptom with jumps.
- Inspect the starter mounting bolts every few years on high-mileage vehicles. A starter that’s come slightly loose from its mounting can misalign with the flywheel ring gear, causing grinding engagement and accelerating wear on both the starter pinion and ring gear teeth — a much more expensive repair than a starter replacement alone.
FAQs About How to Test a Starter Motor
Q: How do I know if it’s the starter or the battery?
The fastest test: turn on the headlights and try to start the car. If the headlights go completely dim or out when you turn the key, the battery can’t sustain the load — it’s a battery problem, not a starter problem. If the headlights stay bright and the car still won’t start (single click or no crank), the battery has adequate voltage but the starter circuit has a fault. Confirm with a multimeter: battery voltage above 12.4V at rest and above 10.5V during cranking rules the battery out.
Q: What does one click mean when I try to start my car?
One loud click almost always means the starter solenoid activated but the motor didn’t spin. Most common causes: the starter motor has seized or failed internally, the solenoid contacts are burned, or in some cases a severely discharged battery that can energize the solenoid but not sustain the current needed to spin the motor. Check battery voltage first, then proceed with solenoid and starter testing.
Q: Can I test a starter without removing it?
Yes — and you should test it in the car before removing it. The S-terminal voltage test, solenoid bridge test, and voltage drop test all confirm or rule out the starter while it’s still mounted. The bench test is only needed for final confirmation when on-car tests are inconclusive. Removing the starter to bench test it first wastes time if the problem turns out to be upstream in the ignition circuit.
Q: How much does starter motor replacement cost?
Remanufactured starters run $80 to $180 in parts. New OEM or premium aftermarket units run $150 to $350. Installed at a shop, accessible starters run $250 to $500 total. Buried starters on some V6 and V8 engines run $450 to $950 due to the additional labor required to reach them. Get a location-specific quote for your vehicle before authorizing any work.
Q: Why does my car start fine in the morning but not when the engine is hot?
This is heat-soak starter failure. Underhood temperatures rise significantly after a hot shutdown, and a starter with worn brushes or weakened field windings may work fine at ambient temperature but fail when it reaches 200°F or higher from underhood heat. The starter cools down over 45 to 60 minutes and works again temporarily. This pattern — reliable cold starts, consistent hot-start failures — is strong evidence of a failing starter even if it passes a room-temperature bench test.
Verdict
Test in the right order and you’ll know what’s wrong before you buy anything.
Listen first — the sound tells you which direction to test. Confirm the battery can sustain voltage under load. Check cable connections for resistance. Test that voltage reaches the S terminal when you turn the key. If it does, bridge the solenoid terminals and see if the starter spins. Run a voltage drop test on both the positive and ground circuits. If everything passes and the starter still won’t spin, then pull it and bench test it.
Most no-start conditions sort themselves out by Step 3. The bench test is for the cases that don’t.
Replace what the tests tell you to replace — not what the sound made you assume.