
When performing brake maintenance or replacing brake pads, it’s essential to understand how to use a brake piston tool. This tool allows you to reset the brake piston, ensuring proper clearance for new brake pads. In this article, we will guide you through the process of using a brake piston tool effectively.
Contents
- 1 Purpose of a Brake Piston Tool
- 2 Tools and Materials Needed
- 3 Step-by-Step Guide to Using a Brake Piston Tool
- 3.1 Step 1: Preparation and Jacking Up the Vehicle
- 3.2 Step 2: Removing the Wheel
- 3.3 Step 3: Locating the Brake Caliper and Pistons
- 3.4 Step 4: Choosing the Correct Adapter for Your Tool
- 3.5 Step 5: Positioning the Brake Piston Tool
- 3.6 Step 6: Compressing the Brake Piston
- 3.7 Step 7: Removing the Brake Pad
- 3.8 Step 8: Installing New Brake Pads
- 3.9 Step 9: Reassembling and Testing
- 4 Maintenance Tips
- 4.1 Lubricating the Brake Caliper
- 4.2 Regular Inspections
- 4.3 Can I use any brake piston tool for my vehicle?
- 4.4 Do I need to remove the brake caliper to use a brake piston tool?
- 4.5 How do I know when to reset the brake piston?
- 4.6 Can I reuse the brake caliper bolts?
- 4.7 How often should I lubricate the brake caliper slides?
Purpose of a Brake Piston Tool
What is a Brake Piston Tool?
A brake piston tool is a specialized device designed to compress the brake pistons in a vehicle’s brake calipers. It features various adapters to fit different brake caliper designs and sizes. By compressing the brake pistons, this tool creates the necessary clearance for removing and installing brake pads.
Why Use a Brake Piston Tool?
The brake piston tool is specifically designed to push the brake piston back into the caliper bore. As brake pads wear down over time, the piston extends to maintain consistent brake performance. When replacing the pads, the piston needs to be reset to accommodate the thicker pads.
Types of Brake Piston Tools
There are various types of brake piston tools available, including cube-style, rotating, and ratcheting tools. Each type has its own unique mechanism for pushing the piston back into place. Choose the tool that is compatible with your vehicle’s brake system.
- Safety First: Precautions Before Using the Tool
Before you begin using a brake piston tool, it’s crucial to prioritize safety. Here are some important precautions to follow:
- Wear protective gear: Put on safety goggles and gloves to shield yourself from debris and brake fluid.
- Secure the vehicle: Park the vehicle on a level surface and engage the parking brake to prevent any accidental movement.
- Relieve pressure: Loosen the brake fluid reservoir cap to relieve any pressure before compressing the pistons.
- Consult the vehicle’s manual: Familiarize yourself with the specific instructions and precautions for your vehicle model.
Read More: A Step-by-Step Guide on How to Change Drum Brakes to Disc Brakes
Tools and Materials Needed
Before using a brake piston tool, gather the following tools and materials:
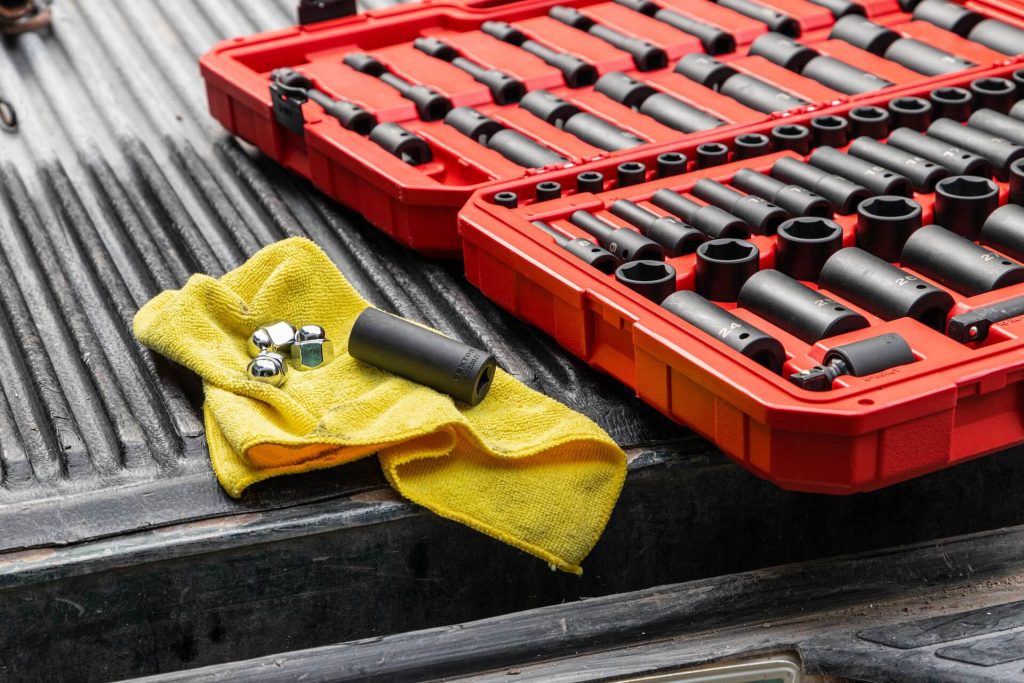
- Brake Piston Tool: Select the appropriate type of tool for your vehicle’s brake system.
- Socket Set: Required to remove the brake caliper bolts.
- Brake Caliper Grease: Lubricates the brake caliper slides for smooth operation.
- Brake Cleaner: Cleans any dirt or debris from the brake caliper and piston.
- Lug wrench
- Jack and jack stands
- Wheel chocks
- New brake pads
- Torque wrench
- C-clamp (optional, as a backup)
Step-by-Step Guide to Using a Brake Piston Tool
Step 1: Preparation and Jacking Up the Vehicle
Proper preparation is key to a successful brake pad replacement. Follow these steps to get started:
- Park the vehicle: Find a level surface to park your vehicle, away from traffic. Apply the parking brake and chock the wheels to prevent any accidental movement.
- Gather the tools: Collect all the necessary tools and materials, ensuring they are within reach.
- Loosen the lug nuts: Use a lug wrench to loosen the lug nuts on the wheel where you’ll be working. Do not remove them completely just yet.
- Jack up the vehicle: Locate the vehicle’s jack points, as specified in the owner’s manual. Position the jack and raise the vehicle until the wheel is off the ground. Then, secure the vehicle on jack stands for added stability.
Step 2: Removing the Wheel
Once the vehicle is safely jacked up, it’s time to remove the wheel. Follow these steps:
- Fully remove the lug nuts: Use the lug wrench to fully remove the lug nuts from the wheel. Place the lug nuts in a safe location, as they will be needed later.
- Take off the wheel: Carefully lift the wheel off the vehicle and set it aside. Ensure it is stored in a secure area to prevent accidents.
Step 3: Locating the Brake Caliper and Pistons
To use the brake piston tool effectively, you need to locate the brake caliper and pistons. Here’s how:
- Identify the brake caliper: The brake caliper is usually located behind the brake rotor and is secured with bolts or slide pins. Consult your vehicle’s manual for the precise location.
- Inspect the brake caliper: Examine the caliper for any signs of damage or excessive wear. If any issues are detected, they should be addressed before proceeding.
- Locate the brake pistons: Once you’ve located the brake caliper, you’ll see the brake pistons inside. Depending on the vehicle, there may be one or more pistons per caliper. Take note of their position and how they are oriented.
Step 4: Choosing the Correct Adapter for Your Tool
Before using the brake piston tool, you’ll need to select the appropriate adapter for your specific vehicle. Refer to the instructions provided with your tool to identify the correct adapter size and shape. It’s important to choose the adapter that fits securely onto the brake piston.
Step 5: Positioning the Brake Piston Tool
Once you have chosen the correct adapter, it’s time to position the brake piston tool. Follow these steps:
- Attach the adapter to the tool: Securely attach the chosen adapter to the brake piston tool, following the manufacturer’s instructions.
- Align the adapter with the piston: Position the tool’s adapter against the brake piston, ensuring a snug fit. The adapter should make direct contact with the piston surface.
- Stabilize the brake caliper: To prevent the caliper from rotating or moving during compression, use a wrench or clamp to stabilize it. This will facilitate a smoother compression process.
Step 6: Compressing the Brake Piston
With the tool and adapter in place, it’s time to compress the brake piston. Here’s what to do:
- Apply pressure: Begin turning the handle or knob of the brake piston tool in a clockwise direction. This will exert pressure on the piston, gradually compressing it.
- Observe the piston movement: As you turn the tool, keep a close eye on the brake piston’s movement. It should retract smoothly and evenly into the caliper bore.
- Continue compression until fully retracted: Keep compressing the piston until it is fully retracted into the caliper. The piston should be flush with the caliper surface.
Note: It’s normal to encounter some resistance during the compression process. However, if you encounter excessive resistance or the piston doesn’t retract, there may be an underlying issue that requires further inspection or professional assistance.
Step 7: Removing the Brake Pad
After compressing the brake piston, you can proceed to remove the old brake pads. Follow these steps:
- Inspect the brake pads: Before removal, take a moment to inspect the old brake pads. Look for signs of wear, damage, or unevenness. If necessary, take note of any issues that need to be addressed.
- Remove the brake pad retaining clips or pins: Depending on your vehicle, the brake pads may be secured with retaining clips or pins. Remove these clips or pins using the appropriate tools.
- Extract the brake pads: Carefully slide out the old brake pads from the caliper, noting their position and orientation. If necessary, take a picture for reference when installing the new brake pads.
Step 8: Installing New Brake Pads
With the old brake pads removed, it’s time to install the new ones. Follow these steps for a proper installation:
- Prepare the new brake pads: Before installing the new brake pads, apply a thin layer of brake lubricant to the backside of each pad. This will help reduce noise and improve performance.
- Align the brake pads: Position the new brake pads in the same orientation as the old ones. Ensure they align correctly with the caliper and brake rotor. Take note of any indicators or markings on the brake pads that guide proper placement.
- Replace retaining clips or pins: If your vehicle uses retaining clips or pins, reinsert them to secure the new brake pads. Ensure they are properly seated and provide a secure fit.
Step 9: Reassembling and Testing
With the new brake pads installed, it’s time to reassemble the components and conduct a final test. Follow these steps:
- Reattach the wheel: Lift the wheel back onto the vehicle, aligning it with the wheel studs. Hand-tighten the lug nuts to secure the wheel in place.
- Lower the vehicle: Carefully lower the vehicle off the jack stands using the jack. Remove the jack stands and lower the vehicle until it rests on the ground.
- Tighten the lug nuts: Using a torque wrench, gradually tighten the lug nuts in a crisscross pattern to the manufacturer’s recommended torque specification. This will ensure the wheel is properly secured.
- Test the brakes: Start the vehicle and test the brakes by pressing the brake pedal several times. This will help reposition the brake pads and ensure they make proper contact with the rotor. Listen for any unusual noises or vibrations and ensure the brakes feel responsive.
Maintenance Tips
Lubricating the Brake Caliper
Regularly lubricate the brake caliper slides with brake caliper grease. This ensures smooth movement of the caliper and prevents sticking or uneven brake pad wear.
Regular Inspections
Periodically inspect your brake system for any signs of wear, damage, or leaks. Promptly address any issues to maintain the safety and effectiveness of your brakes.
Conclusion
Using a brake piston tool is essential when replacing brake pads or performing brake maintenance. By following the step-by-step guide provided in this article, you can confidently use a brake piston tool to reset the brake piston and ensure proper clearance for new brake pads. Remember to perform regular inspections and maintenance to keep your brake system in optimal condition.
FAQs
Can I use any brake piston tool for my vehicle?
No, it’s important to select a brake piston tool that is compatible with your vehicle’s brake system. Refer to the tool’s instructions or consult a professional if you’re unsure.
Do I need to remove the brake caliper to use a brake piston tool?
Yes, the brake caliper needs to be removed to access the brake piston and use the brake piston tool effectively.
How do I know when to reset the brake piston?
When replacing brake pads, it’s recommended to reset the brake piston to accommodate the thicker pads. Always refer to the vehicle’s manual or follow manufacturer guidelines.
Can I reuse the brake caliper bolts?
It’s generally recommended to replace the brake caliper bolts with new ones to ensure proper fastening and safety.
How often should I lubricate the brake caliper slides?
Lubricate the brake caliper slides during every brake pad replacement or as recommended by the vehicle manufacturer. Regular lubrication helps maintain smooth caliper operation.