
This article was updated in July 1, 2026 with new products and information by Mark S. Taylor
When you walk up to your vehicle on a freezing morning, press the unlock button, and meet absolute silence from the door actuators, the immediate assumption is a dead main car battery. In reality, over 85% of sudden vehicle access blackouts are caused by the progressive degradation of a simple, $5 lithium coin-cell battery sealed inside your remote transponder.
Modern automotive entry systems operate on continuous radio-frequency (RF) handshakes. Smart keys and proximity fobs continuously broadcast micro-signals to the vehicle’s Body Control Module (BCM). Because these compact remotes are running complex data encryption loops to prevent signal hacking, they demand an absolute, uncompromised voltage baseline to communicate across distances.
As an ASE-Certified Master Technician, I have seen hundreds of panicked drivers pay for expensive tow trucks when they could have gained access and started their engine in 30 seconds using an emergency passive override loop. In this workshop guide, we will decode the 7 definitive symptoms of a dying fob battery, outline the physics of passive RFID starting, and detail a safe case-opening sequence.
Contents
- 1 The Engineering Architecture of Key Fobs
- 2 7 Critical Symptoms of a Dying Key Fob Battery
- 3 Emergency Protocol: How to Gain Entry and Start Your Car
- 4 Key Fob Battery Specification & Replacement Matrix
- 5 Step-by-Step DIY Key Fob Battery Replacement Sequence
- 6 Component Service & Replacement Cost Matrix (US Pricing)
- 7 FAQs About Symptoms of a Dead Key Fob Battery
- 8 The Verdict: Check the Cell Voltage Rails Early
The Engineering Architecture of Key Fobs
An electronic car remote is essentially a miniaturized, low-power radio transmitter. Inside the plastic shell sits a printed circuit board containing an integrated transmitter chip, an encryption rolling-code generator, and a copper antenna ring.
This infrastructure relies entirely on a single 3-Volt Lithium Coin Cell—most commonly a CR2032, CR2025, or CR2016 element. The first two digits of the code represent the diameter in millimeters ($20\text{mm}$), and the last two digits denote the thickness ($32 = 3.2\text{mm}$).
As lithium chemistry ages over its standard 2 to 5-year operational lifespan, its voltage discharge curve drops off a cliff. Once cell output falls below 2.7V DC, the rolling-code transmission becomes corrupted and choppy, triggering consecutive signal dropouts.

7 Critical Symptoms of a Dying Key Fob Battery
Before your remote goes completely offline, your proximity key loop will flag several of these explicit operational warnings:
- Severe Reduction in Signal Range Boundary: A fresh coin cell allows you to cycle door locks comfortably from 50 to 60 feet away. As voltage starves, the broadcast radius shrinks drastically, forcing you to stand right against the driver’s door glass to command a lock response.
- Consecutive Button Presses Required for Engagement: Pressing the button once produces zero door click. You must rapidly tap the lock or trunk button three or four times before the BCM finally captures a clean, uncorrupted radio code stream.
- Intermittent Inconsistent Function (Thermal Sensitivity): The remote operates flawlessly during hot afternoon hours but drops offline during cold early mornings. Low ambient temperatures slow down the internal lithium chemical reaction speeds, collapsing borderline voltage.
- Active Dashboard Key Diagnostic Warning Messages: Post-2015 smart vehicles continuously evaluate transponder signal decibel levels. When cell output drops, the multi-information display will instantly lock on text alerts like “Key Battery Low,” “Key Fob Battery Depleted,” or “Key Not Detected.”
- Faded or Non-Responsive LED Indicator Light: If your key casing features a tiny red or blue confirmation light, the lens will turn noticeably dim, flicker erratically, or stay completely dark during button compression loops.
- Failure of High-Drain Proximity Features: Proximity-based remote engine starting or automated hands-free tailgate lifting loops fail completely, while low-drain manual lock clicks still operate over short distances.
- Absolute Zero Command Response: The transponder enters terminal structural exhaustion. Buttons do not click the actuators, proximity approach lighting remains completely dark, and the fob behaves like a dead piece of plastic.

Emergency Protocol: How to Gain Entry and Start Your Car
If your key fob experiences sudden terminal failure while you are stranded in a remote location, do not panic. Every automotive manufacturer integrates an emergency manual override circuit directly into the vehicle’s architecture.
Phase 1: Gaining Cabin Access
- Locate the tiny slide release button or tension tab on the rear outer casing of your plastic key fob.
- Slide the tab with your thumb and pull the top key ring loop outward—a hidden steel mechanical key blade will slide straight out of the plastic housing shell.
- Inspect your driver’s door handle. If the cylinder keyhole is invisible, look at the absolute base of the handle trim for a tiny rectangular slot. Insert the tip of the metal key into that slot, pry gently upward, and pop off the plastic cosmetic cap to reveal the manual keyhole cylinder lock flat. Turn the key manually to unlock the driver door.
Phase 2: Activating Push-Button Start (Passive Induction Loop)
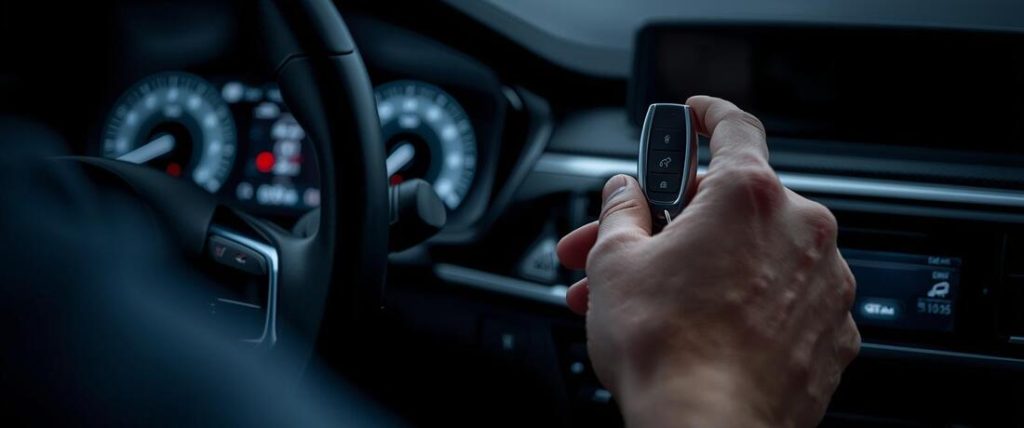
Once you step inside the cabin, attempting to press the Start button will trigger a “Key Not Detected” warning because the fob cannot broadcast an active RF wave. To bypass this roadblock, use this master technician sequence:
1. Isolate the Transponder Against the Ignition Bezel: 1 min.
Depress your primary foot brake pedal completely down flat. Do not use your finger to press the Start button. Instead, grip the dead plastic key fob housing directly in your hand.
2. Trigger the Passive Induction Handshake Loop: 1 min.
Press the exact nose-end or rear-face emblem of the plastic key fob flat against the center of the engine “START/STOP” ignition button.
3. Understand the Internal RFID Transponder Physics: 1 min.
Behind the dashboard push-button trim sits an electromagnetic Induction Antenna Coil. When the key fob casing touches the button, this coil emits a low-frequency magnetic field that excites a passive RFID transponder chip hidden inside the fob. This chip draws raw inductive power straight out of the car’s button bezel, transmitting its security code securely without requiring a single milliamp of internal battery cell current.
4. Execute the Engine Crank and Clear the Dash Faults: 1 min.
Keep the fob pressed flush against the face of the button for 2 seconds until the green ignition status light illuminates solid, then use the fob to push the button in fully. The engine will instantly fire up to an idle. Drive directly to a supplier to swap the coin cell.

Key Fob Battery Specification & Replacement Matrix
| Battery Model | Physical Diameter | Profile Thickness | Common Vehicle Fleet Applications | Target Lifespan |
| CR2032 | $20\text{mm}$ | $3.2\text{mm}$ | Honda, Ford, Toyota, GM, Nissan, Hyundai | 3 to 5 Years |
| CR2025 | $20\text{mm}$ | $2.5\text{mm}$ | Mazda, Mercedes-Benz, Nissan, Audi | 2 to 4 Years |
| CR2016 | $20\text{mm}$ | $1.6\text{mm}$ | Older Lexus, Subaru, Mitsubishi Remotes | 2 to 3 Years |
Step-by-Step DIY Key Fob Battery Replacement Sequence
Replacing a lithium coin cell is an entry-level driveway task that takes less than 5 minutes:
1. Extract the Mechanical Key and Locate the Prying Notch: 1 min.
Slide the retention tab and remove the metal key blade. Look inside the exposed structural cavity of the key slot—you will notice a small offset horizontal shelf or notch molded into the plastic wall line, specifically engineered for tool insertion.
2. Execute a Gentle Torsion Case Splitting Loop: 1 min.
Insert a small flathead pocket screwdriver or a rigid plastic trim tool directly into that designated notch. Do not slide the tool along the side seam like a knife. Instead, hold the tool flat and execute a gentle twist torque motion. The mechanical leverage will cleanly split the two interlocking plastic halves apart.
3. Document the Battery Polarity Orientation: 1 min.
Before touching the old coin cell, take a clear reference photo of its face orientation. Note whether the flat smooth side stamped with the Positive (+) symbol and manufacturer branding faces upward toward you or downward against the circuit contacts.
4. Pop the Spent Cell and Seat the Fresh Lithium Matrix: 1 min.
Use a plastic toothpick or a non-conductive tool to slide beneath the edge of the battery and pop it out of its retention spring clip. Never use a sharp metal knife to pry the cell out, as shorting the positive contact to the negative base plate can fry the circuit board components. Click a brand-new, high-quality name-brand cell (Duracell/Energizer) into the slot matching the original polarity path.
5. Snap the Outer Casing Latches and Retest Range: 1 min.
Align the plastic upper shell over the lower component tray. Squeeze the outer perimeter firmly between your fingers until every single interior plastic clip snaps completely shut. Reinsert the metal blade, walk out to your driveway, and verify the remote executes a clean, rapid lock actuator response from 50 feet away.

Component Service & Replacement Cost Matrix (US Pricing)
| Selected Procurement Vector | Average Material Cost | Labor / Programming Cost | Total Estimated Service Bill |
| Driveway DIY (Premium Brand Battery) | $3 – $8 | $0 (5-Minute Home Task) | $3 – $8 |
| National Auto Parts Store Counter | $5 – $12 | $0 (Counter clerk assistance) | $5 – $12 |
| Mobile Automotive Locksmith Sweep | $5 – $15 | $15 – $35 (On-site call assistance) | $20 – $50 |
| Franchised Main Dealership Service | $10 – $25 | $20 – $45 (Includes full loop check) | $30 – $70 |
| Complete Replacement Transponder Assembly | $60 – $180 | $70 – $150 (Requires OBD2 rolling-code link) | $130 – $330+ |
FAQs About Symptoms of a Dead Key Fob Battery
Q: Can installing the completely wrong thickness coin cell permanently damage my remote?
A: If you insert a thin CR2025 cell into a deeper slot designated explicitly for a thick CR2032 battery, you will not damage the internal microprocessors, but the remote will stay completely dead. Because the CR2025 is 0.7mm thinner, the metal spring prongs inside the housing tray cannot reach the positive face plate, resulting in an open circuit. Never mix up model widths.
Q: What is the root cause if a brand-new battery fails to restore key fob operation?
A: If a verified fresh cell fails to launch a signal, your transponder loop is suffering from one of three distinct component failures: First, the internal metallic contact tabs may have been flattened or bent down during insertion—open the case and gently lift the gold prongs upward. Second, the micro-switches beneath the rubber lock buttons may have snapped clean off the internal circuit board traces from a heavy surface impact. Third, the vehicle BCM may have dropped its stored transponder pairing code, requiring an OBD2 scan tool re-sync.
Q: What happens if your key fob battery dies completely while you are driving?
A: Absolutely nothing dangerous. Once the vehicle’s engine is actively running, the engine mobilizer security validation phase is already complete. You can drive thousands of miles continuously without a battery inside the fob. The vehicle will simply display a “Key Left Vehicle” or “Key Not Detected” text string on the cluster—however, do not turn the engine off until you reach a safe landing location, as you will need the passive induction loop to restart it.
The Verdict: Check the Cell Voltage Rails Early
Never treat a weak key fob signal as a minor cosmetic annoyance you can ignore for months. A low-voltage coin cell is a progressive diagnostic countdown—if the internal lithium density collapses completely while your vehicle is parked in an area with heavy RF interference, your proximity access loops will go offline completely. Take 5 minutes to run a manual flex-test on your backup links, bypass cheap budget-bin generic button cells that leak acid onto fine copper paths, and install a premium name-brand cell early to keep your secure entry systems running flawlessly.
(Want to ensure your vehicle’s alternative electrical systems, charging loops, and engine computer diagnostics are operating with absolute factory precision? Read our master workshop guide on How to Read Check Engine Light Codes Without a Scanner or check out The Car Buzz Official Testing and Editorial Integrity Guidelines Page).