
This article was updated in June 19, 2026 with new products and information by Mark S. Taylor
Mounting a rooftop tent (RTT) onto your vehicle is the ultimate upgrade for overland camping. It provides an elevated, insulated sleeping platform completely isolated from ground moisture, rocks, and critters while freeing up critical cargo space inside your SUV or truck bed.
However, bolting a heavy 120 to 180-pound enclosed box onto the absolute highest point of your vehicle alters its center of gravity and safety dynamics. Skipping the structural physics of roof load capacities won’t just ruin your paint—it can cause your aftermarket roof racks to shear off entirely at highway speeds or cause a catastrophic vehicle rollover.
As an ASE-Certified Master Technician and avid overlander, I have inspected and installed dozens of roof systems. In this comprehensive workshop guide, we will break down the essential formulas for Dynamic vs. Static weight loads, the specialized tools required, and a step-by-step secure installation sequence.
Contents
- 1 What You Need to Know Before You Buy Anything
- 2 Structural Physics: Dynamic vs. Static Weight Ratings
- 3 What You’ll Need (The Installation Checklist)
- 4 The Step-by-Step Rooftop Tent Mounting Sequence
- 5 Operational Guidelines: Height Restrictions & Clearances
- 6 Crossbar Spacing and Overhang: The Specs Nobody Talks About
- 7 Can You Mount a Rooftop Tent on a Factory Roof Rack?
- 8 Cost Breakdown: What You’ll Spend
- 9 Security: How to Lock Your Tent
- 10 FAQs About How to Mount a Rooftop Tent Safely
- 10.1 How much weight can my roof actually hold?
- 10.2 Can I use my factory roof rack or do I need an aftermarket one?
- 10.3 How many people does it take to lift a rooftop tent onto a car?
- 10.4 What’s the proper crossbar spacing for a rooftop tent?
- 10.5 How do I lock my rooftop tent so it doesn’t get stolen?
- 11 The Bottom Line from the Shop Garage
What You Need to Know Before You Buy Anything
Before you spend a dime, you need three numbers from your vehicle and two from your rack. Write them down.
Your vehicle’s dynamic roof load rating is the maximum weight the roof can handle while driving. Most passenger vehicles are rated for 100–165 lbs. Trucks and SUVs with factory raised rails might hit 200 lbs. Check your owner’s manual — it’s usually listed under “Specifications” or “Cargo Loading.”
Your vehicle’s static roof load rating is what the roof can support when parked. This is typically 3–4 times the dynamic rating — 300–600 lbs — because the weight is evenly distributed and there’s no wind force or road vibration. This matters because you, your partner, and your gear will all be up there sleeping.
Your roof rack’s load rating is separate from the vehicle’s. Factory crossbars are usually rated for 100–150 lbs. Aftermarket heavy-duty bars (Thule, Yakima, Rhino-Rack) range from 165–220 lbs. Platform racks (Front Runner, Prinsu) can handle 300–700 lbs static.
Here’s the formula most articles don’t give you:
Dynamic Rating − Rack Weight − Tent Weight = Safety Margin
If your vehicle’s dynamic rating is 150 lbs, your rack weighs 25 lbs, and your tent weighs 120 lbs, your safety margin is 5 lbs. That’s cutting it too close. You want at least 20–30 lbs of margin for gear, wind load, and the dynamic forces of hitting a pothole at 60 mph.
The hard truth: Factory roof rails are rated for 100–165 lbs dynamic — most rooftop tents alone exceed that before you add the rack. Aftermarket heavy-duty bars are non-negotiable for most vehicles.

Structural Physics: Dynamic vs. Static Weight Ratings
This is the most critical safety context that standard camping guides completely ignore. Every vehicle and roof rack system possesses two entirely separate weight metrics:
1. Dynamic Weight Capacity (The Driving Limit)
This is the maximum structural weight your vehicle’s roof and crossbars can safely support while the vehicle is in motion. As you navigate highway speeds, take sharp turns, or hit off-road bumps, wind resistance and kinetic g-forces multiply the effective weight of your cargo.
- The Rule: Most factory and quality aftermarket crossbars (like Thule, Yakima, or Rhino-Rack) have a dynamic rating of 165 lbs ($75\text{ kg}$). Your rooftop tent must weigh less than this number when completely folded flat for transport.
2. Static Weight Capacity (The Camping Limit)
This is the maximum weight the roof infrastructure can support when the vehicle is securely parked and stabilized. Because the car is stationary and experiencing zero kinetic road shocks, the structural steel pillars can support significantly more weight.
- The Formula: The static capacity is typically calculated at 4x to 5x the dynamic weight capacity (roughly 600 to 800 lbs). This safely accounts for the weight of the tent frame, heavy mattresses, bedding, and 2 to 3 adult campers inside.
⚠️ Critical Factory Crossbar Warning: Never, under any circumstances, mount a rooftop tent onto standard factory-installed aerodynamic crossbars that came with your crossover or SUV. These factory bars are engineered exclusively for light luggage or skis, typically carrying a dynamic limit under 100 lbs. They are prone to snapping under the torsional stress of an expanding tent. You must upgrade to heavy-duty aftermarket steel or structural aluminum crossbars.
What You’ll Need (The Installation Checklist)
- Heavy-duty aftermarket crossbars with a confirmed dynamic rating matching your tent
- Specialized universal mounting track sliders and stainless steel M8 bolt hardware (Included with the tent)
- A high-quality racheting box wrench (Typically 10mm or 13mm depending on fasteners)
- A steel tape measure
- A helper (Rooftop tents are heavy and require at least two people to safely lift)
The Step-by-Step Rooftop Tent Mounting Sequence
Follow this precise technician-approved installation sequence to lock your tent down onto the roof infrastructure securely:
1. Measure and Verify Crossbar Spacing: 5 min.
Use a tape measure to space your vehicle’s roof crossbars between 30 and 40 inches apart from center to center. This structural spread ensures optimal longitudinal weight distribution across the vehicle’s roof pillars. Ensure the bars sit perfectly parallel to each other.
2. Slide Mounting Bolts Into the Tent Base Tracks: 10 min.
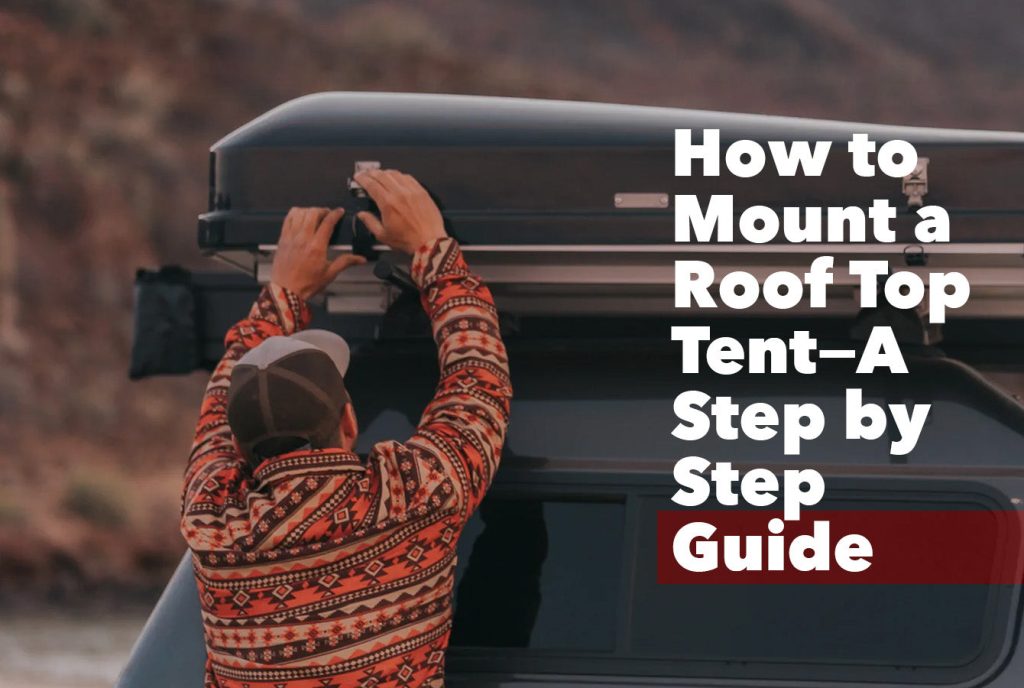
With the rooftop tent resting on a clean cardboard box on the garage floor, tip it slightly to access the aluminum mounting tracks running beneath the base floorpan. Slide the specialized sliding channel bolts or channel nuts into the tracking rails, positioning two bolts per mounting corner.
3. Lift and Position the Tent onto the Crossbars: 5 min.
Enlist the help of at least one or two friends. Grab the tent frame firmly by its primary hinge joints—never lift by the plastic outer travel cover. Carefully hoist the assembly onto your vehicle’s roof, lowering it gently onto the center of the crossbars. Center the tent perfectly from left to right to maintain balanced driving aerodynamics.
4. Clamp the Structural Mounting Plates: 15 min.
Slide the lower steel mounting brackets underneath your roof crossbars, bridging the two channel bolts hanging down from the tent base. Thread the nylon-locking hex nuts onto the bolts by hand. Use a ratcheting box wrench to tighten the nuts evenly across all four mounting points.
5. Execute the Highway Stress Check: 5 min.
Once all fasteners are completely tight, firmly grasp the base frame of the tent with both hands and shake it with maximum physical force. The tent must not move independently from the vehicle. The entire car should rock on its suspension springs, proving the tent has crossed into a unified mechanical bond with the frame.

Operational Guidelines: Height Restrictions & Clearances
| Vehicle Configuration | Typical Added Height | Primary Driving Hazard | Mandatory Clearance Check |
| Standard SUV + Softshell Tent | + 12 to 14 Inches | Low-hanging forest tree branches | Low-clearance parking garages |
| Lifted 4×4 Truck + Hardshell Box | + 15 to 18 Inches | Fast-food restaurant drive-throughs | Home automated garage door tracks |
Always write down your vehicle’s exact total height in inches on a sticky note and place it directly on your dashboard. It is incredibly easy to forget the tent is up there until you enter a low-clearance parking structure, resulting in a shredded tent and body damage.
Crossbar Spacing and Overhang: The Specs Nobody Talks About
| Specification | Measurement | Why It Matters |
|---|---|---|
| Minimum crossbar spread | 36 inches | Prevents tent from pivoting on a single bar |
| Maximum front/rear overhang | 32 inches | Beyond this, tent acts as a lever on bumps |
| Side-to-side overhang | Equal both sides | Off-center load shifts weight to one bar |
| Crossbar width compatibility | 1.25–3.15 inches | Clamps must fit snugly — no gaps |
| Torque spec for U-bolts | 8–10 ft-lb | Too loose = movement; too tight = stripped threads |
A tent overhanging 24 inches past your windshield acts like a dive brake at 70 mph. It kills fuel economy by 10–20% and creates front-end lift that lightens your steering. I’ve driven behind SUVs with tents hanging 3 feet off the front — you can see the front tires go light on every bump. That’s dangerous.
Can You Mount a Rooftop Tent on a Factory Roof Rack?
Honestly? Usually not. Here’s the breakdown:
| Factor | Factory Crossbars | Aftermarket Heavy-Duty |
|---|---|---|
| Dynamic load rating | 100–150 lbs | 165–220 lbs |
| Material | Aluminum | Steel or reinforced aluminum |
| Width | 1.25–2 inches | 1.5–3.15 inches |
| Clamp compatibility | Limited | Universal |
| Cost | \$0 (already own) | \$200–\$600 |
| Off-road durability | Poor — bend on rough trails | Good — designed for dynamic loads |
I’ve seen factory crossbars bend under a 120-lb tent. They’re aluminum designed for 50-lb cargo boxes, not cantilevered loads that bounce on dirt roads. If your factory bars are rated under 150 lbs dynamic, upgrade before you mount the tent.
Cost Breakdown: What You’ll Spend
| Item | Low End | High End | Notes |
|---|---|---|---|
| Soft-shell rooftop tent | \$1,000 | \$2,000 | Lighter (100–130 lbs), less insulated |
| Hard-shell rooftop tent | \$2,000 | \$3,500 | Heavier (140–165 lbs), faster setup |
| Aftermarket crossbar set | \$200 | \$600 | Required if factory bars are under-rated |
| Platform rack system | \$800 | \$1,500 | Best for heavy tents and off-roading |
| Mounting hardware upgrade | \$30 | \$80 | Longer U-bolts, security nuts |
| Professional installation | \$150 | \$400 | Worth it for drill-in rack systems |
| Total setup | \$1,380 | \$5,980 | Rack often costs more than the tent |
Budget $800–$1,500 for a proper platform system before you even buy the tent. The rack is the foundation — cheap out here and everything above it is at risk.
Security: How to Lock Your Tent
Standard U-bolts can be loosened with a wrench in 30 seconds. If you park at trailheads, campgrounds, or city streets, upgrade your hardware:
- Security bolts — tamper-resistant heads that require special bits. Cost: $30–$50.
- Locking nuts — breakaway or pin-style nuts that spin freely once tightened. Cost: $20–$40.
- Cable lock — run a heavy-duty cable through the tent frame and rack. Deterrent only — bolt cutters exist.
- Insurance — check if your auto or renter’s policy covers rooftop tent theft. Many don’t.
⚠️ SAFETY: Security hardware adds 10–15 minutes to setup and takedown. Don’t skip it because you’re in a hurry — a $2,000 tent takes 5 minutes to unbolt and walk away with.
FAQs About How to Mount a Rooftop Tent Safely
How much weight can my roof actually hold?
Check your owner’s manual for the dynamic roof load rating — usually 100–165 lbs for passenger vehicles, up to 200 lbs for trucks and SUVs. The static rating (parked) is 3–4 times higher — 300–600 lbs — which covers you and your gear while sleeping. Remember to subtract the rack weight from the dynamic rating before adding the tent.
Can I use my factory roof rack or do I need an aftermarket one?
Most factory crossbars are rated for 100–150 lbs dynamic — too low for most rooftop tents (100–165 lbs) plus gear. Aftermarket heavy-duty bars (Thule, Yakima, Rhino-Rack) rated at 165+ lbs are recommended. If your factory bars are under 150 lbs, upgrade before mounting.
How many people does it take to lift a rooftop tent onto a car?
Two to four people, depending on the tent. Soft-shell tents weigh 100–130 lbs and can be managed by two strong adults. Hard-shell tents weigh 140–165 lbs and need three to four people, or a hoist/pulley system. Never lift alone — you’ll scratch the roof or drop the tent on yourself.
What’s the proper crossbar spacing for a rooftop tent?
Minimum 36 inches between the front and rear crossbars. For tents longer than 6 feet, use three crossbars (add a center bar). Maximum overhang past the front or rear bar is 32 inches. Measure from the center of the crossbar to the edge of the tent. Uneven overhang shifts weight and creates handling issues.
How do I lock my rooftop tent so it doesn’t get stolen?
Replace standard U-bolts with tamper-resistant security bolts ($30–$50) or locking nuts ($20–$40). Add a heavy cable lock through the frame as a secondary deterrent. Check your insurance policy — many don’t cover rooftop tent theft. The best security is parking in visible, high-traffic areas and removing the ladder when away from camp.
The Bottom Line from the Shop Garage
Mounting a rooftop tent is a highly rewarding DIY project that completely redefines your camping capabilities. The secret to a safe installation lies entirely in verifying your crossbar metrics—never cut corners on cheap factory rails. Take your time, ensure symmetrical weight distribution across your vehicle’s chassis pillars, and verify that your structural brackets are locked down flush before hitting the highway trail.
(Want to ensure your vehicle’s secondary structural components, suspension loops, and wheel safety networks are working flawlessly under heavy overlanding loads? Read our complete master guide on How to Correctly Install Lug Nuts Without Damaging Wheels or check out The Car Buzz Official Editorial Standards and Integrity Guidelines).