
This article was updated in July 5, 2026 with new products and information by Mark S. Taylor
A slipping clutch doesn’t fail all at once. It deteriorates through predictable stages, each with a specific symptom pattern — and the stage you’re in when the repair happens determines whether the bill is $800 or $2,600. Most readers who search this topic are somewhere in the middle of that progression and don’t know it yet.
This is the full picture: what the manual clutch slipping symptoms mean mechanically, two tests you can run in a parking lot to confirm it, which stage you’re in, and what a complete clutch job actually costs before a shop tells you.
Contents
- 1 What a Slipping Clutch Actually Means Mechanically
- 2 Six Symptoms of a Slipping Clutch — What Each One Means
- 2.1 Symptom 1 — Engine RPM Surges Without a Corresponding Increase in Vehicle Speed
- 2.2 Symptom 2 — Burning Smell After Aggressive Driving
- 2.3 Symptom 3 — Clutch Engages Near the Floor
- 2.4 Symptom 4 — Loss of Power and Acceleration on Hills or Under Heavy Load
- 2.5 Symptom 5 — Clutch Shudder or Chatter During Engagement
- 2.6 Symptom 6 — Clutch Pedal Feels Different — Soft, Low, or Inconsistent
- 3 The Clutch Slip Progression Model — Which Stage Are You In?
- 4 Two Driveway Tests That Confirm Clutch Slip — No Tools Required
- 5 How To Read Your Clutch Pedal — What the Engagement Point Tells You
- 6 What’s Actually Causing the Slip — Five Root Causes
- 7 Clutch Shudder vs. Clutch Slip — Two Different Problems
- 8 Can You Still Drive a Slipping Clutch — And What Happens If You Do
- 9 Clutch Replacement Cost — What the Complete Job Should Cost
- 10 What To Ask the Shop Before Approving the Job
- 11 How To Make a Clutch Last Longer — Driving Habits That Double Disc Life
- 12 FAQs About Manual Clutch Slipping Symptoms
- 13 The Expert Verdict
What a Slipping Clutch Actually Means Mechanically
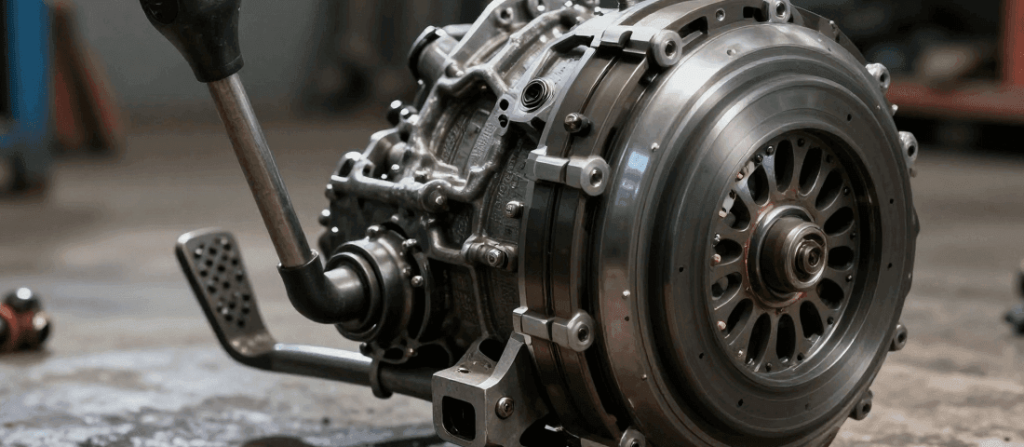
A manual clutch transfers engine torque to the transmission through friction — not through any mechanical lock or gear mesh. The clutch disc is clamped between the flywheel and the pressure plate by spring force. That clamping force, multiplied by the friction coefficient of the disc material, determines how much torque the clutch can transmit before it slips.
New clutch disc friction material has a coefficient of friction around 0.35 to 0.45 on organic compounds. The pressure plate diaphragm spring on a typical passenger car applies 1,200 to 2,000 lbs of clamping force. Multiply those numbers and the clutch has a torque capacity significantly above the engine’s maximum output — there’s a designed safety margin. As the friction material wears, the disc thins, the spring geometry changes slightly, clamping force drops, and the torque capacity margin shrinks. When the margin drops below what the engine produces under load, the disc begins to slip.
That’s the mechanical event. The engine generates more torque than the clutch can transmit. The flywheel spins faster than the disc. The disc slips against the flywheel surface. Engine RPM climbs without a matching increase in wheel speed.
Six Symptoms of a Slipping Clutch — What Each One Means
These six symptoms form the complete clinical picture of a slipping clutch. The first one is diagnostic proof. The rest are confirmatory.
Symptom 1 — Engine RPM Surges Without a Corresponding Increase in Vehicle Speed
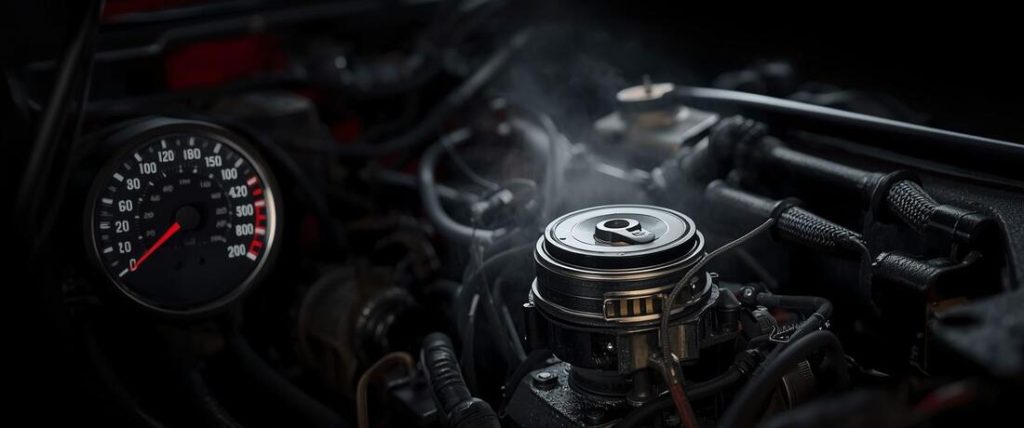
This is the definitive symptom. Floor the throttle in third or fourth gear at highway speed — the tachometer needle climbs faster than the speedometer needle. On a healthy drivetrain, RPM and speed are locked together by the gear ratio. A break in that relationship is physically only possible if something between the engine and the wheels is slipping. With the transmission in gear and no wheel spin, that something is the clutch disc. The RPM surge is mechanical proof of slip — not a symptom to monitor, a confirmation to act on.
Symptom 2 — Burning Smell After Aggressive Driving
A slipping clutch generates heat through kinetic friction between the disc and the flywheel — the same physical process as a brake pad dragging on a rotor. Organic clutch friction material begins to pyrolyze (thermally decompose) at sustained temperatures above 400°F, producing a sharp, acrid burning smell distinct from brake smell. It lingers near the transmission tunnel after a hard pull, a hill start with excessive clutch slip, or stop-and-go driving in heavy traffic. If you smell it once, the clutch slipped significantly during that event. If you smell it regularly during normal driving, the disc is at or near end of life.
Symptom 3 — Clutch Engages Near the Floor
As the friction material wears thinner, the pressure plate must travel slightly farther to apply clamping force against the reduced disc thickness — and the diaphragm spring fingers deflect at a slightly lower pedal position to release it. Both effects move the engagement point downward toward the floor. A clutch that used to grab at mid-pedal travel and now only engages in the last inch before the floor has lost significant friction material since installation. This symptom alone doesn’t confirm slip — it confirms wear. Wear and slip go together.
Symptom 4 — Loss of Power and Acceleration on Hills or Under Heavy Load
On a level road at light throttle, a worn clutch may transfer torque adequately because the load is low. Put the same clutch under the load of a steep incline, a loaded trailer, or wide-open-throttle acceleration, and the torque demand exceeds the clutch’s remaining capacity. The engine works but the power doesn’t reach the wheels — the vehicle accelerates sluggishly or not at all while the tachometer climbs. This symptom is Stage 2 behavior at minimum. If it’s happening on grades that wouldn’t have challenged the car six months ago, the deterioration is measurable.
Symptom 5 — Clutch Shudder or Chatter During Engagement
A vibration or rapid pulsing felt through the pedal, floor, or seat during clutch engagement — not a smooth take-up but a series of rapid grabs and releases. Shudder is a surface irregularity problem rather than a pure friction force problem — the disc is making uneven contact with a warped or hot-spotted flywheel, or the friction material itself is contaminated with oil or glazed unevenly. Oil contamination produces a particularly aggressive chatter: the clutch grabs violently, releases, grabs again in a machine-gun pattern during the engagement phase. Shudder can precede slip or accompany it, but it signals flywheel surface damage or contamination that adds cost to the repair regardless of whether full slip has developed yet.
Symptom 6 — Clutch Pedal Feels Different — Soft, Low, or Inconsistent
On hydraulically actuated systems, a pedal that feels spongy, requires pumping to restore firmness, or sinks slowly to the floor under constant pressure indicates a hydraulic system fault — either air in the line, a failing master cylinder cup seal, or a weeping concentric slave cylinder. A hydraulic fault that partially releases the clutch at rest mimics friction material wear exactly — the disc is seeing reduced clamping force not because the spring is weak but because the hydraulic system is keeping partial pressure on the diaphragm spring fingers. The repair for this is hydraulic system bleeding and component replacement, not a clutch disc — a critical distinction worth $800 to $1,500.

The Clutch Slip Progression Model — Which Stage Are You In?
Clutch slipping is not a binary event. It progresses through four distinct stages, each with a specific symptom combination, a specific internal condition, and a specific repair cost consequence.
| Stage | Symptom Pattern | Internal Condition | Flywheel Status | Repair Scope | Estimated Cost |
|---|---|---|---|---|---|
| Stage 1 — Marginal | RPM surge only under maximum load (WOT, towing, grades above 8%) | Friction material worn but above rivet depth | Surface intact, possible early discoloration | Clutch kit only | $710–$1,100 |
| Stage 2 — Moderate | RPM surge under any hard acceleration; engagement point moved lower; occasional burning smell | Friction material approaching rivet depth; pressure plate showing heat bluing | Early heat discoloration; surface still resurfaceable | Full clutch kit + flywheel resurface | $860–$1,400 |
| Stage 3 — Severe | RPM surge under moderate throttle in any gear; engagement near floor; regular burning smell | Friction material at or below rivet depth; rivets contacting flywheel | Scored by rivet contact; may require replacement | Full clutch kit + flywheel resurface or replace | $1,100–$2,200 |
| Stage 4 — Glazed or Contaminated | Chattering engagement; slip under light load but grabs under heavy load; oil smell mixed with burning smell | Friction material glazed from heat or soaked with oil; disc thickness may be acceptable | Hot spots or oil contamination on surface | Full clutch kit + source leak repair + possible flywheel replace | $1,200–$2,600+ |
The financial cliff edge is Stage 2 to Stage 3.
The difference between a Stage 2 and Stage 3 repair is whether the rivets have contacted the flywheel. Stage 2 means resurfacing the flywheel at a machine shop for $75 to $150. Stage 3 means the flywheel surface is scored by metal contact and may be below minimum thickness spec — requiring replacement at $180 to $1,200 depending on whether it’s a conventional single-mass flywheel or a dual-mass flywheel (DMF). Every mile driven on a Stage 2 clutch that transitions to Stage 3 potentially adds $200 to $600 to the repair bill.
According to friction material wear research documented in SAE technical literature on clutch tribology, the wear rate of organic clutch friction material accelerates significantly as the material approaches the minimum thickness threshold — the reduced material cross-section conducts heat less effectively, raising surface temperature and accelerating chemical decomposition of the friction compound. The clutch doesn’t wear linearly — it wears slowly for most of its life, then rapidly in the final 20 percent of material thickness.

Two Driveway Tests That Confirm Clutch Slip — No Tools Required
Two tests. The first takes 30 seconds and gives you a definitive yes or no. The second gives you a severity indication if the first test is inconclusive.
Test 1 — The Static Stall Test (Definitive)
Find a flat, empty parking lot. Set the parking brake fully — confirm it’s holding by trying to roll the vehicle with the brake applied. Start the engine and allow it to idle. Shift into the highest gear available — 5th or 6th on most modern vehicles. With the clutch fully depressed, bring engine RPM to approximately 1,500 RPM with light throttle. Smoothly and completely release the clutch pedal.
Result interpretation:
- Engine stalls immediately: Clutch is not slipping. The clutch disc transferred the full torque load to the drivetrain, the drivetrain couldn’t move against the parking brake, and the engine stalled. This is the correct outcome.
- Engine continues running: Clutch is slipping. The disc could not transfer sufficient torque to stall the engine against the parking brake. Slipping is confirmed regardless of whether any other symptom is present.
- Engine stumbles but doesn’t fully stall: Clutch is marginal — slipping under the torque load of this test but not completely. Stage 1 or early Stage 2 behavior.
Do not perform this test on a hill — parking brake holding force on a grade varies by brake condition and may not provide sufficient resistance. Flat surface only.
Test 2 — The Dynamic Throttle Test (Severity Indicator)
With the vehicle moving at 25 to 30 mph in third gear, apply the throttle briskly to approximately 75 percent of full throttle. Watch the tachometer and speedometer simultaneously.
Result interpretation:
- RPM and speed rise together proportionally: No slip under this load level. Does not rule out Stage 1 slip — maximum load test required.
- RPM rises faster than speed for 1 to 2 seconds before stabilizing: Marginal slip — Stage 1 to Stage 2 behavior. The clutch catches up once engine RPM stabilizes, but the momentary slip is confirming friction material wear.
- RPM climbs toward redline without a corresponding speed increase: Significant slip — Stage 2 to Stage 3. The engine is producing more torque than the clutch can transmit at this load level.
Run both tests before calling a shop. The combination of results tells you your stage — and gives you a reference point to evaluate whether the shop’s diagnosis matches what you observed.
How To Read Your Clutch Pedal — What the Engagement Point Tells You
The clutch engagement point is a wear indicator you can monitor on every drive without any tools. Here’s how to read it accurately.
In a parking lot or empty road, slowly release the clutch pedal from the fully depressed position while applying light throttle to keep the engine from stalling. Note exactly where in the pedal travel the vehicle first begins to move — that’s the engagement point. Note whether the clutch then fully engages smoothly as the pedal continues rising, or whether the engagement drags across a wide range of pedal travel.
What the position tells you:
- Engagement in the upper half of pedal travel (above midpoint): Normal wear, disc has substantial life remaining.
- Engagement at or near midpoint: Moderate wear. Not urgent, but the direction of travel is important — if it’s moved downward noticeably since you last paid attention, the wear rate is measurable.
- Engagement in the lower third of pedal travel: Significant wear. Stage 2 to Stage 3 territory. Schedule the repair before it becomes an emergency.
- Engagement in the last inch before the floor: End of life. Stage 3 minimum. This clutch is days to weeks from failing completely under normal driving — hours under aggressive driving.
What free play tells you separately:
Free play is the distance the pedal travels before resistance is felt — the slack in the system before the release bearing contacts the diaphragm spring fingers. Factory spec is 0.5 to 1.0 inches. Measure it by hand — push the pedal down with your finger from the resting position until you feel it stiffen. That initial soft travel is free play.
Too much free play (above 1.5 inches on a cable system) means the release bearing isn’t contacting the spring fingers until late in pedal travel — the clutch may not fully disengage at the top of pedal travel, causing grinding during gear changes. Too little free play (below 0.25 inches) means the release bearing is riding against the diaphragm spring fingers continuously — reducing clamping force and causing premature slip and bearing wear. On cable-actuated systems, free play is adjustable at the cable adjuster under the hood or at the transmission. On hydraulic systems, abnormally low free play indicates a swollen slave cylinder piston seal or incorrect CSC position.

What’s Actually Causing the Slip — Five Root Causes
The symptom tests tell you the clutch is slipping. These five causes tell you why — and why the cause matters as much as the symptom for determining the complete repair scope.
Cause 1 — Friction Material Worn to Rivet Depth (Most Common)
Normal wear over the disc’s service life. Organic friction material lasts 60,000 to 100,000 miles under normal driving conditions — less under aggressive driving, towing, or frequent hill starts with excessive clutch slip. The wear is gradual and the driver often doesn’t notice the engagement point migrating lower over months. By the time the RPM surge is undeniable, the disc is typically at or near rivet depth. Repair: full clutch kit replacement. If rivet contact has begun, add flywheel resurfacing to the scope.
Cause 2 — Oil Contamination From a Leaking Seal
Engine rear main seal or transmission input shaft seal leak deposits oil onto the clutch disc friction surface. Oil-soaked organic friction material loses 60 to 80 percent of its friction coefficient — a disc that should clamp at 0.40 µ effective friction slips at 0.08 to 0.16 µ under contamination. The symptom pattern is distinctive: the clutch chatters and grabs unpredictably during light-throttle engagement but slips under sustained load. It doesn’t follow the smooth engagement pattern of wear-based slip. The disc cannot be cleaned — oil is absorbed into the friction material’s porous structure and cannot be fully removed. Repair: full clutch kit plus seal replacement. According to LuK/Schaeffler clutch technology documentation, oil-contaminated clutch replacement without sealing the source leak typically results in disc failure within 10,000 to 20,000 miles of new installation.
Cause 3 — Pressure Plate Diaphragm Spring Fatigue
The diaphragm spring is a precision-engineered component that applies consistent clamping force within tight tolerances when new. After years of heat cycling — every clutch engagement heats the spring slightly, every release cools it — the spring loses preload. A pressure plate that clamped at 1,800 lbs when new may only clamp at 1,100 lbs at 100,000 miles. The disc friction material may measure within acceptable thickness, but the reduced clamping force drops the torque capacity below what the engine produces under load. This cause is identified when a disc removed from a slipping clutch still shows adequate friction material thickness — the spring failed the disc, not the reverse. Repair: pressure plate replacement at minimum; full clutch kit replacement is the standard recommendation since the disc has been heat-cycled alongside the failed spring.
Cause 4 — Glazed Friction Material
Heat glazing occurs when the clutch friction surface reaches temperatures that chemically convert the organic binder in the friction material into a hard, glassy coating. The trigger is repeated slipping — holding the clutch at the engagement point on a hill, repeated launch attempts, or sustained slip in heavy traffic. Glazed material is identifiable visually: the friction surface appears smooth and shiny rather than the matte, slightly rough texture of new or normally worn material. The friction coefficient of glazed material drops to near-zero on the glazed areas, causing slip under loads that unglazed areas could still handle. This produces the characteristic grabbing-and-slipping behavior — smooth areas grip briefly, glazed areas release. Repair: disc replacement. Minor glazing on an otherwise thick disc can sometimes be addressed by scuffing the surface with 80-grit sandpaper, but this is a temporary measure — the glazed surface returns within weeks of normal use.
Cause 5 — Hydraulic System Partial Disengagement
A leaking master cylinder, a weeping concentric slave cylinder, or air in the hydraulic line reduces the pressure available to fully release the diaphragm spring. The result is a clutch that never fully disengages — the disc maintains partial contact with the flywheel even when the pedal is fully depressed. That partial contact generates heat, accelerates wear, and produces slip at low pedal positions when engagement should be complete. The pedal feels soft or spongy. Pumping the pedal temporarily restores firmness if the master cylinder cup seal is bypassing. Repair: hydraulic system bleed and component replacement. The CSC on applicable vehicles is inside the bell housing and is standard practice to replace at any clutch service since it’s only accessible with the transmission removed — parts cost $80 to $180, labor is already paid for.

Clutch Shudder vs. Clutch Slip — Two Different Problems
Shudder and slip are frequently confused because they both occur at the clutch disc interface. The distinction is critical — different causes, different costs, and sometimes different components.
Clutch shudder (judder): A rapid vibration felt through the pedal, transmission tunnel, or driveshaft during clutch engagement — typically in the 0 to 15 mph range during a smooth take-off. The clutch is engaging and releasing multiple times per second rather than grabbing smoothly and holding. Causes: warped or hot-spotted flywheel creating uneven contact, oil contamination producing intermittent friction-to-zero-friction cycling, or worn clutch disc torsional damper springs allowing the disc hub to rattle at the splined connection to the input shaft.
Clutch slip: Engine RPM exceeds what vehicle speed requires — the disc is moving slower than the flywheel during load. No vibration during engagement; the engagement itself may feel smooth. The slip manifests as a speed-RPM disconnect under throttle.
A vehicle can have both simultaneously — a warped flywheel that causes shudder during engagement at low speed and slip under high load. That combination confirms Stage 3 damage at minimum. The flywheel is producing both symptoms: the warp creates hot spots that harden the surface (reducing friction and causing slip) and create the uneven contact geometry that produces shudder.
Can You Still Drive a Slipping Clutch — And What Happens If You Do
The answer depends entirely on your stage.
Stage 1 — Yes, but schedule the repair within 30 days.
The clutch slips only under maximum load. Normal commuting and light driving are fine. The disc has remaining life. Every mile at Stage 1 is moving toward Stage 2, but the progression is slow enough that a 2 to 4 week repair window is reasonable. Avoid towing, avoid aggressive launches, and avoid hills that require sustained clutch slipping to ascend.
Stage 2 — Yes, but the repair window is weeks, not months.
Slip is occurring under moderate load. You can drive, but every heat cycle is pushing the friction material closer to rivet depth. The financial consequence of driving through Stage 2 into Stage 3 is $150 to $600 in additional flywheel work. If the shop has availability in the next two weeks, book it.
Stage 3 — Minimize driving. Tow if possible.
Rivet contact with the flywheel is either happening or imminent. Every heat cycle scores the flywheel surface deeper. The longer this runs, the more likely the flywheel crosses below minimum resurfacing thickness — converting a $125 resurface into a $300 to $1,200 replacement. More critically, Stage 3 clutches fail without warning during aggressive maneuvers — a highway merge at wide-open throttle, a sudden need to accelerate out of traffic. The clutch delivers no power to the wheels at the worst possible moment.
Stage 4 — Do not drive for extended distances.
A contaminated or fully glazed clutch is unpredictable. It may engage cleanly one moment and slip completely the next — the oil contamination or glazed patches on the disc create a friction surface that varies from adequate to near-zero depending on temperature, load angle, and disc position. Hill starts become a genuine risk. A clutch that slips completely on a steep grade with traffic behind the vehicle is a safety situation, not a maintenance inconvenience.
The heat escalation mechanism — why continued driving costs more money:
A slipping clutch generates heat through kinetic friction. At Stage 2 slip rates under moderate throttle, the friction surface temperature can reach 400 to 600°F within seconds of a slipping event. That heat transfers into the flywheel mass — a chunk of cast iron or steel that absorbs heat slowly but also releases it slowly. Repeated heat cycles create localized temperature gradients across the flywheel face, and those gradients cause the surface to expand unevenly. The uneven expansion creates hard spots — areas where the steel transforms into martensite, a harder and more brittle crystalline structure. Martensite on a flywheel surface resists the surface grinder used for resurfacing — a flywheel with martensite spots cannot be resurfaced to a flat, consistent finish. The machine shop returns it as unrepairable, and the flywheel gets replaced. That’s the $300 to $1,200 consequence of driving through Stage 2 into Stage 3 thermal damage.
Clutch Replacement Cost — What the Complete Job Should Cost
Labor rates: $120 to $210/hr at a US independent shop. Dealership labor: $160 to $280/hr. All costs reflect 2026 US market pricing.
The clutch job is one of the most labor-intensive common repairs on a manual transmission vehicle — the transmission must come out to access the clutch assembly on virtually every application. On a front-wheel-drive compact, that’s 3 to 5 hours. On a rear-wheel-drive performance car, 4 to 7 hours. On a body-on-frame pickup, 5 to 8 hours including driveshaft removal and transfer case disconnect on 4WD applications.
Stage 1–2 — Clutch Kit Replacement (No Flywheel Damage)
| Component | Parts Cost | Labor Hours | Labor Cost | Total Estimate |
|---|---|---|---|---|
| Clutch kit (disc, pressure plate, release bearing) — FWD compact | $180–$380 | 3–5 hrs | $360–$1,050 | $540–$1,430 |
| Clutch kit — RWD sport/performance | $280–$600 | 4–7 hrs | $480–$1,470 | $760–$2,070 |
| Clutch kit — truck/pickup (2WD) | $300–$650 | 5–7 hrs | $600–$1,470 | $900–$2,120 |
| Clutch kit — truck/pickup (4WD) | $300–$650 | 6–8 hrs | $720–$1,680 | $1,020–$2,330 |
| Pilot bearing (always replace) | $10–$25 | Included | — | Add $10–$25 |
| CSC replacement (where applicable) | $80–$180 | Included | — | Add $80–$180 |
Stage 3 — Clutch Kit Plus Flywheel Resurfacing
| Add-On Service | Parts/Machine Cost | Labor | Total Addition |
|---|---|---|---|
| Flywheel resurfacing (machine shop) | $75–$150 | Remove/reinstall included in clutch labor | $75–$150 |
| Flywheel replacement — single mass | $180–$450 | Included | $180–$450 |
| Flywheel replacement — dual mass (DMF) | $350–$1,200 | Included | $350–$1,200 |
Stage 3 total range: Add the flywheel line to the base clutch kit cost above. A FWD compact at Stage 3 with flywheel resurfacing: $615 to $1,580. A 4WD pickup at Stage 3 requiring DMF replacement: $1,370 to $3,530.
Stage 4 — Clutch Kit Plus Seal Repair (Oil Contamination)
| Add-On Service | Parts Cost | Labor | Total Addition |
|---|---|---|---|
| Rear main seal replacement | $20–$65 parts | Included (transmission already out) | $20–$65 |
| Transmission front input shaft seal | $15–$40 parts | Included | $15–$40 |
| Flywheel cleaning and inspection | $0–$75 | Included | $0–$75 |
The rear main seal replacement is the critical add-on for oil contamination cases. The seal is accessible only with the transmission removed — which is already happening for the clutch job. The additional parts cost is $20 to $65. Skipping it to save $40 in parts means the new clutch disc contaminates with oil within the first 10,000 to 20,000 miles — requiring the same $500+ labor investment a second time for a disc that should have lasted 80,000 miles.
What To Ask the Shop Before Approving the Job
Three questions that protect you from scope creep and ensure the correct repair:
1. “What’s the flywheel condition and are you resurfacing or replacing it?”
The shop should measure the flywheel thickness against the minimum spec stamped on the flywheel face (or in the service manual) before making this call. If they say “we always replace the flywheel” without measuring it, ask for the measurement. A flywheel within spec and without hard spots costs $75 to $150 to resurface — not $300 to $1,200 to replace. Conversely, if they say the flywheel “looks fine,” ask specifically about hot spots and martensite — a visual-only inspection misses hardened spots that the grinder can’t remove.
2. “Is the rear main seal leaking and are you replacing it while the transmission is out?”
This is a $20 to $65 parts decision with zero additional labor cost at time of clutch service. A shop that doesn’t proactively check for and address seal leaks at clutch service time is either missing the inspection step or leaving future repair work on the table.
3. “Are you replacing the concentric slave cylinder?”
On vehicles with an internal CSC, the answer should always be yes. The CSC is only accessible with the transmission removed. Parts cost $80 to $180. Skipping it on a high-mileage vehicle saves $100 now and risks a hydraulic system failure within 2 to 3 years that requires pulling the transmission again at full labor cost.
How To Make a Clutch Last Longer — Driving Habits That Double Disc Life
Clutch longevity is almost entirely determined by how the driver uses the pedal. The mechanical components wear at a rate set by friction surface temperature, and friction surface temperature is set by how often and how long the disc slips during normal operation.
1. Keep your left foot off the pedal when you’re not shifting.
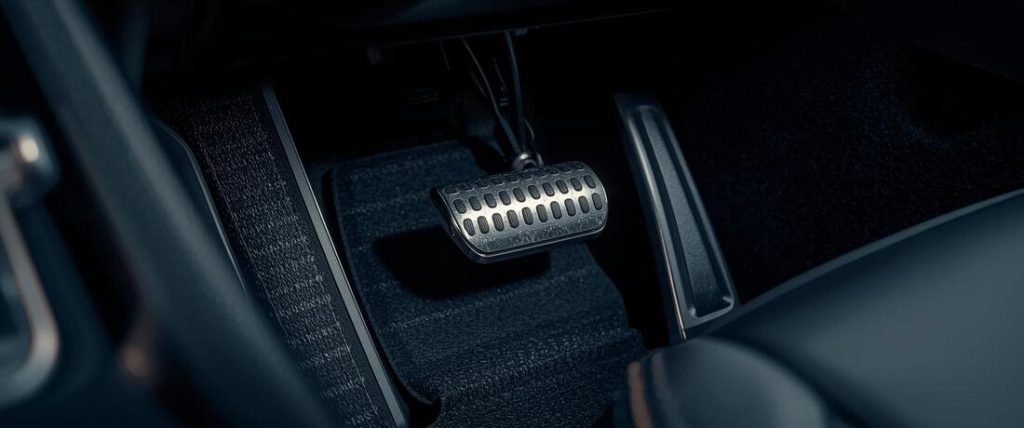
This is the single most impactful habit. A left foot resting on the clutch pedal with 5 to 10 lbs of force compresses the release bearing against the diaphragm spring fingers, reducing the spring’s effective clamping force. The disc slips under loads it should handle cleanly. The release bearing wears continuously instead of only during actual shifts. Drivers who rest their foot here typically see clutch life of 40,000 to 60,000 miles. Drivers who keep their foot off the pedal between shifts routinely exceed 100,000 miles on the original disc.
2. Don’t ride the clutch on hills.
Holding the vehicle stationary on a slope by balancing clutch engagement against engine torque — instead of using the parking brake or footbrake — slips the disc against the flywheel continuously at low speed differential. The heat generated per minute of hill-holding in this manner can equal dozens of normal engagement cycles. Use the footbrake to hold position, then execute the hill start cleanly: brake to clutch transition, engage cleanly, move. One clean engagement generates far less heat than 30 seconds of clutch-holding.
3. Complete gear changes decisively.
A slow, hesitant clutch release during upshifts extends the slip phase unnecessarily. The disc is designed to engage quickly — a smooth but relatively fast clutch release minimizes the time spent at the slipping engagement zone where heat is generated. Dragging the clutch release out over three seconds because you’re afraid of stalling generates more wear than a quick, controlled release that stalls the engine occasionally while you’re learning.
4. Match RPM before downshifting.
Downshifting without rev-matching forces the transmission to accelerate through the drivetrain — the clutch disc must absorb the speed differential between the lower gear’s RPM requirement and the engine’s current RPM. Blipping the throttle during downshifts to match RPM before releasing the clutch eliminates this disc-loading event entirely. Rev-matched downshifts generate essentially no additional disc wear compared to a normal upshift.
5. Change the hydraulic fluid on schedule.
On hydraulically actuated clutch systems, the brake fluid in the clutch hydraulic circuit absorbs moisture over time — identical to the brake system. Moisture-saturated fluid lowers the boiling point, and on a hard-used clutch system where hydraulic temperatures can spike during aggressive driving, fluid vapor in the lines causes the pedal to go soft unexpectedly — leading to incomplete disengagement, extended slipping, and accelerated wear. Flush the clutch hydraulic system every 2 years or 30,000 miles alongside the brake fluid service.
FAQs About Manual Clutch Slipping Symptoms
How do I know if my clutch is slipping or if it’s something else?
Run the static stall test. Set the parking brake, start the engine, engage the highest gear, bring RPM to 1,500, and release the clutch completely. A healthy clutch stalls the engine immediately — no exceptions. If the engine keeps running, the clutch is slipping. This test is definitive and takes 30 seconds. No other drivetrain fault produces this result in a manual transmission vehicle.
Can a slipping clutch fix itself?
No. Friction material wear is irreversible — worn material does not grow back. Oil contamination does not evaporate from absorbed friction material. A glazed surface may temporarily improve if the vehicle is driven hard enough to thermally cycle the glazed layer off, but this generates the same heat that caused the glazing in the first place and accelerates the underlying wear. A slipping clutch only progresses toward complete failure.
How long can you drive on a slipping clutch?
Stage 1: weeks to a few months under normal driving. Stage 2: days to weeks before flywheel scoring begins. Stage 3: as short as a single highway drive before complete failure or flywheel damage beyond resurfacing. Stage 4 (contaminated or glazed): unpredictable — the clutch may hold on flat roads and fail completely on a steep grade. Don’t trust it for any situation where sudden loss of drive would create a safety problem.
Does a slipping clutch affect all gears equally?
No. Lower gears have higher mechanical advantage — the clutch sees less torque demand per unit of engine output. Slip is typically first noticed in high gears (4th, 5th, 6th) under load, because that’s where torque demand is highest. As the clutch deteriorates further, slip appears in progressively lower gears. By Stage 3, slip occurs in second and third gear under moderate throttle — any gear where engine output exceeds the clutch’s remaining capacity.
What does a slipping clutch smell like?
Acrid, sharp, slightly chemical — distinct from the rubber smell of spinning tires or the metallic smell of overheated brakes. The organic binder in clutch friction material decomposes at sustained temperatures above 400°F, releasing combustion byproducts that linger in the passenger compartment through the HVAC fresh air intake and around the transmission tunnel. If you smell it once after an aggressive pull, the clutch slipped significantly during that event. If you smell it regularly during normal driving in moderate traffic, the disc is at or near end of service life.
The Expert Verdict
A slipping clutch is a staged problem with a staged repair cost. The driver who catches it at Stage 1 or early Stage 2 pays for a clutch kit and an afternoon of labor. The driver who ignores the RPM surge and burning smell until Stage 3 pays for the same clutch kit plus flywheel work — and the driver who continues into thermal damage territory potentially pays for a dual-mass flywheel on top of everything else.
Run the stall test. Check the engagement point. If the engine doesn’t stall or the clutch grabs in the last inch of pedal travel, you know your stage — and you know the repair scope before any shop tells you.