
This article was updated in July 16, 2026 with new products and information by Mark S. Taylor
A squeaky car door has one correct fix and several wrong ones. Most people reach for WD-40, get three days of quiet, and then the squeak comes back. The second attempt gets more WD-40. The squeak comes back louder. By the third time, they’re searching for a real answer.
The real answer starts with identifying which of the four components in the door assembly is actually making the noise — because the fix for a dry hinge pin is different from the fix for a worn check strap, and both are completely different from a weatherstripping squeak. Apply the wrong product to the wrong location and you solve nothing. Apply the right product to the right location and the squeak is gone in 15 minutes and stays gone for months.
Contents
- 1 Find the Squeak First — Four Different Sources That Sound the Same
- 2 The Hinge Pin and Bushing Wear Test — When Lubrication Won’t Fix It
- 3 Why WD-40 Is the Wrong Product — and What to Use Instead
- 4 What You Need — Tools and Products for Each Squeak Source
- 5 How To Fix a Squeaky Car Door Hinge — Step by Step
- 5.1 Step 1 — Open the Door Fully and Identify Both Hinges
- 5.2 Step 2 — Protect the Painted Surface (Optional but Recommended)
- 5.3 Step 3 — Apply White Lithium Grease to the Hinge Pin Gap
- 5.4 Step 4 — Apply Grease to the Hinge Leaf Contact Faces
- 5.5 Step 5 — Cycle the Door 10 to 15 Times
- 5.6 Step 6 — Repeat on the Second Hinge
- 5.7 Step 7 — Wipe Excess Grease
- 5.8 Step 8 — Locate and Lubricate the Check Strap (While You’re Already There)
- 6 Lubricating the Door Check Strap
- 7 Fixing Weatherstripping Squeak
- 8 When Lubrication Doesn’t Fix It — Hinge Pin and Bushing Replacement
- 9 The Complete Fix in 15 Minutes — Quick Reference
- 10 How Long Will the Fix Last — and What Makes It Come Back
- 11 FAQs About How To Fix a Squeaky Car Door
- 12 The Expert Verdict
Find the Squeak First — Four Different Sources That Sound the Same
Before you touch a lubricant, identify where in the door’s movement arc the squeak occurs and roughly where on the door the sound comes from. That combination tells you which component is the source.
Source 1 — Hinge Pin Squeak
When it occurs: Continuously throughout the door’s opening and closing swing — from the moment the door starts moving until it reaches its open position, then again from open to closed. The squeak doesn’t concentrate at any specific position.
Where it comes from: The hinge area — the A or B pillar where the door is attached. On a front door, listen for sound from the front leading edge where the hinges are. On a rear door, from the rear leading edge.
What it is: Dry metal-to-metal contact between the hinge pin and the hinge knuckle bore. The grease that kept the pin sliding smoothly in its bore has dried out, washed away, or was never adequate.
Fix: White lithium grease on the hinge pin area — detailed in the step-by-step procedure below.
Source 2 — Door Check Strap Squeak
When it occurs: At specific positions in the door’s swing — typically at the first detent (roughly one-third open) or the second detent (fully open position). The squeak or click happens at these positions, not continuously through the full arc.
Where it comes from: The check strap — the flat metal strap with notched detents that holds the door open and prevents it from swinging past its limit. It’s usually visible when the door is fully open as a flat metal bar connecting the door to the body, visible in the door jamb area.
What it is: Dry contact between the check strap’s detent mechanism and its housing, or a dry pivot bushing at the check’s mounting point.
Fix: White lithium grease sprayed into the check strap body gap and at the pivot point.
Source 3 — Weatherstripping Squeak
When it occurs: Specifically when the door is being closed in the last few inches of travel — as the rubber seal compresses against the door opening flange — or when the door is first opened from the fully closed and sealed position.
Where it comes from: The door perimeter — the rubber seal that runs around the full door opening. The squeak comes from the rubber dragging against the painted metal door flange rather than from the hinge area.
What it is: Dried or hardened weatherstripping that has lost its flexibility and drags rather than sliding smoothly against the door frame as it compresses.
Fix: Silicone spray applied to the weatherstripping — not white lithium grease, not WD-40. Petroleum products degrade rubber.
Source 4 — Worn Hinge Pin and Bushing (Knock-Squeak)
When it occurs: Throughout the door’s swing, similar to Source 1, but with a different character — a squeak combined with a knock, thud, or wobble sensation rather than a clean squeak.
Where it comes from: The hinge area, same as Source 1.
What it is: Not just dry lubrication — the hinge pin and its bushing are physically worn, creating mechanical clearance (play) between the pin and the knuckle bore. The pin wobbles in the bore as the door swings, creating both the friction squeak and the knock from the pin hitting the sides of the worn bore.
Fix: Hinge pin and bushing replacement. Lubrication temporarily reduces the noise but cannot eliminate the mechanical play. This requires a different repair than a lubrication job.
The quick location test to differentiate Source 1 from Source 4:
With the door fully open, grasp the door at its outer edge with both hands — not the window frame, but the actual door edge. Attempt to lift the door straight up and push it straight down, applying firm vertical force. You’re testing for vertical play in the hinge pins.
A door with only dry (not worn) hinges feels completely solid in this test — no vertical movement at all, just the squeak when it swings. A door with worn hinge pins and bushings shows detectable vertical movement at the door edge — the door actually moves up and down slightly before the worn hinge’s clearance is taken up. If you can feel or see that vertical play — even 1/16 inch of movement — lubrication will quiet the squeak temporarily but the pin and bushing need replacement before the door begins to sag and affects the latch alignment.

The Hinge Pin and Bushing Wear Test — When Lubrication Won’t Fix It
The vertical play test tells you whether you’re dealing with a lubrication job ($6 and 15 minutes) or a mechanical repair job ($15 to $40 in parts and an hour of work, or $75 to $200 at a shop).
Run the test on every door that squeaks before buying anything. The result determines your approach:
No vertical play detected: Dry hinge. Lubrication is the complete fix. The pin and bushing are in good condition — they just need grease. Proceed to the step-by-step procedure.
Vertical play detected — less than 1/8 inch: Early-stage wear. Lubrication will quiet the noise for months at a time, but the play will increase gradually. Plan for hinge pin and bushing replacement within the next year. Lubrication is the correct short-term approach.
Vertical play detected — 1/8 inch or more at the door edge: Significant wear. The door is or will soon begin to sag. Lubrication may quiet the noise temporarily but won’t address the sag. The door’s closing geometry is affected — the latch may not engage the striker cleanly, requiring a harder push to close. Hinge pin and bushing replacement is the correct repair now.
A door that requires a noticeably harder push to close than it used to, or that makes contact with the striker housing before the latch engages, has already reached the point where hinge wear is affecting function — not just making noise. That’s the safety-relevant version of this problem, because a latch that doesn’t fully engage in the striker means a door that appears closed but isn’t locked into its safety position.
Why WD-40 Is the Wrong Product — and What to Use Instead
WD-40 is the most commonly applied solution to a squeaky car door. It is also the reason most people are searching for a better answer three days later.
The name WD-40 stands for “Water Displacement, 40th formula” — it was developed in 1953 by the Rocket Chemical Company for the aerospace industry as a corrosion inhibitor and water displacer for missile components. It is not a lubricant. Per WD-40 Company’s own product description, the product’s primary functions are water displacement, corrosion prevention, and loosening stuck parts — not long-term lubrication.
The chemistry explains why the squeak returns. WD-40’s base is a lightweight petroleum distillate — similar to mineral spirits — with a small concentration of mineral oil. When sprayed onto a dry hinge, the petroleum distillate penetrates the metal surfaces and provides immediate lubrication. The squeak stops. But the petroleum distillate evaporates from exposed metal surfaces within 3 to 7 days under normal conditions. The thin mineral oil film left behind washes away with the next rain or car wash. The hinge is now dry again — and in many cases drier than before, because the WD-40 also flushed out any remaining original factory grease from the hinge assembly. The squeak returns, often worse than before.
The correct products for each squeak source:
White lithium grease — for all metal-to-metal hinge and check strap contact:
White lithium grease is a soap-thickened lubricant — the lubricating agent (lithium soap) is a solid base that holds the oil in place rather than allowing it to run off or evaporate. Applied to a door hinge, it stays on the pin and in the knuckle bore through rain, temperature changes, and car washing. It doesn’t run onto painted surfaces the way liquid oils do. It maintains lubrication for months under normal use rather than days.
The correct specification is NLGI Grade 2 consistency — the standard grease consistency for automotive applications, firm enough to stay where applied but soft enough to work into hinge gaps without disassembly. Per NLGI grease consistency standards, Grade 2 is equivalent to the consistency of peanut butter — it holds its shape but spreads under pressure.
Aerosol white lithium grease (Permatex, CRC, WD-40 Specialist White Lithium Grease — the specialist line, not standard WD-40) is the most convenient form for hinges — the spray straw directs grease into the hinge gap without requiring disassembly.
Silicone spray lubricant — for all rubber-to-metal contact (weatherstripping):
Silicone is chemically inert relative to rubber — it lubricates without causing the rubber to swell, crack, or degrade. Petroleum-based lubricants (WD-40, white lithium grease, motor oil) attack the plasticizers in rubber, causing initial swelling followed by brittleness and cracking as the petroleum leaches out the rubber’s flexibility agents. Silicone spray applied to weatherstripping provides a slippery surface between the rubber and the door flange without degrading the seal material.
What You Need — Tools and Products for Each Squeak Source
Have the right products for the right source before starting. Running back to the parts store mid-procedure is the surest way to leave the door half-done.
For hinge and check strap squeak (Sources 1 and 2):
| Item | Purpose | Cost |
|---|---|---|
| White lithium grease (aerosol with straw) | Hinge pin, hinge leaves, check strap body | $6–$12 |
| Rags or paper towels | Wipe excess grease from painted surfaces | $0–$2 |
| Painter’s tape (optional) | Protect painted surfaces near hinges | $3–$6 |
For weatherstripping squeak (Source 3):
| Item | Purpose | Cost |
|---|---|---|
| Silicone spray lubricant | Rubber seal lubrication | $5–$10 |
| Clean microfiber cloth | Spread silicone evenly, wipe excess | $0–$3 |
For worn hinge pin and bushing (Source 4 — replacement required):
| Item | Purpose | Cost |
|---|---|---|
| Hinge pin and bushing kit (application-specific) | Replace worn pin and bushing | $15–$40 per hinge pair |
| 3/8″ drive ratchet and appropriate sockets | Remove hinge pin retainer or mounting bolts | Already owned or $20–$40 |
| Punch and hammer (for pinned hinges) | Drive out old hinge pin | $10–$20 if not owned |
| White lithium grease | Lubricate new pin during installation | $6–$12 |
What not to buy:
- Standard WD-40 (not the Specialist line) — wrong product for long-term lubrication
- Motor oil or 3-in-1 oil — too thin, runs off immediately, attracts dirt
- Petroleum-based grease (bearing grease) on rubber — degrades weatherstripping

How To Fix a Squeaky Car Door Hinge — Step by Step
This procedure addresses Sources 1 and 2 — hinge pin squeak and check strap squeak. Confirm the vertical play test above shows no significant play before proceeding. If play is present, this procedure will help temporarily but refer to the hinge pin replacement section afterward.
Step 1 — Open the Door Fully and Identify Both Hinges
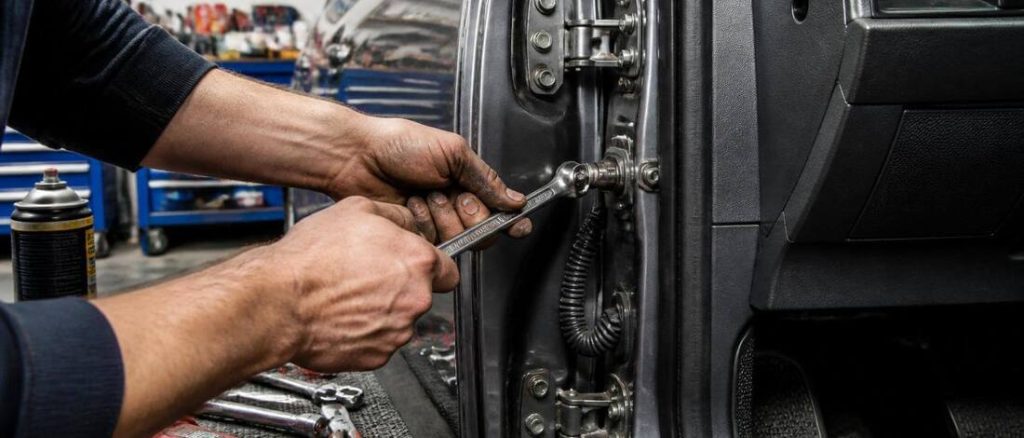
Open the door to its maximum open position. Look at the hinge area — on the front door, this is the front edge where the door meets the A pillar (the pillar between the windshield and the front door). You’ll see the upper hinge and the lower hinge — two rectangular assemblies of folded metal with the hinge pin running vertically through the center. Both hinges need lubrication regardless of which one is squeaking — if one is dry, the other is at the same stage.
Step 2 — Protect the Painted Surface (Optional but Recommended)
Place a strip of painter’s tape on the painted surfaces immediately adjacent to each hinge — on the door skin and on the A pillar. White lithium grease on a painted surface won’t damage the paint chemically, but it’s very difficult to remove once embedded in paint pores. The tape prevents any overspray from contacting the painted areas. If you’re confident with the spray straw application, skip the tape.
Step 3 — Apply White Lithium Grease to the Hinge Pin Gap
Attach the spray straw to the aerosol can nozzle. Direct the straw tip into the gap between the hinge leaves at the center barrel where the pin passes through. Apply a 1 to 2 second burst of grease directly into this gap. You’ll see white grease emerge from the opposite side of the barrel — that confirms the grease has penetrated through the hinge knuckle and coated the pin.
Do this at the top of the hinge barrel and at the bottom — the pin passes through two contact points at each hinge leaf.
Step 4 — Apply Grease to the Hinge Leaf Contact Faces
The hinge leaves — the flat metal flanges on each side of the hinge barrel — can also contact each other slightly during the door swing, particularly on hinges that have experienced any minor deformation or on doors with heavy rubber seals creating compression load. Apply a thin spray of white lithium grease to the flat faces of the hinge leaves where they meet.
Step 5 — Cycle the Door 10 to 15 Times
Close and open the door completely 10 to 15 times at a normal speed. This distributes the grease through the full contact surface of the hinge pin bore and between the hinge leaves. On the first few cycles, you may still hear the squeak — the grease is working its way into the tight metal clearances. By the 5th to 10th cycle, the squeak should be diminishing or gone.
If the squeak hasn’t reduced after 15 cycles, the grease hasn’t reached the contact zone. Apply a second, heavier burst directly into the pin gap and cycle 10 more times.
Step 6 — Repeat on the Second Hinge
Apply the same procedure to the second hinge (upper hinge if you started at the lower, and vice versa). Both hinges share the door’s load and both wear at approximately the same rate — treating only the squeaking hinge while leaving the other dry means the second one starts squeaking within weeks.
Step 7 — Wipe Excess Grease
Use a rag to wipe any grease that has run onto the hinge mounting surfaces, the door edge, or the pillar paint. Remove the painter’s tape if applied. Grease on the door edge can transfer to clothing when passengers grab the door edge to pull it closed — worth a thorough wipe.
Step 8 — Locate and Lubricate the Check Strap (While You’re Already There)
With the door fully open, look into the door jamb area — you’ll see the check strap: a flat metal bar with a loop at one end (attached to the door) and a pin or bracket at the other end (attached to the body). Direct the spray straw into any gap in the check strap body and apply a short burst. Also spray the pivot bushing at the body attachment point.
Cycle the door through its full swing and through the detent positions — feel for the clicks as the door moves through the check positions. Any squeak or resistance at these positions should diminish after the grease reaches the detent mechanism.
Lubricating the Door Check Strap
If the squeak occurs specifically at one or two positions in the door’s swing — a squeak that happens at the same spot every time rather than continuously — the check strap is the source.
The check strap has three lubrication-accessible points:
Point 1 — The check body mechanism: The interior of the check body (the housing where the flat strap passes through with the detent notches) can receive aerosol grease through any gap in the housing. Apply grease and cycle the door through the full range of motion to distribute the lubricant across the detent mechanism.
Point 2 — The check pivot at the body mounting point: Where the check’s eye or bracket pivots on the body-mounted pin, there’s a metal bushing that can dry out. Spray directly at this joint from multiple angles to ensure penetration.
Point 3 — The strap itself: Some check straps have a rubber or plastic pad that contacts the check housing as the strap slides through. Wipe silicone spray on the flat strap body to reduce friction between the strap and its guide.
After lubrication, cycle the door slowly through each detent position. The detent clicks should be clean and the previous squeak at those positions should be gone.

Fixing Weatherstripping Squeak
If the squeak occurs only when the door is in the last few inches of closing — or immediately as the door opens from the fully closed position — the weatherstripping is the source, not the hinges.
Why this squeak happens: Rubber weatherstripping loses flexibility over time from UV exposure, ozone, and temperature cycling. Hardened rubber doesn’t compress smoothly — it catches and drags against the door frame as it compresses, producing the characteristic chirp or squeak at the moment of sealing contact.
The correct lubricant: Silicone spray. Not WD-40, not white lithium grease — petroleum products cause rubber to swell initially, then accelerate cracking as the petroleum leaches the rubber’s plasticizers. Silicone is chemically inert relative to EPDM rubber (the standard weatherstripping material) and provides a durable slippery surface that lasts months.
Application:
- Open the door fully. Spray silicone lubricant onto a clean microfiber cloth — don’t spray directly onto the weatherstripping from the can, as overspray can reach painted surfaces and glass where silicone is very difficult to remove.
- Wipe the silicone-coated cloth along the full length of the weatherstripping — the door’s perimeter seal. Work the cloth into any folds or lips in the seal’s cross-section profile.
- Wipe a second, dry cloth over the seal to remove excess silicone.
- Close and open the door three to five times. The drag sound should diminish immediately.
Also check the condition of the weatherstripping while you have it lubricated. Look for:
- Sections where the seal has separated from its mounting channel
- Visible cracks or tears in the rubber
- Areas where the seal is severely compressed flat with no recovery
Lubrication restores function to aged but intact weatherstripping. It cannot repair a seal that is torn, separated from its channel, or so compressed it has lost all resilience. A weatherstripping seal in that condition needs replacement — not more silicone.
When Lubrication Doesn’t Fix It — Hinge Pin and Bushing Replacement
Lubrication is the complete solution for a door with dry hinges and no mechanical wear. When the vertical play test reveals movement at the door edge — and particularly when the door has started to sag or requires unusual force to latch — the hinge pin and its bushing need replacement.
Here’s what’s happening mechanically. The hinge pin is a precision steel shaft that runs through the hinge knuckle. Surrounding the pin inside the knuckle is a bushing — typically nylon on modern vehicles, bronze on older ones. The bushing is the sacrificial component: it’s designed to wear before the pin or the knuckle bore wear. As the bushing wears, the clearance between the pin and the knuckle increases. The door begins to sag because gravity is now pulling the door edge down through that clearance rather than the pin holding it precisely in position. The squeak is the pin rattling in the worn bore; the sag is the structural consequence.
Two hinge designs, two different repair approaches:
Hinges with removable pins (common on pre-2005 domestic trucks, older domestic cars):
The hinge pin is held in place by a cotter pin or snap ring at the top or bottom of the hinge barrel. Removing the retaining hardware allows the pin to be driven out with a punch. A hinge pin and bushing kit (application-specific, available at most auto parts stores for $15 to $40 per hinge pair) includes the new pin and replacement bushings. Installation reverses the removal sequence with the new components.
Hinges with non-removable or welded pins (most modern unibody vehicles):
Many modern vehicles use hinges where the pin is not designed to be removed — it’s either staked in place or the hinge is a single welded assembly. On these vehicles, the repair options are:
- Complete hinge replacement: The hinge is unbolted from the door and body, and a new hinge (with its pin already installed) is fitted. Requires door alignment after replacement.
- Door strap hinge repair kits: Some aftermarket suppliers offer repair kits for specific vehicles that install a serviceable pin-and-bushing through the existing hinge knuckle after drilling.
- Dealer or shop hinge replacement: On vehicles where hinge replacement requires door realignment, this is typically a shop job — the door must be aligned to close correctly and latch without binding after a hinge is replaced.
The safety consequence of deferring hinge replacement:
As hinge wear progresses and the door sags further, the latch — the mechanism that locks the door closed — stops aligning cleanly with the striker. The latch tries to engage the striker pin, but the misalignment means the latch contacts the striker housing rather than centering on the pin. The driver pushes harder to close the door. Over time, the repeated impact of forced closure damages the latch pawl. Eventually the latch doesn’t fully engage — the door appears closed (the latch makes contact with the striker) but isn’t in its secondary safety latch position. The door can come open during a collision or during a hard corner when lateral G-forces load the door against its latch.
A squeak diagnosed as worn hinges and confirmed by the vertical play test should be repaired, not indefinitely lubricated. The lubricant quiet period buys time to schedule the repair — it’s not a permanent substitute.
The Complete Fix in 15 Minutes — Quick Reference
For the reader who has diagnosed the source and just needs the summary:
For hinge squeak (Source 1 — no vertical play detected):
- Open door fully
- Apply aerosol white lithium grease into the hinge pin gap at upper and lower contact points — both hinges
- Apply grease to hinge leaf faces
- Cycle door 10–15 times
- Apply grease to check strap and pivot
- Wipe excess from painted surfaces
- Confirm squeak is gone
For check strap squeak (Source 2 — squeak only at specific positions in swing):
- Apply aerosol white lithium grease into check strap body gap
- Spray check pivot bushing at body mount
- Cycle door through full range and through detent positions 10 times
- Confirm squeak at detent positions is gone
For weatherstripping squeak (Source 3 — squeak only at close/open from closed):
- Apply silicone spray to microfiber cloth
- Wipe full weatherstripping perimeter
- Wipe dry with second cloth
- Cycle door 3–5 times
- Confirm chirp on closing/opening is gone
For worn hinge (Source 4 — vertical play detected):
White lithium grease application per Source 1 procedure for immediate noise reduction, followed by hinge pin and bushing replacement or complete hinge replacement within 30 to 60 days.
How Long Will the Fix Last — and What Makes It Come Back
White lithium grease on a door hinge, properly applied with full penetration of the pin gap and confirmed by grease emerging from the opposite side of the barrel, lasts 6 to 18 months under normal driving and washing conditions. The variance depends primarily on car washing frequency and method.
What shortens the lubrication interval:
- Automatic car washes with underbody spray — the high-pressure water jet directed at the rocker panel reaches the lower hinge and strips grease from the pin area more effectively than any road driving does; a vehicle that goes through automatic washes weekly may need re-lubrication every 3 to 4 months
- High-frequency door opening in a wet environment — parking and retrieving a vehicle in rain daily exposes the hinge to more water flushing than normal
- Very hot climates — heat accelerates the oxidation of grease and reduces its effective service life modestly
What extends the lubrication interval:
- Hand washing with normal garden hose pressure — doesn’t dislodge hinge grease meaningfully
- Covered parking — reduces temperature cycling and UV exposure on rubber components
- Re-applying at first sign of slight squeak return — catching the squeak at the first faint return and re-applying before it becomes loud again extends the total effective lubrication lifetime
Silicone spray on weatherstripping typically lasts 3 to 6 months under normal conditions — shorter in climates with significant temperature cycling because the rubber expansion and contraction works the silicone off the surface gradually. Re-applying silicone to weatherstripping at the start of winter (when cold temperatures stiffen the rubber) and at the start of summer (when humidity and heat cause different drag patterns) is the most practical maintenance interval.
The re-application trigger:
Don’t wait for the squeak to return at full volume before re-applying. The moment a faint squeak begins — noticeably quieter than the original problem but present — is the correct re-application timing. At that point, the existing grease layer has thinned to the point where it’s providing marginal lubrication. A fresh application at this stage requires less product, penetrates more easily, and silences the squeak immediately. Waiting until the squeak is fully established again allows the hinge to run dry-on-metal again, which accelerates wear and requires more grease to re-establish the lubricant film.
FAQs About How To Fix a Squeaky Car Door
Why does my car door squeak only in cold weather?
Rubber weatherstripping stiffens in cold temperatures — the rubber loses flexibility and drags against the door flange rather than compressing smoothly. A door that’s quiet in summer but squeaks in winter has a weatherstripping friction issue, not a hinge issue. Apply silicone spray to the weatherstripping in October before the cold season starts and you’ll likely eliminate the seasonal squeak entirely. If the squeak is from the hinges rather than the seal, cold temperature also thickens grease — a partially dry hinge that’s quiet in summer may squeak in winter because the residual thin grease film stiffens and loses its lubricating properties.
Can I use cooking spray or olive oil on door hinges?
Temporarily, yes — any oil reduces friction. Practically, no. Vegetable oils and cooking sprays oxidize rapidly when exposed to air and temperature — they turn into a sticky varnish on metal surfaces within weeks. The varnished deposit attracts dust and dirt, creating an abrasive paste in the hinge bore that actually accelerates wear. WD-40 is a better emergency option than cooking spray. White lithium grease is the correct solution.
My door squeak comes from inside the door, not the hinge area — what is it?
A squeak from inside the door panel (rather than from the hinge area or door perimeter) is typically the door card (interior panel) flexing against the door shell, a loose speaker grille, or internal door components (window regulator, door lock actuator) that have lost their mounting or cushioning. This is distinct from hinge squeak and requires removing the door panel to access the source. If you push firmly on different areas of the door interior panel and can locate a spot where the squeak changes or stops under pressure, that’s the flex point.
Does a squeaky door mean the hinge is broken?
Not usually. A squeak alone — without vertical play, door sagging, or difficulty latching — indicates dry lubrication rather than mechanical failure. The hinge is structurally intact; the lubricant film has depleted. Lubrication is the complete fix at this stage. A hinge that is mechanically failing (worn pin and bushing) produces a squeak combined with a knock or wobble, and the vertical play test will show detectable movement at the door edge.
How do I stop my car door from squeaking permanently?
There’s no permanent solution — hinges are mechanical components that require periodic lubrication maintenance. The realistic expectation is 6 to 18 months between lubrication jobs with white lithium grease, and 3 to 6 months between silicone applications on weatherstripping. Using the correct product (white lithium grease for metal, silicone for rubber) and applying it correctly (penetrating the hinge pin gap until grease emerges from the opposite side) provides the longest interval between treatments. Re-applying at the first sign of faint squeak return — before the problem becomes loud — extends the effective maintenance cycle.
The Expert Verdict
A squeaky car door is a 15-minute fix with the right product and a 15-minute fix that lasts three days with the wrong one. WD-40 is the wrong one for long-term lubrication — its petroleum distillate evaporates within days and leaves the hinge drier than before. White lithium grease is the right one for metal-to-metal hinge and check strap contact. Silicone spray is the right one for rubber weatherstripping.
Diagnose the source before you buy anything. A squeak at specific detent positions in the door swing is a check strap, not a hinge. A squeak at the moment of closing or opening from closed is weatherstripping, not a hinge. A continuous squeak through the full swing with no vertical play at the door edge is a dry hinge — white lithium grease and 15 minutes.
A continuous squeak through the full swing with detectable vertical play is a worn hinge — lubricate it today to quiet it, and replace the pin and bushing before the door starts sagging.