
This article was updated in July 13, 2026 with new products and information by Mark S. Taylor
P0446 is a check engine light code that most drivers either ignore because the car runs fine or misdiagnose because they read it was “probably the gas cap.” It’s not the gas cap. It’s an electrical circuit fault in the EVAP vent control system — and the difference between a $3 connector terminal fix and a $35 vent valve replacement versus a $1,200 PCM replacement comes down to one 15-minute electrical test that most DIY guides don’t mention.
Here’s the exact definition, the specific failure mechanism, how to test it yourself before ordering anything, and what the repair costs at each damage level and how do i fix code p0446.
Contents
- 1 What P0446 Actually Means — The Exact Definition
- 2 P0446 vs. P0442 and P0455 — Why This Is Not a Gas Cap Code and Not a Leak Code
- 3 How the EVAP System Actually Works — Why the Vent Valve Matters
- 4 What Causes P0446 — Five Specific Faults in Order of Frequency
- 5 How To Test for P0446 Yourself — The Pinpoint Test Sequence
- 6 The Bi-Directional Command Test — The Definitive Diagnosis
- 7 Where To Find the Vent Control Valve on Common Vehicles
- 8 Vehicle-Specific P0446 Causes and Known Issues
- 9 P0446 Repair — What Gets Replaced and What It Costs
- 9.1 Repair Scenario 1 — Wiring Connector Repair (Most Cost-Effective)
- 9.2 Repair Scenario 2 — Vent Control Valve Replacement
- 9.3 Repair Scenario 3 — Charcoal Canister With Integral Vent Valve
- 9.4 Repair Scenario 4 — PCM Replacement (Confirmed Driver Circuit Failure)
- 9.5 What To Ask the Shop Before Approving Any EVAP Repair
- 10 After the Repair — Getting the EVAP Monitor Ready for Inspection
- 11 Can You Drive With P0446?
- 12 FAQs About How Do I Fix Code p0446
- 13 The Expert Verdict
What P0446 Actually Means — The Exact Definition
The PCM (Powertrain Control Module) has detected an electrical fault in the vent control valve circuit. The vent control valve — a normally-open solenoid mounted on or near the charcoal canister — controls when the EVAP system is open to atmosphere and when it’s sealed for the PCM’s leak self-test. When the PCM commands the vent valve to close, it monitors the circuit to confirm the valve responded. When the circuit feedback doesn’t match the command — because the solenoid coil is open or shorted, the wiring is broken, or the PCM’s own driver circuit has failed — the PCM sets P0446.
The word “circuit” in the code definition is the critical qualifier. P0446 is not reporting that the EVAP system has a leak. It’s reporting that the electrical control circuit for the vent valve is malfunctioning. This distinction determines the correct diagnostic approach — electrical pinpoint testing, not smoke testing for leaks.
P0446 vs. P0442 and P0455 — Why This Is Not a Gas Cap Code and Not a Leak Code
Stop here if you’ve already replaced the gas cap or are planning to. The gas cap is the correct first step for P0457 (loose or missing fuel cap) — a completely separate code from a completely separate system location. P0446 has nothing to do with the fuel filler cap. The filler cap seals the fuel tank at the filler neck. P0446 is about the vent control circuit on the charcoal canister. These are different components at different locations in the vehicle with different failure modes.
The EVAP code family breaks down specifically by what the PCM detected:
| Code | Description | Correct Diagnostic Approach |
|---|---|---|
| P0440 | EVAP system general malfunction | Broad EVAP inspection — multiple possible causes |
| P0442 | EVAP system small leak detected | Smoke machine test — find the physical leak |
| P0446 | Vent control circuit malfunction | Electrical pinpoint test — check circuit, not leak |
| P0447 | Vent control circuit open | Electrical pinpoint test — specifically open circuit |
| P0448 | Vent control circuit shorted | Electrical pinpoint test — specifically short circuit |
| P0449 | Vent solenoid circuit (Toyota-specific) | Electrical pinpoint test — same as P0446 |
| P0455 | EVAP system large leak detected | Smoke machine test — find the physical leak |
| P0457 | EVAP system leak — fuel cap loose | Check and replace gas cap |
A smoke machine test is the correct tool for P0442 and P0455. It is not the correct diagnostic tool for P0446. A shop that quotes a smoke test for P0446 without first performing electrical circuit testing is either misidentifying the code type or running a diagnostic protocol they haven’t adjusted for the specific code.
How the EVAP System Actually Works — Why the Vent Valve Matters
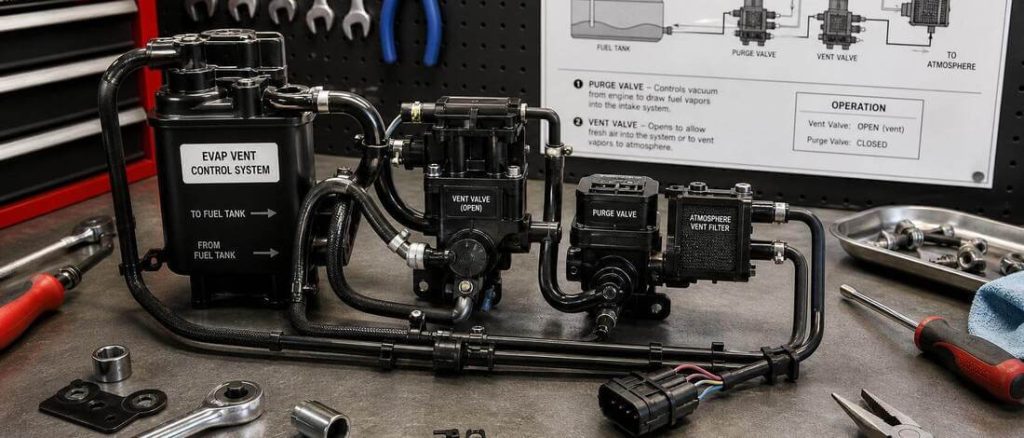
The EVAP (Evaporative Emission Control) system captures fuel vapor from the gas tank before it can escape to the atmosphere. Fuel vapors are stored in a charcoal canister — a housing filled with activated carbon granules that absorb and hold hydrocarbons. The stored vapors are periodically drawn from the canister into the engine and burned as part of the normal air-fuel mixture. This purge event is controlled by the purge solenoid valve near the intake manifold.
The vent control valve is the canister’s atmospheric connection. Under normal operation with the engine running, the vent valve is open — fresh air flows into the canister, through the activated carbon, and the purge solenoid draws the vapor-laden air into the engine for combustion. The vent valve allows this airflow.
The PCM also uses the EVAP system to test itself for leaks — a required OBD-II self-test per EPA EVAP system monitor requirements. The self-test sequence works like this:
- The PCM waits for specific drive conditions (coolant temperature, ambient temperature, fuel level, vehicle speed) to be met
- The PCM commands the vent valve closed — sealing the EVAP system from atmosphere
- The PCM commands the purge valve open — drawing intake manifold vacuum into the sealed EVAP system
- The Fuel Tank Pressure (FTP) sensor measures the resulting vacuum — typically −4 to −10 inches of water column
- The PCM monitors whether the vacuum holds steady (system sealed — no leak) or bleeds down (system has a leak)
If the vent valve circuit doesn’t respond to the close command at Step 2 — because the solenoid coil is open, the wiring is broken, or the PCM driver circuit has failed — the PCM detects the circuit discrepancy and sets P0446 before the self-test can even proceed. The test never runs because the prerequisite (vent valve commanded closed and confirmed) was never met.
What Causes P0446 — Five Specific Faults in Order of Frequency
Cause 1 — Failed Vent Control Valve Solenoid (Open Coil) — Most Common
The electromagnetic coil inside the solenoid valve breaks internally — an open circuit. The PCM commands the valve closed by grounding the circuit, but no current flows through the broken coil. The PCM detects no current draw on its driver circuit and sets P0446. The valve itself remains permanently open (normally-open design) — the EVAP system cannot seal. This is the most common failure mode on vehicles above 80,000 miles, particularly in applications where the vent valve is mounted to the underside of the vehicle near the fuel tank and exposed to vibration, heat cycling, and moisture.
Confirmed by: resistance measurement at the solenoid terminals reads OL (open/infinite resistance) on a DMM. Normal spec: 20–40 ohms depending on application.
Cause 2 — Corroded or Broken Wiring at the Vent Valve Connector — Equally Common on High-Mileage Vehicles
The wiring harness at the vent valve connector corrodes from road salt, vibration-cracks the insulation, or breaks at the terminal crimp. A broken supply wire means no voltage reaches the solenoid — the circuit can’t operate. A broken ground control wire means the PCM can’t complete the circuit — the current feedback that confirms command execution is absent. The PCM sees the circuit as open and sets P0446.
This cause is at least as common as the solenoid failure on Rust Belt vehicles — more common on some Toyota underbody applications where the connector sits directly in the path of road spray. Confirmed by: visual inspection of the connector for corrosion, terminal measurement for supply voltage at the connector with key on, resistance measurement from the PCM ground control pin to chassis ground.
Cause 3 — Blocked or Kinked Vent Hose
The atmospheric vent hose from the vent valve to outside air is blocked by a mud-dauber wasp nest, kinked from a prior repair, or collapsed from age-related rubber degradation. This doesn’t directly cause the electrical circuit fault that P0446 reports — but it does prevent the vent valve from opening the system to atmosphere even when electrically commanded open. The PCM may set P0446 secondarily when its EVAP self-test logic detects that the system can’t vent correctly. More commonly, a blocked vent hose produces P0440 or P0446 together.
Confirmed by: visual inspection of the vent hose for kinks, blockages, or collapsed sections — blow through the hose by mouth to confirm unrestricted airflow.
Cause 4 — Stuck-Closed Vent Valve (Mechanical Failure With Intact Electrical Circuit)
The solenoid is electrically functional — resistance tests normal, the PCM can command it — but the valve’s internal plunger is mechanically seized in the closed position from corrosion, debris, or a failed spring. The PCM believes the valve is operating normally (the circuit feedback is correct) but the EVAP system can’t vent to atmosphere. This causes fuel tank vacuum buildup — symptoms include difficulty removing the fuel cap (vacuum holds it sealed) and, on some applications, slight inward deformation of the fuel tank. P0446 may or may not set depending on how the PCM’s feedback circuit interprets a mechanically stuck valve.
Confirmed by: bi-directional scan tool commands the valve open — air should flow through the atmospheric vent port of the valve; no airflow with open command confirms mechanical seizure.
Cause 5 — PCM Driver Circuit Failure (Rare)
The internal transistor (driver) in the PCM that grounds the vent control circuit fails. The PCM sends the close command but its own output circuit can’t complete it. The circuit never grounds. P0446 sets. This is the most expensive diagnosis — requires confirming that the vent valve tests good (correct resistance), the wiring tests good (supply voltage present, no broken ground wire), AND the PCM’s ground command never appears on the ground control wire when commanded via scan tool. All other causes must be eliminated before condemning the PCM.
Confirmed by: vent valve resistance is 20–40 ohms (normal), supply voltage is present at connector, bi-directional command issued — ground control wire remains at battery voltage and never drops to 0V.
How To Test for P0446 Yourself — The Pinpoint Test Sequence
This sequence moves from the fastest/cheapest test to the most involved. Stop when a test confirms the fault — don’t continue to the next test if the current one identifies the problem.
Before any testing: Have the code confirmed with a scanner. Note any additional codes stored — P0442 or P0455 alongside P0446 indicates there may also be a leak, not just a circuit fault. Address the circuit fault first (P0446), then retest for leaks.
Test 1 — Visual Inspection (5 Minutes, No Tools)
Locate the charcoal canister and vent control valve on your vehicle (see the location guide below). Inspect:
- The vent valve connector: look for visible corrosion on the terminal contacts (green or white buildup), cracked connector housing, pushed-back terminals, or a connector that isn’t fully seated
- The vent hose: trace the hose from the vent valve to its atmospheric opening; look for kinks, collapsed sections, or any obstruction at the open end
- The vent valve body: look for physical damage, cracking, or signs that the valve has been impacted by road debris
A visually corroded connector on a high-mileage vehicle with an underbody canister is worth cleaning and retesting before spending $35 on a new valve. Use electrical contact cleaner on the terminals, allow to dry, reconnect, clear the code, and complete a drive cycle. If the code doesn’t return, a corroded connector was the fault.
Test 2 — Solenoid Resistance Test (10 Minutes, DMM Required)
Disconnect the vent valve electrical connector. Set a digital multimeter to resistance (ohms). Touch the probes to the two terminals inside the vent valve connector — measuring the solenoid’s internal resistance.
- 20–40 ohms (application-specific): Solenoid coil is intact. The valve is not the electrical failure point. Proceed to Test 3.
- 0 ohms (or near zero): Solenoid coil is shorted internally. Replace the vent valve.
- OL (infinite resistance / open circuit): Solenoid coil is broken. Replace the vent valve.
Verify the correct resistance specification for your specific vehicle in the service manual — Toyota vent valves typically read 33–36 ohms; GM applications typically 25–35 ohms. A reading within the correct range rules out the solenoid as the cause.
Test 3 — Supply Voltage Test (10 Minutes, DMM Required)
Reconnect the vent valve connector. Set the DMM to DC voltage. Using back-probe pins or a wire piercing probe, identify the supply wire (pin 1 on most applications — consult the wiring diagram for your vehicle). With the key in the ON position (engine off), measure voltage on the supply wire.
- 12.5–14.2V with engine running (or 12.0–12.5V key-on, engine-off): Supply circuit is intact. The PCM is receiving power to operate the vent valve circuit. Proceed to Test 4.
- 0V: No supply voltage. Check the fuse for the EVAP system circuit (consult the fuse box diagram — typically labeled “EVAP,” “Purge,” or “Engine Control”). If the fuse is good, trace the supply wire from the connector back toward the fuse box for damage.
Test 4 — The Bi-Directional Command Test (15 Minutes, Scan Tool With Bi-Directional Capability Required)
This is the definitive test. It answers whether the PCM is issuing the command correctly, whether the wiring is transmitting it, and whether the valve is responding — all in one procedure.
Connect a bi-directional scan tool to the OBD-II port. Navigate to the active test or bi-directional control menu — the specific menu path varies by tool and vehicle. Find the EVAP Vent Control Valve (or Canister Vent Valve, or VSV for Vapor Switching Valve on Toyota applications). Per SAE J1979 Mode $08 specifications, OBD-II standardized the bi-directional EVAP component test in this mode.
With the vent valve connector plugged in and the scan tool commanding the valve closed:
Back-probe the ground control wire (pin 2 on most applications) and measure DC voltage with the DMM.
- Voltage drops from ~12V to 0V when commanded closed: The PCM is grounding the circuit correctly. The wiring is intact from the PCM to the valve. If the solenoid resistance was correct (Test 2) and this test passes, physically verify the valve is sealing by listening for click at the valve body when the command is issued — the solenoid should produce an audible click. No click with a correct resistance reading indicates a mechanically stuck valve.
- Voltage remains at ~12V when commanded closed: The PCM is not completing the ground circuit. Either the PCM driver circuit has failed (Cause 5) or there’s an open in the ground control wire between the PCM and the connector. Probe the ground control wire at the PCM connector — if voltage drops there but not at the vent valve connector, the wire is broken between the PCM and the valve. If it doesn’t drop at the PCM connector either, the PCM driver circuit has failed.
Scan tools that provide bi-directional EVAP vent valve control at DIY-accessible price points: BlueDriver Bluetooth Pro ($120, phone app), Autel ML619 ($150), Innova 5160RS ($180), Launch CRP129E ($200). A basic code reader that only reads and clears codes cannot perform this test.
The Bi-Directional Command Test — The Definitive Diagnosis
The command test works because it independently tests each link in the control chain:
Link 1 — PCM output: Does the PCM issue the command? Confirmed if the ground control wire voltage drops at the PCM’s output pin.
Link 2 — Wiring integrity: Does the command reach the valve? Confirmed if the ground control wire voltage drops at the valve connector.
Link 3 — Solenoid response: Does the valve solenoid click and operate? Confirmed by the audible click at the valve body and, if available, smoke machine verification that the valve seals when commanded closed.
Most P0446 diagnoses require only Links 1 and 2 — either the PCM is commanding the circuit or it isn’t, and either the command is reaching the valve or it isn’t. Link 3 matters in the specific scenario where the solenoid resistance is normal and the PCM command is reaching the valve but the valve still isn’t sealing — mechanical seizure.
A driver who completes Tests 1 through 4 has done what a shop’s EVAP diagnostic covers and has specifically identified which component requires replacement. The $100 to $200 shop diagnostic fee buys this test sequence from a technician — performing it yourself takes the same equipment and the same 30 to 45 minutes, and produces the same answer.
Where To Find the Vent Control Valve on Common Vehicles
The vent control valve location varies significantly by vehicle platform. Finding it is the first physical step after completing the electrical tests.
Toyota Trucks and SUVs (Tundra, 4Runner, Tacoma, Sequoia — 2000–2020):
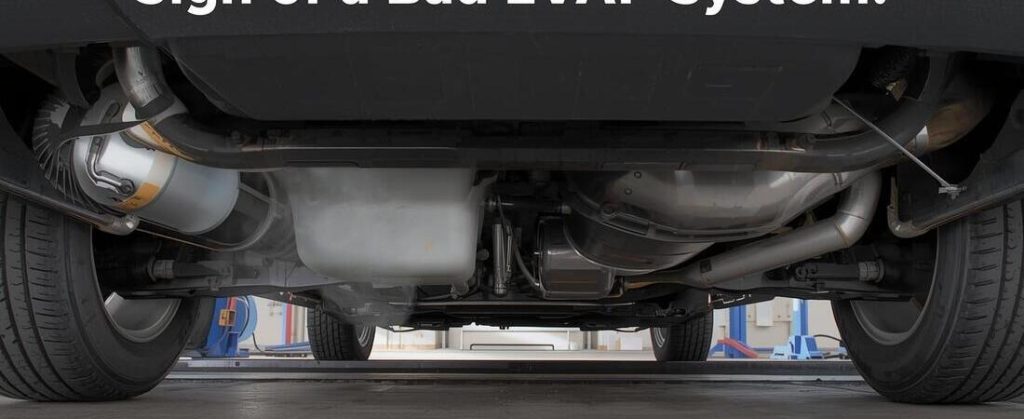
The charcoal canister and vent valve assembly is mounted to the frame rail or underbody near the fuel tank — typically accessible from under the vehicle on the driver’s rear side. Lift the vehicle or use a floor jack and stands. The vent valve connector is the small 2-wire connector on the canister assembly. This underbody location is where Toyota TSB EG014-05 identified connector corrosion as the primary P0449/P0446 failure cause on these models.
Toyota Camry and Corolla (2002–2020):
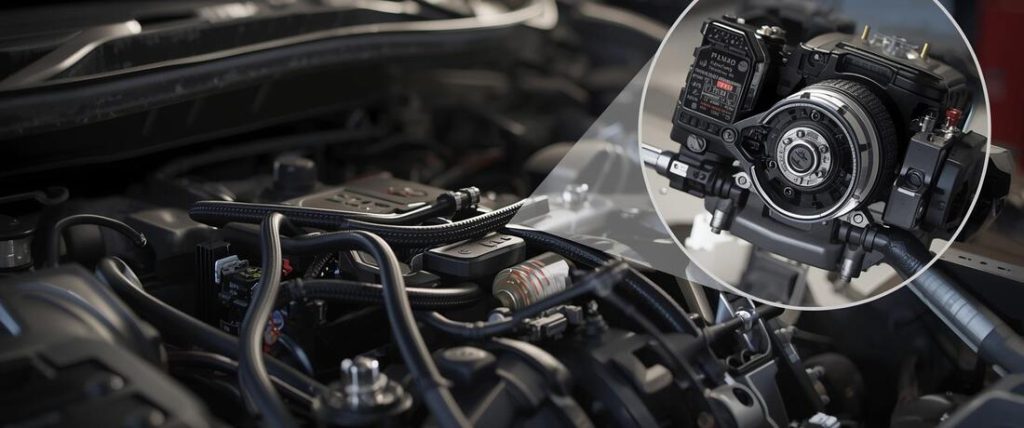
The charcoal canister is typically in the engine bay, near the intake manifold or air filter housing. The vent valve connector is more accessible than on the truck applications.
GM Trucks and SUVs (Silverado, Sierra, Tahoe, Suburban — 2007–2019):
The canister is typically mounted in the frame rail area near the rear of the vehicle or in the driver’s side front wheel well. On 5.3L applications, GM TSB PIP4882 identified vent hose cracking and connection failures as common P0446 causes — inspect the hose connections at the canister before testing the solenoid.
Honda Civic, Accord, CRV (2006–2020):
The canister is typically mounted under the vehicle near the fuel tank on the passenger side. The vent valve may be a separate component from the canister on these applications.
Nissan and Infiniti (Altima, Maxima, Frontier, Pathfinder):
The EVAP canister is typically under the vehicle near the fuel tank. Nissan uses a “canister vent control valve” designation — same component, different name.
Generic identification: Follow the small-diameter hose from the fuel tank or fuel filler area toward the engine. The charcoal canister is the plastic housing this hose connects to. The vent valve is the solenoid mounted on the canister with a 2-wire electrical connector and an atmospheric vent opening (open to air or connected to a hose pointing downward or toward the wheel well for water intrusion prevention).
Vehicle-Specific P0446 Causes and Known Issues
Several platforms have documented, recurring P0446 causes that allow you to shortcut the full diagnostic sequence and go straight to the confirmed failure point.
Toyota Trucks and SUVs (Tundra, 4Runner, Tacoma, Sequoia 2003–2007):
Toyota issued Technical Service Bulletin EG014-05 specifically addressing P0449 (Toyota’s internal designation for the vent control circuit code) on these models. The root cause: the vent valve connector is mounted under the vehicle in the frame rail area and is directly exposed to road spray. The terminals corrode from road salt and moisture, creating intermittent or permanent open circuits in the vent valve control circuit. Toyota’s repair procedure under this TSB is a wiring harness repair kit — not vent valve replacement. Before replacing the vent valve on any of these models, clean the connector terminals with electrical contact cleaner, measure terminal resistance to confirm good contact, and clear the code. If the code doesn’t return within two drive cycles, the connector was the fault. If it returns, proceed to the solenoid resistance test.
GM Trucks (Silverado, Sierra, Colorado 2007–2014 with 4.8L, 5.3L, 6.0L):
GM TSB PIP4882 addresses P0446 on these platforms, identifying vent hose cracking at the canister connection as the primary cause. The vent hose develops a small crack from vibration and age, allowing uncontrolled venting that prevents the EVAP system from sealing during the self-test. The PCM interprets this as a vent control circuit issue when it’s actually a physical hose failure. The fix is a hose clamp tightening or hose section replacement — $5 to $15 in parts. Before ordering a vent valve on these platforms, physically inspect the hose connections at the canister for cracking or looseness. Squeeze the hose — if it crackles or collapses easily, the rubber has degraded and the hose section needs replacement.
Nissan Frontier, Pathfinder, Xterra (2005–2015):
These models are documented for vent valve solenoid failure from heat exposure — the canister is mounted closer to the engine than on most applications. The solenoid coil ages rapidly from the elevated underhood temperatures. Solenoid resistance measurement is the correct first test — these applications commonly show open-coil failure (OL resistance reading) on the solenoid test. Replacement vent valve parts availability is good and cost is low ($25–$45 for an OEM-quality replacement).
Honda Civic and Accord (2006–2011):
Honda uses a “two-way valve” design in some EVAP system layouts. The vent control function is integrated differently than on most domestic applications — the diagnostic sequence for P0446 on these models should be verified against the Honda service manual rather than a generic procedure, as the control circuit differs from the standard two-wire solenoid layout.

P0446 Repair — What Gets Replaced and What It Costs
The repair cost depends entirely on which component the diagnostic sequence identified as the fault. Do not replace components that weren’t confirmed faulty by testing — EVAP system diagnosis is the category most associated with unnecessary part replacement, and shops that replace the purge valve, vent valve, FTP sensor, and canister sequentially without testing are billing the customer for each failed guess.
Repair Scenario 1 — Wiring Connector Repair (Most Cost-Effective)
| Component | Parts Cost | Labor Hours | Labor Cost | Total Estimate |
|---|---|---|---|---|
| Connector terminal kit + wire | $3–$15 | 0.5–1.0 hrs | $60–$210 | $63–$225 |
Corroded or broken terminal contacts at the vent valve connector are repaired by cleaning existing terminals or installing new crimp terminals from a connector repair kit. This repair is within DIY reach — a $10 terminal kit from the parts store and basic wire crimping tools are all that’s needed if the break is at the connector itself.
Repair Scenario 2 — Vent Control Valve Replacement
| Component | Parts Cost | Labor Hours | Labor Cost | Total Estimate |
|---|---|---|---|---|
| Vent control valve (OEM equivalent) | $25–$85 | 0.5–1.0 hrs | $60–$210 | $85–$295 |
On most applications the vent valve unclips or unbolts from the canister with one or two fasteners, and the connector unplugs. Replacement is a 20 to 30 minute job. The labor time climbs to 1 hour on applications where the canister is in a cramped underbody location requiring vehicle lifting and extended reach.
OEM-equivalent aftermarket vent valves from Dorman, Standard Motor Products, or Bosch are appropriate replacements. Avoid unbranded marketplace valves — EVAP vent valves must meet specific resistance and flow specifications and off-brand units have documented failure rates above 20 percent within 12 months on multiple forum reports.
Repair Scenario 3 — Charcoal Canister With Integral Vent Valve
| Component | Parts Cost | Labor Hours | Labor Cost | Total Estimate |
|---|---|---|---|---|
| Charcoal canister assembly (with vent valve) | $80–$250 | 0.5–1.5 hrs | $60–$315 | $140–$565 |
On some applications — particularly Honda and some Toyota layouts — the vent valve is integral to the canister and cannot be replaced separately. Replacement requires the entire canister assembly. Confirm whether your application has a serviceable separate vent valve or a canister-integral valve before ordering parts.
Repair Scenario 4 — PCM Replacement (Confirmed Driver Circuit Failure)
| Component | Parts Cost | Labor/Programming | Total Estimate |
|---|---|---|---|
| PCM (remanufactured) | $300–$800 | $200–$500 | $500–$1,300 |
| PCM (OEM new) | $600–$1,400 | $200–$500 | $800–$1,900 |
PCM replacement for P0446 is rare but real. Confirm the diagnosis with absolute certainty before approving this repair — verify that the vent valve solenoid resistance is within specification, supply voltage is present at the connector, and the ground control wire never drops to 0V even when commanded by the scan tool. Any one of these tests pointing to a component other than the PCM means the PCM is not the fault. PCM replacement requires programming at a dealer or an independent shop with the OEM programming subscription — a $200 to $500 add-on beyond the PCM parts cost.
What To Ask the Shop Before Approving Any EVAP Repair
Three questions that prevent unnecessary parts replacement:
1. “What specific test confirmed this component is faulty?”
The answer should reference a specific measurement: “The solenoid tested open circuit at the connector,” or “The PCM is issuing the command but the voltage isn’t dropping at the valve, pointing to the wiring.” Any answer that amounts to “it’s the most common cause” or “we checked everything” without a specific measurement is not a diagnostic — it’s a guess.
2. “Did you test the vent valve solenoid resistance directly?”
This is the fastest and most definitive test for the valve itself. A shop that didn’t perform this test before recommending valve replacement may not have actually tested the valve.
3. “Is the EVAP diagnostic fee included in the repair quote or separate?”
A shop that charges a diagnostic fee and then a repair quote is doing the correct job — diagnosis first, then repair. A shop that only quotes the repair without a separate diagnostic step either didn’t diagnose or is including an unperformed diagnosis in the repair price.
After the Repair — Getting the EVAP Monitor Ready for Inspection
This is the step most repair guides skip — and it’s the one that causes a second trip to the emissions testing station.
When you clear a P0446 code (or any code) with a scan tool, the PCM resets all OBD-II readiness monitors to “not ready.” The EVAP monitor — the specific monitor that runs the vent valve circuit test that originally set P0446 — must run and complete before an emissions inspection will pass. An inspection taken with the EVAP monitor showing “not ready” will fail on monitor readiness, even if the code doesn’t return and the underlying problem is fixed.
The EVAP monitor drive cycle requirements (general — verify for your specific vehicle):
The EVAP monitor requires conditions that most monitors don’t need:
- Cold start: coolant temperature below 86°F at startup — the monitor typically won’t run unless the engine starts cold
- Fuel level: between 25 and 75 percent full — the monitor uses the fuel level as part of its reference; a nearly empty or nearly full tank prevents the monitor from running
- Sustained driving: at least 10 minutes of driving including both idle and highway speeds above 55 mph
- Ambient temperature: typically above 40°F — the monitor is suspended in extreme cold
Most vehicles need 1 to 3 days of normal mixed driving — a cold start, some city driving, some highway driving — before the EVAP monitor completes. Check the monitor status using the scan tool (Mode $01 or the readiness monitor screen) before going to an emissions inspection. All monitors should show “ready” or “complete” before the inspection. If the EVAP monitor is not ready after 3 to 5 complete drive cycles, the repair may be incomplete and P0446 may be on the verge of resetting.
Fuel level management before the inspection:
If an inspection is imminent, fill the tank to approximately half-full before running the drive cycle. This keeps the fuel level within the EVAP monitor’s acceptable window for the full duration of the drive cycle. Running the drive cycle on a nearly empty or nearly full tank prevents the EVAP monitor from completing even on a correctly repaired system.
Can You Drive With P0446?
Yes — P0446 does not affect drivability, fuel economy, or engine safety. The EVAP system is an emissions system, not a performance system. A vehicle with P0446 stored starts normally, runs normally, and drives normally in every operating condition.
Three situations where delaying the repair has consequences:
Emissions inspection: P0446 sets the EVAP monitor to “not ready” and keeps the check engine light on. Most US states fail vehicles that have an active check engine light or incomplete OBD-II monitors. If an inspection is within 30 days, address P0446 promptly — you need repair time plus drive cycle time before the test.
Additional EVAP codes: A vent valve that’s stuck open allows uncontrolled venting — the EVAP system can’t seal for the self-test, and the PCM may set additional codes (P0440, P0442) as secondary failures. Repairing P0446 before secondary codes accumulate keeps the repair scope limited to one component.
Fuel vapor smell: A mechanical vent valve failure that allows the canister to vent uncontrolled can allow raw fuel vapors to escape to atmosphere rather than being captured and burned. If you notice a fuel smell near the vehicle when parked — particularly in enclosed spaces — address the EVAP system promptly regardless of inspection deadlines.
FAQs About How Do I Fix Code p0446
Will replacing the gas cap fix P0446?
No. P0446 is about the vent control circuit on the charcoal canister — not the fuel filler cap. The gas cap is the correct fix for P0457 (loose or missing gas cap). P0446 and P0457 are separate codes with separate causes. If your scanner showed P0446, the gas cap is not the component to replace.
How do I know if it’s the vent valve or the wiring?
Test 2 in the diagnostic sequence above differentiates them. Disconnect the vent valve connector and measure resistance across the solenoid terminals. Normal resistance (20–40 ohms, application-specific) means the valve is electrically intact — the fault is in the wiring or the PCM, not the valve. Open or shorted resistance means the valve has failed. Test takes 5 minutes with a $20 DMM.
Can I replace the vent valve myself?
On most applications, yes. The vent valve is a straightforward unplug-unclip-replace-replug repair that requires no special tools beyond basic hand tools and a DMM for post-replacement verification. The complication on some applications is location — Toyota truck and SUV canisters require lifting the vehicle and working under the frame rail. If the repair requires lifting the vehicle, use proper jack stands rated for your vehicle’s weight.
Why did P0446 come back after I replaced the vent valve?
Three possible reasons. First: the vent valve was not the actual fault — the wiring or PCM is the issue. Running the pinpoint test sequence before the replacement would have identified this. Second: the replacement vent valve is faulty — test the resistance of the new valve before installation and verify it reads within spec. Third: the connector was corroded and contaminating the new valve’s circuit — clean the connector terminals before installing the new valve.
How long does it take the EVAP monitor to complete after repair?
One to three days of normal mixed driving in most cases — cold starts, city driving, and at least one highway drive above 55 mph per drive cycle, with fuel level between 25 and 75 percent. Check the monitor status with a scan tool before presenting for an emissions inspection.
The Expert Verdict
P0446 is one of the most misdiagnosed codes in the OBD-II system — not because it’s complex, but because most guides treat it as a leak code requiring a smoke test or a gas cap replacement. It’s neither. It’s an electrical circuit code requiring a $20 DMM and a scan tool with bi-directional capability to diagnose in 30 minutes.
Test the solenoid resistance first. If it’s open or shorted, replace the valve — $35 and 30 minutes. If resistance is correct, check the connector for corrosion and the supply voltage at the connector. If those check out, run the bi-directional command test. That sequence eliminates every possible failure point in a logical order, from cheapest fix to most expensive — and it’s the same sequence a shop technician follows when they charge $150 for the diagnostic.
Clear the code after the repair. Drive 1 to 3 days to completion of the EVAP monitor. Verify monitor readiness before the emissions inspection. That’s the complete P0446 resolution.