
This article was updated in August 19, 2026 with new products and information by Mark S. Taylor
You just finished bolting on a fresh set of brake pads and rotors. The pedal feels firm in the driveway, but two months down the road, you notice a burning smell from the front wheel or the car pulling slightly to the left. You pull the wheel off, only to find the inboard pad worn down to the steel backing plate while the outboard pad looks brand new.
I have seen this exact scenario roll into my shop hundreds of times. In almost every case, the driver skipped or botched one simple 15-minute maintenance step: cleaning and greasing the brake caliper slide pins.
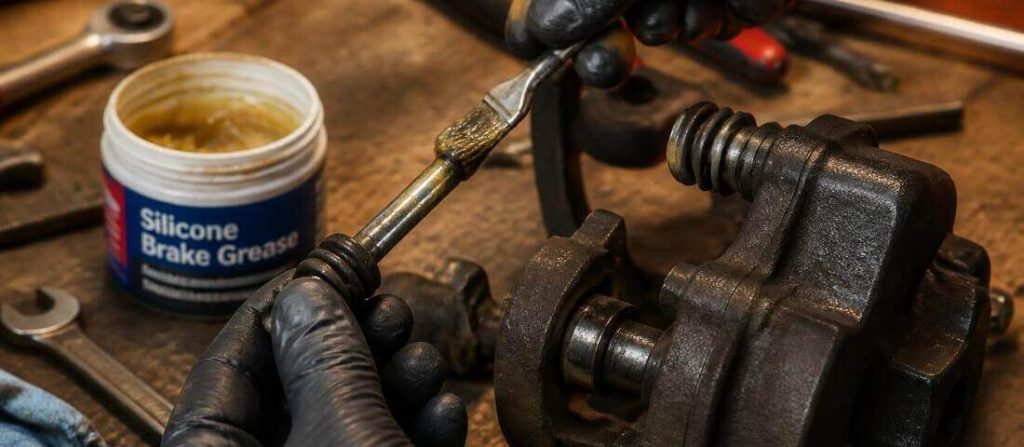
Quick Answer (How to Grease Caliper Pins):
To grease brake caliper slide pins, remove the caliper slide bolts, pull the pins from the mounting bracket, and clean all old lubricant and road grime with brake cleaner and a wire bore brush. Apply a thin, even coat of 100% pure silicone brake paste or high-temperature synthetic ceramic lubricant to the smooth metal shank of the pin. Reinstall the pins into the rubber boots, twist to distribute the grease, and gently burp trapped air past the boot seal to prevent hydraulic lock. Never use petroleum-based chassis grease or anti-seize.
| Service Factor | Specification / Standard |
| Recommended Lubricant | 100% Pure Silicone Brake Paste (e.g., 3M 08946, AGS Sil-Glyde) |
| Prohibited Lubricants | Petroleum chassis grease, white lithium grease, copper/aluminum anti-seize |
| DIY Material Cost | $15–$30 (Silicone paste, aerosol brake cleaner, brush) |
| Service Interval | Every brake pad replacement or every 20,000–30,000 miles |
| Time Required | 15–25 minutes per axle |
| Critical Safety Risk | Swollen rubber boots, seized pins, severe tapered pad wear, overheated rotors |
Contents
- 1 Can You Drive With Dry or Sticking Caliper Slide Pins?
- 2 What Do Brake Caliper Slide Pins Actually Do?
- 3 The Big Lubricant Mistake: Silicone vs. Petroleum vs. Anti-Seize
- 4 Symptoms of Dry, Sticky, or Seized Caliper Pins
- 5 Tools and Materials Required for the Job
- 6 Step-by-Step Guide: How to Grease Brake Caliper Pins
- 6.1 Step 1: Safely Raise and Support the Vehicle
- 6.2 Step 2: Unbolt and Suspend the Brake Caliper
- 6.3 Step 3: Extract and Inspect the Slide Pins
- 6.4 Step 4: Clean the Pins and Flush the Bracket Bores
- 6.5 Step 5: Apply a Thin, Controlled Coat of Silicone Paste
- 6.6 Step 6: Install the Rubber Boots and Insert the Pins
- 6.7 Step 7: Remount the Caliper and Torque to Factory Spec
- 7 How to Free a Seized or Stubborn Caliper Slide Pin
- 8 Real-World Repair Cost Breakdown (DIY vs. Shop)
- 9 DIY vs. Professional Shop Decision Guide
- 10 Prevention & Long-Term Maintenance Rules
- 11 FAQs About How to Grease Brake Caliper Pins
- 11.1 Which caliper slide pin has the rubber bushing on it?
- 11.2 Can I use WD-40 or penetrating oil to lubricate caliper slide pins?
- 11.3 Why does my caliper slide pin pop back out when I push it in?
- 11.4 What is the difference between caliper slide pin grease and brake pad grease?
- 11.5 How much grease should I put on brake caliper slide pins?
- 12 Mark’s Final Verdict
Can You Drive With Dry or Sticking Caliper Slide Pins?
⚠️ Mechanic Safety Assessment: Drive to Shop / Fix Promptly
If your caliper slide pins are dry, sticking, or lightly binding, your vehicle remains steerable, but your braking efficiency is compromised. You should not take the car on long road trips or mountain driving. Driving with sticking slide pins causes continuous friction drag, which rapidly overheats the brake rotor, boils brake fluid in the caliper bore, and can lead to sudden brake fade or total pad friction material separation within 500 to 1,500 miles.
When a slide pin seizes completely, the floating caliper loses its ability to self-center over the rotor. That means one pad remains pressed hard against the spinning rotor even after you lift your foot off the brake pedal.
The resulting friction generates intense heat. On a 15-minute highway run, a dragging brake corner can reach temperatures exceeding $600^\circ\text{F}$ ($315^\circ\text{C}$). That level of heat will glaze your brake pads, warp the steel rotor friction ring, and bake the rubber piston dust seal until it cracks and leaks hydraulic fluid.
If you smell burning friction material or feel the steering wheel tug toward the ditch when coasting, stop driving at highway speeds and inspect the slide pins immediately.

What Do Brake Caliper Slide Pins Actually Do?
Most modern passenger cars, SUVs, and light trucks use floating disc brake calipers (also known as sliding calipers) on at least one axle. Unlike fixed calipers that feature hydraulic pistons on both sides of the rotor, a floating caliper uses a piston on the inboard side only.
Here is how the mechanical clamp works when everything is functioning correctly:
- Hydraulic Application: You press the brake pedal, forcing hydraulic fluid into the caliper cylinder. The internal piston extends, pushing the inner brake pad directly against the inner face of the brake rotor.
- Caliper Slide Reaction: As the inner pad contacts the rotor, hydraulic pressure continues building inside the caliper body. Because the caliper is mounted on smooth slide pins inside the stationary mounting bracket, the entire caliper housing slides inward.
- Outer Pad Clamping: This sliding motion pulls the outer caliper claws inward, pressing the outer brake pad firmly against the outside face of the rotor. You get equal, balanced clamping pressure on both sides of the spinning rotor.
- Release and Clearance: When you release the pedal, hydraulic pressure drops. The square-cut rubber seal around the caliper piston flexes back, retracting the piston roughly $0.005$ inches ($0.12\text{ mm}$). The caliper slides outward along the guide pins to relieve pressure on the outer pad.
If those guide pins are dry, rusted, or jammed with gummed-up grease, that release motion cannot happen. The caliper locks in place, leaving the pads trapped in a constant semi-engaged state against the rotor.
The Big Lubricant Mistake: Silicone vs. Petroleum vs. Anti-Seize
The single biggest error DIYers and even some lube-shop technicians make is grabbing whatever tub of grease is sitting on the workbench. Slide pins live inside rubber dust boots made of EPDM (ethylene propylene diene monomer) synthetic rubber.
Using the wrong chemical compound on EPDM rubber will destroy your brake job faster than salt on raw steel.
| LUBRICANT COMPATIBILITY GUIDE | |
| 100% Pure Silicone Paste (e.g., 3M 08946, Sil-Glyde) | ✅ SAFE — Will not swell EPDM rubber boots |
| Ceramic Synthetic Lube (e.g., Permatex Ceramic) | ✅ SAFE — High heat rating (Check EPDM label) |
| Petroleum Chassis / Bearing Grease | ❌ DESTROYS BOOTS — Swells rubber by up to 30% |
| Copper / Aluminum Anti-Seize | ❌ BINDS PINS — Dries into abrasive solid powder |
Why Petroleum Grease Destroys Caliper Pins
Standard wheel bearing grease, multi-purpose chassis grease, and white lithium aerosol sprays contain petroleum distillates. When petroleum contacts EPDM rubber, the rubber absorbs the hydrocarbon chains.
Within a few weeks, the rubber dust boots and the small rubber damper bushings found on the pins will swell by 20% to 30%. The swollen rubber pinches tightly around the guide pin, locking it inside the bracket channel like a cork jammed into a bottle.
Why Anti-Seize Is Not a Slide Pin Lubricant
Anti-seize is designed to prevent static threaded fasteners from galling under high heat. It is not an active sliding lubricant.
The liquid carrier in anti-seize evaporates rapidly under brake heat, leaving behind a dry, crusty residue of suspended copper or aluminum flakes. That gritty powder acts like liquid sandpaper inside the slide pin bore, scoring the metal and binding the pin within a few months.
💡 Shop Tip: Always buy a dedicated 4 oz or 8 oz tube of 100% pure silicone brake paste (such as 3M 08946 or AGS Sil-Glyde). A single $15 tube will service 15 to 20 complete brake jobs without ever damaging a rubber boot or damper sleeve.
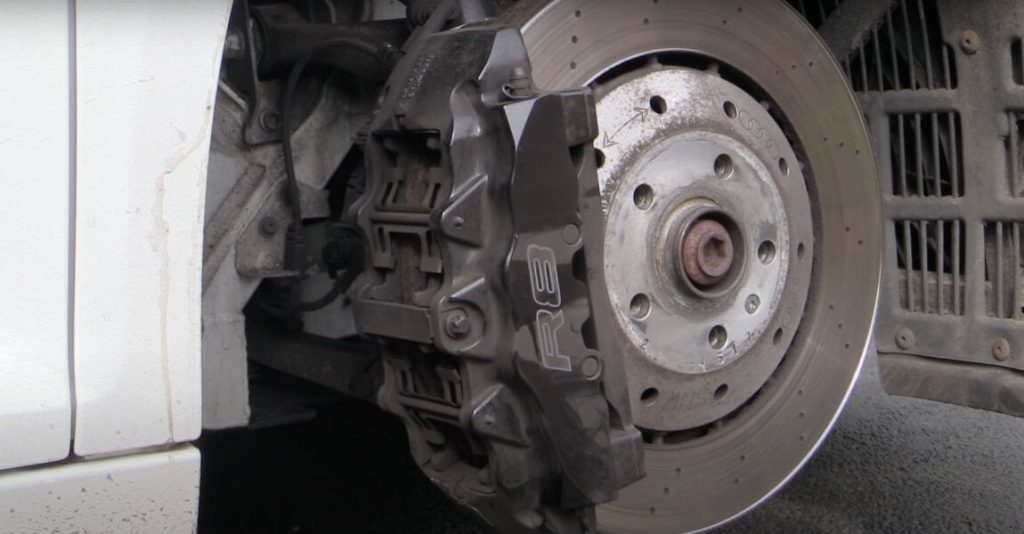
Symptoms of Dry, Sticky, or Seized Caliper Pins
How do you know your slide pins are failing before you disassemble the brakes? Look for these distinct mechanical warning signs during your daily drive:
- Severe Inboard vs. Outboard Pad Wear: Pull your wheel off and inspect the thickness of both brake pads through the caliper inspection window. If one pad has 8 mm of friction material while the opposite pad is worn down to 2 mm, the slide pins are frozen.
- Tapered / Diagonal Pad Wear: If a brake pad is thicker at the top than at the bottom, or worn down on one leading edge, the caliper is cocking at an angle because one slide pin is moving while the other is stuck.
- Vehicle Pulling Under Coasting or Braking: When a slide pin locks, that wheel suffers from continuous brake drag. The vehicle will pull toward the sticking side when coasting, or dart unexpectedly when you tap the brake pedal.
- Excessive Heat and Brake Dust on One Wheel: After a normal 20-minute drive, walk around your vehicle and hold your hand 2 inches away from each wheel hub (do not touch the metal directly). If one wheel radiates intense heat or is coated in heavy black brake dust while the others are clean and cool, that caliper is dragging on its pins.
- Spongy Brake Pedal Feel: When a caliper is forced to flex over seized pins to clamp down on the rotor, that physical flexing absorbs master cylinder hydraulic pressure. This gives the driver a soft, spongy pedal feel that bleeding the brake lines will not fix.
Tools and Materials Required for the Job
Servicing your brake caliper slide pins does not require high-end diagnostic computers or expensive specialty equipment. You can complete the entire job in your driveway with basic hand tools.
REQUIRED TOOLS & SUPPLIES
├── Safety & Lifting
│ ├── Hydraulic floor jack & 2 heavy-duty jack stands
│ ├── Wheel chocks & impact-rated safety glasses
│ └── Nitrile mechanic gloves
├── Hand Tools & Wrenches
│ ├── 3/8-inch drive ratchet with socket set (usually 12mm, 14mm, or 17mm)
│ ├── Open-end box wrenches (to hold the slide pin hex flats)
│ ├── Caliper hanger hook (or sturdy mechanics wire)
│ └── 3/8-inch drive torque wrench (calibrated in ft-lbs or Nm)
└── Cleaning & Lubrication Chemicals
├── 100% pure silicone brake paste (e.g., AGS Sil-Glyde, 3M 08946)
├── 2 cans of non-chlorinated aerosol brake cleaner
├── 0.45 caliber nylon or bronze wire bore brush
├── Clean lint-free microfiber shop rags
└── Replacement caliper pin boot hardware kit ($12–$25, if boots are torn)
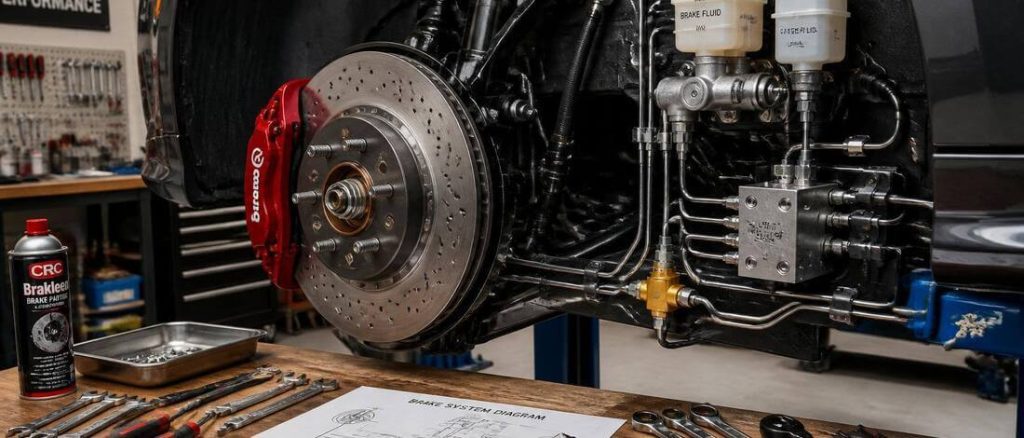
Step-by-Step Guide: How to Grease Brake Caliper Pins
Follow this exact shop-grade procedure to clean, inspect, lubricate, and reinstall your caliper slide pins correctly.
Step 1: Safely Raise and Support the Vehicle
Park the vehicle on level, solid concrete. Set the parking brake firmly and place wheel chocks behind the opposite tires.
Loosen the lug nuts on the target wheel by half a turn using a breaker bar. Jack up the vehicle at the factory pinch-weld or subframe lift point, lower the chassis onto a heavy-duty jack stand, and verify stability before removing the lug nuts and wheel.
Step 2: Unbolt and Suspend the Brake Caliper
Locate the two caliper slide pin bolts on the backside of the caliper body. On many Japanese and domestic vehicles (such as Toyota, Honda, Ford, and GM), you will need one wrench to hold the slide pin’s guide flat while using your ratchet to remove the bolt.
Once both bolts are removed, slide the caliper housing off the brake pads and bracket.
⚠️ Mechanic Warning: Never allow the heavy steel caliper to dangle by its flexible rubber brake hose. That strains the internal braided fabric and can cause internal hose rupture. Hang the caliper securely from the suspension coil spring using a metal hanger hook.
WRONG: Dangle caliper by hose ──────> Internal hose tear & brake failure!
RIGHT: Hang caliper from spring ────> Zero strain on hydraulic lines.
Step 3: Extract and Inspect the Slide Pins
Grasp the metal slide pins with your fingers and pull them straight out of the caliper mounting bracket.
Take immediate note of which pin came from which hole. Many vehicles feature one solid steel pin and one pin fitted with a small black rubber damper sleeve. You must reinstall each pin into its original position.
Inspect the extracted pins for the following red flags:
- Deep rust pitting, scoring, or gouges along the smooth shank.
- Black, baked-on, gummy grease residue.
- Torn, cracked, dry-rotted, or swollen rubber dust boots.
- A swollen or distorted rubber damper bushing that refuses to slide smoothly.
If the pins are physically scored or heavily pitted from rust, do not reinstall them. Replacement pin and boot hardware kits cost between $12 and $25 per axle at any auto parts store.
PIN CONDITION ASSESSMENT:
- Light dirt / dried grease ──> Clean with brake cleaner & reuse.
- Micro-surface rust ─────────> Buff with 0000 steel wool, clean & reuse.
- Deep pits / grooves / bend ─> DISCARD PIN. Install new hardware kit.
Step 4: Clean the Pins and Flush the Bracket Bores
Spray the metal slide pins thoroughly with aerosol brake cleaner and wipe them completely clean with a shop rag until the bare, shiny steel is exposed.
Next, address the hidden trap: the blind hole inside the caliper mounting bracket. Spray brake cleaner directly into the slide pin bore. Insert a 0.45 caliber wire or nylon bore brush into the hole, twisting and scrubbing in and out to dislodge oxidized, hardened grease. Flush the bore once more with brake cleaner and allow it to dry completely.
CLEANING THE BLIND BORE:
1. Spray brake cleaner into hole ──> 2. Scrub with bore brush ──> 3. Final flush & dry
Step 5: Apply a Thin, Controlled Coat of Silicone Paste
Apply a pea-sized dab of 100% pure silicone brake paste onto your gloved finger. Spread a thin, smooth, even film along the cylindrical shank of the slide pin.
💡 Shop Tip (Avoid the Air-Lock Trap): Never squirt grease directly into the blind hole of the caliper bracket. Filling the hole creates a hydraulic and pneumatic air-lock. When you push the pin in, the trapped air compresses like a spring, popping the pin right back out and forcing the brake pad to drag against the rotor. Lubricate the pin shank only.
CORRECT: Thin, transparent film on metal pin shank.
WRONG:   Squirt grease down the blind hole (causes air-lock bounce back).
Step 6: Install the Rubber Boots and Insert the Pins
Inspect the rubber dust boots seated in the bracket. If they are in good condition, ensure their retaining ribs are fully seated in the bracket grooves.
Slide the lubricated pin straight into the boot and push it down into the bore. Rotate the pin 360 degrees three or four times to distribute the silicone film evenly across the internal bore surface.
Now, perform the “boot burp”: Push the pin all the way into the bore until it bottoms out. If the pin springs back outward, trapped air is sealed inside the boot. Gently slide a blunt plastic trim tool or probe between the pin shank and the rubber boot lip to break the vacuum seal. You will hear a tiny hiss as the trapped air escapes, and the pin will now slide back and forth with smooth, hydraulic damping and zero spring-back.
THE "BOOT BURP" TECHNIQUE:
Push pin in ──> Lift rubber boot lip with blunt probe ──> [HISS: Air Escapes] ──> Pin stays seated!
Step 7: Remount the Caliper and Torque to Factory Spec
Set your brake pads into their abutment clips. Lower the caliper housing back over the pads and line up the bolt holes with the slide pin flats.
Thread the caliper mounting bolts in by hand to avoid cross-threading. Use your torque wrench to tighten the bolts to the vehicle manufacturer’s exact specification—typically 23 to 35 ft-lbs (31 to 47 Nm) on passenger cars and 35 to 50 ft-lbs (47 to 68 Nm) on trucks and large SUVs.
Reinstall the road wheel, thread the lug nuts by hand, lower the vehicle to the ground, and torque the wheel lug nuts in a criss-cross star pattern to factory spec (typically 80 to 100 ft-lbs for passenger cars, 140 to 150 ft-lbs for heavy trucks).
How to Free a Seized or Stubborn Caliper Slide Pin
If you pull off your caliper bolt and discover that the slide pin is frozen solid inside the bracket hole, do not reach for a 5-pound sledgehammer. You risk snapping the pin bolt off inside the carrier, which ruins the bracket instantly.
Use this systematic 3-tier shop extraction protocol:
STUCK PIN EXTRACTION TIERS
TIER 1: Penetrating Soak & Wrench Twist Pull rubber boot lip back, spray Kroil or PB Blaster, fit an open-end wrench on the pin flats, and rock back and forth until rotational movement breaks the rust seal.
TIER 2: Controlled Propane Heat Unbolt the bracket from the knuckle. Clamp the bracket in a bench vise. Apply moderate heat from a propane torch to the outer cast-iron bracket ear (never directly to the pin). The bracket expands, allowing you to twist the pin.
TIER 3: Bracket Replacement (The Smart Mechanic’s Choice) If a pin takes more than 15 minutes of fighting, or comes out with deep rust pitting, scrap it. A brand-new caliper carrier bracket with fresh pins and boots costs $25–$45.
Real-World Repair Cost Breakdown (DIY vs. Shop)
Servicing caliper slide pins is one of the most cost-effective preventive maintenance jobs you can perform on a modern vehicle. Here is how the real-world numbers stack up across the US market:
| Service Option | Parts & Supplies Cost | Professional Labor Cost | Total Estimated Cost | Notes & Recommendations |
| DIY Slide Pin Service (Existing Pins) | $15–$25 | $0 | $15–$25 | Includes 1 tube of pure silicone paste and 2 cans of brake cleaner. |
| DIY Pin & Boot Hardware Replacement | $25–$45 | $0 | $25–$45 | Includes new guide pins, EPDM dust boots, and damper sleeves for both front or rear wheels. |
| Professional Shop Brake Inspection & Lube | $20–$40 | $100–$160 | $120–$200 | Billed as 1.0 hour of shop labor to clean, inspect, and lube slide pins on one axle. |
| Professional Caliper Bracket Replacement | $45–$90 | $140–$220 | $185–$310 | Required if slide pins are seized solid or stripped inside the bracket carrier. |
| Full Caliper Assembly Replacement (Seized) | $90–$220 | $180–$280 | $270–$500 | Required if a neglected sticking pin overheats and destroys the caliper piston and hydraulic seals. |

DIY vs. Professional Shop Decision Guide
Should you grease your own caliper slide pins, or take the car to a professional repair facility? Use this quick checklist to decide:
DO IT YOURSELF IF:
✔ You own basic hand tools, a hydraulic jack, and jack stands.
✔ The slide pins move freely or have only light surface grime.
✔ You want to save $120–$200 on routine brake maintenance.
✔ You have 45 minutes of free time on a weekend.
HIRE A PROFESSIONAL SHOP IF:
✘ A slide pin is seized solid and you do not own a bench vise or torch.
✘ The caliper bracket mounting bolts are seized to the suspension steering knuckle.
✘ The caliper piston seal is torn, leaking brake fluid, or burnt from extreme heat.
✘ You are uncomfortable safely lifting and supporting a vehicle on jack stands.
Prevention & Long-Term Maintenance Rules
To ensure your brake calipers float smoothly for the entire life of your vehicle, follow these three shop-proven maintenance rules:
- Service Pins at Every Pad Replacement: Never install new brake pads without pulling, cleaning, and re-greasing the slide pins. Performing a “pad slap” without greasing the pins is the number one cause of premature brake failure.
- Inspect the Rubber Boots Every 15,000 Miles: When rotating your tires, peek behind the caliper with a flashlight. If a rubber dust boot is torn, cracked, or slipped off its metal retention lip, water and road salt will enter the bore and seize the pin within a few months.
- Never Mix Lubricant Chemistries: If you are switching from an unknown factory grease to silicone paste, clean 100% of the old lubricant out of the bracket hole first. Mixing different grease thickeners (like lithium 12-hydroxystearate with polyurea or silicone) causes the lubricants to separate, thin out, and run out of the bore onto the brake pads.
FAQs About How to Grease Brake Caliper Pins
Which caliper slide pin has the rubber bushing on it?
On vehicles equipped with a rubber damper sleeve on one slide pin (such as many Toyota, Honda, Subaru, and Ford models), the pin with the rubber bushing usually belongs in the trailing position (the bottom hole on front calipers where the caliper is mounted behind the rotor, or the top hole on calipers mounted ahead of the rotor). Always check your vehicle’s factory service manual or take a photo during teardown to ensure you return the sleeved pin to its original channel.
Can I use WD-40 or penetrating oil to lubricate caliper slide pins?
No. WD-40 and standard penetrating oils are solvents and light rust dissolvers, not high-temperature boundary lubricants. They evaporate under standard braking temperatures within a few miles and contain petroleum distillates that will rapidly swell and rot the EPDM rubber dust boots. Only use 100% pure silicone brake paste or synthetic ceramic brake lubricant.
Why does my caliper slide pin pop back out when I push it in?
Your slide pin is experiencing hydraulic air-lock. This happens when grease is squirted directly into the blind hole of the bracket or when air is trapped behind the rubber boot during assembly. When compressed, the trapped air pushes the pin outward like a spring. To fix it, clean excess grease out of the bore and gently slide a blunt probe under the boot lip to “burp” the trapped air out.
What is the difference between caliper slide pin grease and brake pad grease?
Slide pin grease must be chemically compatible with EPDM rubber boots and capable of smooth sliding in a sealed metal-on-metal tube (silicone paste is best). Brake pad grease (often ceramic or molybdenum-based) is formulated to quiet metal-on-metal vibration where the pad steel ears touch the stainless steel abutment clips. While high-grade pure silicone ceramic grease can be used for both, standard petroleum anti-squeal compound must never be applied to slide pins.
How much grease should I put on brake caliper slide pins?
Apply a thin, transparent coat along the smooth metal shank of the pin—roughly the amount of a single pea. You should be able to see the metal through the grease film. Never pack the rubber boot or the blind bracket hole full of grease, as excess lubricant creates air-lock and hydro-locks the slide mechanism.
Mark’s Final Verdict
Brake jobs are not just about swapping pads and slapping on new rotors. A braking system is a dynamic mechanical assembly that relies on smooth, unobstructed floating movement to deliver safe stopping power and even friction wear.
Taking an extra 15 minutes to pull your slide pins, scrub out the blind bores with a $4 wire brush, and coat the shanks in pure silicone paste will prevent tapered pad wear, eliminate dragging rotors, and save you hundreds of dollars in avoidable brake repairs.
Do the job right the first time: diagnose your hardware, use the correct lubricant, burp the rubber boots, and torque every fastener to factory specification.