
This article was updated in September 16, 2026 with new products and information by Mark S. Taylor
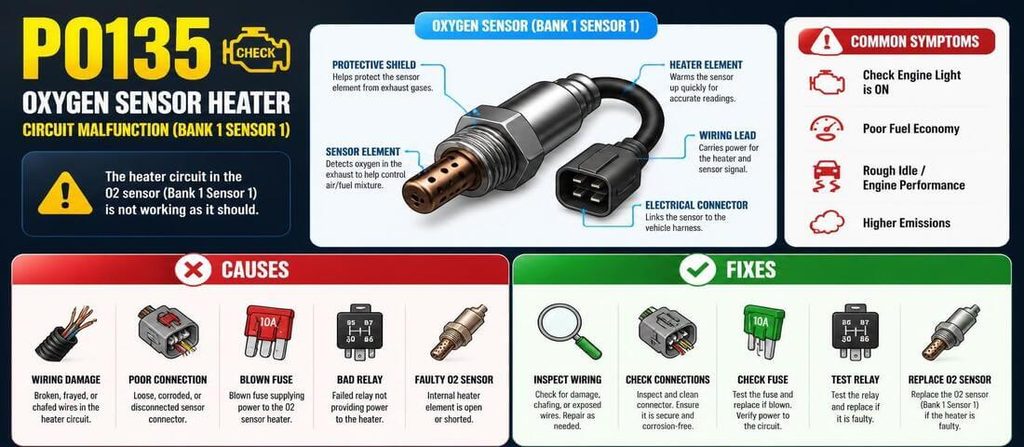
If your check engine light is on and your scanner shows P0135, the problem is related to the heater circuit for the Bank 1 Sensor 1 oxygen sensor.
But don’t make the common mistake of assuming the entire oxygen sensor has failed.
P0135 specifically points to a problem with the O2 sensor’s heater circuit. The fault could be inside the sensor, but it could also be caused by a blown fuse, damaged wiring, a bad connector, poor electrical connection, or another problem in the heater circuit.
The right repair starts with testing the circuit.
Contents
- 1 What Does P0135 Mean?
- 2 P0135 Symptoms
- 3 Common Causes of P0135
- 4 How to Diagnose P0135
- 4.1 Step 1: Scan for All Codes
- 4.2 Step 2: Identify Bank 1 Sensor 1
- 4.3 Step 3: Inspect the Wiring
- 4.4 Step 4: Inspect the Connector
- 4.5 Step 5: Check the Fuse
- 4.6 Step 6: Check Heater Power
- 4.7 Step 7: Test Heater Resistance
- 4.8 Step 8: Check for Voltage Drop
- 4.9 Step 9: Check the Control Circuit
- 4.10 Step 10: Check for Technical Service Bulletins
- 5 How to Fix P0135
- 6 Does P0135 Mean the O2 Sensor Is Bad?
- 7 Can P0135 Be Caused by a Blown Fuse?
- 8 Can P0135 Cause Poor Fuel Economy?
- 9 Can You Drive With P0135?
- 10 P0135 vs Related O2 Codes
- 11 P0135 Repair Cost
- 12 Common P0135 Diagnostic Mistakes
- 12.1 Replacing the O2 sensor immediately
- 12.2 Checking only for voltage
- 12.3 Ignoring the fuse
- 12.4 Using a generic resistance specification
- 12.5 Installing a universal sensor without checking wiring
- 12.6 Replacing the fuse without finding the cause
- 12.7 Testing the wrong sensor
- 12.8 Blaming the PCM too soon
- 13 FAQs About Causes and Fixes P0135 Code
- 14 Final Verdict
Quick Answer: What Causes P0135?
The most common causes of P0135 include:
- Failed oxygen sensor heater element
- Open heater-circuit wiring
- Shorted heater circuit
- Blown O2 sensor heater fuse
- Damaged or corroded connector
- High resistance in the heater wiring
- Damaged wiring near the exhaust
- Poor heater-circuit ground or control circuit
- Incorrect replacement sensor
- Rarely, a PCM/ECM control problem
The best way to fix P0135 is to identify why the Bank 1 Sensor 1 heater isn’t operating as expected instead of automatically replacing the O2 sensor.
What Does P0135 Mean?
P0135 stands for:
O2 Sensor Heater Circuit Malfunction — Bank 1 Sensor 1
The oxygen sensor located upstream of the catalytic converter uses a built-in heater to reach its operating temperature more quickly.
Without the heater, the sensor has to depend more heavily on exhaust heat to reach the required operating temperature.
The engine computer monitors the heater circuit and/or the sensor’s warm-up behavior. If the expected heating performance isn’t achieved, P0135 can be stored.
What is Bank 1?
Bank 1 is the side of the engine containing cylinder #1.
On a four-cylinder inline engine, there is normally only one cylinder bank, so Bank 1 is the only bank.
On a V6 or V8, you need to identify which side contains cylinder #1 before locating Bank 1 Sensor 1.
What is Sensor 1?
Sensor 1 is generally the oxygen/A/F sensor located before the catalytic converter.
So P0135 generally concerns the front/upstream O2 sensor on Bank 1.
Always verify the exact sensor location using the vehicle’s service information because sensor terminology can vary between manufacturers.
P0135 Symptoms
P0135 may produce surprisingly few symptoms.
Possible symptoms include:
- Check engine light
- Poor fuel economy
- Longer time before closed-loop operation
- Rough running during warm-up
- Increased emissions
- Poor drivability in some cases
- Failed emissions inspection
Some vehicles may drive almost normally because the engine can eventually heat the sensor through exhaust temperature even if the electrical heater isn’t working.
OBD-Codes identifies the check engine light and poor fuel economy as common symptoms.
Why You May Not Notice a Big Difference
The O2 heater’s primary job is to get the sensor hot quickly.
Once the exhaust has heated the sensor sufficiently, the engine may operate relatively normally.
That means P0135 can be a real electrical fault even when the car seems to drive fine.

Common Causes of P0135
1. Failed O2 Sensor Heater
The heating element inside the oxygen sensor can develop:
- An open circuit
- An internal short
- Excessive resistance
- Other internal electrical failures
If the heater element itself has failed, replacing the sensor is generally the repair because the internal heater isn’t normally serviceable separately.
OBD-Codes lists high heater resistance and internal heater opens or shorts as possible P0135 causes.
2. Blown Heater-Circuit Fuse
Many vehicles protect the O2 sensor heater circuit with a fuse.
A blown fuse can disable the heater and trigger P0135.
But don’t stop at replacing the fuse.
If the fuse blew because the sensor or wiring is shorted, the new fuse may blow again.
Find out why the fuse failed.
3. Damaged Wiring
O2 sensor wiring lives in a difficult environment.
The harness can be exposed to:
- Exhaust heat
- Road debris
- Water
- Oil
- Vibration
- Abrasion
Look for melted insulation, broken wires, chafing and previous repairs.
4. Damaged Connector
The connector can develop:
- Corrosion
- Loose terminals
- Bent pins
- Heat damage
- Water intrusion
- Poor terminal tension
A new sensor won’t fix a bad connector.
5. High Resistance in the Heater Circuit
A circuit can have voltage present and still fail to deliver the required current.
Corroded terminals, damaged wires and poor connections can create excessive resistance.
This is why simply checking for voltage isn’t always enough.
6. Heater Ground or Control Problem
Depending on the vehicle design, the heater circuit may use a switched power supply and PCM-controlled ground, or another manufacturer-specific arrangement.
Don’t assume every four-wire O2 sensor uses the exact same circuit.
Use the vehicle’s wiring diagram.
7. Damaged Wiring Near the Exhaust
This deserves special attention.
The sensor is mounted near extremely hot exhaust components, so wiring that has sagged onto the exhaust can melt or short.
Inspect the harness routing carefully.
8. Incorrect Replacement Sensor
Universal or incorrectly wired sensors can create heater-circuit problems.
The correct connector doesn’t always guarantee the sensor is electrically correct for the vehicle.
For critical emissions sensors, verify the exact application and wiring.
9. PCM/ECM Problem
A control-module fault is possible, but it should be near the end of the diagnostic process.
Don’t replace a PCM because P0135 is stored.
Prove the power, ground, wiring, sensor and control circuit first.
How to Diagnose P0135
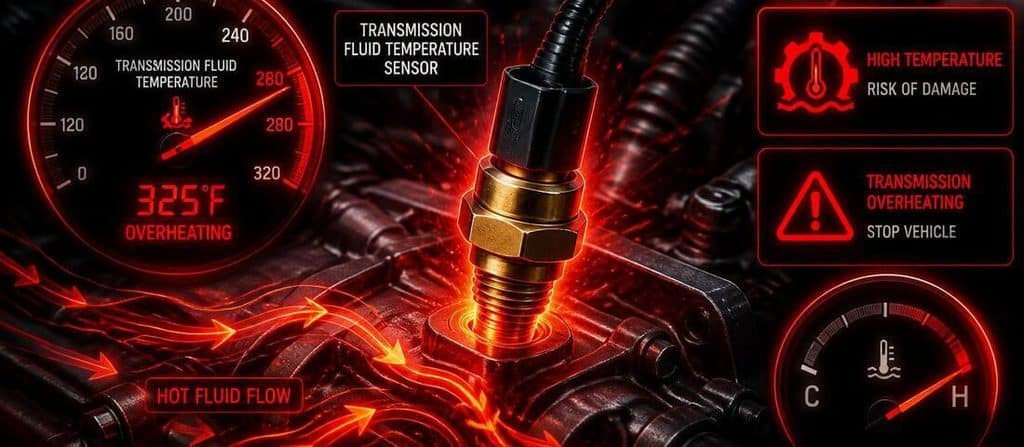
A good P0135 diagnosis is mainly an electrical diagnosis.
Step 1: Scan for All Codes
Before replacing anything, scan the vehicle for all stored and pending DTCs.
Pay particular attention to other O2 heater codes.
If multiple heater codes appeared simultaneously, investigate their shared power supply, fuse, relay or ground before replacing multiple sensors.
That can save you from replacing several perfectly good sensors.
Step 2: Identify Bank 1 Sensor 1
Confirm the correct sensor before testing.
Remember:
Bank 1 = cylinder #1 side
Sensor 1 = upstream/front sensor
On some vehicles, an air/fuel-ratio sensor may be used instead of a conventional narrowband O2 sensor.
Don’t order a part based on the code description alone.
Step 3: Inspect the Wiring
Follow the harness from the sensor toward the engine harness.
Look for:
- Melted insulation
- Broken wires
- Chafing
- Pinched harness
- Loose connections
- Previous repairs
- Oil contamination
- Exhaust contact
Pay special attention to places where the harness passes close to the exhaust manifold, catalytic converter or heat shields.
Step 4: Inspect the Connector
Disconnect the sensor according to the manufacturer’s procedure.
Check for:
- Corrosion
- Bent terminals
- Loose terminals
- Burn marks
- Water
- Damaged locking tabs
- Terminals pushed backward
A visual inspection can find obvious problems, but an apparently clean connector can still have poor terminal tension.
Step 5: Check the Fuse
Locate the fuse that supplies the O2 sensor heater.
Check it according to the manufacturer’s wiring diagram.
If it is blown, don’t simply replace it and call the repair finished.
Determine why it blew.
Step 6: Check Heater Power
With the sensor disconnected and the ignition in the appropriate state specified by the manufacturer, test the heater power circuit.
Many vehicles use battery voltage for the heater supply, but don’t assume 12 volts is a universal specification or test condition.
Some systems control the heater differently.
Use the factory wiring diagram and service procedure.
Step 7: Test Heater Resistance
With the sensor disconnected, identify the heater terminals using the correct wiring diagram.
Measure resistance across the heater circuit.
A failed heater may show:
- Infinite/open resistance
- Resistance outside the specified range
- A short condition
There is no universal O2 heater resistance value that applies to every vehicle.
Sensor type, manufacturer and application all matter.
Use the vehicle-specific specification.
Step 8: Check for Voltage Drop
If power and ground appear present, voltage-drop testing can reveal excessive resistance in the circuit.
This is especially useful when the circuit passes a simple continuity test but the heater doesn’t operate correctly under load.
A continuity beep alone does not prove that a circuit can carry the required current.
Step 9: Check the Control Circuit
If the heater is controlled by the PCM, verify the control side according to the manufacturer’s diagnostic procedure.
Don’t apply battery voltage directly to an unknown control circuit.
You can damage the PCM or sensor.
Step 10: Check for Technical Service Bulletins
Search the vehicle’s:
- Year
- Make
- Model
- Engine
- P0135
OEM service information can reveal known wiring, connector, sensor or software problems.
How to Fix P0135
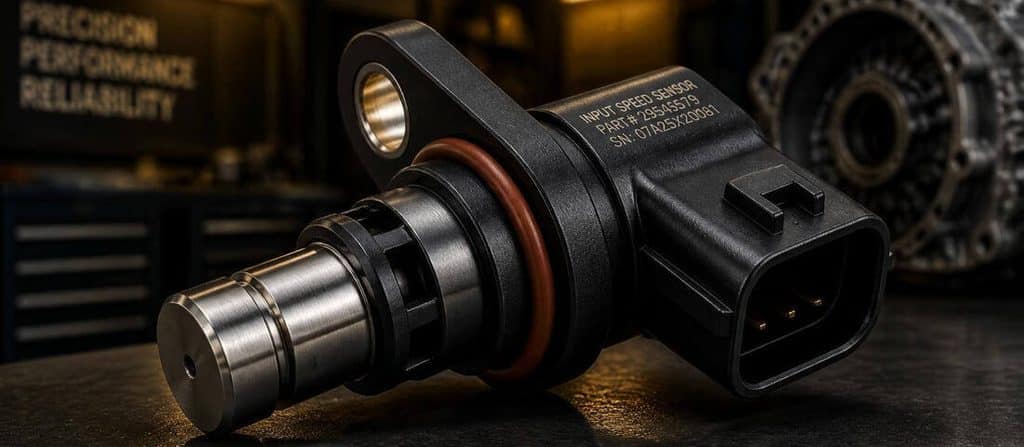
Once the actual cause is identified, the repair is usually straightforward.
Fix 1: Replace the Failed O2 Sensor
If testing confirms that the internal heater element is defective, replace the Bank 1 Sensor 1 oxygen/A/F sensor.
Use the correct application.
For some vehicles, an OE-quality sensor is preferable because sensor calibration and heater characteristics can matter.
Fix 2: Repair Damaged Wiring
If the harness is broken, melted or chafed, repair it using the manufacturer’s recommended wiring procedure.
Route the repaired harness away from the exhaust and secure it correctly.
Fix 3: Repair the Connector
Replace damaged terminals or the connector when required.
Don’t ignore loose terminal tension.
Fix 4: Replace the Blown Fuse
Replace the fuse with the correct rating only after determining why it failed.
Never install a higher-rated fuse to keep it from blowing.
That’s a wiring/fire risk, not a repair.
Fix 5: Repair a Heater Ground or Control Circuit
If testing identifies a problem with the heater control circuit, repair it according to the factory wiring diagram and diagnostic procedure.
Fix 6: Repair Exhaust-Heat Damage
If the wiring has been melted because it was routed too close to the exhaust, repair the wiring and correct the harness routing.
Otherwise, the new repair can fail again.
Does P0135 Mean the O2 Sensor Is Bad?
Not necessarily.
This is the most important diagnostic point.
P0135 is specifically about the heater circuit.
The fault can be inside the sensor, but it can also be outside the sensor.
Think of the circuit as:
Power → fuse/relay → wiring → sensor heater → control/ground
A problem anywhere along that path can produce a heater-related fault.
That’s why replacing the sensor without testing the circuit can result in unnecessary parts replacement.

Can P0135 Be Caused by a Blown Fuse?
Yes.
A blown fuse can interrupt power to the O2 sensor heater.
However, if the fuse has blown, find the underlying cause.
A shorted heater or damaged wiring may cause the fuse to blow repeatedly.
If you replace the fuse and it immediately fails again, stop replacing fuses and diagnose the circuit.
Can P0135 Cause Poor Fuel Economy?
Yes, it can contribute to poor fuel economy.
The heater allows the sensor to reach operating temperature sooner.
If the sensor takes too long to become operational, the engine may spend longer in a strategy that doesn’t use the oxygen sensor normally.
The exact effect depends on the vehicle’s control strategy and the underlying fault.
Can You Drive With P0135?
Usually, P0135 is not an immediate engine-damage emergency by itself.
The vehicle may continue to run reasonably well, especially after the exhaust becomes hot enough to heat the sensor.
However, you shouldn’t ignore it indefinitely.
An unresolved O2 heater fault can contribute to increased emissions, poor fuel economy and warm-up drivability problems.
Have it diagnosed sooner if the vehicle also has:
- Rough running
- Stalling
- Major fuel-economy changes
- Additional fuel-mixture codes
- Multiple O2 sensor codes
- A flashing check engine light
A flashing check engine light requires more urgent attention because it can indicate an active misfire.
P0135 vs Related O2 Codes
These codes are easy to confuse.
| Code | Meaning |
|---|---|
| P0130 | O2 Sensor Circuit Malfunction — Bank 1 Sensor 1 |
| P0131 | O2 Sensor Circuit Low — Bank 1 Sensor 1 |
| P0132 | O2 Sensor Circuit High — Bank 1 Sensor 1 |
| P0133 | O2 Sensor Circuit Slow Response — Bank 1 Sensor 1 |
| P0134 | O2 Sensor Circuit No Activity — Bank 1 Sensor 1 |
| P0135 | O2 Sensor Heater Circuit Malfunction — Bank 1 Sensor 1 |
| P0141 | O2 Sensor Heater Circuit Malfunction — Bank 1 Sensor 2 |
| P0155 | O2 Sensor Heater Circuit Malfunction — Bank 2 Sensor 1 |
The key difference is that P0135 is specifically a heater-circuit fault.
P0135 Repair Cost
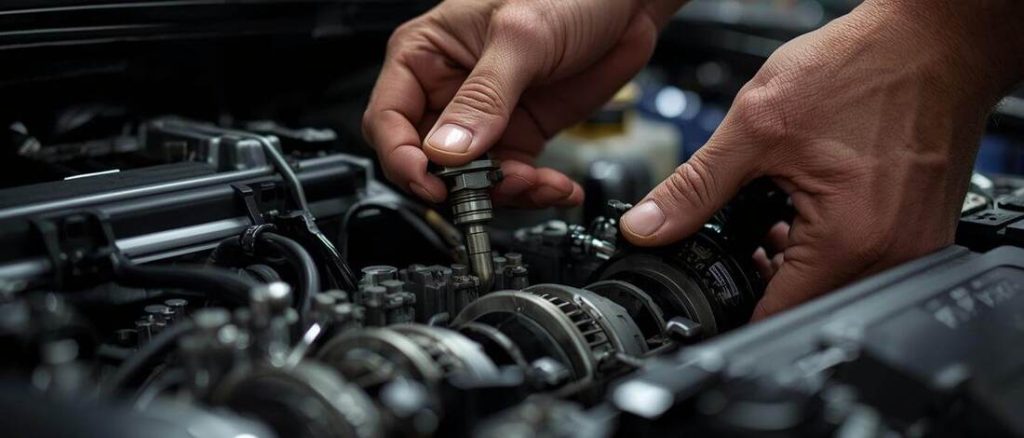
The cost depends on what failed.
| Repair | Typical cost level |
|---|---|
| Fuse replacement after confirmed cause | Low |
| Connector repair | Low to moderate |
| Wiring repair | Low to moderate |
| O2 sensor replacement | Moderate |
| A/F sensor replacement | Moderate to high on some vehicles |
| Harness diagnosis/repair | Moderate |
| PCM-related repair | Vehicle-dependent and potentially expensive |
Don’t treat a generic O2-sensor price as the expected repair cost.
The cheapest repair may be a connector or wiring fault, while some vehicles use expensive air/fuel-ratio sensors.
Common P0135 Diagnostic Mistakes
Replacing the O2 sensor immediately
This is the biggest mistake.
P0135 doesn’t prove that the sensor itself has failed.
Checking only for voltage
Seeing voltage at the connector doesn’t prove the heater circuit can deliver the required current.
Ignoring the fuse
A shared heater power supply can cause multiple sensor-heater codes.
Using a generic resistance specification
O2 sensor heater resistance varies by application.
Use the manufacturer’s specification.
Installing a universal sensor without checking wiring
An incorrectly wired sensor can create additional problems.
Replacing the fuse without finding the cause
If the fuse blew because of a short, the replacement fuse may fail again.
Testing the wrong sensor
P0135 is Bank 1 Sensor 1.
Confirm the sensor location before testing or replacing anything.
Blaming the PCM too soon
The PCM should be near the end of the diagnostic process, not the beginning.
FAQs About Causes and Fixes P0135 Code
What is the most common cause of P0135?
A failed heater element inside the Bank 1 Sensor 1 oxygen sensor is a common cause, but wiring, connectors, fuses and heater-control problems can produce the same code.
Can a blown fuse cause P0135?
Yes. If the fuse supplies the O2 heater circuit, a blown fuse can prevent the heater from operating.
Can bad wiring cause P0135?
Yes. Open, shorted, damaged or high-resistance wiring can cause a heater-circuit malfunction.
Which O2 sensor is P0135?
P0135 generally refers to Bank 1 Sensor 1, the upstream/front oxygen or air/fuel-ratio sensor.
Does P0135 mean I need a new O2 sensor?
Not automatically. Test the heater circuit, power supply, wiring and connector first.
Can P0135 cause a failed emissions test?
Yes. Because the check engine light may be illuminated and the fault can affect emissions-system operation, the vehicle may fail an emissions inspection depending on local requirements.
Final Verdict
P0135 is an O2 sensor heater-circuit problem—not automatically a bad oxygen-sensor problem.
The correct diagnostic sequence is:
Scan → identify Bank 1 Sensor 1 → inspect wiring → inspect connector → check fuse → test heater power/control → test heater resistance → repair the confirmed fault.
If the heater element inside the sensor has failed, replace the sensor. If the sensor tests good, keep looking at the circuit.
P0135 tells you the Bank 1 Sensor 1 heater isn’t performing as expected. It doesn’t tell you which part of the heater circuit failed.