
This article was updated in July 19, 2026 with new products and information by Mark S. Taylor
Buying replacement door speakers before diagnosing the actual fault is how a $0 fix turns into a $150 mistake. A speaker that’s completely silent might have a blown voice coil — or it might have a broken wire in the door jamb, or an amplifier sitting in protection mode because a different speaker’s wire is touching door metal, or a wiring harness adapter with one connector mis-seated.
The correct sequence takes 15 minutes and costs nothing until the fault is confirmed. Here’s the complete car door speakers not working diagnostic path.
Contents
- 1 The First Check Takes 30 Seconds and Fixes It for Free Half the Time
- 2 Nine Causes of Silent Car Door Speakers — Ranked by How Easy They Are to Fix
- 2.1 Cause 1 — Balance or Fade at an Extreme Setting (Free Fix)
- 2.2 Cause 2 — Disconnected or Partially Seated Speaker Connector at the Door (Free Fix)
- 2.3 Cause 3 — Incorrect or Mis-Seated Wiring Harness Adapter (Free Fix — Aftermarket Installations)
- 2.4 Cause 4 — Blown Inline Speaker Fuse (Cents)
- 2.5 Cause 5 — Broken Wire at the Door Jamb (Low Cost Fix)
- 2.6 Cause 6 — Failed Crossover Component (Component Speaker Systems Only)
- 2.7 Cause 7 — Blown Speaker Voice Coil
- 2.8 Cause 8 — Failed Head Unit Speaker Output (One or Two Channels)
- 2.9 Cause 9 — External Amplifier in Protection Mode or Failure
- 3 Amplifier Protection Mode — Why All Your Speakers Go Silent From One Bad Wire
- 4 The Door Jamb Wire — The Most Common Wiring Fault That Tests Good Until You Move the Door
- 5 How To Test Each Component in the Speaker Circuit — Four Methods From Quickest to Most Definitive
- 6 Why Aftermarket Radio Installations Are the Most Common Cause of Suddenly Dead Door Speakers
- 7 When the Speaker Itself Is the Problem — What a Blown Speaker Looks and Sounds Like
- 8 Fix Costs — What Each Repair Actually Runs
- 9 How To Prevent Door Speaker Failures
- 10 FAQs About Car Door Speakers Not Working
- 10.1 Why does my car speaker crackle or buzz instead of being completely silent?
- 10.2 My front speakers work but rear speakers don’t — what’s wrong?
- 10.3 Can I replace just one car door speaker?
- 10.4 How do I know if my speakers are blown or if the amplifier is clipping?
- 10.5 Why would one door speaker work and the other door speaker on the same side not work?
- 11 The Expert Verdict
The First Check Takes 30 Seconds and Fixes It for Free Half the Time
Before any tool comes out, check the head unit’s balance and fade settings.
Balance controls the left-right distribution of audio between the driver’s and passenger’s side speakers. Set fully to the right, the left-side speakers go completely silent. Set fully to the left, the right side goes silent.
Fade controls the front-rear distribution. Set fully to the rear, the front speakers are silent. Set fully to the front, the rear speakers are silent.
Both controls are in the head unit’s audio settings menu — typically accessible by pressing the audio or settings button and navigating to the EQ or balance section. Confirm both are set to center before any further diagnosis. A balance setting accidentally nudged to one extreme during a menu adjustment, or a fade that’s been at “front” for so long the owner forgot they set it, accounts for a meaningful percentage of “my door speakers stopped working” calls to car audio shops.
If balance and fade are both centered and speakers are still silent, proceed to the diagnostic sequence below.
Nine Causes of Silent Car Door Speakers — Ranked by How Easy They Are to Fix
Cause 1 — Balance or Fade at an Extreme Setting (Free Fix)
Already described above. Confirm center position on both controls. Takes 30 seconds.
Cause 2 — Disconnected or Partially Seated Speaker Connector at the Door (Free Fix)
The speaker wire terminates at a quick-connect blade connector that plugs onto the speaker’s terminals. This connector can vibrate loose over time or during door panel removal. If the door panel was removed recently for any reason — speaker replacement, window regulator repair, door handle replacement — the speaker connector may not have been fully reseated.
Symptom fingerprint: Sudden silence following door panel removal or any work inside the door cavity. The speaker may work intermittently when the door is manipulated.
Fix: Remove the door panel and push the speaker connector firmly onto the speaker terminals until it seats fully. Costs $0.
Cause 3 — Incorrect or Mis-Seated Wiring Harness Adapter (Free Fix — Aftermarket Installations)
An aftermarket head unit installed with a vehicle-specific wiring harness adapter connects to the factory wiring through a plastic connector that provides the correct pin assignments for that vehicle. A partially seated adapter leaves some pins without contact. A wrong adapter (installed for a similar but different vehicle) has incorrect pin assignments that leave speaker channels disconnected.
Symptom fingerprint: Some speaker channels work and others don’t immediately after an aftermarket head unit installation. The failing channels are silent from the moment the installation is complete.
Fix: Disconnect and firmly reseat the harness adapter. Confirm the adapter part number matches the vehicle’s year, make, and model. Costs $0 for reseating; $10–$35 for a replacement if the wrong adapter was used.
Cause 4 — Blown Inline Speaker Fuse (Cents)
Some aftermarket speaker installations and factory premium audio systems include small inline fuses in the speaker wiring — typically located in a blade fuse holder within a few inches of the speaker wiring tap or amplifier output. A blown inline speaker fuse produces complete silence on the protected channel.
Symptom fingerprint: Sudden silence on one or two speakers. No corresponding changes to other speakers. If it’s a factory system, the non-working channels may correspond to a specific door.
Fix: Locate and inspect any inline fuse holders in the speaker wiring run. Replace a blown fuse with the same current rating. Cost: $1–$3.
Cause 5 — Broken Wire at the Door Jamb (Low Cost Fix)
The door jamb wire fatigue fracture is the most common wiring failure in car audio and the one most likely to be missed by standard diagnostic procedures — covered in the dedicated section below. The wire breaks internally at the door jamb flex point while its outer insulation remains intact.
Symptom fingerprint: Speaker works in some door positions but not others — works when the door is fully closed, fails when the door is half-open. Or gradual progression from intermittent to permanent silence over weeks.
Fix: Cut out the fractured section and splice in new wire. Parts cost $5–$20.
Cause 6 — Failed Crossover Component (Component Speaker Systems Only)
Component speaker systems include a passive crossover network — a small circuit board with capacitors and inductors that splits the audio signal between the tweeter and the woofer. A failed crossover capacitor (typically an electrolytic capacitor that has dried out) blocks the audio signal from reaching the woofer or the tweeter.
Symptom fingerprint: The tweeter works but the woofer is silent, or vice versa, in a component speaker system. Both speakers measure correct DC resistance when tested individually.
Fix: Replace the failed crossover capacitor ($5–$15 for the component) or replace the entire crossover network ($20–$60). Requires identifying the failed component with a capacitor ESR test.
Cause 7 — Blown Speaker Voice Coil
The most common speaker hardware failure. The voice coil’s copper windings overheat from sustained amplifier clipping (which delivers harmonic distortion energy rather than clean sine waves to the speaker, generating excess heat), from sustained overpowering, or from water damage that corrodes the winding connections. The voice coil burns open — creating an open circuit — producing complete silence from that speaker.
Symptom fingerprint: Speaker is completely silent. Tests as open circuit on DMM (OL, infinite resistance) or very low resistance (0.5 ohms or less, indicating a shorted coil). The speaker cone may have a burned smell when the grille is removed.
Fix: Speaker replacement. A blown speaker cannot be repaired in practice — voice coil replacement is technically possible but costs as much as or more than a replacement speaker in most cases. Cost: $25–$200 for replacement speakers per pair.
Cause 8 — Failed Head Unit Speaker Output (One or Two Channels)
The head unit’s built-in amplifier can fail per-channel. Right-channel failure produces silent right front and right rear speakers while left channels work normally. Front-channel failure on a four-channel head unit produces silent front speakers while rear channels work.
Symptom fingerprint: Symmetric channel failure (both right channels or both left channels dead) pointing toward head unit output stage failure. The head unit still plays audio on working channels and all source functions (Bluetooth, USB, FM) work normally.
Fix: Head unit replacement ($50–$600) or, as a temporary workaround, using an external amplifier bypassing the failed head unit output channels.
Cause 9 — External Amplifier in Protection Mode or Failure
The most complex cause — covered in the dedicated section below because the diagnostic and the range of sub-causes are more involved than the other entries. An amplifier in protection mode silences all its outputs simultaneously.
Symptom fingerprint: All speakers connected to an external amplifier go silent simultaneously. The amplifier’s power LED is on but no audio is produced. A protection LED (often red or amber, separate from the power LED) may be lit or flashing.
Fix: Depends on why protection mode triggered — a shorted speaker wire, a failed amplifier channel, thermal shutdown, or voltage fault. See the dedicated section below. Cost range: $0 (repair the short) to $600 (amplifier replacement).
Amplifier Protection Mode — Why All Your Speakers Go Silent From One Bad Wire
This failure mode affects every car audio system that uses an external amplifier — which includes almost all factory premium audio systems (Bose, Harman Kardon, JBL, Beats, Bang & Olufsen, and similar) and any aftermarket system where an external amp was added.
The amplifier’s protection circuit monitors each output channel for fault conditions: short circuit (speaker wire touching door metal), overtemperature (inadequate ventilation or sustained high-power operation), low supply voltage (weak 12V system), and DC offset (failing output stage sending DC current to the speakers). When any of these conditions is detected on any channel, the amplifier shuts all its outputs and often indicates the fault with a protection LED.
From the driver’s perspective, it looks like the amplifier has completely died — all speakers went silent simultaneously. The amplifier still powers on (power LED lit), but nothing plays. Every speaker connected to that amplifier is silent.
The specific scenario most people don’t recognize: a speaker wire that chafed through its insulation and is contacting the door metal creates a short circuit on that one speaker channel. The amplifier detects the near-zero impedance on that channel (a short circuit looks like 0 ohms, where a speaker looks like 4–8 ohms), identifies it as a fault, and shuts down all outputs to protect itself. The driver has completely silent sound system from a single wire rubbing against a door panel screw.
The diagnostic sequence for protection mode:
- Confirm the protection LED is lit or flashing (the indicator is on the amplifier chassis, separate from the power LED — consult the amplifier’s manual if the LED meanings aren’t labeled).
- Turn off the system completely.
- Disconnect one speaker wire channel from the amplifier (either the positive or negative wire at the amplifier’s speaker output terminal is sufficient to break the circuit on that channel).
- Power the system on.
- Check whether the protection LED extinguishes. If it does, the disconnected channel was the source of the fault — the short circuit or overloaded channel that triggered protection.
- If protection mode remains, reconnect that channel and disconnect the next one. Repeat until the protection LED extinguishes.
- Once the faulting channel is identified, inspect the speaker wire for that channel along its entire route — particularly at the door jamb where wires cross sheet metal edges, and at any point where the wire passes through a body panel hole. Look for damaged insulation with the bare copper wire visible and touching metal.
- Repair the insulation break (electrical tape as a temporary fix, heat shrink tubing as a permanent fix).
- Power the amplifier on with all channels reconnected — the protection mode should clear and audio should resume.
An amplifier that remains in protection mode even with all speaker channels disconnected has an internal fault — not a speaker wiring problem. The amplifier’s output stage has failed and requires repair ($120–$350) or replacement ($80–$600).
The Door Jamb Wire — The Most Common Wiring Fault That Tests Good Until You Move the Door
Every time a car door opens and closes, the speaker wire at the door jamb flexes. The wire bends, straightens, and bends again through a 90-degree arc that it repeats for the life of the vehicle. Over 10,000 to 50,000 flex cycles, individual copper strands inside the wire break from fatigue. The outer insulation remains intact — the wire looks completely normal from the outside. But internally, the wire’s conductive cross-section is progressively reduced.
The symptom progression: first the speaker plays intermittently — works with the door closed, cuts out when the door is partially open. Then the intermittent window narrows. Eventually the speaker is permanently silent because the remaining strand count is too low to carry meaningful current at any door position.
Per SAE J1128 automotive wiring flexure standards, automotive primary wire in continuous flex applications must maintain conductivity through a specified number of flex cycles at the design bend radius. The door jamb represents the highest-flex application in a vehicle’s wiring system — more than any other point in the vehicle.
Why a standard continuity test misses this: A DMM testing continuity draws microamps of current through a few remaining strands — enough to beep the continuity indicator. The actual audio signal might be 2 to 5 amps of peak current, which the few remaining strands cannot carry. The speaker tests as “connected” but doesn’t work.
The correct diagnostic test:
- Set the DMM to continuity (beep mode).
- Connect the probes to both ends of the suspect speaker wire — one probe at the head unit or amplifier connection point, the other at the speaker connector inside the door.
- With the probes connected and the DMM beeping continuously (indicating continuity), slowly open the door from fully closed to fully open while watching for any interruption in the beep.
- Close the door again slowly, watching for interruption during the closing arc.
- If the beep stops at any door position, the wire has an internal fracture at the point corresponding to that door angle — most commonly when the door is approximately half-open, where the jamb wire experiences its maximum flex.
The repair: Cut the wiring at both ends of the door jamb run — at the body grommet on the body side and at the door body grommet on the door side. Route new wire through the grommet or route new wire using a replacement door jamb wiring boot if one is available for the application. Splice to the existing wire ends on each side with crimp connectors or solder-and-heat-shrink. Speaker wire for this application should be 16-gauge or heavier, rated for outdoor or automotive use. Cost: $5–$20 in materials, 1–2 hours of work.
How To Test Each Component in the Speaker Circuit — Four Methods From Quickest to Most Definitive
Method 1 — Visual Inspection (2 Minutes, No Tools)
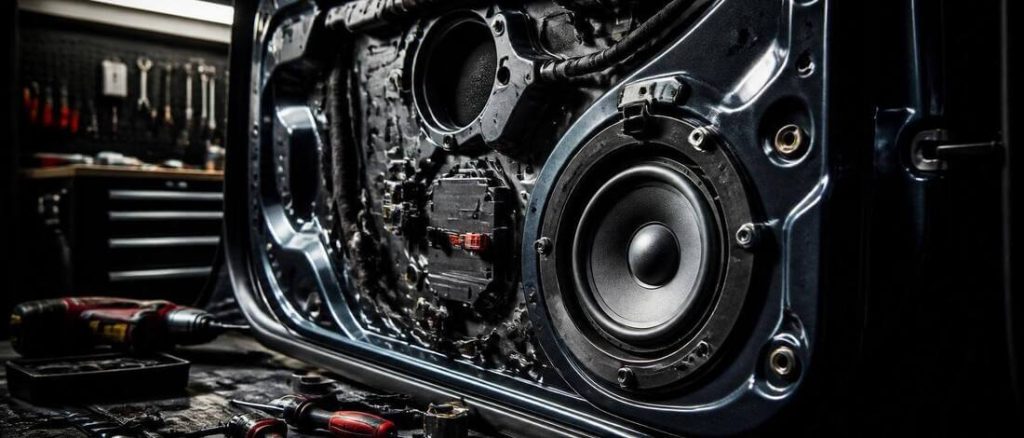
Before any electrical testing, remove the door panel (4–8 screws/clips depending on the vehicle) and inspect the speaker and its wiring:
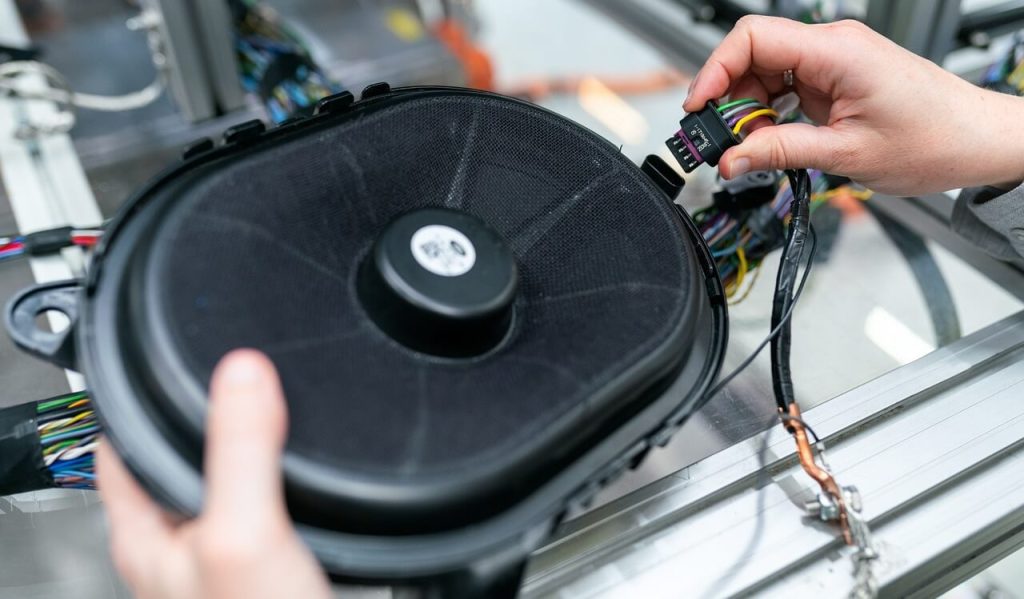
- Speaker connector: Is it fully seated on the speaker terminals? Connectors that aren’t fully seated have a visible gap between the connector body and the speaker terminal mounting point. Push until fully seated.
- Speaker grille: Remove the grille if accessible and look at the speaker cone. Is it visually intact? A visually torn surround, a cone with visible water damage (staining, mold), or a cone that has separated from the surround explains the silence without any electrical testing.
- Wiring at the speaker: Is the wire intact between the connector and the door jamb area? Look for pinched wire (caught under a door panel screw), wire that’s been pulled loose from the connector, or wire with damaged insulation.
Visual inspection finds approximately 30 percent of door speaker faults without any tools.
Method 2 — The 1.5V Battery Tap Test (2 Minutes, Just a AA Battery)
Disconnect the speaker wiring connector. Touch the positive terminal of a AA battery momentarily to one speaker terminal and the negative terminal to the other speaker terminal. Listen for a click or pop from the speaker cone.
- Click or pop heard: The voice coil is intact and the cone can move. The speaker is mechanically functional. The fault is upstream — in the wiring or the head unit/amp output.
- No click or pop, cone doesn’t move: The voice coil is an open circuit (blown) or the cone is physically seized. The speaker has failed.
This test requires no DMM and gives a definitive result in 10 seconds. The battery voltage is far too low to damage a speaker — the speaker barely moves.
Method 3 — DC Resistance Test With a DMM (5 Minutes)
Disconnect the speaker wiring connector. Set the DMM to resistance (ohms). Touch the probes to the two speaker terminals.
| DMM Reading | Interpretation |
|---|---|
| 3.0–4.5 ohms | Healthy 4-ohm speaker — voice coil intact |
| 6.0–9.0 ohms | Healthy 8-ohm speaker — voice coil intact |
| OL (infinite) | Blown voice coil — open circuit — replace speaker |
| 0.1–0.5 ohms | Shorted voice coil — replace speaker |
| Anywhere in between | Voice coil intact — fault is elsewhere |
A speaker with a correct DC resistance reading is not blown. If the resistance test shows a normal value and the 1.5V tap test produced a click, the speaker is functional and the fault is in the wiring or the signal source.
Method 4 — AC Voltage Test at the Speaker Connector (Definitive, DMM Required)
This test confirms whether the signal is reaching the end of the speaker wiring — definitively separating a speaker fault from a wiring or amplifier fault.
- Reconnect the speaker wiring to the head unit or amplifier side (leave the speaker itself disconnected — the speaker connector is unplugged from the speaker).
- Set the DMM to AC voltage.
- Touch the probes to the two wires of the speaker connector (or to the quick-connect terminals if accessible).
- Play audio through the system at moderate volume.
- AC voltage reads 1–8V: Signal is reaching the end of the wire. The wiring is intact and the head unit or amplifier is outputting signal on this channel. The fault is the speaker itself (failed voice coil that the DC resistance test may have missed for a partially shorted coil) or the connector at the speaker (corroded terminals preventing connection).
- AC voltage reads 0V: No signal is reaching this point. The fault is the wiring (broken wire) or the signal source (head unit output stage failure or amplifier in protection mode or failure).
This single test result dramatically narrows the diagnostic. Voltage present at the wire end = speaker fault. No voltage at the wire end = wiring or source fault.
Why Aftermarket Radio Installations Are the Most Common Cause of Suddenly Dead Door Speakers
An aftermarket head unit installed into a vehicle with a factory premium audio system — Bose, Harman Kardon, JBL, Beats, Bang & Olufsen, or any other OEM branded audio system — requires more than a wiring harness adapter to work correctly. These factory systems use a separate amplifier module, and the door speakers connect to that amplifier, not directly to the head unit.
Here’s the signal path in a factory premium system:
Head unit preamp output → OEM amplifier → door speakers
The OEM head unit produces a low-level preamp signal — typically 1V to 4V — which the factory amplifier boosts to 20 to 100 watts per channel to drive the door speakers. The door speakers were designed for this amplified signal.
When an aftermarket head unit is installed, the typical wiring harness adapter connects the aftermarket head unit’s speaker-level outputs directly to the speaker wiring — bypassing the factory amplifier. The aftermarket head unit’s speaker outputs power the tweeters and subwoofer if they’re connected directly. But the door speakers, which were connected to the factory amplifier’s outputs, are now connected to the factory amplifier’s inputs — which is wrong and produces no signal.
In other words: the factory amplifier is still in circuit between the wiring and the door speakers. The aftermarket head unit is sending its speaker-level output into the factory amplifier’s input — a signal that the factory amplifier wasn’t designed to receive, and often one that the factory amplifier simply ignores or mutes.
The result: door speakers that are completely silent while tweeters, a factory subwoofer, or other directly-wired speakers may work.
The fix options:
- Use a line output converter (LOC): An LOC converts the aftermarket head unit’s speaker-level output back to a preamp-level signal that the factory amplifier can accept. The factory amplifier then drives the door speakers normally. Cost: $20–$80 for a LOC; installation adds $40–$100 at a shop.
- Bypass the factory amplifier entirely: Install an aftermarket amplifier (or use the aftermarket head unit’s speaker outputs directly) and wire the door speakers directly to the new signal source, completely removing the factory amplifier from the signal path. Requires replacing the speaker wiring runs to the door speakers. Cost: $80–$400 for an aftermarket amplifier; $60–$180 for speaker wiring; $100–$200 installation labor.
- Use a vehicle-specific integration adapter: Companies including PAC Audio, Metra, and Axxess make vehicle-specific integration kits that handle the factory amplifier interaction for specific vehicles — preserving factory amplification, speaker configurations, and sometimes even retaining the factory amplifier while adding aftermarket head unit control. Cost: $30–$150 depending on the application.
For any aftermarket installation on a vehicle with a factory premium audio badge, ask the installer specifically: “Does this vehicle have an OEM amplifier and how are you handling it in this installation?” The answer determines whether the installation will result in working door speakers or silent ones.
When the Speaker Itself Is the Problem — What a Blown Speaker Looks and Sounds Like
A blown speaker is completely silent — no audio at any volume, no distortion, no crackling. This distinguishes a blown speaker from a damaged speaker, which still produces sound (distorted, buzzing, or weak) but not clean audio.
The distinction matters for repair priority: a completely silent speaker needs replacement now. A distorted or buzzing speaker may continue to function for months while the underlying damage (torn surround, rubbing voice coil) progressively worsens. The distorted speaker can wait for a convenient repair window; the completely silent speaker is already at end of life.
What causes voice coil burnout:
The voice coil converts electrical energy to heat as a normal consequence of operation — the resistance of the copper windings dissipates power as heat during normal playback. The voice coil’s thermal capacity and the ventilation through the speaker’s motor gap allow this heat to dissipate at normal power levels. When an amplifier clips — sends a distorted waveform that’s flat-topped at its peaks — the clipped waveform contains high-frequency harmonic energy that the speaker cannot convert to sound efficiently, turning it entirely into heat instead. Per research on electrodynamic speaker failure documented in AES engineering literature, sustained amplifier clipping is the primary cause of voice coil thermal failure in car audio applications.
Gain set too high on an amplifier — the most common car audio setup error — causes the amplifier to clip at moderate volume levels. The speaker overheats progressively at what feels like a comfortable listening volume. The voice coil fails without the driver ever pushing the volume above 60 to 70 percent.
What a blown speaker looks like:
- Remove the door panel and the speaker grille.
- Look at the cone — paper or polypropylene cone material may have visible burn staining or warping near the center (near the voice coil area) if overheating was severe.
- Check the surround — a foam surround that has aged and separated doesn’t produce a completely silent speaker, but it may explain distortion if it was preceding the voice coil failure.
- The definitive test is the DC resistance measurement above — OL (infinite resistance) confirms the open voice coil.
Replacement selection:
When replacing a blown speaker, choosing the correct size is the primary requirement — but don’t stop there. Match the replacement to the available power and the mounting depth available in the door:
- Mounting depth: measure the space behind the speaker location before buying. Many vehicles have shallow door cavities — a speaker requiring 3 inches of mounting depth in a door that only offers 2 inches won’t fit without a spacer ring.
- Sensitivity: a speaker with higher sensitivity (measured in dB/1W/1m) produces more volume from the same amplifier power. In a low-power factory system (under 20 watts per channel), a high-sensitivity speaker (90 dB or above) produces significantly more audible volume improvement than a low-sensitivity speaker.
- Power handling: match the speaker’s continuous power handling to the amplifier’s RMS output. A speaker rated for 50 watts RMS driven by a 200-watt amplifier at high gain will fail quickly for the same thermal reasons as the original failure.
Fix Costs — What Each Repair Actually Runs
All labor rates at $120–$210/hr for an independent car audio shop.
By Fault Type
| Fault | DIY Parts Cost | Shop Labor | Total DIY | Total Shop |
|---|---|---|---|---|
| Balance/fade setting (adjust only) | $0 | $0–$45 if shop diagnoses | $0 | $0–$45 |
| Loose speaker connector (reseat) | $0 | $45–$90 | $0 | $45–$90 |
| Wrong/mis-seated harness adapter | $0–$35 | $45–$90 | $0–$35 | $45–$125 |
| Blown inline fuse | $1–$3 | $45–$90 | $1–$3 | $46–$93 |
| Door jamb wire fracture (splice repair) | $5–$20 | $60–$210 | $5–$20 | $65–$230 |
| Failed crossover capacitor | $5–$60 | $60–$150 | $5–$60 | $65–$210 |
| Blown speaker (one pair) | $25–$200 | $50–$150 | $25–$200 | $75–$350 |
| Amplifier protection mode — shorted wire | $0–$20 | $60–$150 | $0–$20 | $60–$170 |
| Amplifier output stage failure | $120–$350 repair or $80–$600 replace | $60–$180 | $200–$600 | $200–$780 |
| Failed head unit output channel | $50–$600 (replacement HU) | $60–$180 | $50–$600 | $110–$780 |
| OEM amp bypass (LOC installation) | $20–$80 (LOC) | $40–$100 | $20–$80 | $60–$180 |
The repair order that prevents wasted money:
- Check balance and fade — free, takes 30 seconds
- Reseat the speaker connector and harness adapter — free, takes 5 minutes
- Inspect inline fuses — $1–$3 if blown
- Perform the battery tap test and DC resistance test on the speaker — free (battery test) or $15–$45 for a DMM if you don’t own one
- Perform the door jamb wire flex test — free
- Test AC voltage at the speaker connector — confirms upstream signal is present
- Only after all above confirm the speaker is the fault: purchase replacement speakers
A speaker replacement as Step 1 without any prior diagnosis — the most common approach taken without this guide — costs $25 to $200 per pair and solves the problem only if the speaker was actually the fault. If the problem was a wiring fault or an amplifier protection mode condition, the new speakers will also be silent and the original problem remains.
How To Prevent Door Speaker Failures
Three practices that extend speaker life and prevent the most common wiring failures.
1. Set amplifier gain correctly.
The primary cause of blown voice coils is sustained amplifier clipping from incorrect gain settings. Set the amplifier’s gain (input sensitivity) using the DMM voltage method — not by ear. A gain set too high causes the amplifier to clip at moderate volume levels, delivering high harmonic content to the speakers continuously. A correctly set gain (amplifier clips at the same input level as the head unit’s maximum clean output) protects the voice coil at any volume the system will realistically play.
2. Inspect door jamb wiring during routine service.
During any door panel removal for other work — speaker installation, window regulator replacement, door handle repair — inspect the door jamb wire bundle. Look for cuts, abrasion marks on the insulation, or any point where the wire bundle is in contact with a sheet metal edge. Protect any identified abrasion points with split loom tubing or tape before reinstalling the door panel. Five minutes of inspection prevents a $20 repair from becoming a $300 shop visit after the wire eventually breaks.
3. Address door water intrusion immediately.
Moisture in the door cavity is the primary cause of speaker cone and surround deterioration, and it contributes to wiring connector corrosion and speaker terminal oxidation. The door has drainage holes at the bottom — confirm they’re clear by inserting a wire or pipe cleaner if you suspect blockage. Check the window seal condition — a worn window seal allows more water entry during rain and car washing. A speaker cone with a visible waterline stain or a surround that’s soft and mushy is in the process of failing. Addressing the moisture source and replacing the affected speakers before complete failure prevents finding a dead speaker on a morning when you least expect it.
FAQs About Car Door Speakers Not Working
Why does my car speaker crackle or buzz instead of being completely silent?
A crackling or buzzing speaker is a damaged speaker rather than a dead one — completely different diagnostic path. Buzzing specifically on bass frequencies typically indicates a torn surround or foreign debris in the speaker gap. Crackling on transients indicates a partially rubbing voice coil (deformed former contacting the magnetic gap) or a failing speaker terminal connection. A buzzing speaker still has an intact voice coil — the DC resistance test confirms this. Replace the speaker when the distortion becomes objectionable; it will not self-heal.
My front speakers work but rear speakers don’t — what’s wrong?
Check the fade setting first — every time. If fade is centered and only rear speakers are silent, the fault is specific to the rear speaker circuit: check the rear speaker connectors at the head unit or amplifier, check for an inline fuse in the rear speaker run, and test the rear speaker wiring at the door jamb or package tray locations. On vehicles with a factory subwoofer or factory amplifier, the rear speakers may be on a different amplifier channel than the fronts — a partial amplifier failure can kill rear channels while leaving fronts working.
Can I replace just one car door speaker?
Technically yes — but it’s rarely the best approach. Door speakers on the same axle (both fronts or both rears) work as a stereo pair. Replacing one speaker with a different model from the remaining original speaker creates a mismatched frequency response — the new speaker sounds different than the old one on its side. The audible mismatch is most noticeable on centered audio content (vocals, center-panned instruments) because the two sides reproduce them differently. Replacing both speakers on the same axle with a matched pair costs only marginally more than replacing one and produces a significantly better result.
How do I know if my speakers are blown or if the amplifier is clipping?
A blown speaker is completely silent with an OL reading on the DMM resistance test. An amplifier that’s clipping produces sound — distorted, harsh sound at high volumes, but sound. If you hear distorted audio at high volume that cleans up at lower volumes, the amplifier’s gain is set too high and the amplifier is clipping — the speakers aren’t blown yet but they’re taking damage with every loud session. Reduce the gain and address the root cause before a speaker does blow.
Why would one door speaker work and the other door speaker on the same side not work?
A partial failure of one speaker in a matched installation (both door speakers on the driver’s side, for example) points to a failure specific to that speaker — a blown voice coil, a disconnected connector, or a break in the wiring specific to that run. Check the connector at the non-working speaker first, then test that speaker’s DC resistance, then trace the wiring from that speaker back to the head unit or amplifier.
The Expert Verdict
A door speaker that’s completely silent is one of five things: a $0 settings fix, a $0 connector fix, a $20 wiring fix, a $60 speaker replacement, or a $300 amplifier repair. Getting to the right answer takes 15 minutes of testing. Getting to the wrong answer by skipping straight to speaker replacement costs $60 minimum and solves nothing if the wiring or amplifier was the actual fault.
Start with the battery tap test — it’s the fastest confirmation of whether the speaker itself is functional. If the speaker clicks, the speaker is fine and the fault is upstream. Test AC voltage at the speaker connector to confirm signal is reaching the wire end. If voltage is present, the connector at the speaker or the speaker itself is the fault. If no voltage is present, the wiring or the source is the fault.
Check the amplifier’s protection LED if an external amplifier is in the system. One shorted wire can silence every speaker in the vehicle while the amplifier is physically fine — knowing that changes the repair from a $600 amplifier replacement to a $5 wire repair.